LUTs, short for Look Up Tables, were first used by experts in the film and video industries. They employed these tools to give their videos a captivating cinematic style and to smoothly switch between different color schemes.
Nowadays, anyone can spice up their images using LUTs in Photoshop, thus adding a pop of color and tweaking tones with just a single click.
If you use Adobe Photoshop CS6 or a more recent version, you can easily work with 3D LUTs. However, if you own an older version, it is a good idea to upgrade your software.
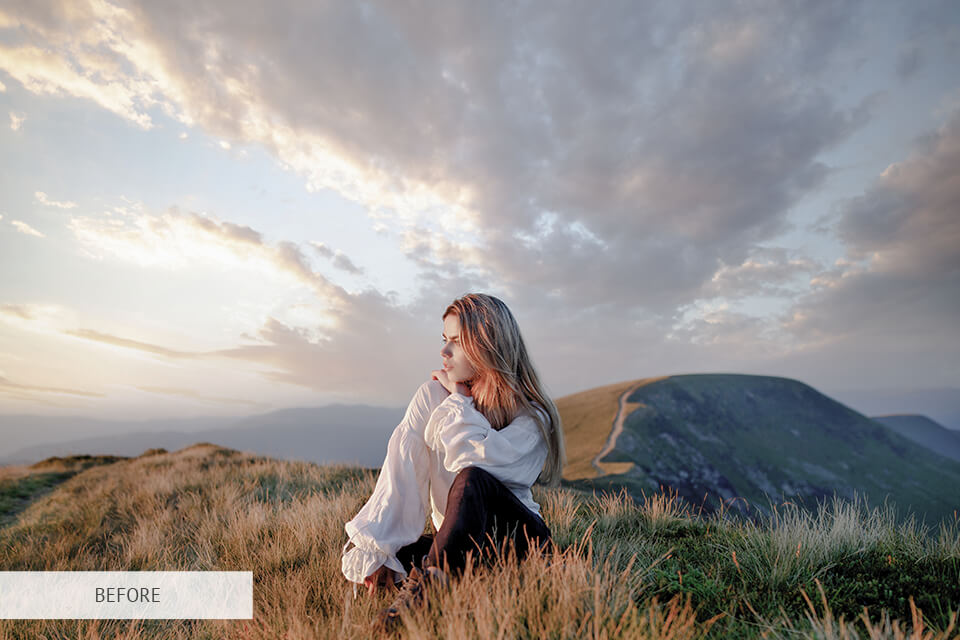
Add the photo you will be editing to the work area. To make the editing process more convenient, you can customize the workspace in Photoshop to your liking.
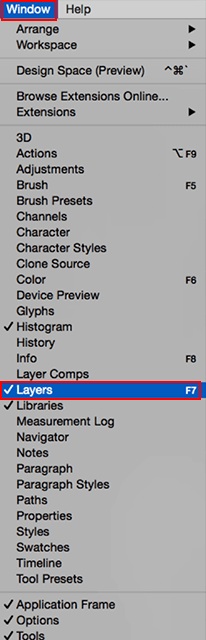
Go to Window > Layers to make sure your Layers panel is on display. If you spot a little checkmark next to Layers, you're good to go with step 2. If it's not there, just click on Layers to enable the Layers panel.
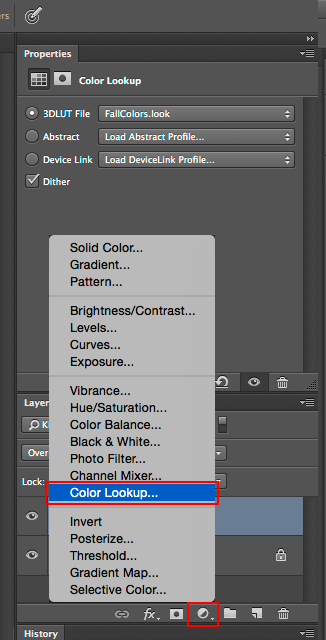
Next, navigate to the Adjustments Panel and find the ‘Color Lookup’ icon.
You can also find the ‘Color Lookup’ Adjustment by clicking the adjustments icon in the Layers Panel if you’re looking to quickly add a LUT to your document.

Open the Properties tab of the adjustment layer. Click on the 3DLUT file drop-down menu and a list will appear. The list you see includes the default LUTs shipped with Photoshop.
Pick one and see what happens
Play around and try different default LUTs and see what happens. Using these 2 instruments, it is possible to make an image look 3D in Photoshop in a quick way.
Since 3D LUTs are used within adjustment layers, you can handle them just like any other adjustment layer. Therefore, it becomes easier to adjust their blending mode or tweak their opacity.
To do this, make a copy of the LUT layer, so you end up with two layers. Convert one to Color blending mode and the other to Luminosity blending mode.
You can then fine-tune the color by adjusting the opacity of the color layer and tweak the tone by changing the opacity of the Luminosity layer.

Even though Photoshop includes some LUTs by default, you can broaden its capabilities by adding your personal LUTs or those you've picked up elsewhere. To infuse that cinematic vibe, opt for Cinematic LUTs. Click on the Adjustment Layer icon. Choose Color Lookup. Click on Load 3D LUT in the Properties panel. Click on Load 3D LUT a second time in the menu. Now choose the LUT you want to use on your device.
Surely! You can transform a set of adjustment layers into Photoshop LUTs, and later apply a LUT in Photoshop to your images with just a single click. Double-check that there's just a single layer for the image in the file, and it should be either locked or set as the background layer. If it's not currently a background layer, simply head over to Layer > New > Background from Layer. Add your adjustment layers and adjust their settings, just like you would during a standard editing process. Make sure that you're using only adjustment layers. After that, head to File > Exports > Color Lookup Tables. There will appear the LUT export dialog. Add a name or description for it, and if you intend to share it, consider mentioning a copyright holder. The default settings will handle the rest. You are likely to be tempted to set the quality to Maximum, but by doing so, you will receive a very bulky LUT file. In most cases, a Medium quality setting is just right. Now, click OK and then select the location where you'd like to save your LUT file.
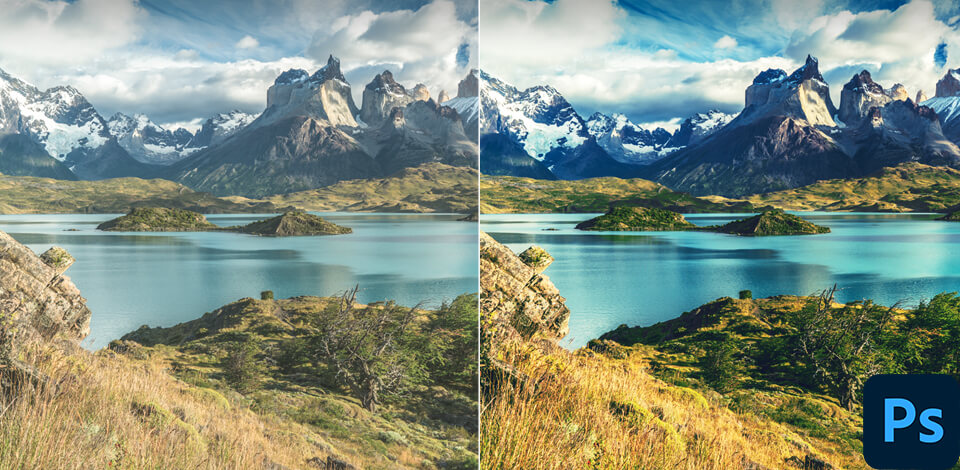
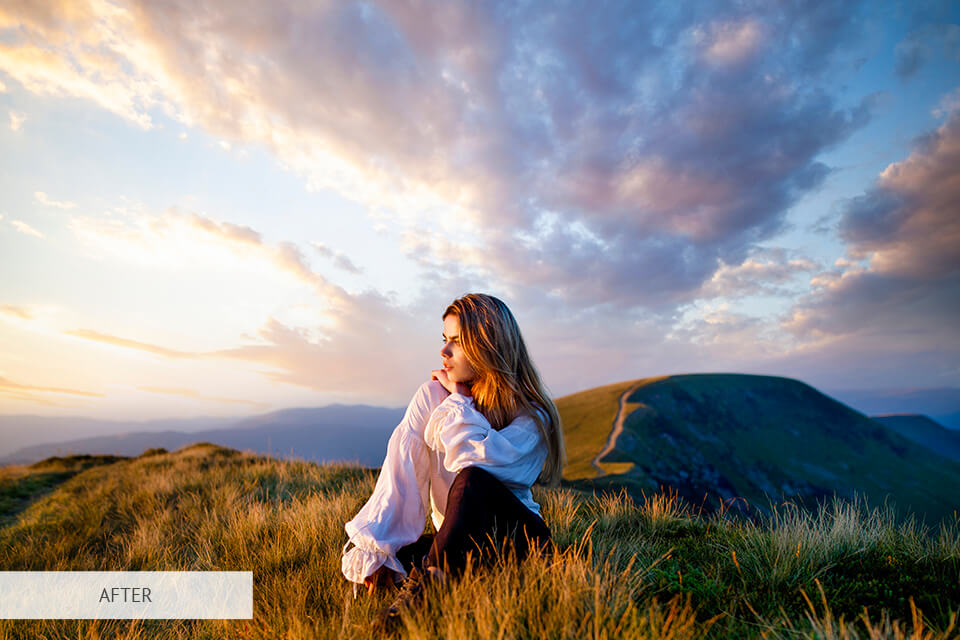
The LUTs packaged in this bundle allow you to infuse your videos with a cool, dramatic touch, making your subjects stand out and giving their skin a smoother appearance. They also work to intensify the colors, strike a balance between the light and dark areas of your pictures, and provide an overall professional touch to your creative works.


