Adobe Photoshop allows customizing workspaces according to your preferences. You can pick panels you want to see and hide those you don’t need. This way, working on a specific project, you may create your own Photoshop workspace to conveniently interact with the software.
The guide below covers the workspaces available in Adobe Photoshop. I will explain how you can customize, save, update, and delete them. You will also learn how to effectively work with panels.
To learn how to use workspace in Photoshop, we should define what this term refers to. In brief, it is a preset layout for different elements. A specific layout determines which panels are displayed on the screen. It also defines how those panels are arranged, indicates which tools are available in the Toolbar and how it is organized.
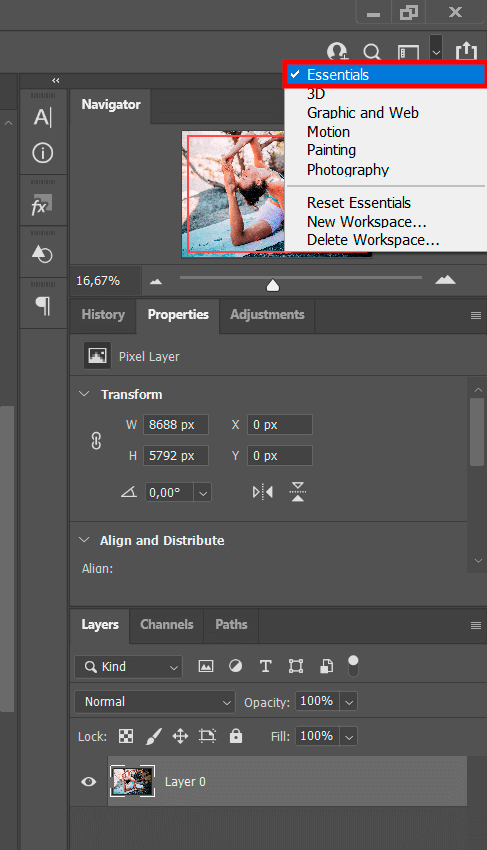
The default workspace in Photoshop is called Essentials. If you don’t pick a custom option, you can use this layout.
This universal workspace is suitable for various purposes. Here, you will find the most popular panels, including Layers, Adjustments and Properties, Color and Swatches.
Besides Essentials, you can work in other layouts choosing the one suitable for your needs. You can find these options in the Menu Bar in the Window Menu.
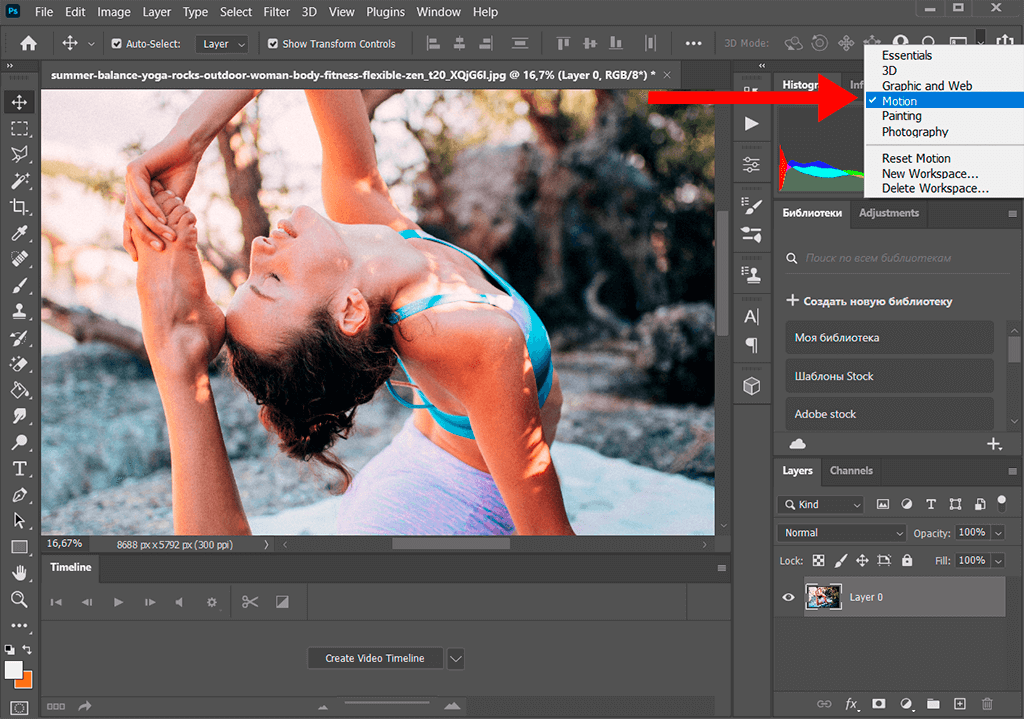
The menu includes 3D, Graphic and Web, Motion, Painting, and Photography workspaces you may choose from. In case you already have some custom layouts, you will also find them here. In the menu, you will see a checkmark next to Essentials. It means that this option is currently active.
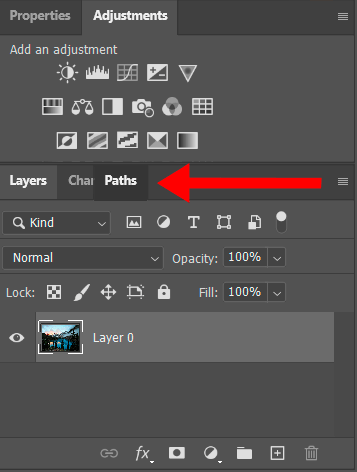
Another way to find different layouts is to click on the Workspace icon in the upper right part of the interface above the panel columns to see a list.
If you want to come back to the default layout, go to the Window menu. Click on the Workspace and choose Essentials. You can also click on the Workspace icon and select Essentials from the list.
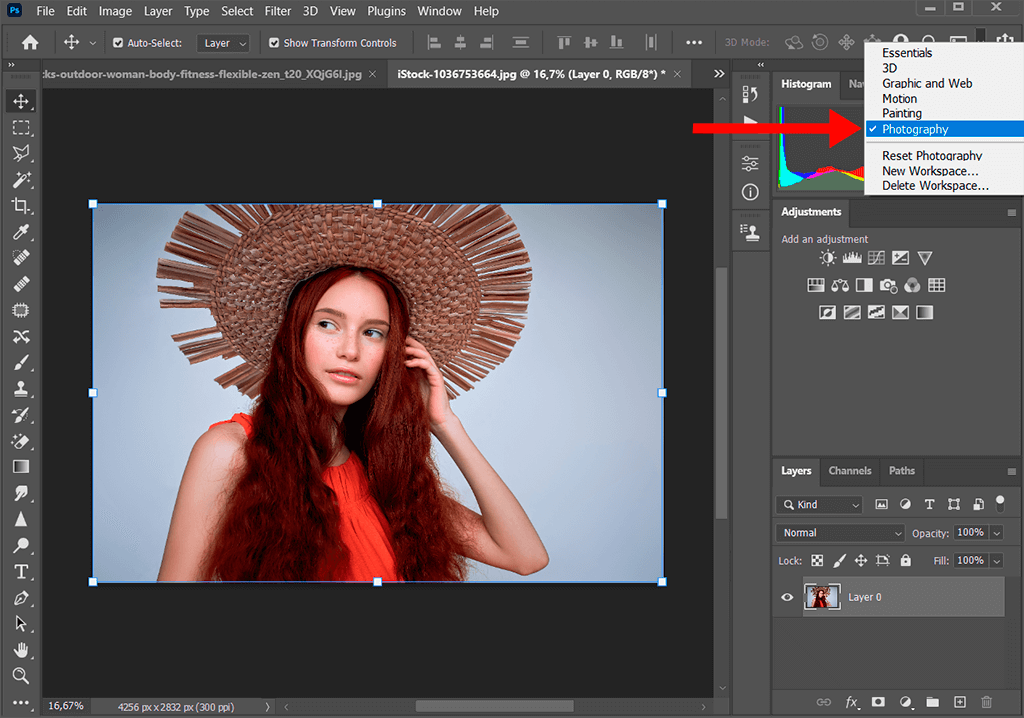
The Photography layout is different from Essentials since the Libraries panel is grouped in with the Adjustments panel in the middle column. For comparison, in Essentials, it is in its own column on the right.
Plus, in the Photography layout, the Color and Swatches panels (which were grouped at the top of the middle column in Essentials) are replaced with the Histogram and Navigator panels (which are more helpful when editing and retouching pics).
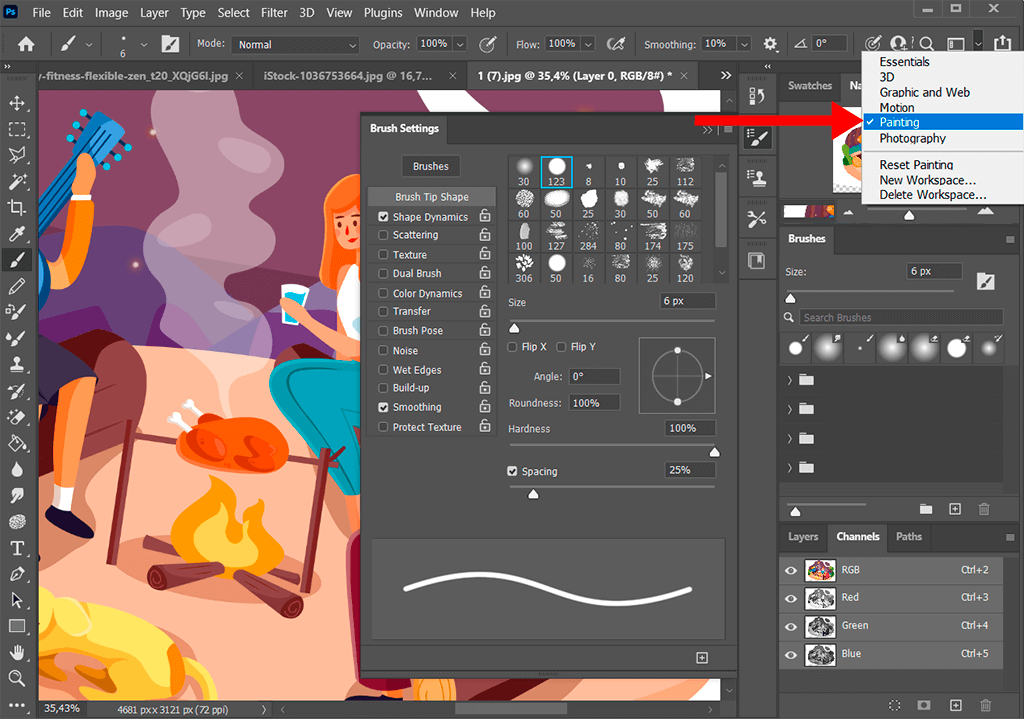
If you need the Painting workspace, you should click on the Workspace icon in the upper right part of the interface. Next, choose this option in the list.
While in the Photography workspace, the Histogram panel is at the top of the main column, in Painting, it was replaced with the Swatches panel. Under it, you will find Brush Presets that replaced the Libraries and Adjustments panels. On the left, you will still find the column with History and Clone Source panels.
With Photoshop workspace, you can customize the interface and tailor it for your specific needs. This photo editing software has so many panels that they can hardly fit into the screen. So, it’s essential to display only those panels that you currently need and use. For instance, a shooter needs only specific panels to process images.
If you need to perform other operations besides editing and retouching, you can use panels suitable for graphic design, clip editing, or typography. You can clear the interface from unnecessary panels and enhance your productivity.
Read on to learn what useful features you can use:
Wide choice of brightness levels: Select Edit > Preference (Windows) or Photoshop > Preferences (macOS) and pick a Color Theme swatch in the Interface section.
On-image displays: They keep you informed when you are using your favorite tools. They show dimensions, transformation angles, etc. Besides, you can change the location of displays. To do that, pick the Option from the Show Transformation Values in the Interface preferences.
Maximized screen space: You can switch between Standard and Fullscreen display modes by clicking on the button at the bottom of the toolbar.
Set UX color: What’s more, you can adjust the color theme of the interface. You may choose among Black, Dark Gray, Medium Gray and Light Gray options. First, select Edit > Preferences > Interface. Pick the color theme you like most.

You can also create and use your own custom workspace. The software offers more than 30 various panels that you can arrange in different ways. Each panel contains unique features that allow you to create and improve images. These 30 panels take up too much space on the screen, so we can’t do without customization options. By changing the size of panels and hiding the unnecessary ones, we can create an optimal workspace for your needs.
If you can’t find a suitable panel on the screen, click on the Window menu and pick the option you need. All the panels are available in the Window menu. If you see a tick mark, it means the panel is open or visible.
Almost all panels feature a context-sensitive menu. Having clicked on three lines in the upper right corner, you can open the menu. For example, if you activated the Paragraph panel tab by clicking on it, then clicked on the menu, you will see a different set of options.
Panel groups shown together are called a dock. When you move panels into and out of a dock, you dock and undock them.
You can also drag a panel from one group to another by clicking on the Tab and dragging it anywhere you need. When doing that, you will see a blue line around the group. It means that your chosen panel will join that group.
If you want to dock a panel group, you can drag it by the title bar into the dock.
By dragging the panel or panel group out of the dock by its tab or title bar, you will remove them. You can also place it in another dock or make it free-floating.
If you can’t clearly see your processed images because various panels cover them, you can instantly hide them all. Press the Tab key. In case you want them back, press Tab again. By clicking the Tab key, you can hide the Tool Options bar, the Tools, and all open panels. This way, you will clearly see your picture without any distractions.
If you want to hide everything except for the Tool Options bar and Toolbar, press Shift + Tab.

Right-click (Win) / Control-click (Mac) on the panel’s icon to close it. Next, select Close in the menu.
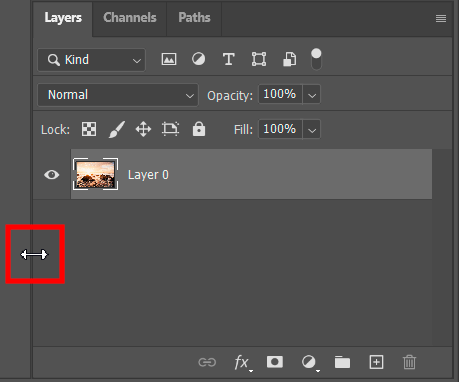
Working in the Photoshop workspace, you can resize a Panel or Panel Group by moving the cursor over the right, bottom edge or corner. When the cursor turns into a double arrow, you can click and drag the edge to resize.
You may save layouts, change them and arrange panels as you like.
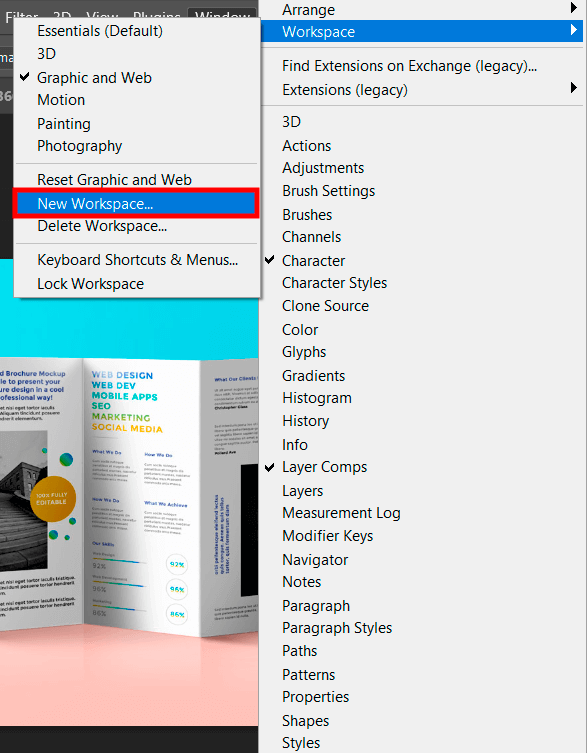
When you’ve done it, click on the Window menu, Workspace and then click on the New Workspace.
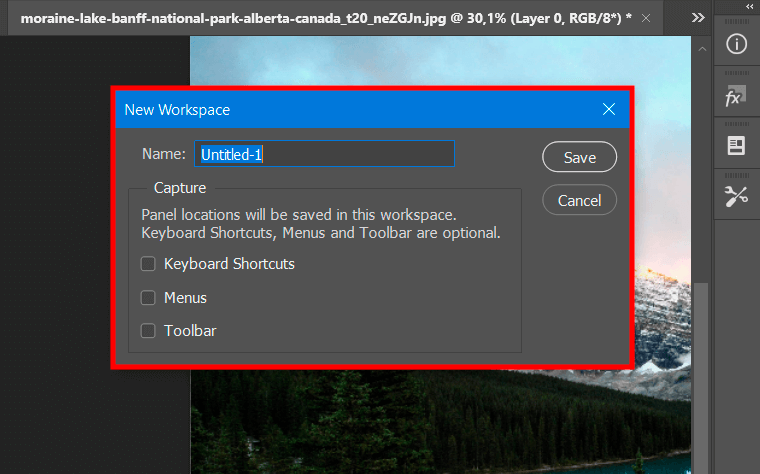
A dialog box will appear on the screen. First, name your custom layout. In the dialog box, you can also create custom keyboard shortcuts, menus, and a custom Toolbar layout. You can also leave these options unchecked. Then, click Save.
To check whether your layout is successfully saved, click on the Workspace icon once again. You will see a list with a new workspace at the top. Now, you can select it and work on it.
You can change your layout after creating it. To update it, follow the same steps you need to take to save it.
Find the Window menu, select Workspace, and pick New Workspace. You can also click on the Workspace icon and pick New Workspace. You will see a dialog box. Fill out the name field with the same name as the current workspace. Click on Save to save the changes.
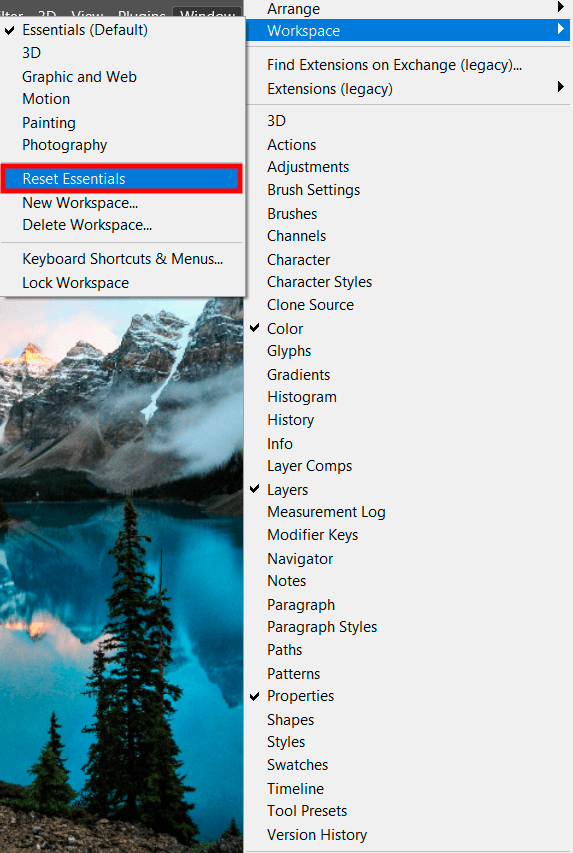
If you don’t like your adjustments, you can restore the default settings. First off, make sure you selected the workspace that you want to reset and it is active. Next, find the Window menu and select Workspace, or click on the Workspace icon above the panels, and select Reset Essentials from the menu.
After resetting the Essentials, you can again enjoy the default layout. In case you have been working with a modified unsaved workspace, the modifications won’t exist anymore. Thus, if you want to permanently modify your custom workspace, re-save and overwrite the current one.
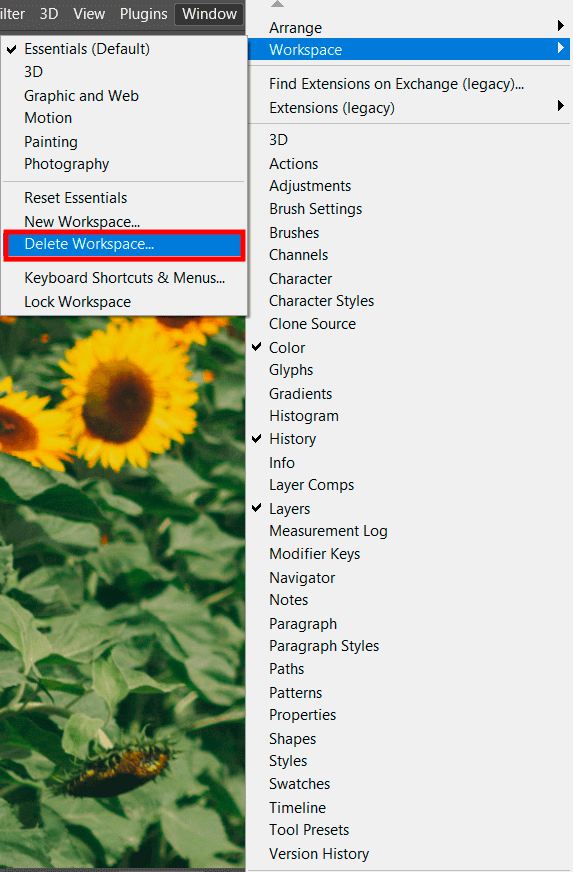
When using this Adobe software, you won’t be able to delete the workspace that is currently active. First off, find some other layout on the list and make it active. In our case, we are already in the Essentials workspace.
To begin with, you should go to the menu. You can either go to Window > Workspace or click the Workspace icon. Next, choose Delete Workspace. A dialog box will appear on the screen. Pick the option you don’t need and want to get rid of. Next, click Delete and Yes.
Don’t have time to manually edit your images? Check out a set of professional Photoshop textures that will help you improve your pics in several clicks.
These tools might come in handy not only for specialists. They also work great for those who need to create art projects, inscriptions, invitations, marketing materials, and backgrounds. In case you face any challenges when installing the textures, study the tutorial on how to add texture in Photoshop.
Luckily, this software provides a free 30-day trial period for its users. Within this month, you can test out all its features and see how they work with your pics. When this period is over, you can pick a suitable paid subscription plan. You don’t have to waste time downloading the program again.
Check whether your device complies with the minimum requirements. Processor: Intel or AMD processor with 64-bit support. Operating system: Windows 10 64-bit (version 1909) or later; macOS Catalina (version 10.15) or later, LTSC versions are not supported. RAM: 8 GB or more. Monitor resolution: 1280 x 800 display at 100% UI scaling.
If you provided your payment details before downloading Photoshop, a free plan will automatically turn into a paid one when the trial period is over. If you didn’t indicate your payment details, you can buy a plan on the Creative Cloud page.
Sometimes, even experts fail to remember something. That’s why the developers created Photoshop Help to assist users when necessary. Click Help > Photoshop Help to see the Adobe Help Viewer. Choose Adobe Help in the right Content panel to learn how to get help.
To begin with, you should go to Photoshop Learn & Support and study the info. Here, you will find video and step-by-step tutorials, Help content, and links to useful Adobe resources.


