If you want to learn how to use displacement map in Photoshop, we've prepared this step-by-step guide to help you out. When working in the editor, some users need to add text and graphics to the main object. If you overlay the text as a separate layer on top of the main one, the photo will look unnatural.
To achieve a realistic outcome, the added object must repeat the texture and shape of the main element. If you want to put a logo on a T-shirt, you need to add a fabric texture and curves to the logo.
For such manipulations, graphic designers use a displacement map in Adobe Photoshop.
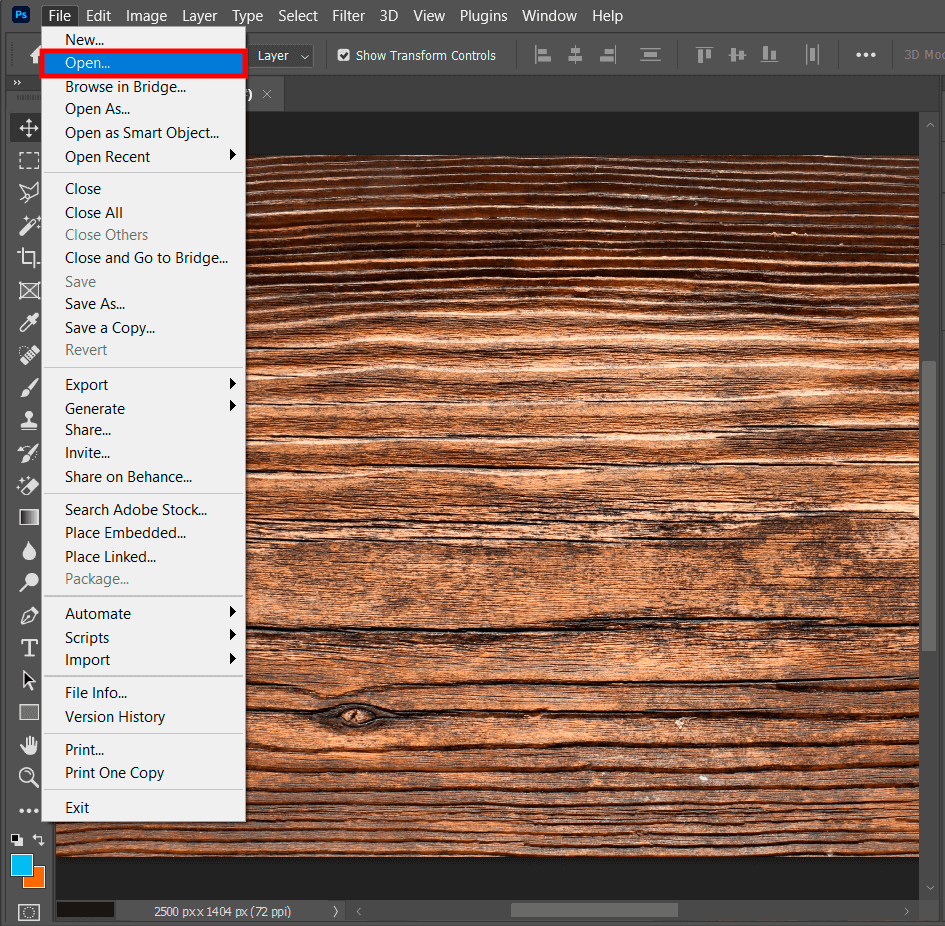
Choose a texture for your future design. Once selected, open a new image that will serve as the basis for the Photoshop displacement mapping. If you are just learning the editor and don’t know how to add texture in Photoshop, you can check out this detailed guide.
Click File> Open. The texture will appear in your workspace.

Convert your textured image into black & white. Go to the Image tab and choose Adjustments > Black & White. You need to get a high-contrast image.

Based on the background texture, you may need to increase the contrast. Open the Levels window, using Ctrl + L, and move the sliders on the left and right to the center until you like the contrast level.

You need to save your file as an independent PSD doc. However, you should first press Image > Mode > Grayscale. To make the image 8 bits per channel, choose Image > Mode > 8 Bits/Channel.
Once completed, save the result. You can press Ctrl + Click or right-click on the chosen channel and select Duplicate Channel. Then you should move to Destination > Document and create a New one. After naming the document, press OK to save it.

To make the picture look lifelike, add Gaussian blur, by choosing Filter > Blur > Gaussian Blur from the top panel. Customize the blur radius to 1 pixel. This value may vary based on the image resolution.

Return to the original image and enable all color channels using the RGB button in the Channels panel. Enter text or drag the element you want to add. You can either choose a color for an object or make it black & white.

Transform your text or graphic element into a smart object. You need to use Ctrl + Click or right-click the layer in the Layers panel and choose the Convert to Smart Object feature.
Then go to the top menu and choose Filter> Distort> Displace. Use the default settings and click OK. You will see the window where you need to choose the newly created .PSD image in grayscale. Once done, press Open.
Now the element comes with the applied Photoshop displacement maps. You can zoom in to scrutinize the effect.

You can add slight adjustments to your design to make it as close to your expectations as possible. You can experiment with different blending modes. If you choose the Normal mode, the picture may not look as good as you want. Try choosing and comparing Overlay and Soft Light blend modes, they usually work great for a natural outcome.

Choose a solid color for more detailed customizations. Use the Create New Fill panel or Adjustment Layer in the Layers panel > choose Solid Color and pick the most suitable shade.
Move to the text or graphics layer and Ctrl + click on the Layers option. You will only select the text/graphic with the Photoshop displacement mapping. Holding Ctrl + Shift+ i, you can invert the selection. Next, you need to select the solid color layer and delete it. Your text/graphics will acquire a new color. You can also experiment with the opacity parameters to set the desired level.

The final step in this Photoshop tutorial is to select the color layer. You should choose the Soft Light mode for it.

Your image is ready! You can save and use it the way you want.

If you want to diversify the design, you can use ready-made textures for Adobe Photoshop for Windows 10 or Mac. They allow for creative experiments, so you can find the best variant for a specific type of graphic design.


