The newest version of Photoshop comes with a powerful Warp tool with upgraded functionality. While the Warp option has been available for a long time, users had a limited choice of adjustment options. However, Photoshop CC has a more advanced version of this feature.
Adobe has updated the Photoshop warp tool by adding default and customizable grids. You can add grid lines and control points as well as drag several points to deform an image. Besides, you can scale your image and rotate selected areas.
If you have even used Adobe Photoshop, you might have tried using the Warp tool that enables you to transform your photos and drawings by dragging the control points of a grid. Besides images, it allows you to warp shapes and paths. In this tutorial, I will explain to you how to warp an image in Photoshop by following the 8 simple steps.
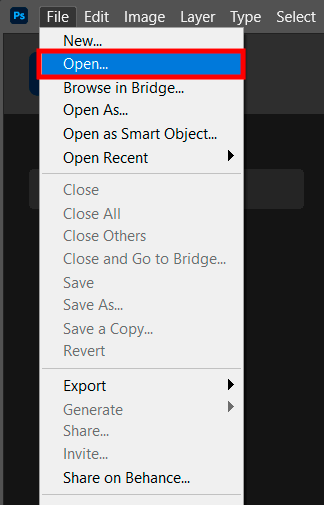
Upload an image that you need to warp and create a duplicate.
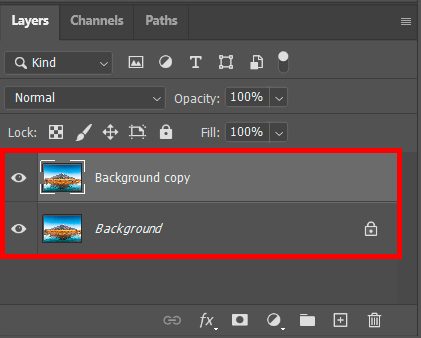
Find the layer that you want to transform in the Layers panel. If you import JPG or PNG photos, this layer might be locked by default. In this case, click on the Lock icon to unlock it. You can also drag this image onto the New Layer icon. It will allow you to create an editable copy layer.
Note: It’s impossible to use the Warp tool to edit the background layer.
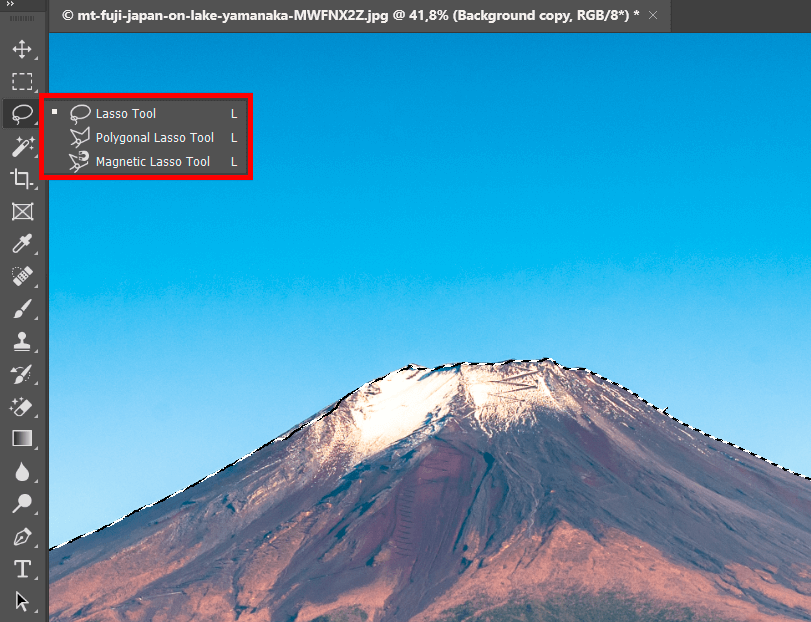
You can use one of the available selection tools (for instance, Lasso Tool or Rectangular Tool in the Toolbox) to select any area before performing Photoshop warping. Use them to select a part of the layer that you need to transform.
Note: If you don’t use the selection tools, the program will automatically warp the entire layer.
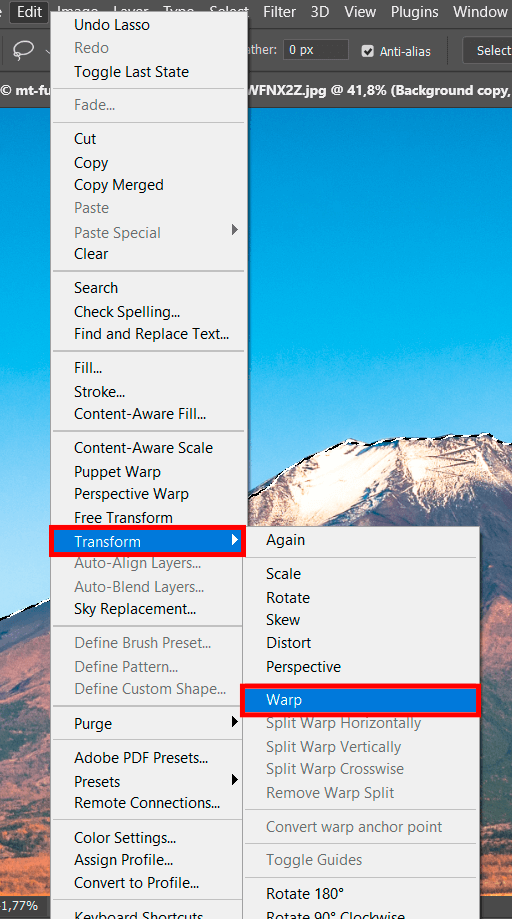
Go to Edit> Transform> Warp. When you select this option, you will see a grid over the layer or the selected area. When the Transform tool is selected, right-click on the selection and click on Warp to achieve a similar effect.

Once you have selected a photo that you want to warp, you will see a gridded mesh over it. You can click on every part of the mesh and drag it to deform your image in any direction you see fit. If you have never done this before, you might need to practice a bit before you get a result that you are satisfied with. Then, you can save it.
To control the mesh, click on the highlighted dots on the edge of the grid, intersections of the grid lines or the area inside the selection.
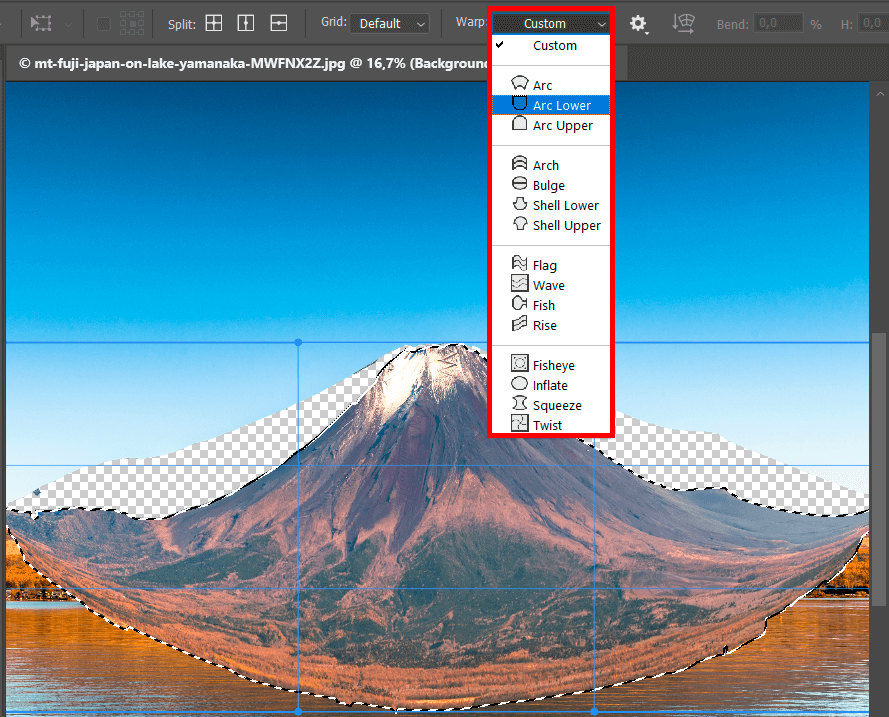
Use the pop-up menu to manipulate the shape of your image and get the result you need. When using the Photoshop warp tool, there is no need to deform your photo manually since you can use one of the available shapes.
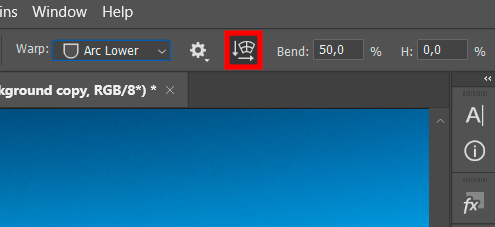
To enhance your photo even further, go to the Warp menu in the Options bar. In the pop-up menu, you will find several options that will come in handy for performing various edits. Here, you will see the following options:
If you want to find out how to warp an image in Photoshop but need to meet a tight deadline, you can save time by contacting a professional service. The experts will quickly cope even with advanced photo-editing tasks. They can replace heads, perform surreal manipulations and create professionally-looking drawings. The professionals will send you enhanced photos in a few business days.

If you are fully satisfied with your image, apply the edits you’ve made. There are two ways to do it:
To undo your edits, press Esc or click on the Cancel button located near the button with a tick mark.
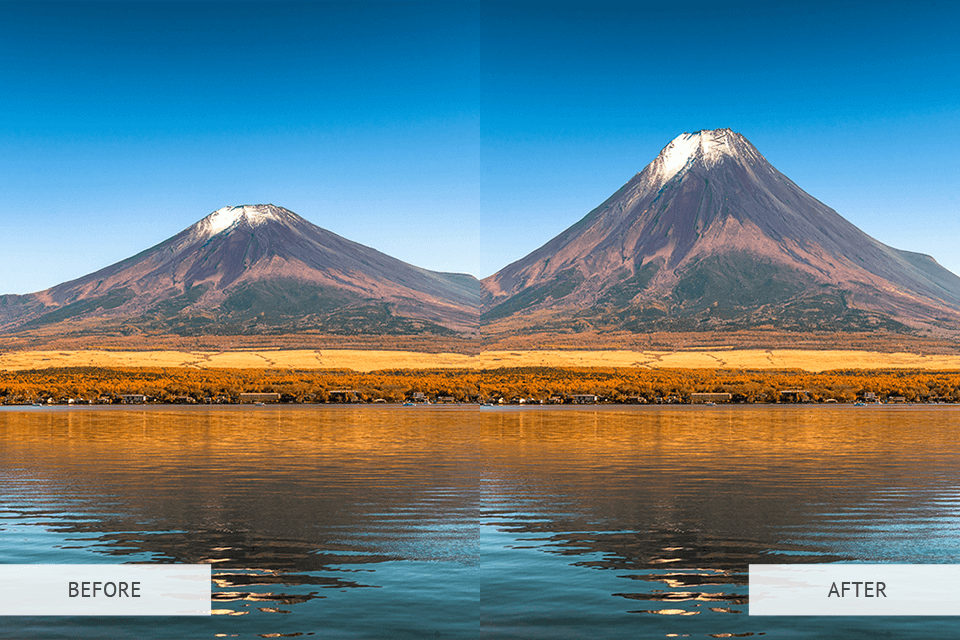
This is how your photo will look like after Photoshop wrapping. To speed up post-processing, make sure to use handy Photoshop keyboard shortcuts that will help you cope with all the tasks more quickly.

After learning how to warp an image in Photoshop, you can enhance your photos even more by using these unique effects. Take a look at this set of Photoshop actions that are suitable for enhancing the main photography types, which makes them a perfect option for beginners and experienced photographers alike.
Use them if you want to give your photos an unusual look, apply a variety of eye-catching effects and tweak colors to make your pictures stand out. These actions a compatible with different versions of Photoshop, like СС or CS 4-6. You can either download one filter to edit the project you are currently working on or save the whole bundle of actions to your device.


