Aspiring photographers, graphic designers, and digital artists often want to learn how to change PPI in Photoshop, since high resolution allows them to print their works in the best quality possible. Read on if you need to find out how to enhance your graphics files by improving their sharpness and making colors more saturated.
PPI stands for pixels per inch and refers to the picture’s resolution. If an inch of your image contains more pixels, its resolution will be higher. High-resolution images can be printed in better quality.
In Adobe Photoshop, you can change PPI in two ways. You can increase this value by resampling a picture without changing its size, however, the program might add information to the picture to raise the PPI. With the help of Photoshop tutorials, even beginners can change PPI in no time.
If you decide to increase PPI with the help of resampling, your image might become blurry or pixelated. However, you can turn off this option to change the displayed picture size and PPI.
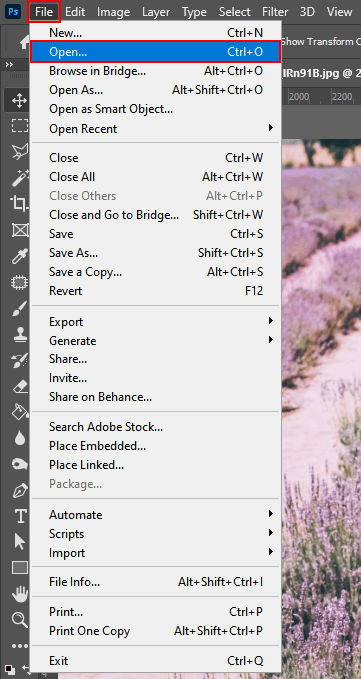
To start, select a picture that you need to improve by increasing its PPI value. Open it in Photoshop with the help of the File > Open option in the menu. You can also use Photoshop keyboard shortcuts, such as Ctrl + O to import any image.
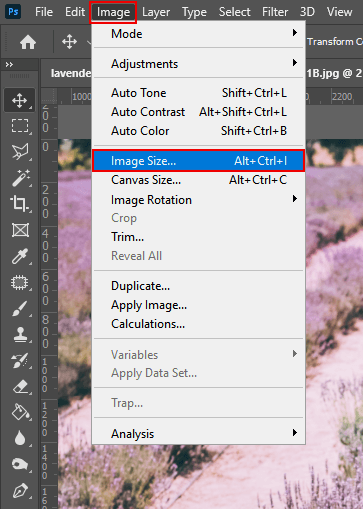
When using Photoshop, you can preview the image size and resolution in the Image Size menu (go to Image > Image Size). You can also use the Alt + Ctrl + I key combination.
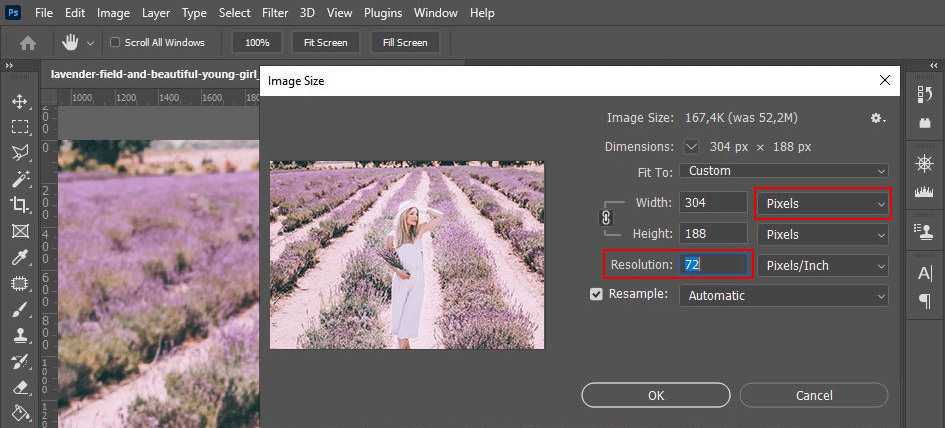
Click on the arrow near the «Dimensions» field and select «Pixels». The program will display the current dimensions of the image in pixels. In the «Resolution» text field, you will see the number of pixels per one inch of the picture.
Indicate a large pixel value in the «Resolution» text field if you want to increase the number of pixels per inch. Tick the «Resample» field and click on «OK» to resize the image or increase the number of pixels.
Besides changing PPI in Photoshop, you can adjust the width or height of your photo as well. Keep in mind that if you change one of them, other settings will be adjusted accordingly. Those who want to learn how to print photography, need to tick the Resample Image feature and select any resolution, width, or height they need.
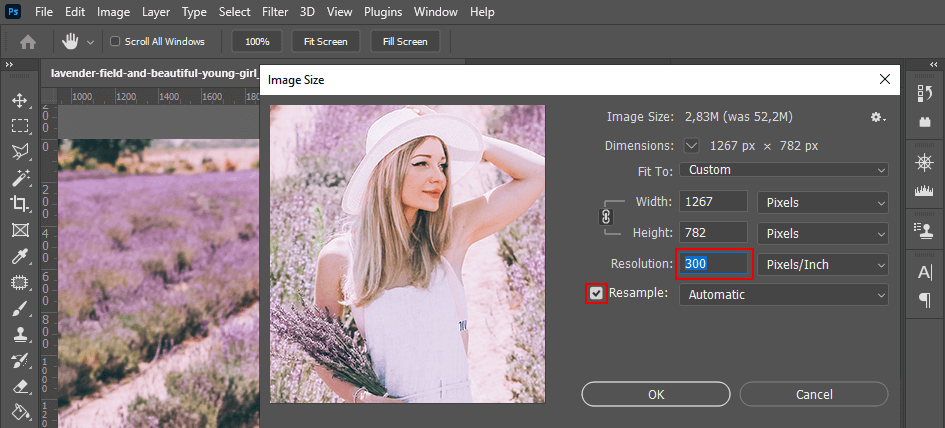
If you want to increase resolution in Photoshop, there is no need to change the overall number of pixels in your image. You just need to select how many pixels each inch will contain. After adjusting the resolution, you will notice how the image quality will improve.
For better convenience, you can select a specific format with a suitable resolution. To do it, select the “Fit To” option to see all the possible PPI options. It’s a perfect solution for those who don’t want to adjust the settings manually.
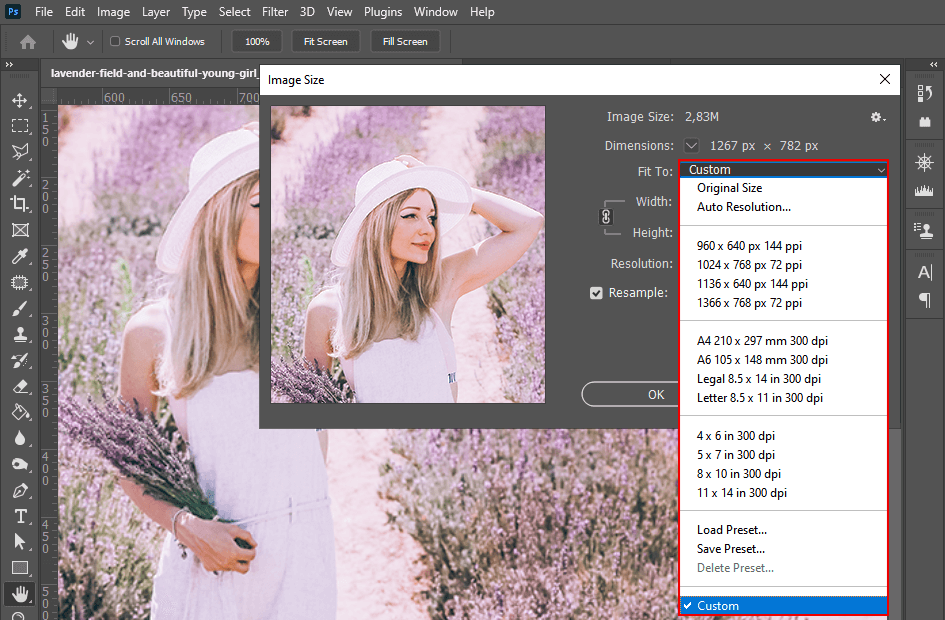
Click on the «ОK» button to apply the settings. Then, you can further enhance your image or just save the settings by selecting the File > Save option. Alternatively, you can also use the Ctrl + S key combination.
With the help of this Photoshop PPI tutorial, you can easily improve the quality of your images. However, if you don’t want to spend much time mastering all the features of graphic editing software, it’s better to contact professional photo editors.
To give your photos a polished look, you can contact the FixThePhoto team that consists of expert photo retouchers. They will tweak colors in your photos and professionally enhance them within the shortest possible time frame and at an affordable price.

By changing PPI, you can improve the resolution of your image. It will come in handy when you need to get a high-quality photo that can be printed or used in online advertising materials. However, if you want to get attention-grabbing pictures, you need to pay attention to other things as well. Make sure to edit your photos and save them in high resolution. If you have never done this before, it might be difficult for you to use pro-level post-processing software.
To edit your photos more quickly, you can use various actions that allow you to apply advanced effects to your photos.