If you are mulling over how to make a perfect Photoshop cut out, you can use a variety of techniques. With them, you can cut out a basic object or its part from the background or remove a complex object with many details.
Every professional photo editing software has tools that will help you cope with this task. In this tutorial, I will describe 3 methods of cutting out objects from the background in Photoshop. They will be of use for beginners and professionals alike.
This technique is a perfect match for images with such complex elements as hair. If your model is blessed with voluminous hair, it might be challenging to enhance a portrait even if you have pro-level skills. You need to edit each strand of hair separately using the minimum time.
Read this step-by-step guide to cut out a complex object from a picture. Here, I will demonstrate it on the example of hair.
Open a portrait that you want to make more polished. First, you need to prepare it for further enhancement by resizing or rotating it if necessary.
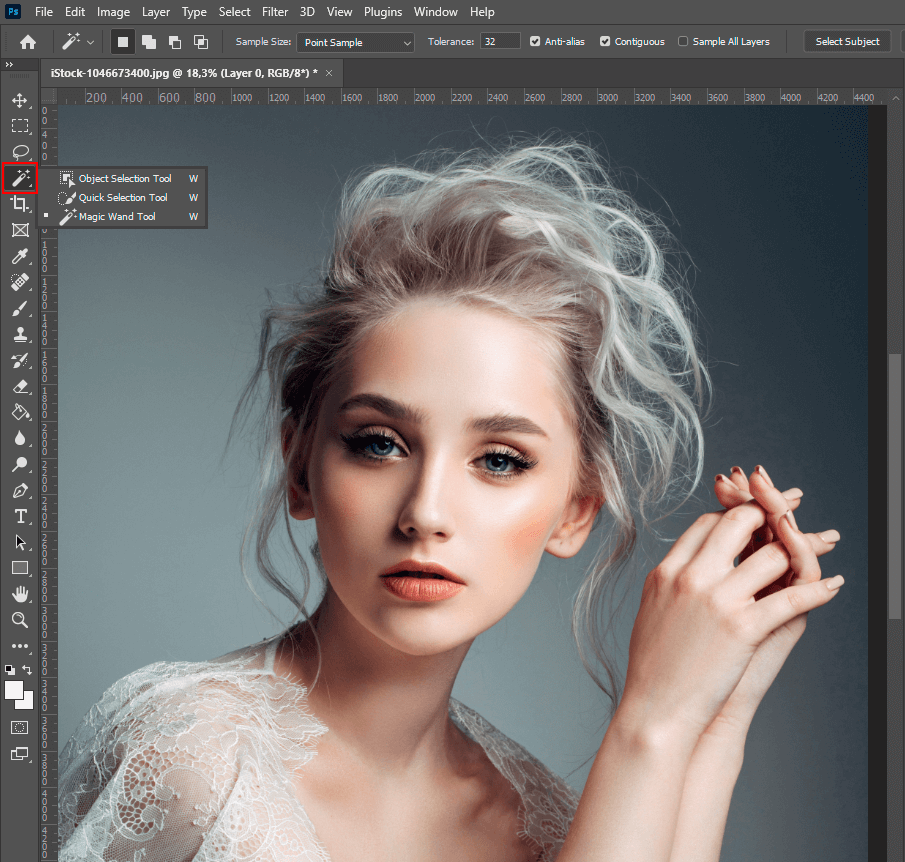
If you don’t know how to crop image in Photoshop, you can use the auto-crop feature to resize your photo to specific parameters. Find the Quick Selection tool in the Tools panel.
Click on the portrait to select the whole picture or its part.

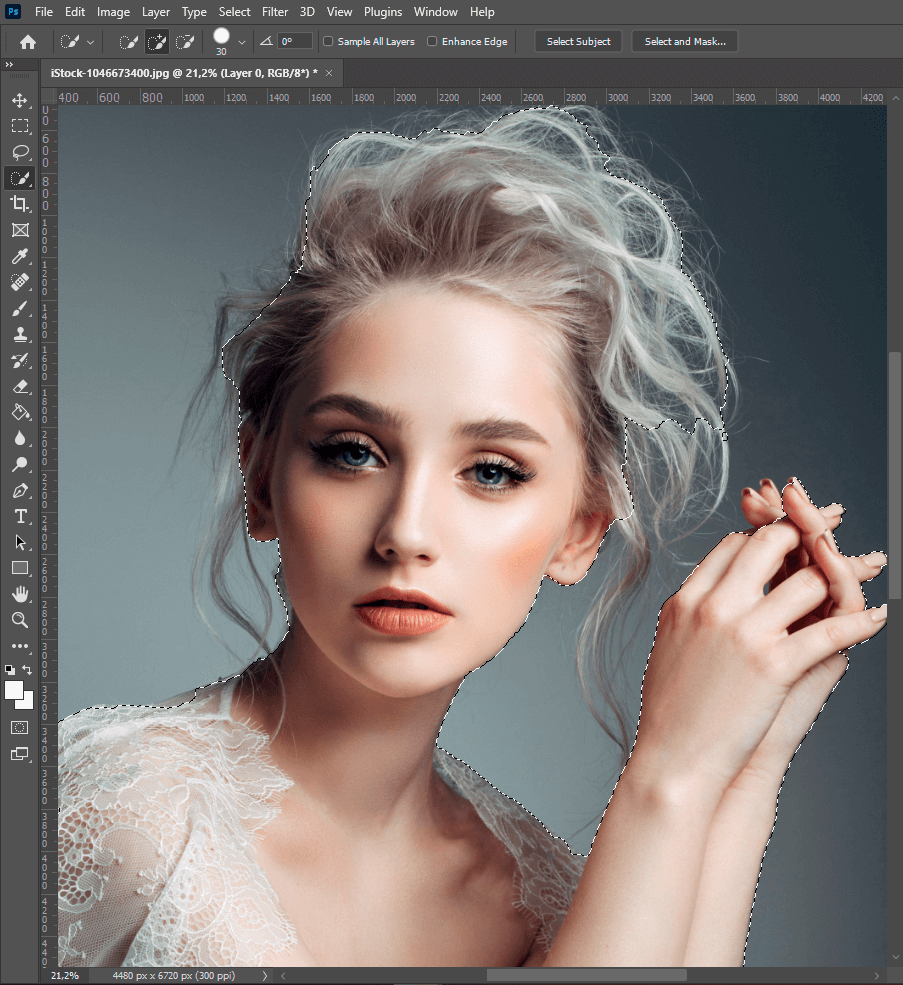
If you select everything, make sure to invert the selection to select the model.
To do it, go to the Select>Inverse menu or use the Cmd/Ctrl+Shift+I key combination.
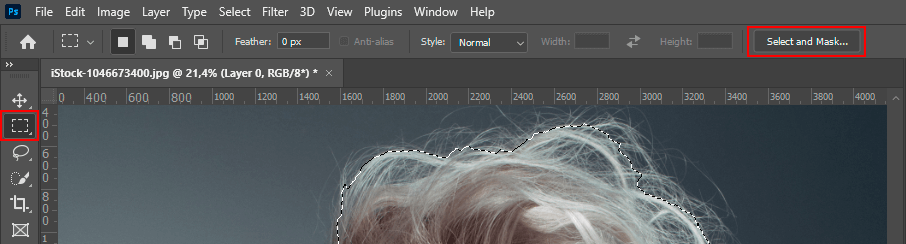
Click on the Select and Mask option on the top toolbar to mask in Photoshop. You will see the Select / Mask workspace. Here, you can turn the background black or white to make the outline of your object more noticeable. By raising the Transparency value, you can make the background fully transparent to preview your picture.
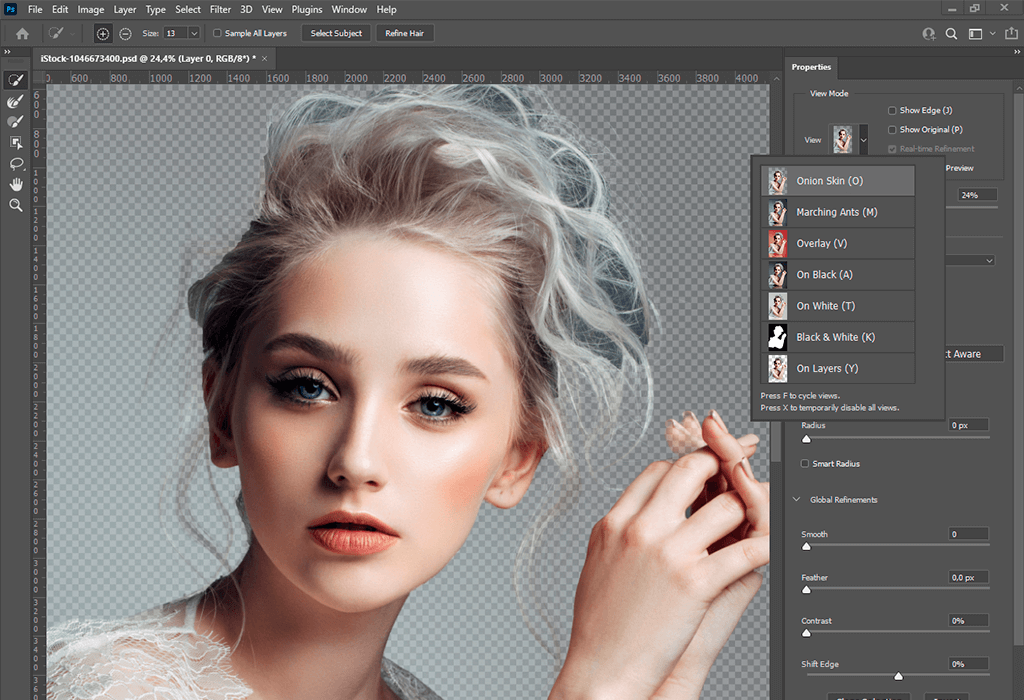
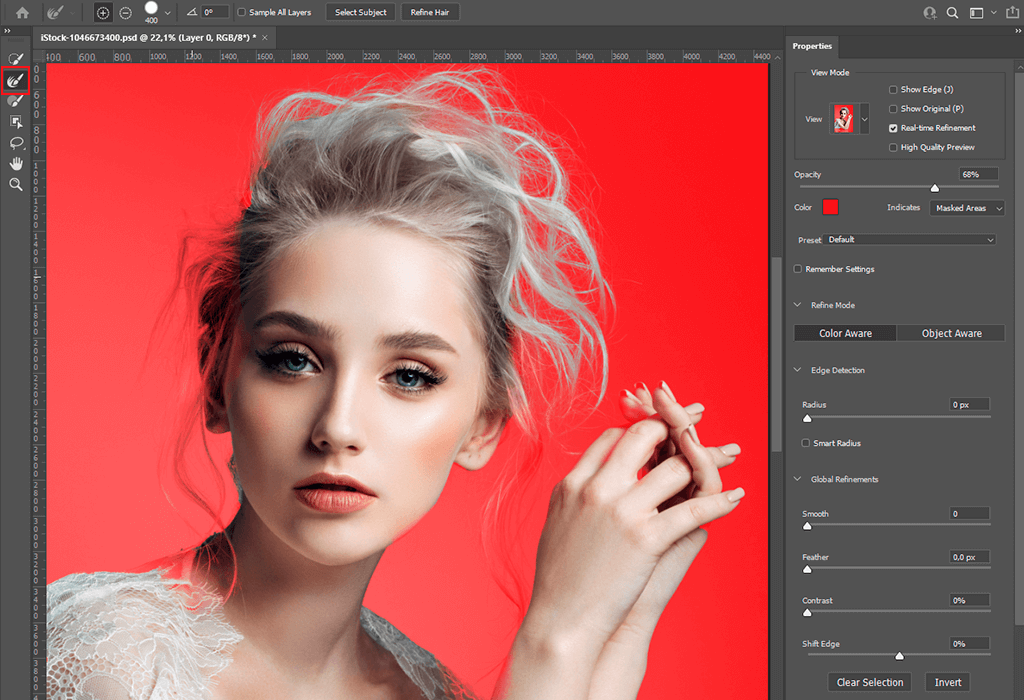
In the left toolbar, select the Refine brush and use it to paint over the stray hair. You need to fine-tune your selection by removing the ends of the hair. Make sure not to overdo and move around the edges to help the program see the difference between the hair and the background.
When painting over the areas, you will see that the selection gradually improves. Thanks to the Select and Mask feature, you can also decontaminate colors. It will help you avoid color fringing when you are editing hair. Select the New Layer with Layer Mask and confirm your choice.
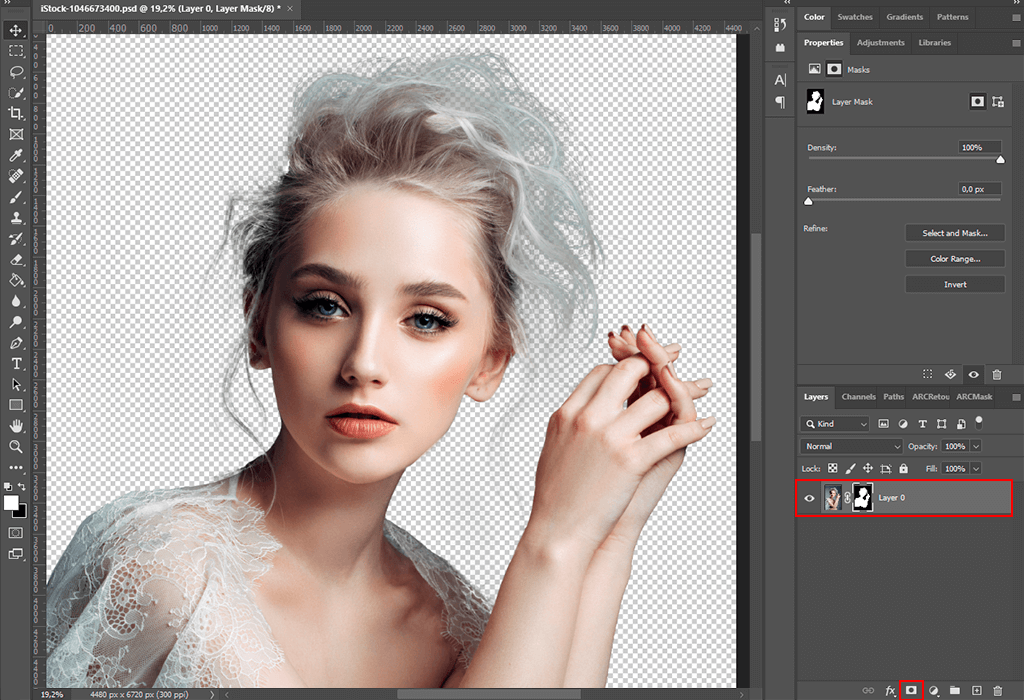
Click on the mask layer to see a perfectly cut-out image with an accurate hair outline. Now, you can add any suitable background. However, if this task is too complex for you, make sure to contact a special service.
Professional FixThePhoto team will help you quickly remove background in Photoshop regardless of the complexity of the task. They can cut out a picture in Photoshop with high accuracy.
To use this method, you need to select the color range and cut it out to create a cleaner image. This option will also be of service for those who need to cut out glass elements, smoke, or liquid. It’s the best way of selecting complex subjects and removing them from the single-color background.
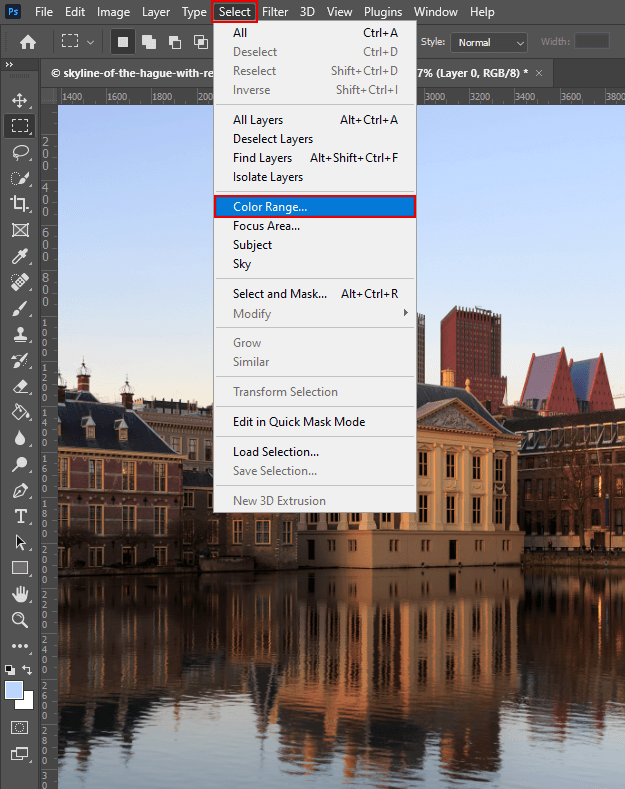
Open a picture and choose Select> Color Range.
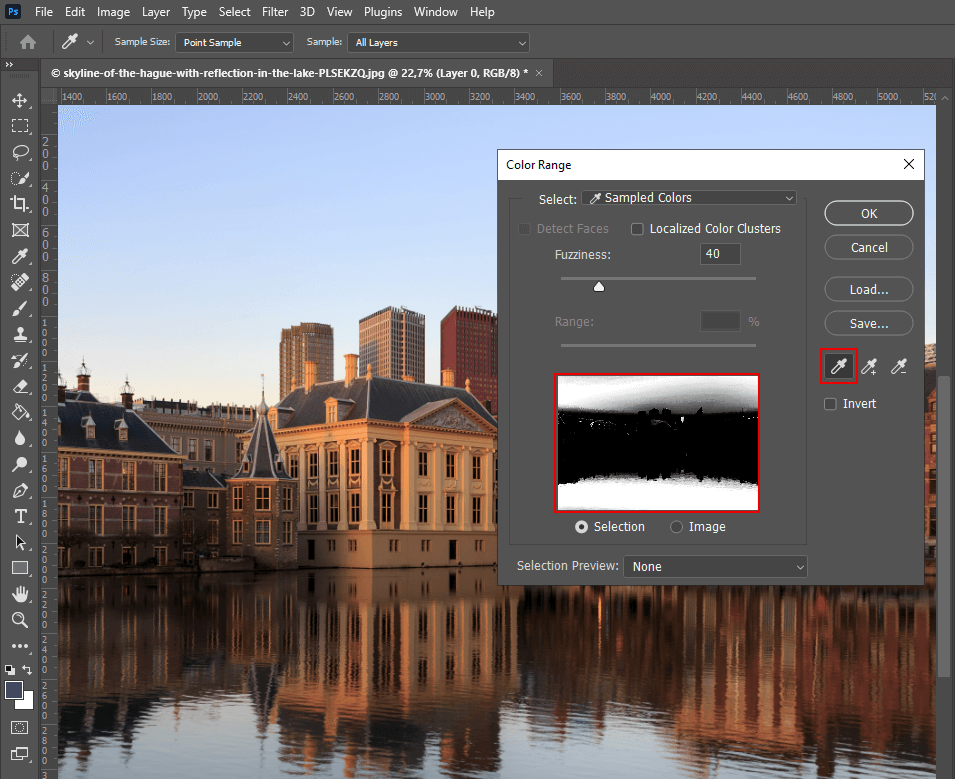
Find the Color Picker tool on the left. Click with it on the background and select the main color. In the preview window, you will see some white areas. It means that you have selected them.
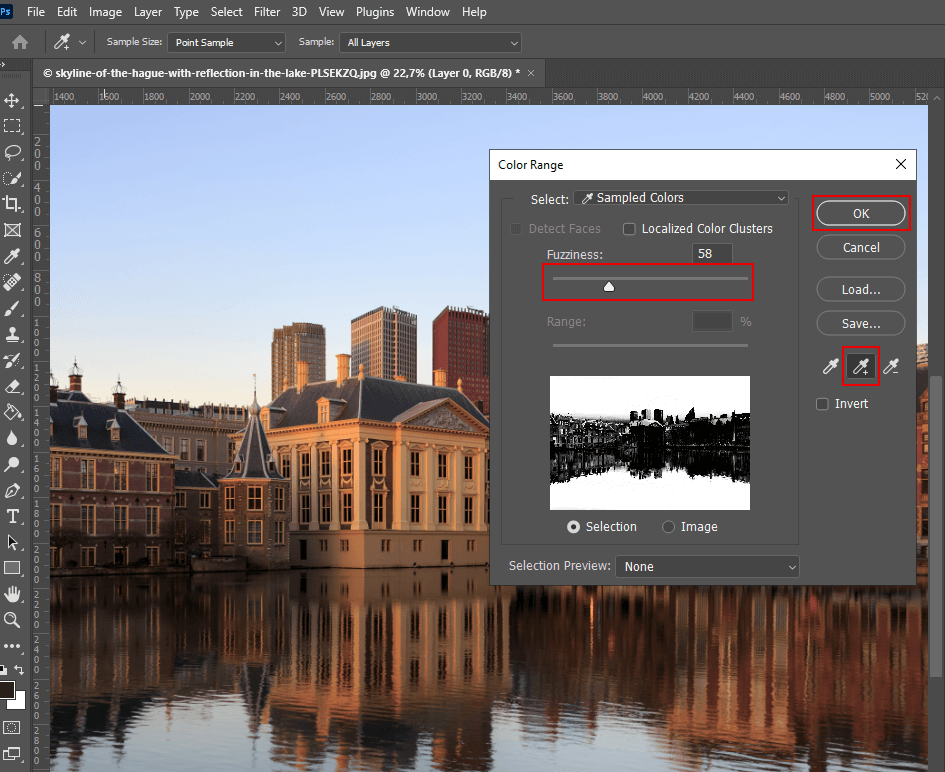
Click on the color picker with the “+” sign. Drag it over the background to make the selected area larger. Move the Fuzziness slider to fine-tune the selection. This way, you can make your object black and turn the background white in the preview window. Click Ok to apply the selection.
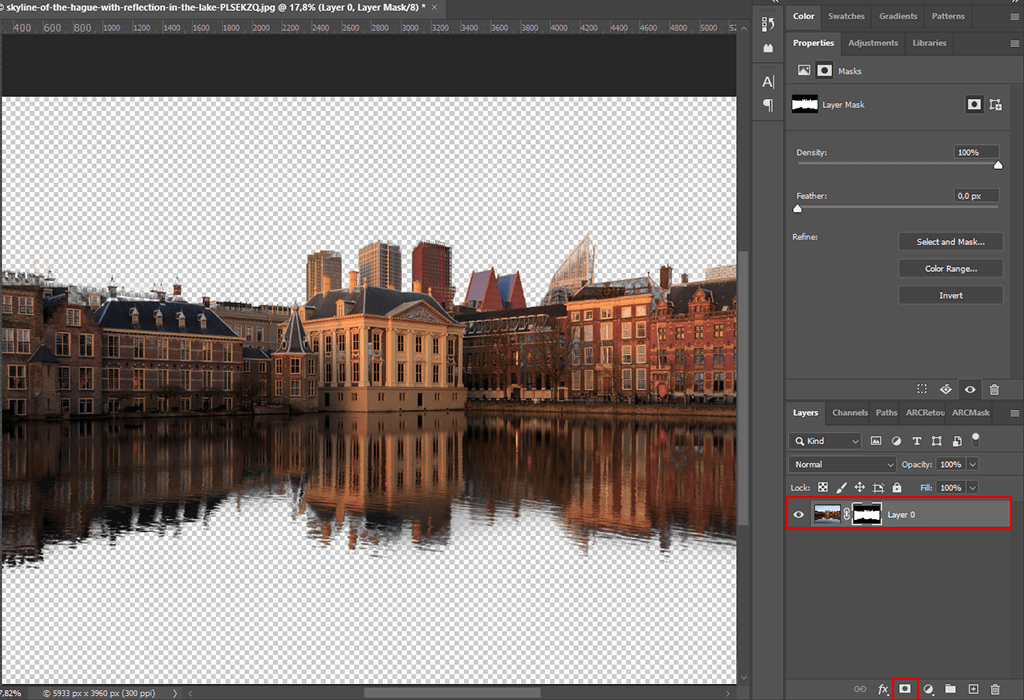
Now that you have selected the background, you can invert the selected area and hide the background. While holding the Alt / Option key, click on the new layer mask. Once you have clicked on the Layer Mask icon, your image should be ready.
If you need to create a selection with clean edges, nothing will compare to the pen tool. It’s the fastest way to cut out images in Photoshop, which makes it an excellent choice for those who work with basic objects.
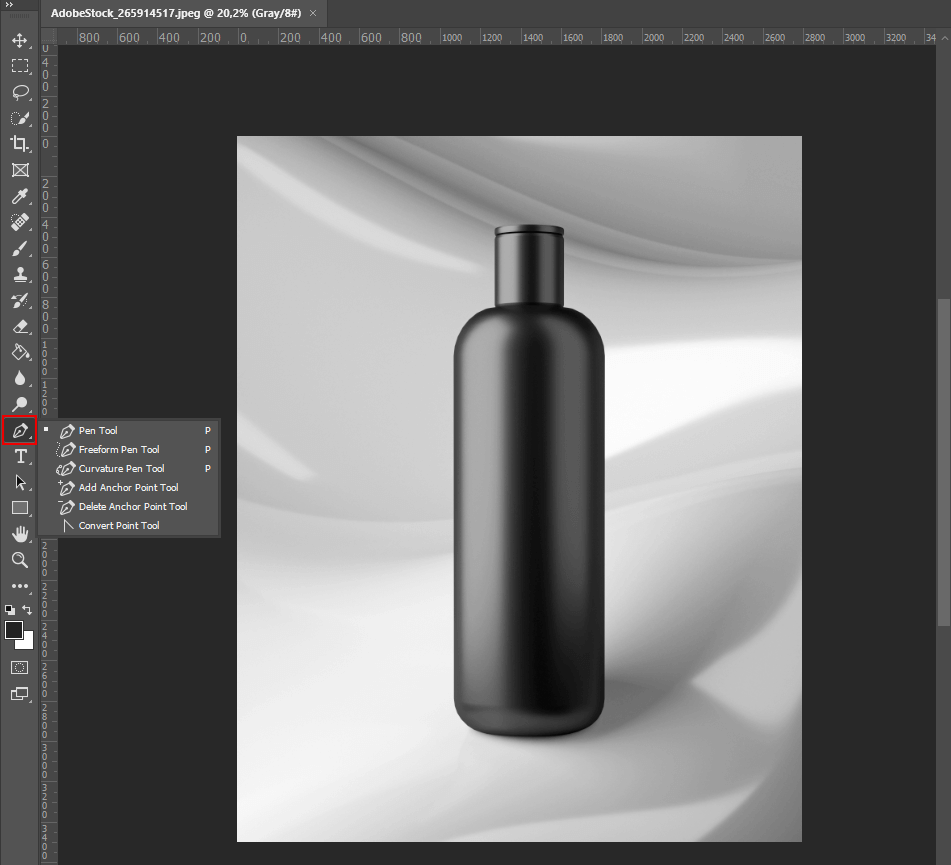
Find the Pen tool on the toolbar. Select the Path option instead of Shape.
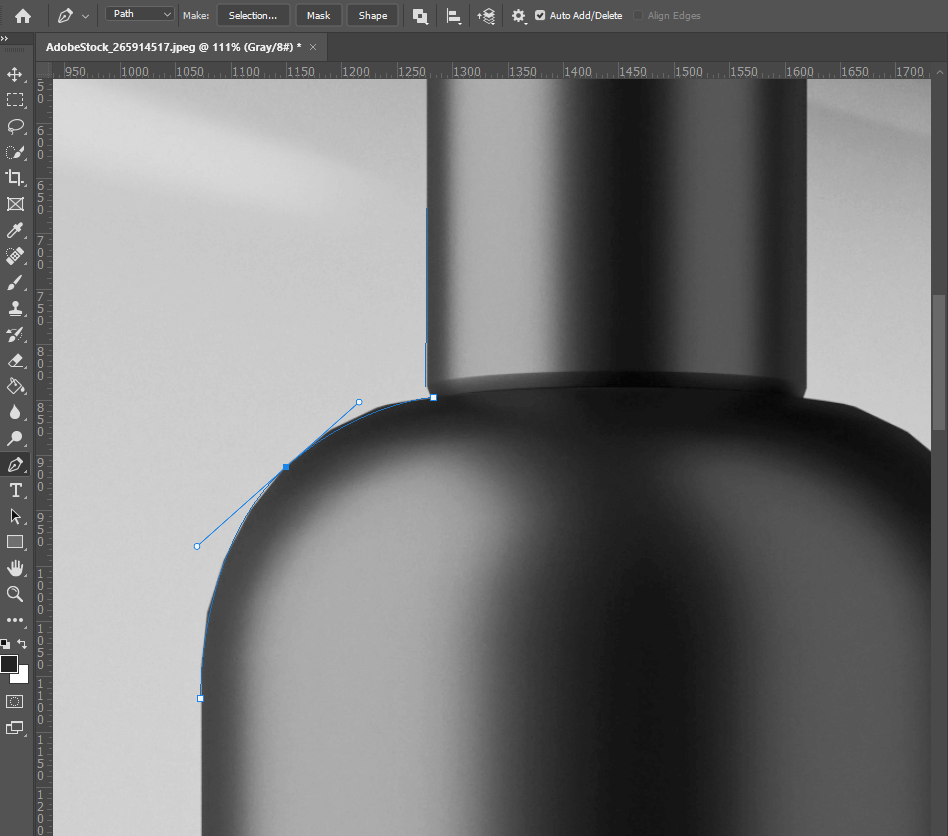
Start from the corner and drag the pen to where you want to make the path. When approaching a curve, click and drag again. A line between 2 points will appear.
If you move the Pen closer or further away, this line will change. Besides, it can be changed depending on the direction. There is no need to create a precise selection at this stage. You just need to create a path that roughly outlines your object.
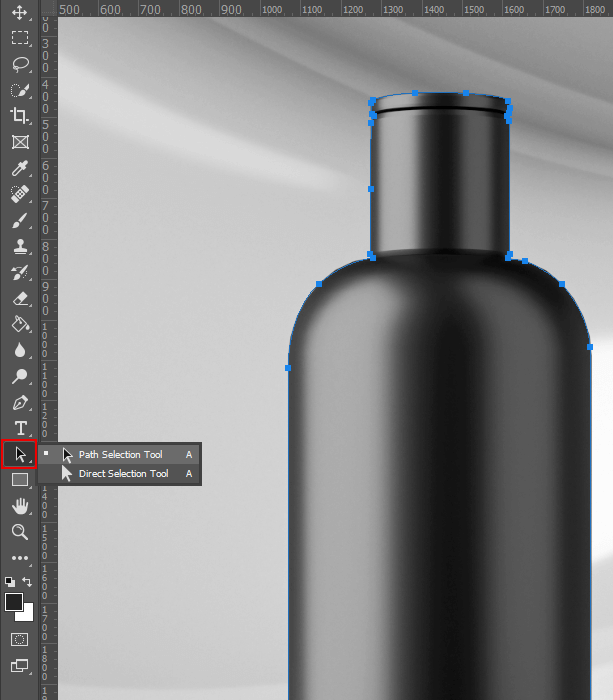
In the Toolbox, select the Direct Selection Tool. Zoom in to see your object clearly and drag the points where they should be. By clicking on the ends of the handles, you can adjust the angle of the path. Move these end-points to create a more accurate outline by changing the curve. While it might be difficult to create a precise selection at first, you just need to practice more to do it quickly.
If you want to outline many curves, use the Pen tool with + on it to add new points. Then, use the direct selection tool once again or keep using the + pen tool.
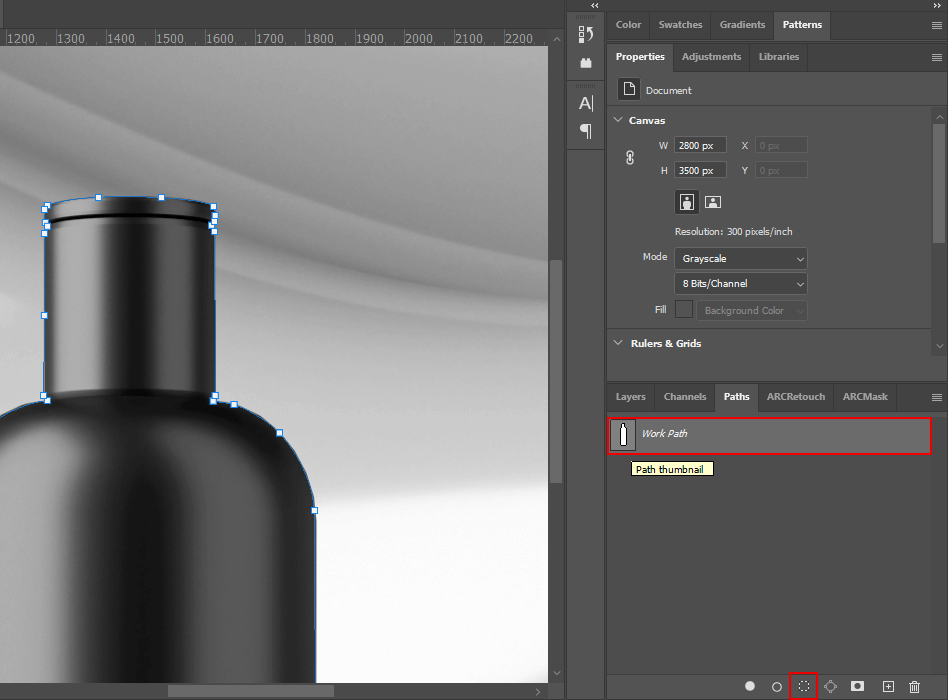
Go to the Paths menu. The path that you have created is marked as Work Path. To use it in the future, save it as a clipping group in InDesign or Quark Xpress.
This method is perfect for those who work with vector graphics since it can help you prepare your images for printing. If you want to learn how to cut out a image in Photoshop, you need to convert the path to a selection or mask.
To create a selection based on the path, select the work path in the Paths panel while holding Cmd/Ctrl. You will see the outline of your selection.
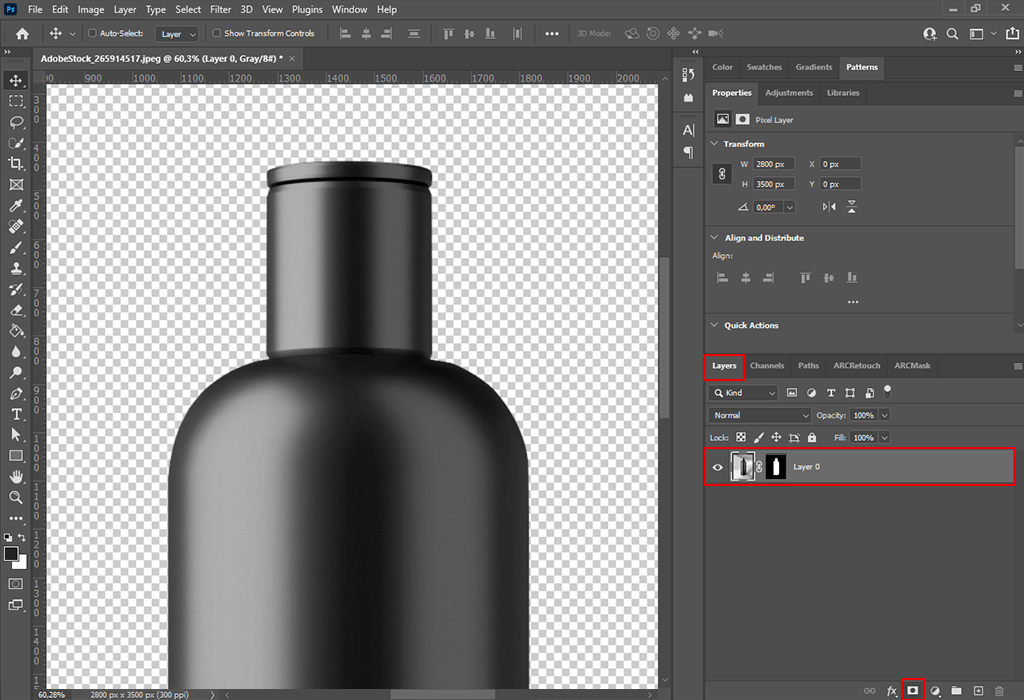
Hold the Alt/Option key to convert the path to an inverted mask. Now, you have an accurate cut-out with precise edges.

If you want to create a flawless portrait, try applying these ready-made Photoshop effects that will help you create a romantic bokeh background and add a magical glow to your photo. These actions were specifically developed for those who need to get beautiful skin tones, improve the light balance, and give their photos a unique look.


