Is there too much space around the main object in the photo? Do you need to adjust the image to a certain size? Then you should crop an image in Photoshop. Another choice is to contact professional photo color correction services. As a result, you can crop any image in a few minutes.
Applying the Crop Tool is the simplest and most common method. After figuring out how to crop an image in Photoshop using this tool, you can achieve the desired result in a few clicks.
STEP 1. Open Photoshop and open a picture.
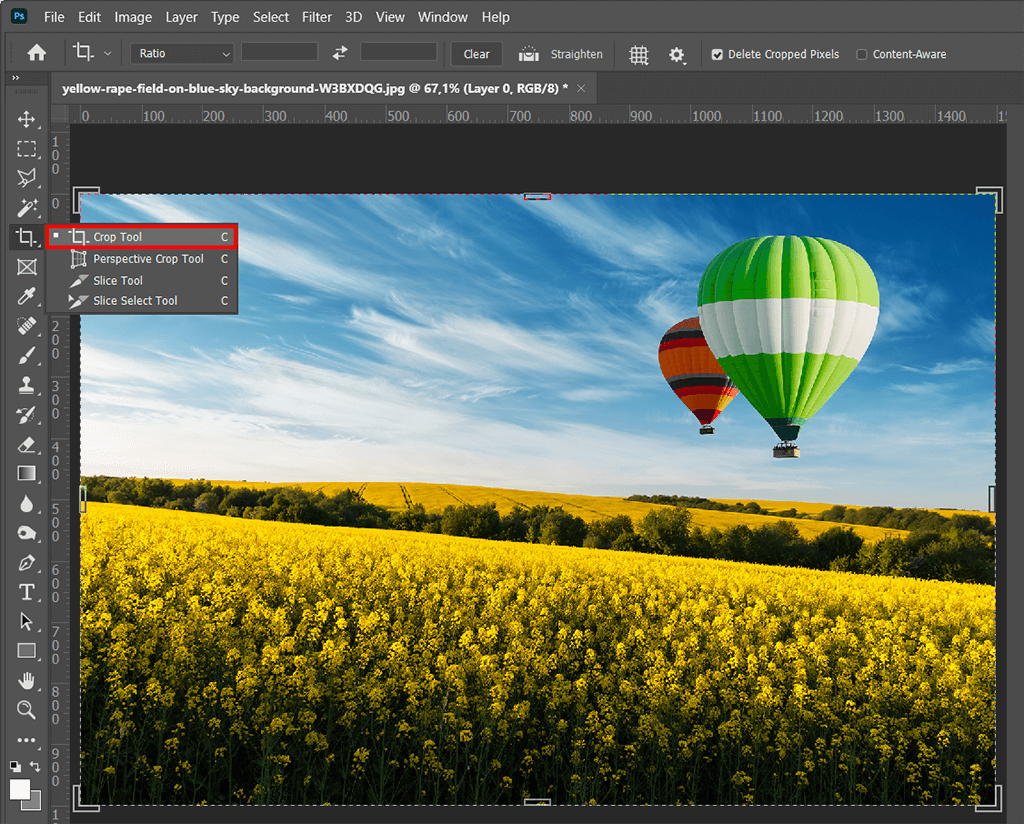
STEP 2. Go to the Toolbar and find the Crop tool there. You can also activate it by pressing the C key.
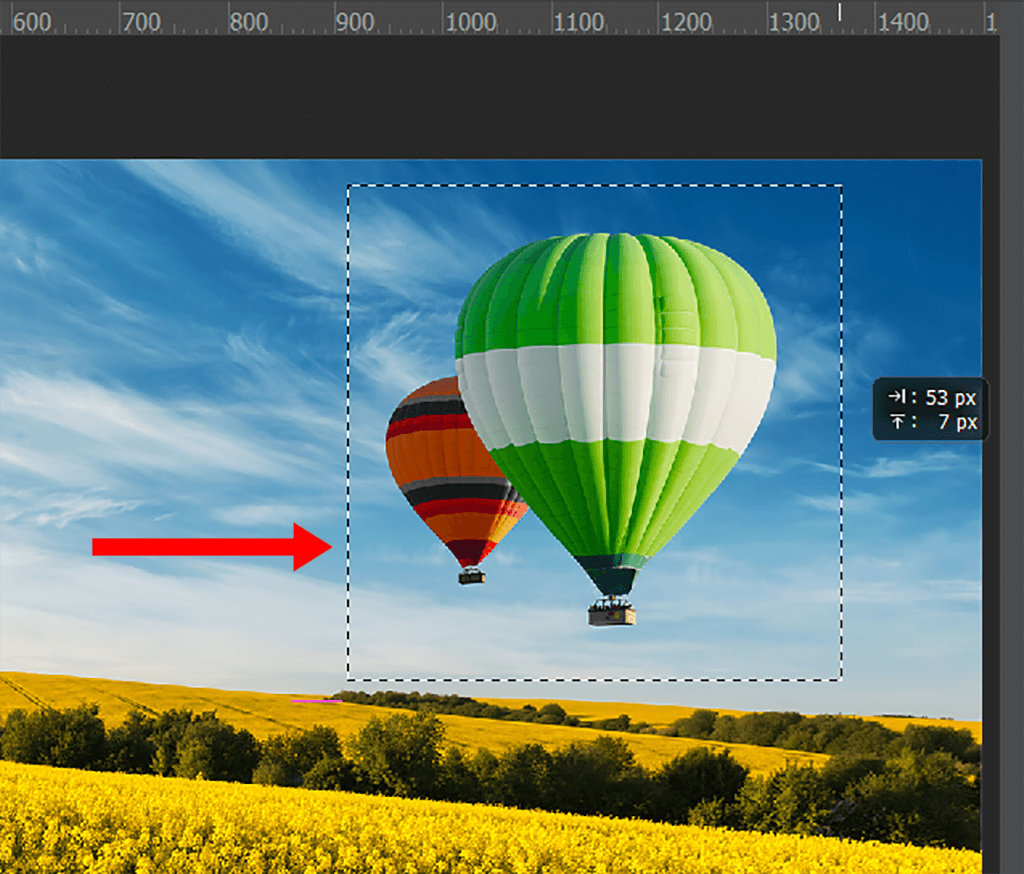
STEP 3. Click the left mouse button and hold it while moving the cursor diagonally. This action allows you to select the area for cropping.
STEP 4. Now, you don’t need to hold the button. You will see that the area that you are going to save is framed with eight square markers. Then, you can move the crop area, resize and rotate it.
STEP 5. You can use the ENTER button to crop the photograph. Also, you can do the same thing by selecting the Apply button in the Options panel. To cancel the manipulation, you need to choose the ESC button or undo the corresponding action using the Options panel.
STEP 6. Save the resulting picture.
You can use this Photoshop crop tool in a desktop and mobile version, such as Photoshop Express. It is a basic tool for cropping photos there.
You can set use the auto-crop borders feature if you need to get a picture that has certain parameters. Here are simple instructions to follow:
STEP 1. Press the C key or find the crop tool in the toolbar. Once the crop borders appear, you can select and drag them. To constrain the shape, you should hold Shift.
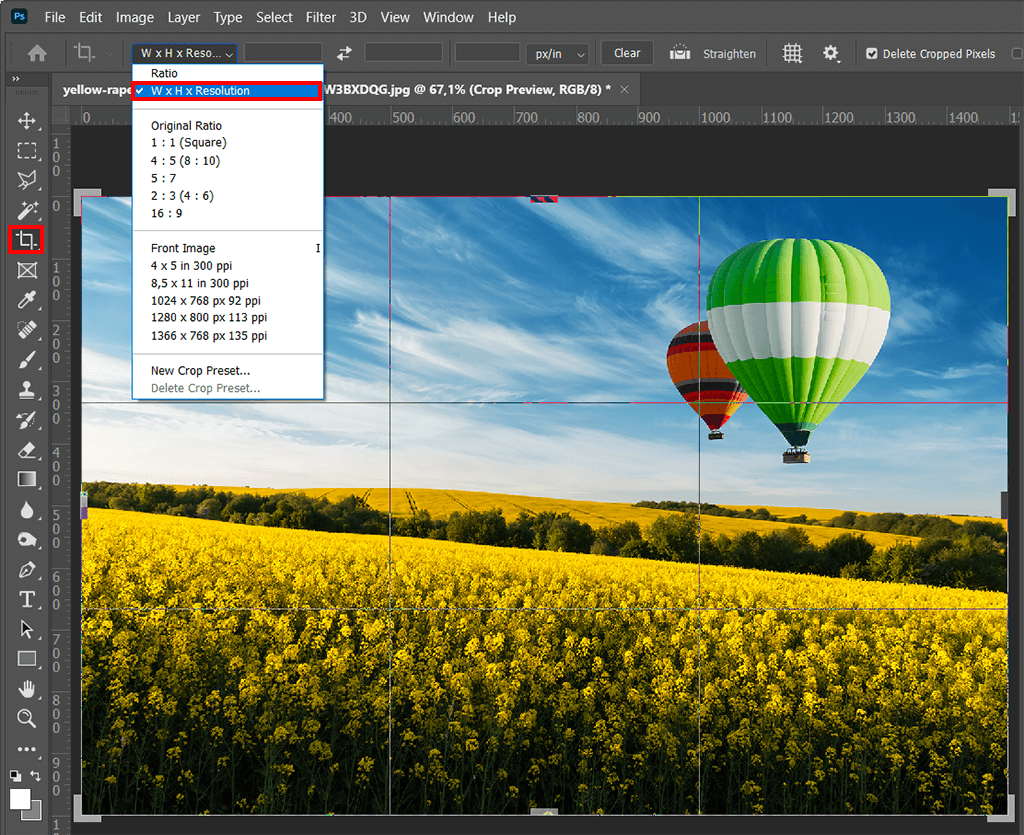
STEP 2. Find the Resolution, Width, and Height parameters in the toolbar at the top.
STEP 3. Set the size or aspect ratio you need. For example, you can set the frame size to 6 by 8 inches. That means the cropping area will have a 6x8'' aspect ratio whenever you change it.
STEP 4. Then you should choose a proper resolution. I recommend choosing at least 300 PPI for printing. If you plan to use pictures on the Internet, a lower value is enough.
STEP 5. Apply cropping by pressing the Enter key. The result will correspond to the parameters that you have set.
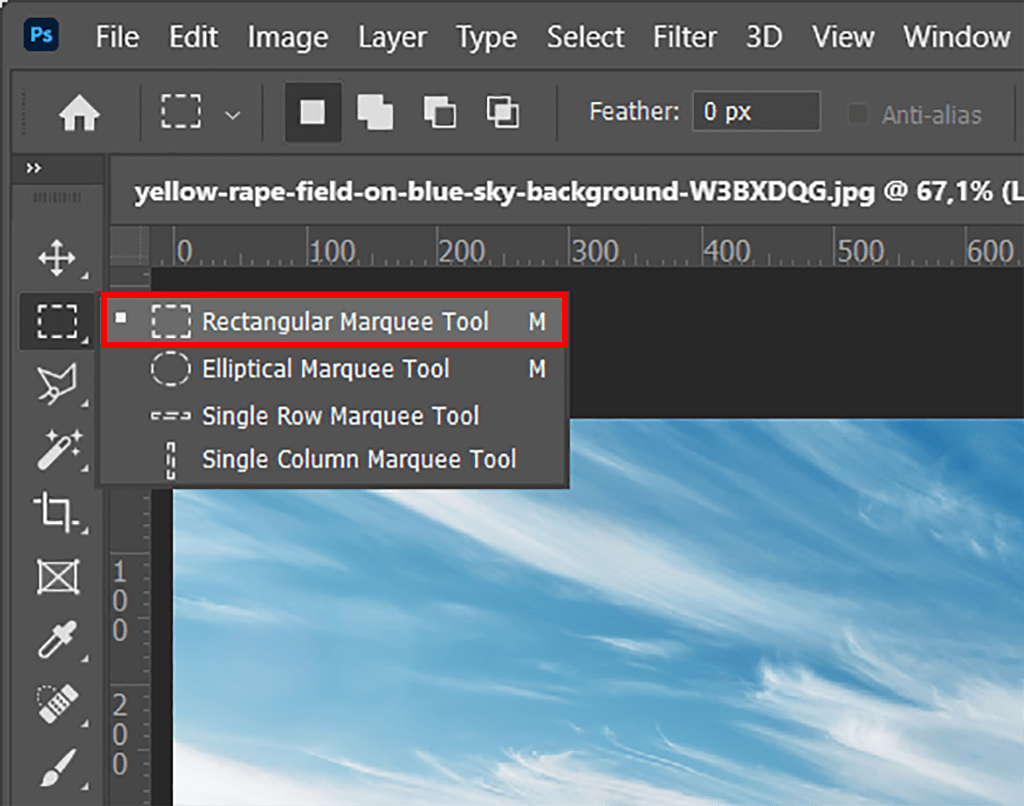
Another common way to crop images in Photoshop is using the selection tools. Many users consider the Rectangular Marquee tool to be one of the most powerful and convenient.
STEP 1: After opening the picture you want to crop, select the Rectangular Marque.
STEP 2. First, you need to create a selection. When the rectangle is ready, move it to the area you want to crop.
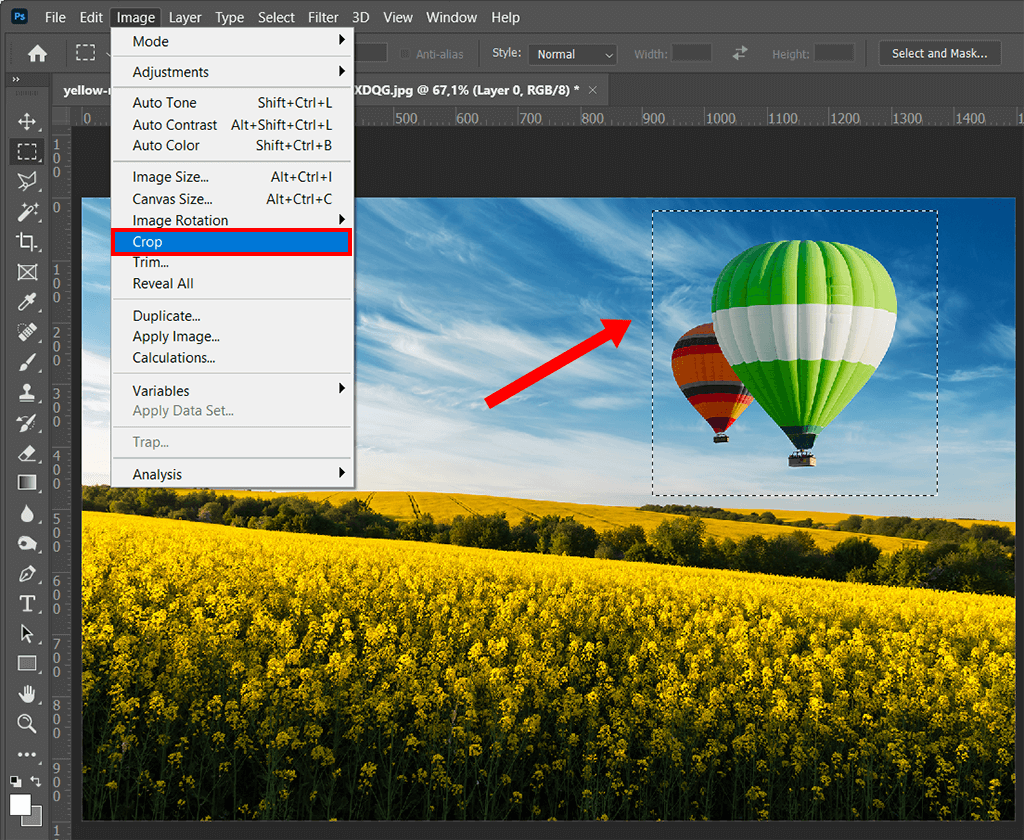
STEP 3. Apply the Crop action in the Image menu. After that, the final picture will correspond to the size of the selection area.
STEP 4. Save the final photo.
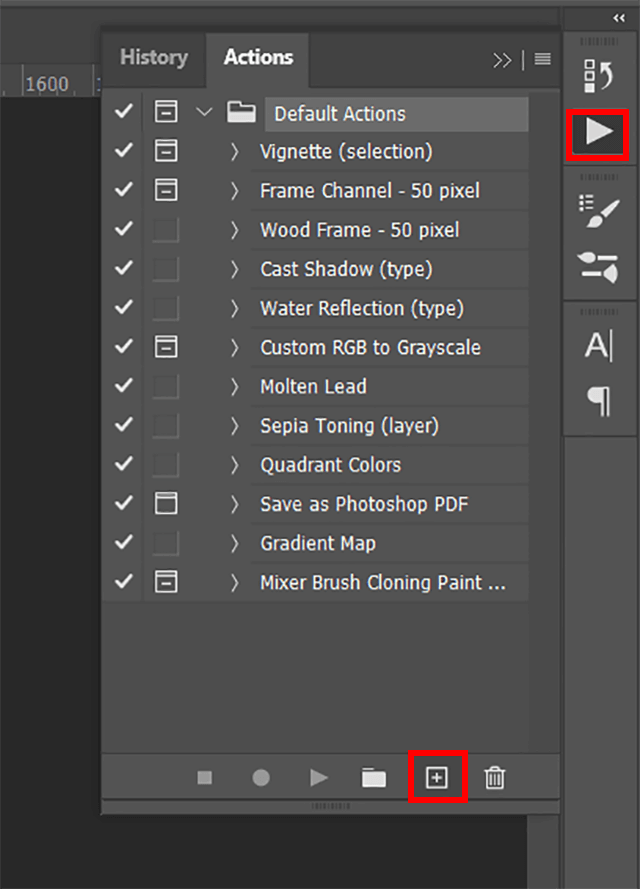
If you are looking for another way of cropping image in Photoshop, try using special Photoshop actions. You can either apply ready-made Photoshop actions, including free ones, or create your own effect for fast batch cropping.
Here are some simple steps you should take to create such an action.
STEP 1. You will store the original and edited images in two folders on your PC. So, you need to create them. Name these folders as Old and New. You should keep the original pictures in the first one.
STEP 2. Open your photo in the program. Go to the Window menu and put a check mark on the Operation line. Choose the “Create a new operation” option in a new tab.
STEP 3. In the top line, enter the name (Size + Sharpness) and click on the Save button. Now all your subsequent manipulations will be saved as an action.
STEP 4. Then, you should set the proper width (for example, 600) in the Image menu and save it by clicking on the OK button.
STEP 5. To save the edited photo, press the Ctrl + S keys simultaneously. The “Save” option will appear in the action records. Then, you need to click on the Stop Play/Record button.
This action can be applied to all objects. You need to go to the File menu → Automate → Batch Editing. By applying the action, you can crop all the selected photos to the desired size.
While cropping images in Photoshop, you can further enhance your photo by applying several basic actions.
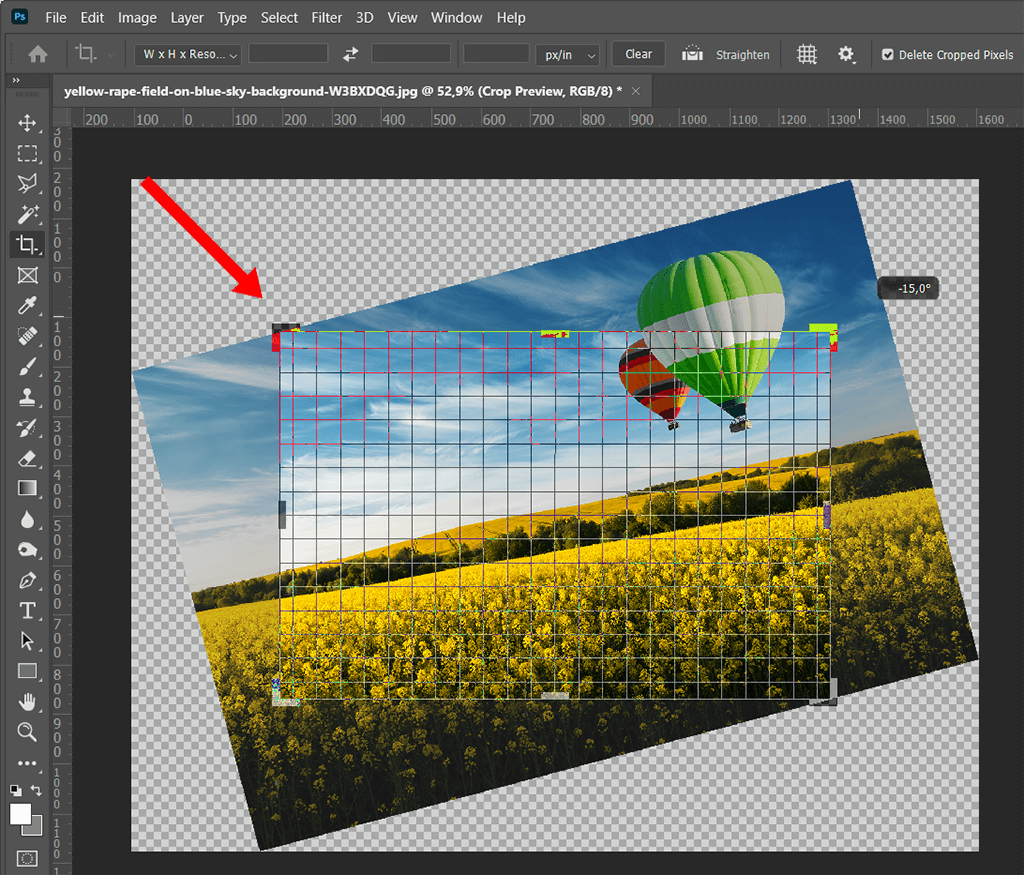
First, you can use the cursor to move the cropping area. Put it inside the selected zone and hold down the left mouse button to drag the area to the desired place. By moving the squares, you can adjust the size.
If you want to use certain proportions in the future, you should hold down the SHIFT key. Then, you can rotate your image by using the corner handles. Hover over one of them and move it.
Find the Cancel button in the Options panel and click on it if you don’t want to save the results.

You can always use ready-made actions to crop your photos. For example, with this set of Photoshop actions, you can crop an image in a few clicks to create a Polaroid-style photo.


