Want to add visual interest to a photo by adding a border in Photoshop? It’s easier than you think. In this tutorial, I’ll go over the 2 simplest methods to achieve that. By the end of the tutorial, you’ll know how to add a classic, as well as a custom border in a matter of minutes.
If you want to add a basic solid border, follow the steps below. This will help you learn how to make a classic white border, commonly used by Instagram photographers.
Open the photo of choice in Photoshop.
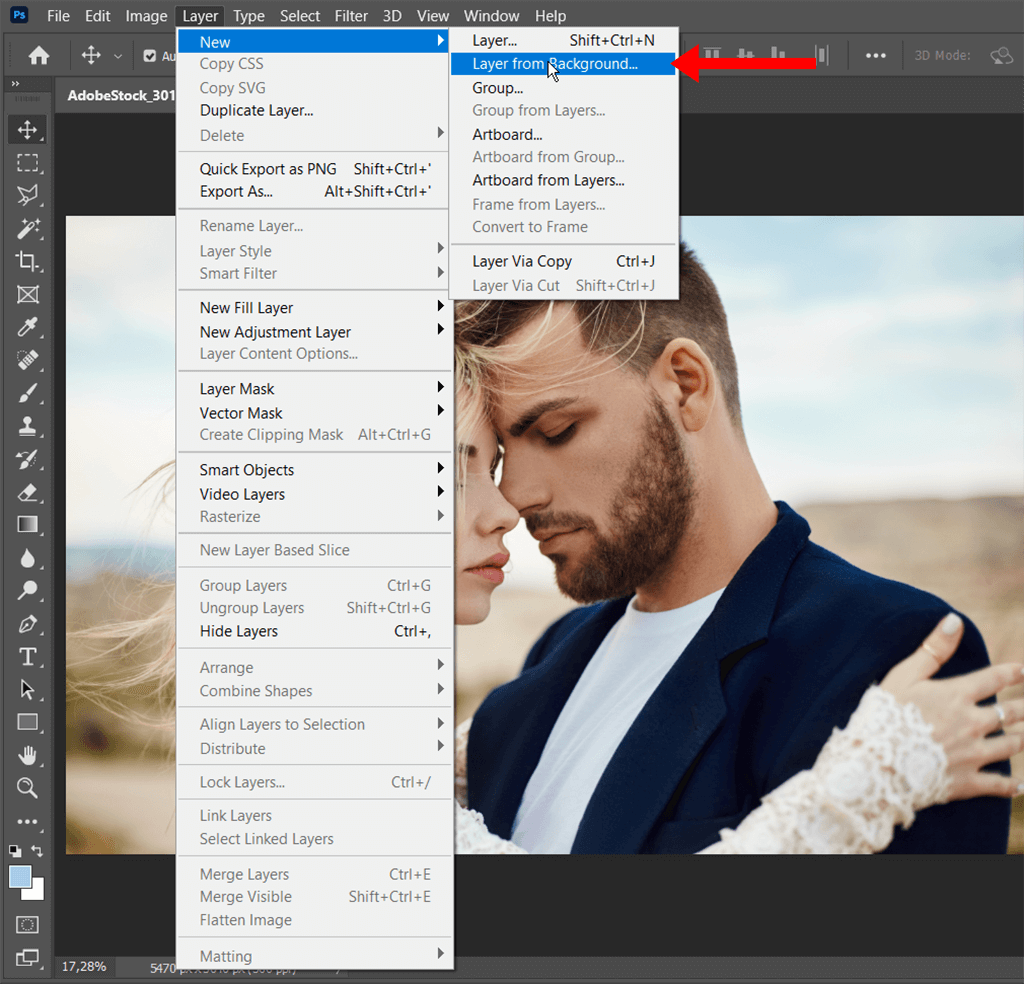
Go to the main panel, and select “Layer”. Next, click on “New” and then “Layer from Background”. This step is essential since later on, it will let you alter the frame color much easier.
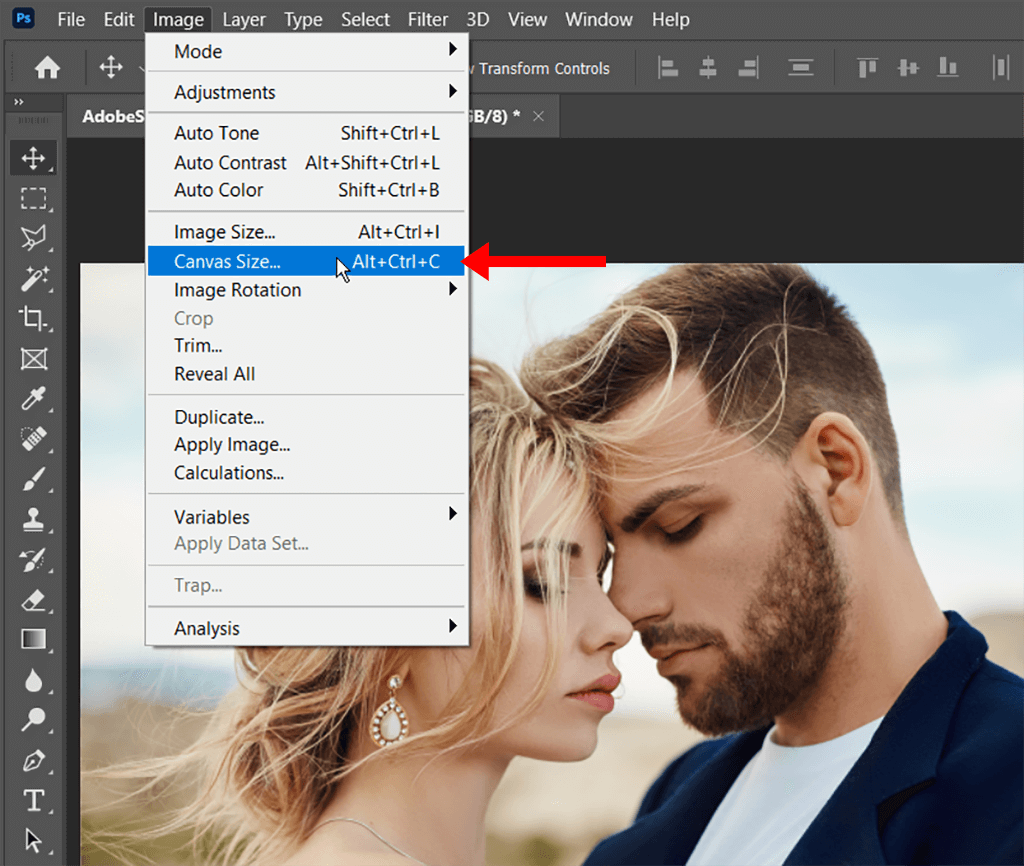
Now, we’ll specify the size of our classic frame. In order to do this, navigate to the “Image” tab. Click on “Canvas Size” in the fly-out menu. For those who prefer using Photoshop keyboard shortcuts, press Alt+Ctrl+C/Alt+Cmd+C.
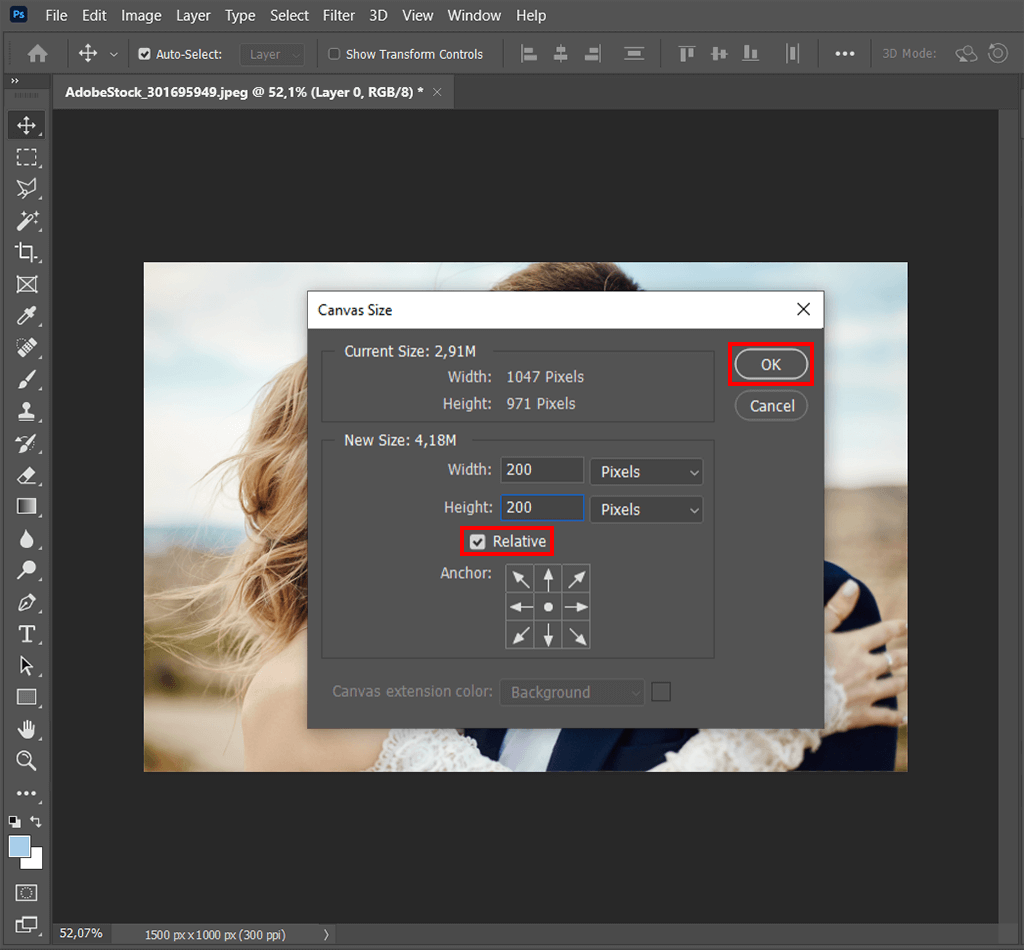
In this window, you’ll be able to change the size of your Photoshop border. Since we want to use relative values, when specifying the border’s size, we need to check the corresponding box. After that, enter the preferred width and height.
An important thing to note here is that the number you entered will be distributed between opposite sides. So for example, if you want the height of your border to be 5 inches, you need to enter twice that number, which is 10, in this case. Click “OK” once you’re done.
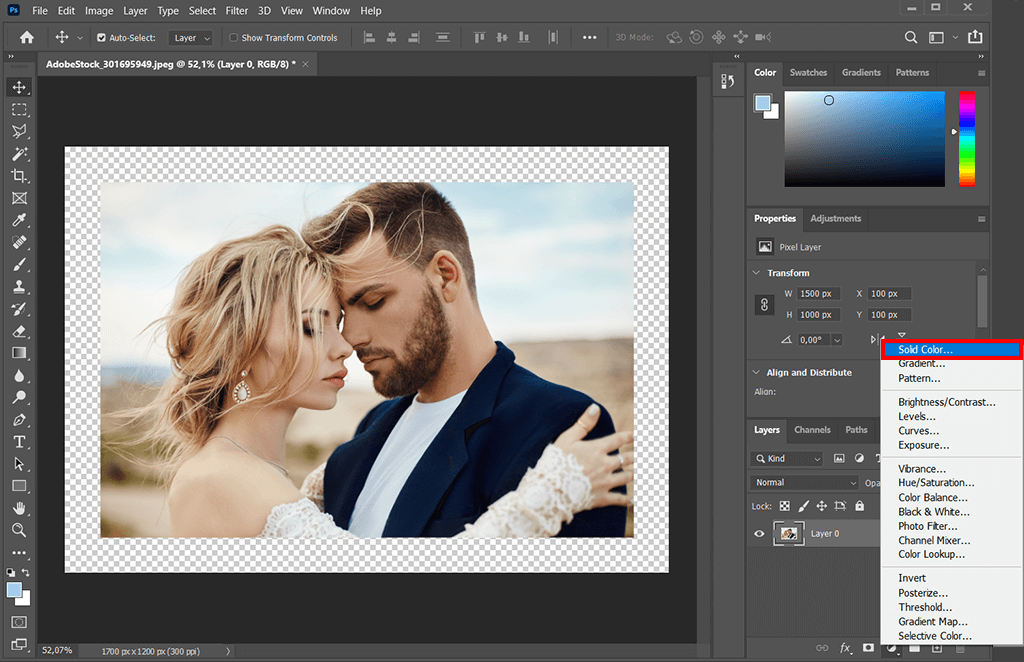
To fill that space with color, we'll have to navigate to the bottom of the Layer's Panel and click on the fourth option from the left. You'll see a new menu pop up. Choose the first option – “Solid Color.”
Your image is now blocked from view by black canvas. To fix this, move the layer you just added below the one that contains your image.
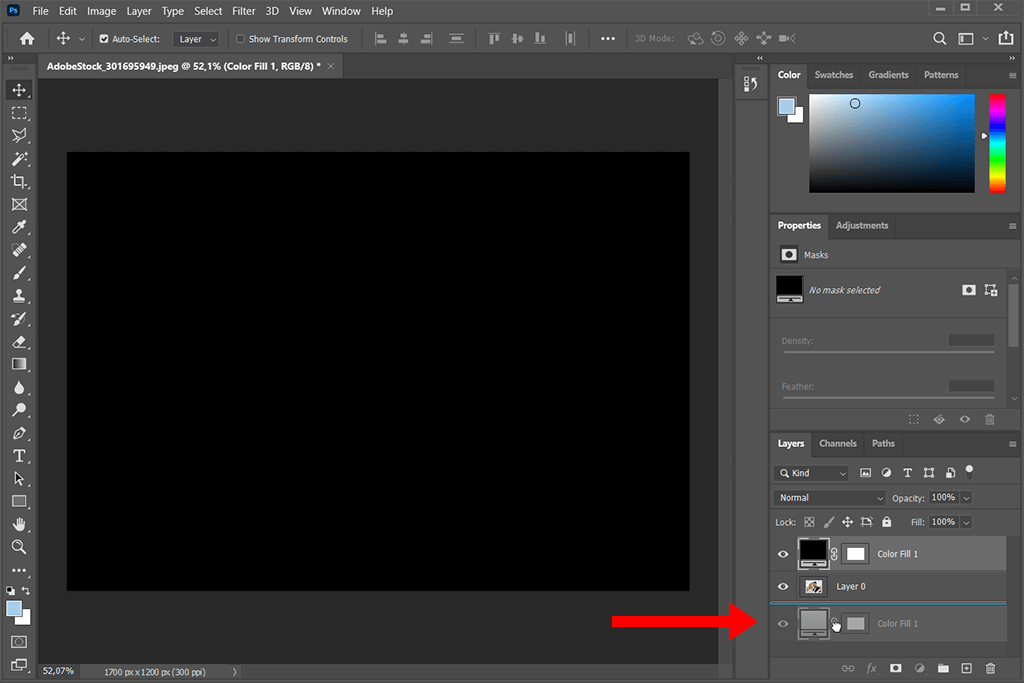
To alter the frame's color from black, click twice on the layer’s color swatch. Drag to select a color and desired hue.
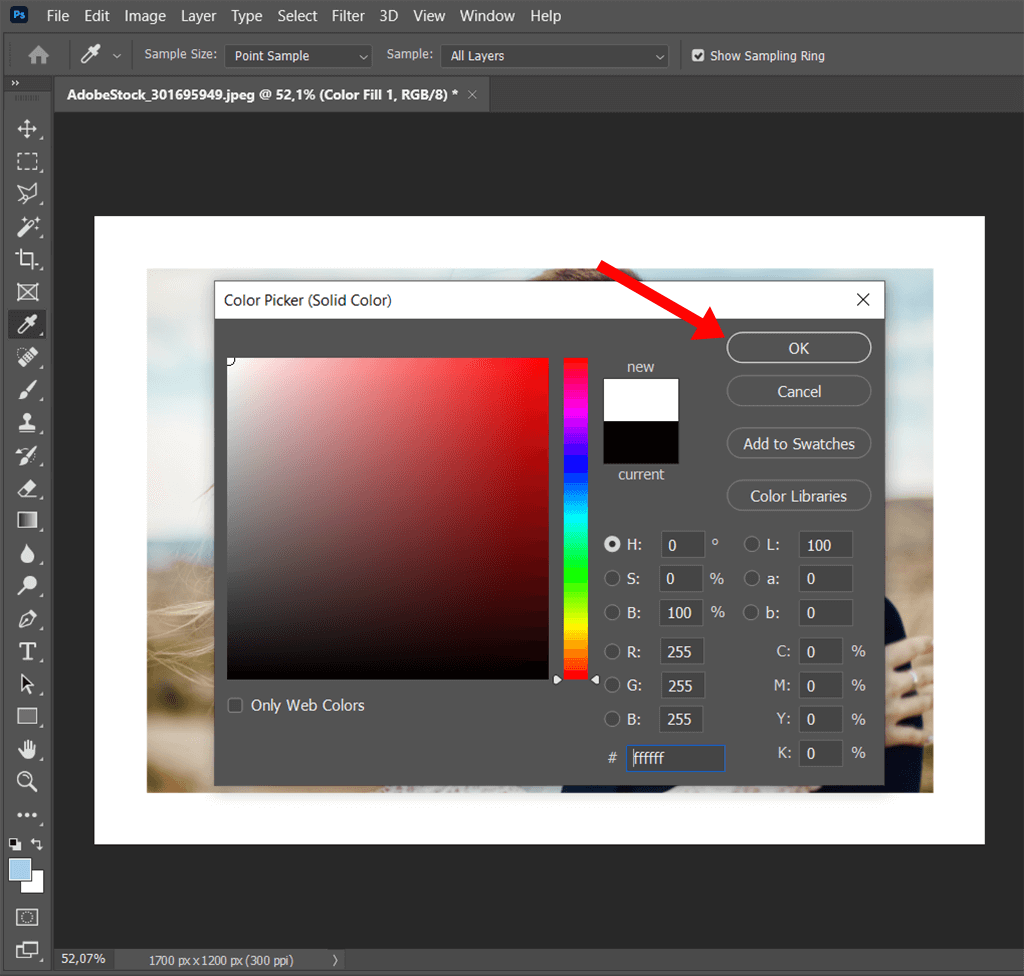
Now you know how to add a border in Photoshop in 5 simple steps. move on to more difficult Photoshop tutorials, like how to make a collage in Photoshop.
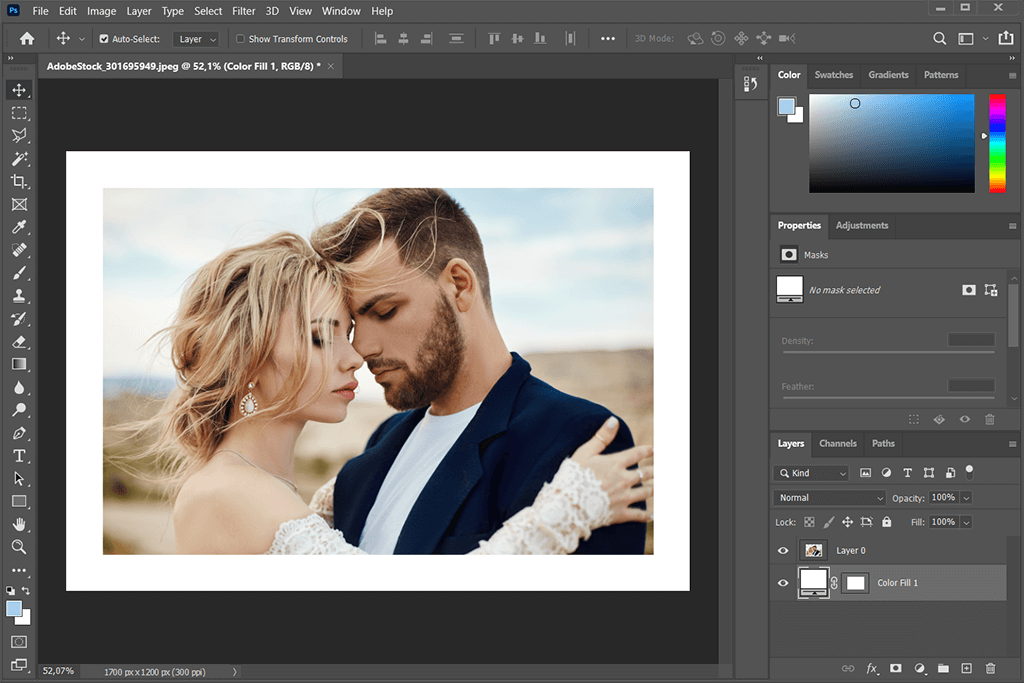
If you want to get creative with your frame by adding an interesting pattern - follow the steps below.
Upload a photo of your choice. Then, we'll fill the layer with a color, as we did in the previous tutorial.
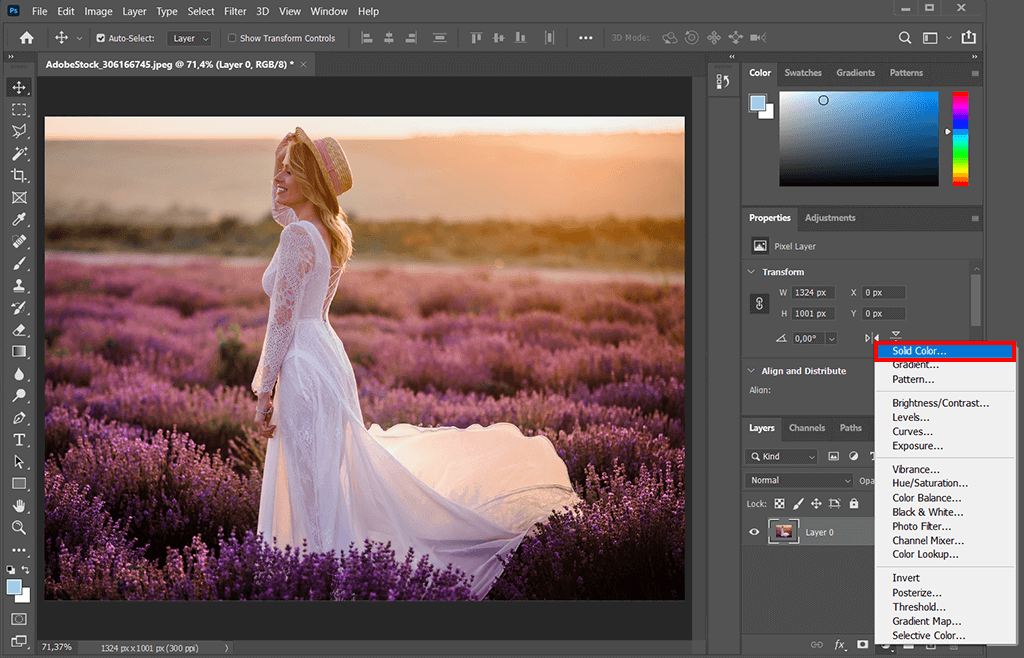
You’ll see the Color Picker window appear. Select white color and press “OK”.
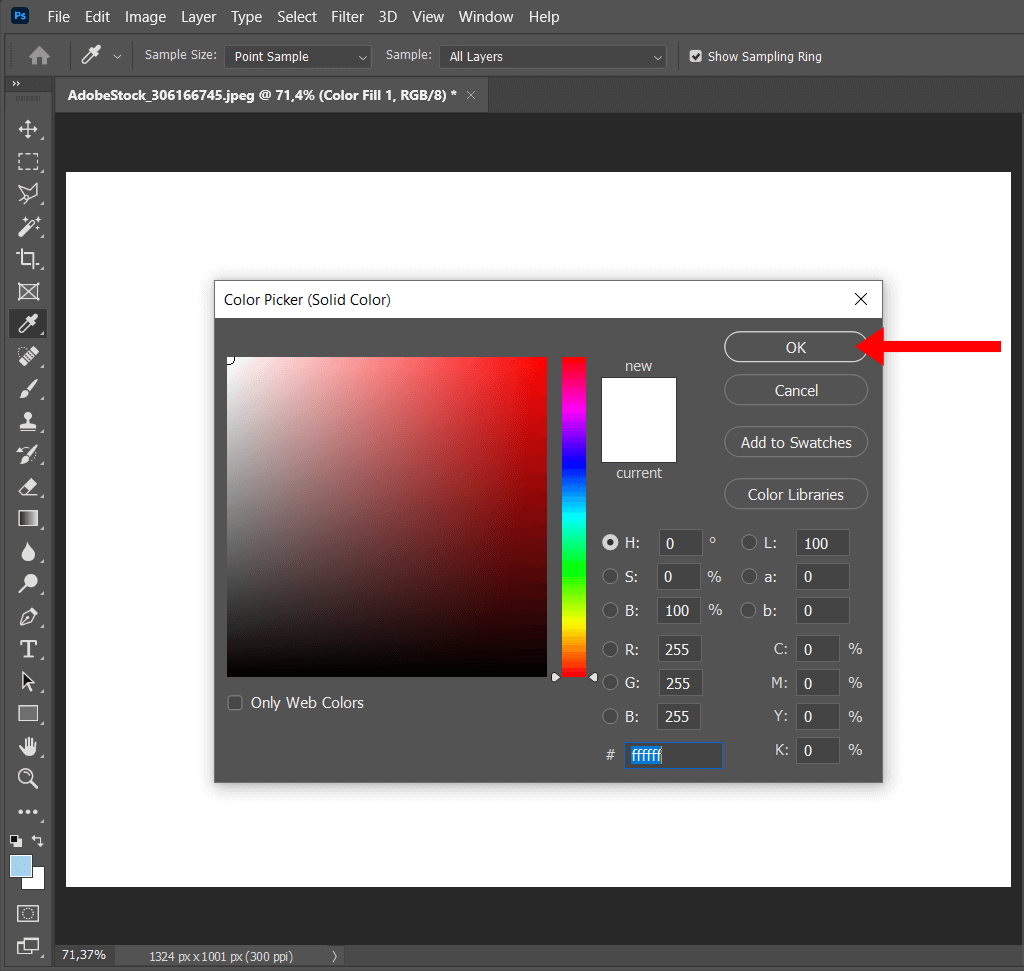
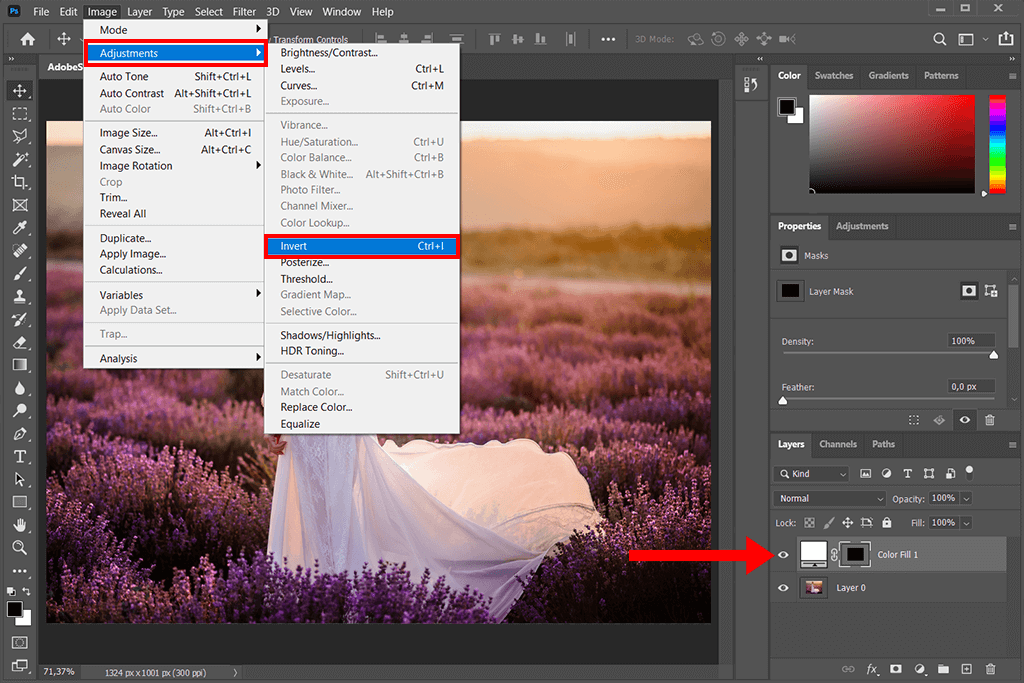
Your image can't be seen now, since it's completely covered with white. In order to place your photo back in the foreground, you'll need to invert the mask. Go to the Image tab, and choose the second option from the top – “Adjustments”.
Select “Invert” from the fly-out menu that appears. Alternatively, use the Ctrl+I/Cmd+I hotkey. This will bring your image back into the foreground.
Open the Brushes Panel. There are several ways to do this. You can either click on the Windows tab, and then choose Brush, or activate it using the F5 key. Choose a brush you want to draw a frame with.
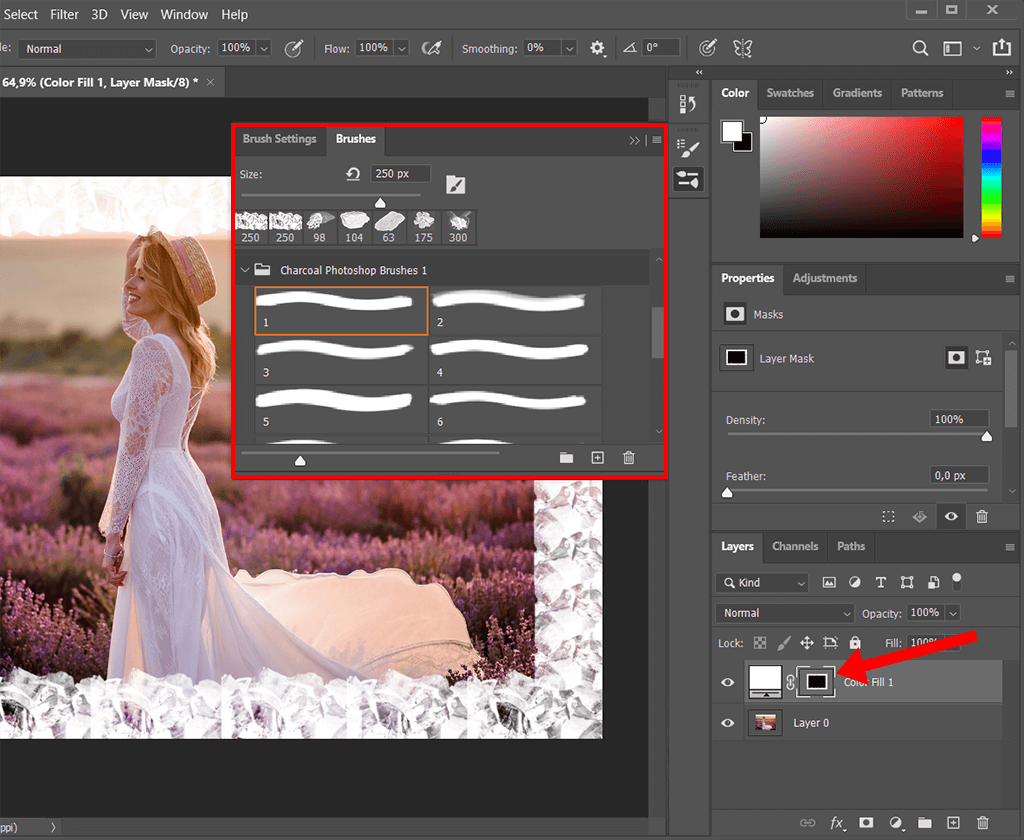
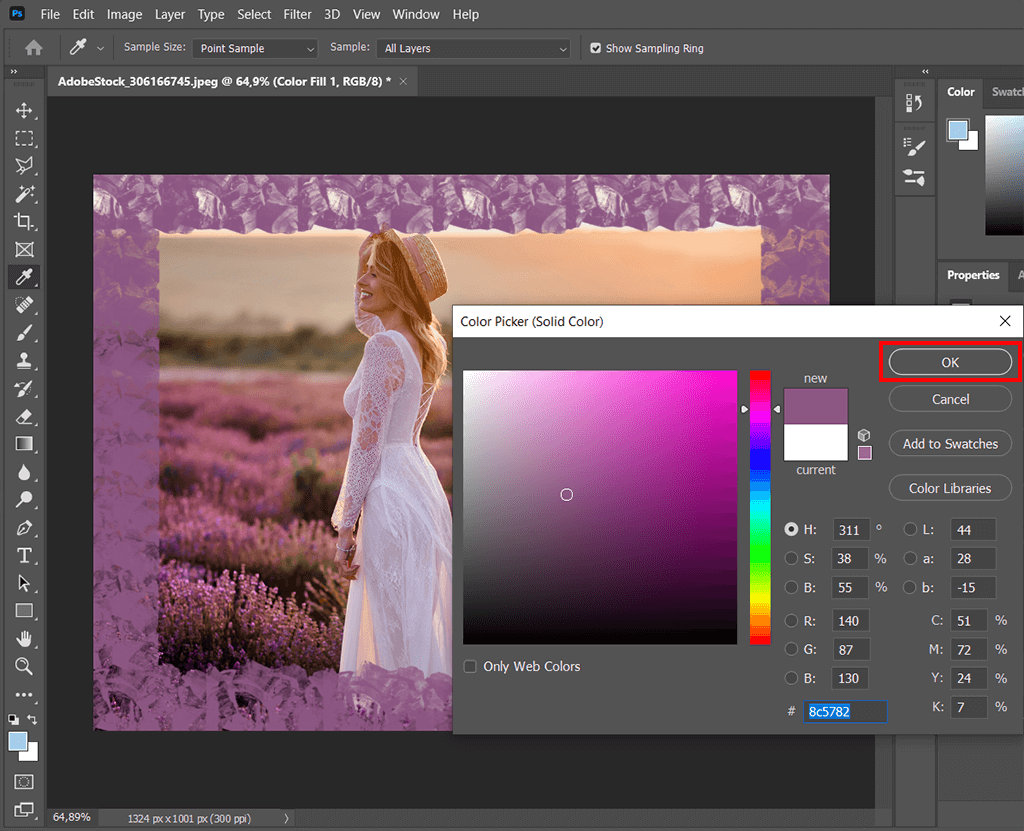
Start drawing your frame. You can change its color once you’re done with any hue you wish.

Want your workflow in Photoshop to be more efficient? Use this bundle of free actions, brushes, and overlays that were designed by pro photographer. These will save you lots of time, and you’ll still manage to deliver professional results.