You have fantastic vacation photos or landscape shots that you wanted to post but the campfire isn’t as noticeable as you want it to be or has gone out completely? Then check out this working and efficient lesson on how to make fire in Photoshop to make the image look more appealing and finished.
By properly using Photoshop as a tool for making fire in Photoshop, you can imitate a quality, realistic campfire, flame, or even a superpower effect for an artistic image or a manga cover if you’re an artist.

Open the photo that you want to add a realistic fire to and immediately add your overlay. Before you learn this lesson, I suggest refreshing your skills by reading my old guide on how to use overlays in Photoshop.

I’ll hide all my overlays and will work with one of them at a time for maximum convenience. Place the first overlay on the needed layer by pressing “Ctrl+T”. Next, click the mask layer and smoothen the transitions. Press “Enter” once you’re done working on the first layer.
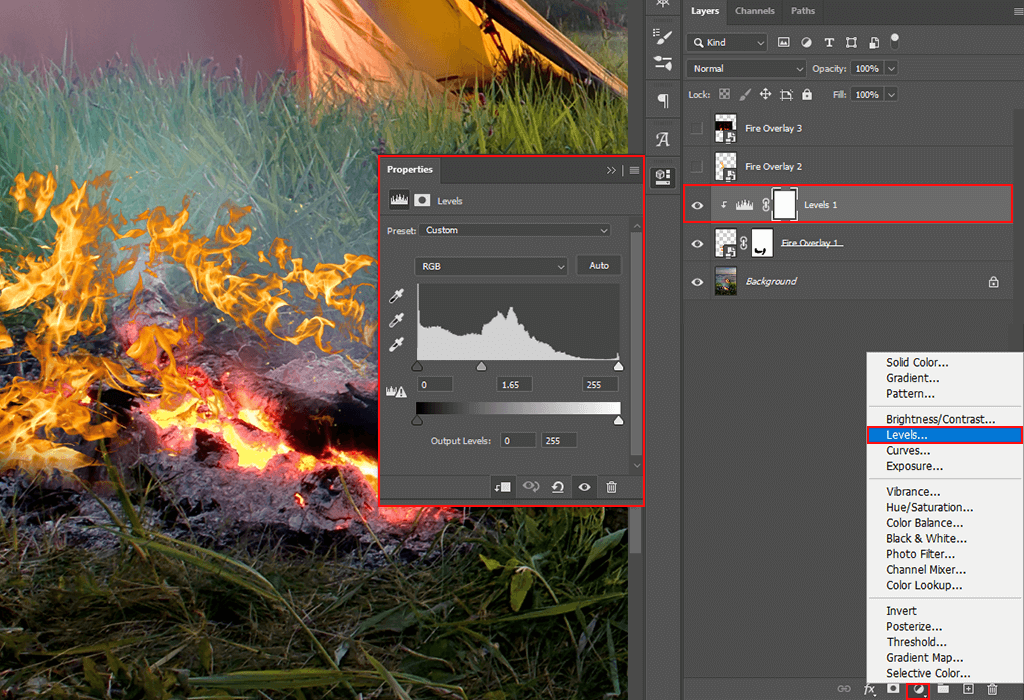
To make the fire brighter – open Levels and attach them to the first overlay using the “Alt” key, as shown in the screenshot.
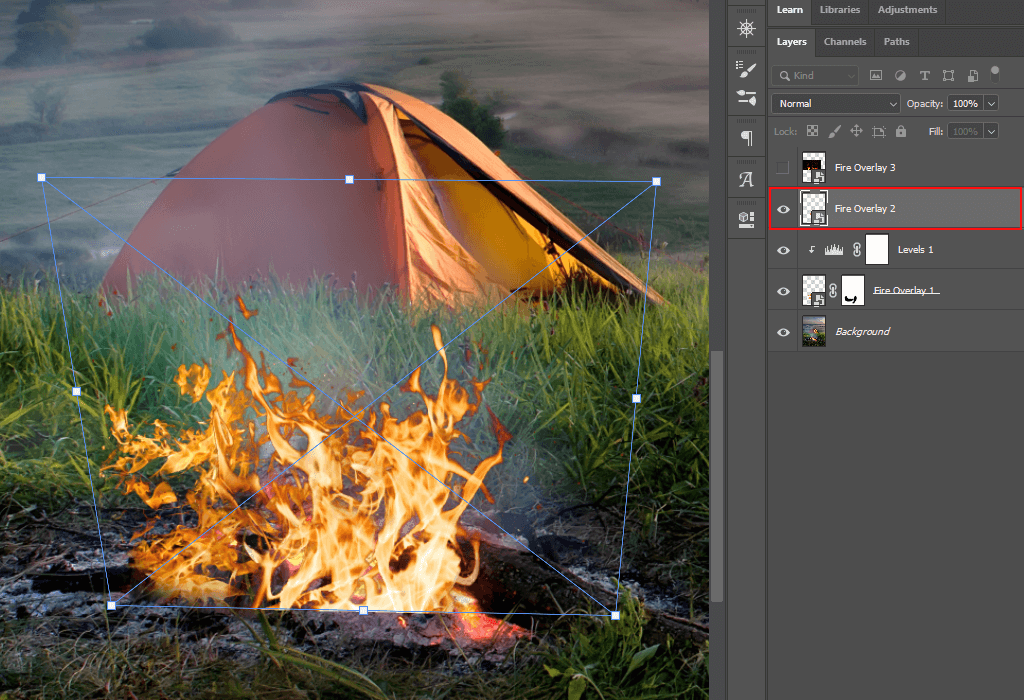
Add and place the second overlay with the help of Transform and give the flame a realistic shape.
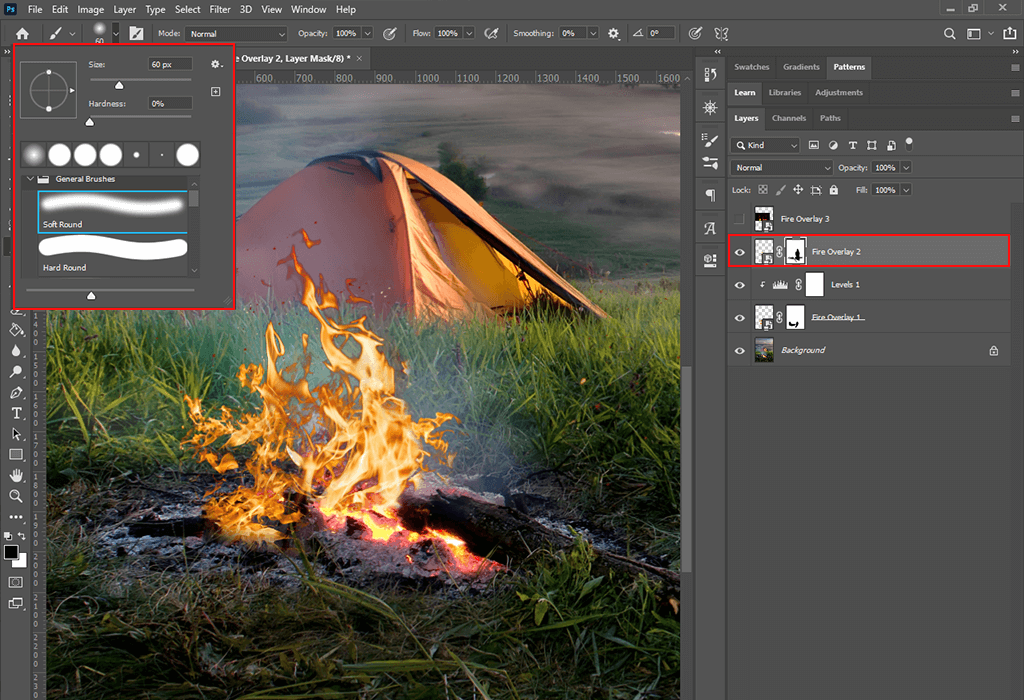
Erase all unnecessary parts with the help of a brush and a layer mask to give the fire a proper, finished shape.
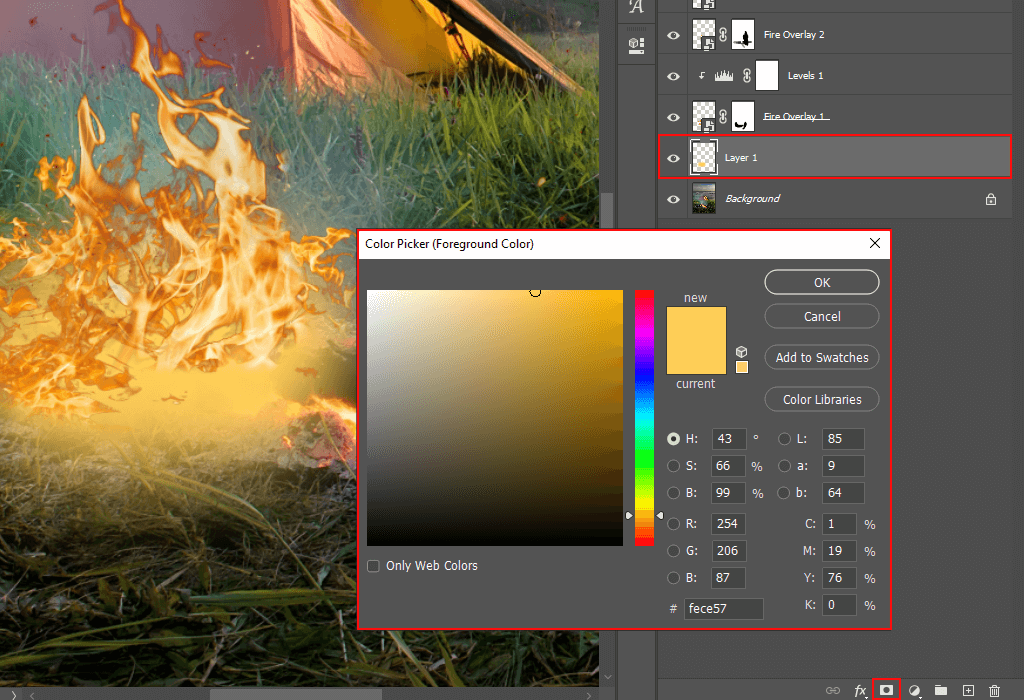
You can add glares to make the fire stand out more. To do so, keep using the brush tool and create a new layer under all the overlays, pick the yellow color, and draw a glare around the needed fire area. Also, don’t forget to change the blending mode to “Overlay”.
Add the last fire sparks overlay from the professional library of FixThePhoto designers or your personal collection, and change the blending mode to “Linear Dodge (Add)”. Next, repeat all previously learned steps: create a layer mask and remove all unnecessary parts with a brush.
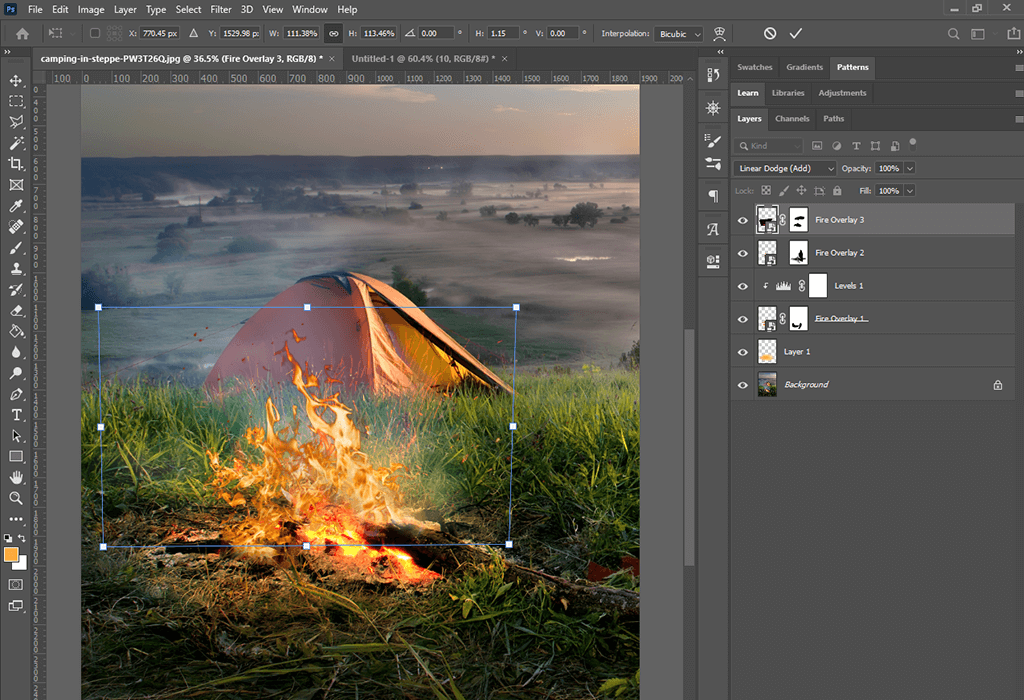
Transform the splatters. They have to follow the general flame direction and go upward. It’s important to mention that the number of so-called fire splashes should be kept to a minimum, as you can see in the example.
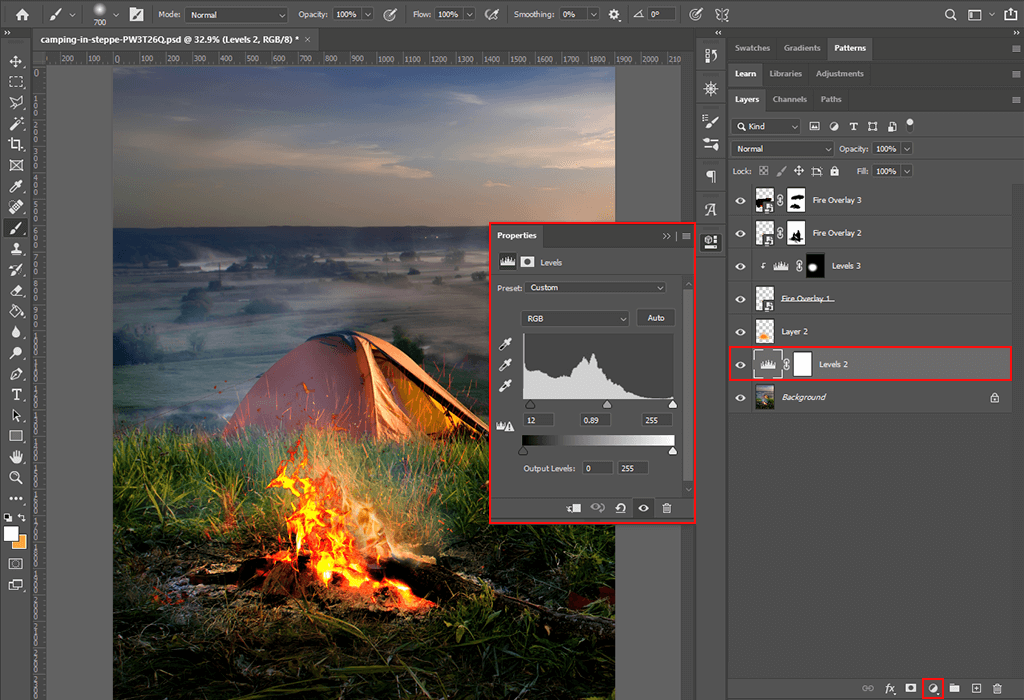
At this stage, you can move on to exporting the image or increasing its contrast by using “Levels”.
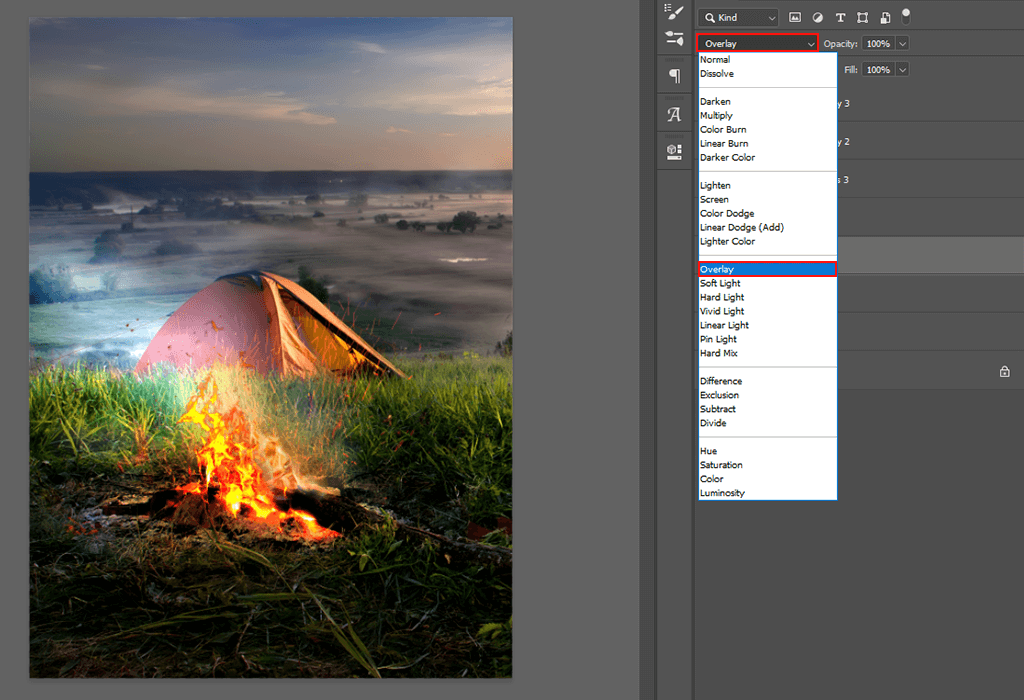
Another option you have is to add smoke. To do so, create a new layer under the overlays, select the brush tool, and imitate smoke with a white-colored sweeping brush. Afterward, change the blending mode and save the image.
The last changes aren’t necessary, I simply showed how to create unique and mesmerizing images by properly implementing various ideas. If your Photoshop skills aren’t high enough to bring your ideas to life, or you’re going to publish a photo in a magazine and want to make it look professionally edited, then you can reach out to our experts. The retouchers will fulfill all your requests within the shortest period possible.
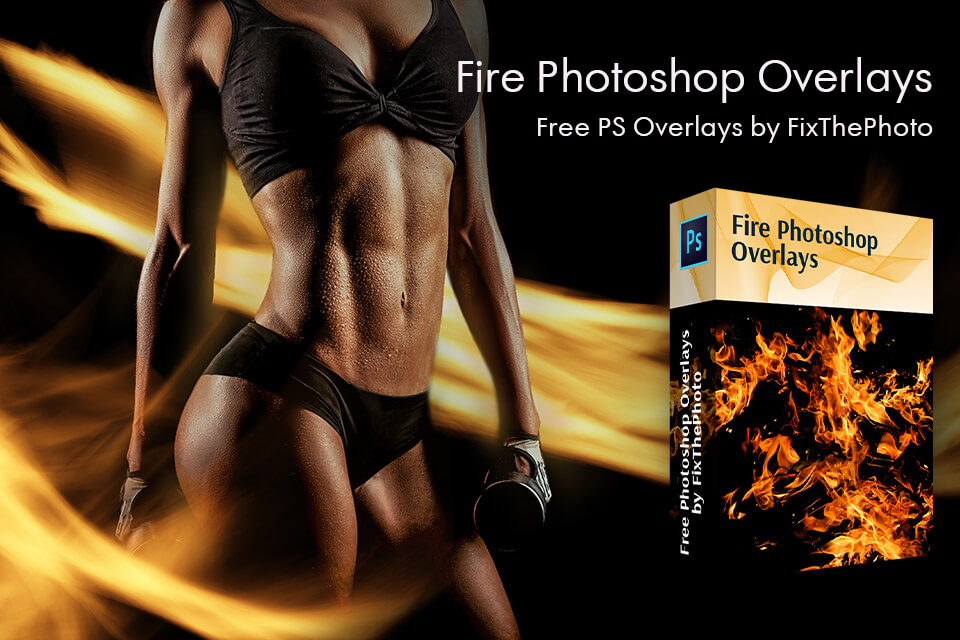
If your library lacks the necessary overlays, you can check out the free pack offered by FixThePhoto’s professional designers. It contains fire overlays that imitate all kinds of shapes from round to discontinuous.
You can make use of premade Photoshop smoke brushes. The only thing you have to do is perform a small transformation and adjust the opacity while removing all the unnecessary details.
If you don’t like how you’ve transformed the fire overlay or you erased too many flames, you can always cancel the last action with the “Ctrl + Z” hotkey combination.
You may be using an outdated Photoshop version like 6.0 or older. In that case, I suggest familiarizing yourself with a short manual on how to receive the latest version of Photoshop free.
Once you’re done editing the image, use the “Ctrl + E” hotkey combination.
Make sure that you fulfill the special requirements imposed by the functions you want to use, for instance, GPU or OpenCL (install a graphics adapter). If this solution didn’t help, you can check out other possible reasons that can cause Photoshop lagging.