
A photo zine is a selection of printed shots that you arrange in a magazine style, create and publish yourself. Apart from photographs, it can contain illustrations and hand-written/printed captions.
With the help of a photo zine, you may share your business idea or make a school presentation more creatively. Photographers use photo zines to demonstrate the series of their shots in a well-organized and meaningful way.
If you are wondering how to make a photo zine, the given guide is for you. It helps figure out what to start with and how to proceed. Learn in more detail about each step of the process – from picking the paper accordingly to printing, binding and more.

It is a bad idea to start arranging shots without a clear concept in mind. If you are stuck and can’t think of anything, draw inspiration from creative photography series ideas or photo essay examples. Concept helps people understand what is happening in your photography zine, as well as grasp the general idea behind it.
Think through the beginning, middle and end of the story. The first shot should be striking enough to catch the person’s eye and make them continue viewing your zine.
The last shots are supposed to serve as a logical end to the story told in the zine. These may be pictures that display the call to action or put stress on the conveyed idea.
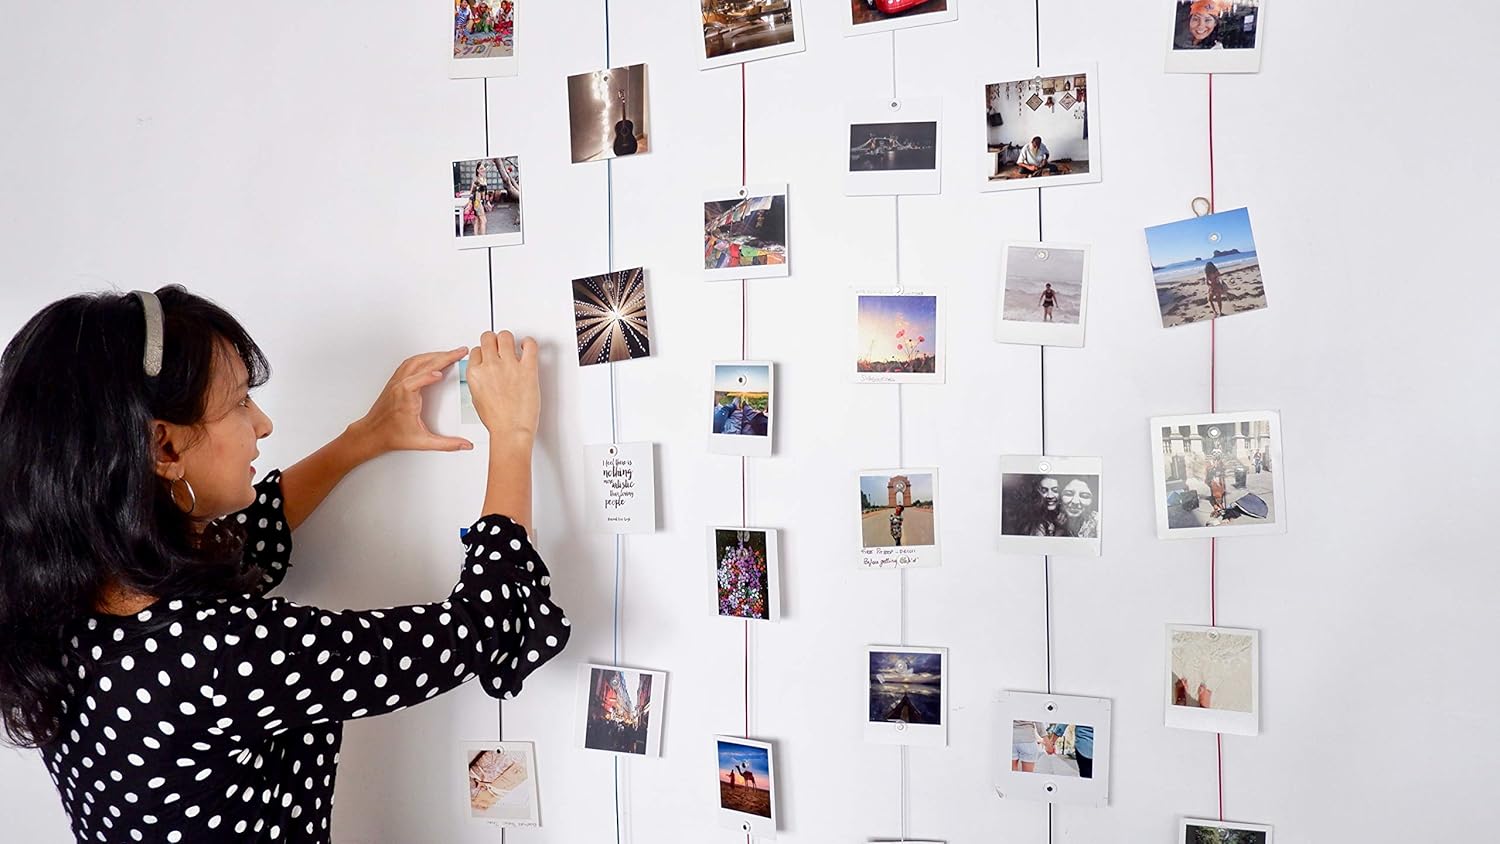
To see how well the shots go together and whether the whole composition of photo zines looks just as good as in your head, make sure to print and arrange all shots in physical space. I suggest attaching the shots to the wall using tape and placing them into appropriate groups.
Once the groups of shots are in front of you, it will be instantly noticeable whether some rearrangements need to be done or whether something is missing.
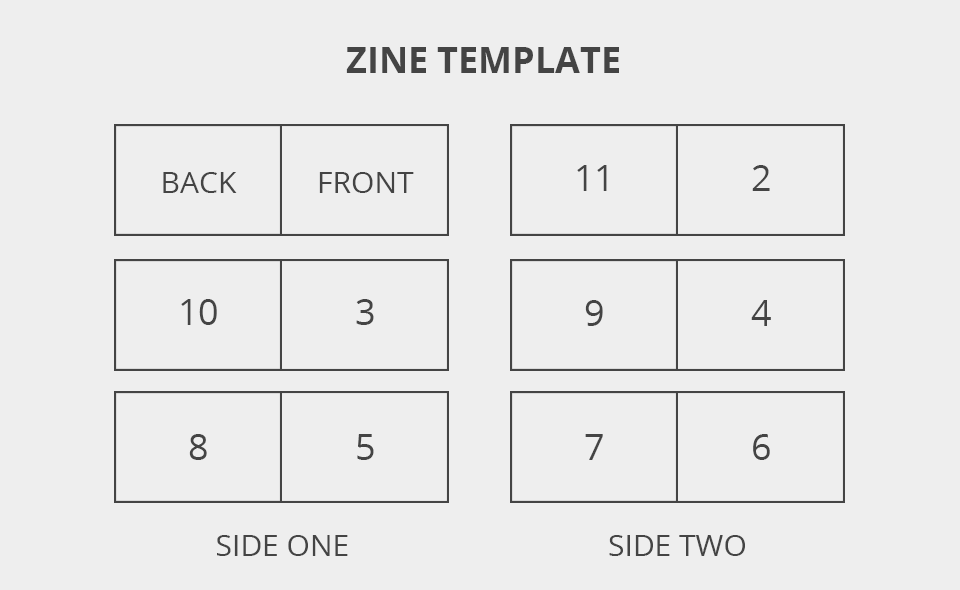
Designing a zine template in advance is also important. Start with the number of shots you wish to feature. Then consider the number of pages. You are free to place a single shot or several shots on one page.
Besides, use both sides of the page to put the shots on. If you are thinking of folded pages, it gets a bit difficult since you have to organize the pages accordingly in order to achieve the desired arrangement in the photo zine. Above, you will see a recommended page layout for a zine with 12 pages.

For more comprehensive zine photography, consider adding hand-written or printed captions and text. Try giving descriptions to each shot, explaining what is so special about it and why it is featured in the zine.
Stay away from self-evident descriptions. If the location of the shot matters, and it isn’t immediately clear, mention this. If the shots display certain people and they are involved in the story you tell, be sure to include their names.
Written captions provide more context to the zine and its story, as well as help viewers establish a connection between the shots within the zine.
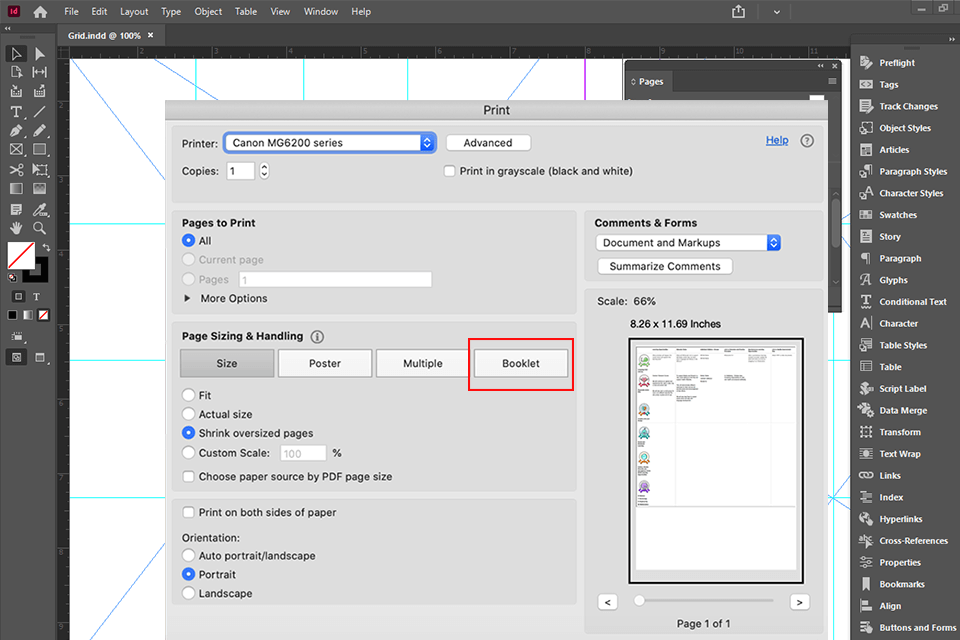
When learning how to make a photo zine, remember that word processing and picture manipulation software like Photoshop may help you create a page layout template. But since they aren’t intended solely for designing layouts, I suggest that you use dedicated software like InDesign for designing purposes. Thankfully, with numerous InDesign tutorials, you will figure out what is what in no time.

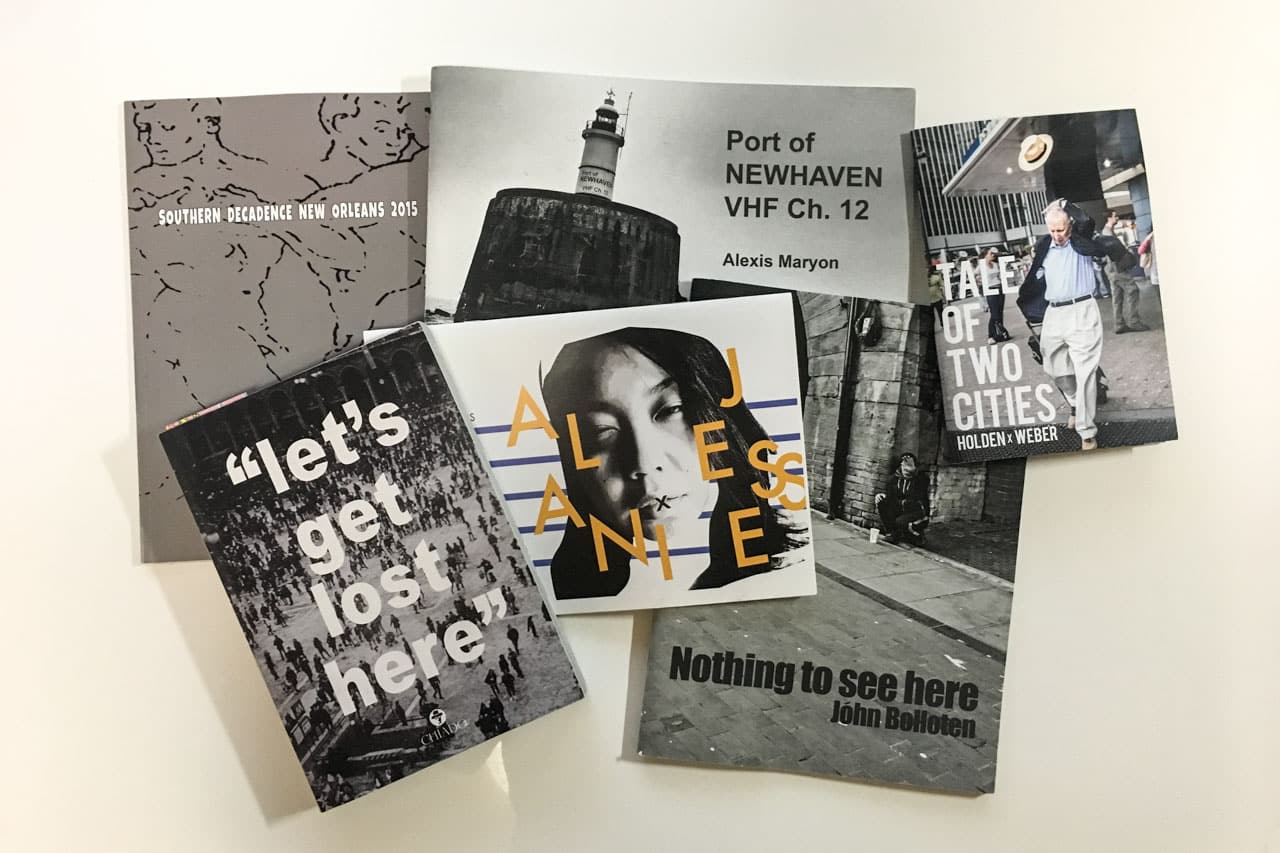
Print just a couple of copies of your photography zine – this will make it more special and valuable in the eyes of those who end up buying it. When packing the zine for the recipient, put a handwritten note or a sticker inside the pages as a small gift. To make the zine even more extraordinary, add a nice signed print.
Make sure to share the news on the launch of the zine on social networks and use this opportunity to attract more visitors to the website or attention to the crowdfunding campaign, for instance.
Before you pick the size, decide whether you want the photo zine to be compact and easy to carry around or whether it should be something be bigger to place on the shelf or console. The most widespread dimensions for zines in the US are 5.5″ x 8.5″ and 8.5″ x 11″, which are equal to the European A5 and A4 sizes. In case you are using a commercial printer, you may be able to pick custom and square sizes.
Mind that once you opt for a particular size on a commercial printer, this will be the actual size of the zine in the closed position. When being opened, that size will be doubled.
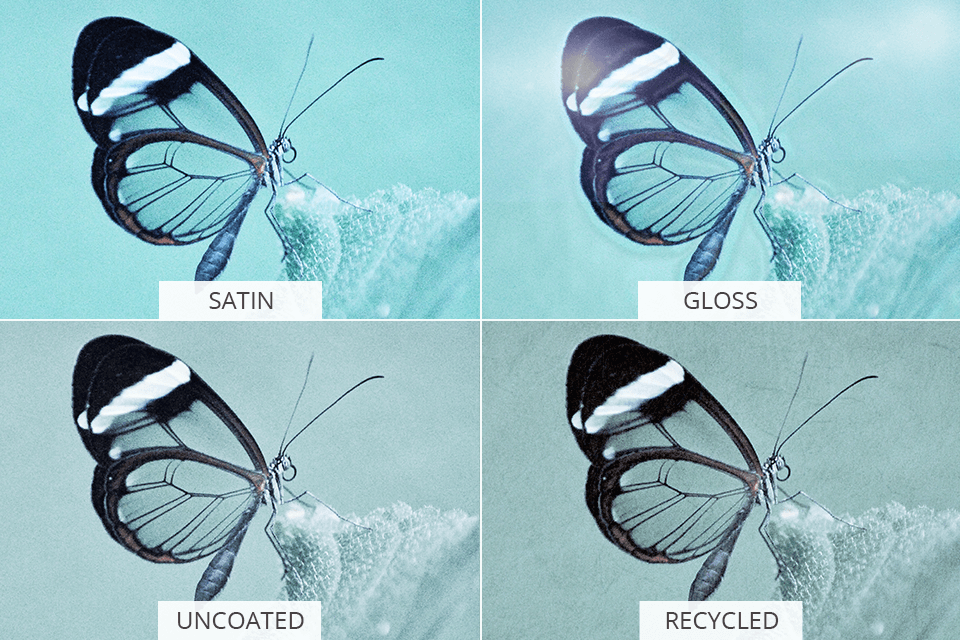
For photography zines, you may pick between four primary paper types. They all look and feel different, thus influencing the way the shots appear when printed.
Satin is the basic paper option. It is mainly characterized by a smooth matte finish. If you strive for the most precise printing of the shot, go for satin paper.
Gloss is a smooth shiny paper that boosts color vibrance. A go-to choice for photography albums.
Uncoated is a standard writing paper. It has a bit of a rugged feel and tends to make the colors duller.
Recycled is a harsher variant of uncoated paper that also leaves the colors to look dull.
The last two types are quite widespread for printing zines with a retro theme. Before you decide on a particular type, be sure to try a sample pack – this lets you feel and touch the paper until you purchase a whole pack.
For the text pages and cover pages, you may combine various paper types. For instance, use uncoated paper for the text pages and a gloss cover with a gloss lamination.

Paper thickness is also a significant parameter when it comes to creating photo zines.
Text paper is suitable for the inner pages and is supposed to be of 70, 80 or 100 lb.
Cover paper is suitable for the cover pages and is supposed to be of 80, 100, 110 or 130 lb.
But an 80 lb text paper and an 80 lb cover paper don’t have an identical thickness. 80 lb text paper is equal to 44 lb cover paper, taking into account that cover paper is 1.8 times thicker than text paper.
Some people opted not to use regular covers in their zines. This is referred to as “self cover”, meaning that the first and last pages of text paper serve as a cover of the zine.
Once you are done with the cover of the zine, the final step is to laminate it with a protective substance. As a result, the zine will not only look more appealing but also will be resistant to scratches, smudges, spots and ink appearing because the zine is held by sweaty and hot hands. Still, some don’t want to splurge on extra lamination and prefer a “self cover” for a worn-out and retro design of the zine.
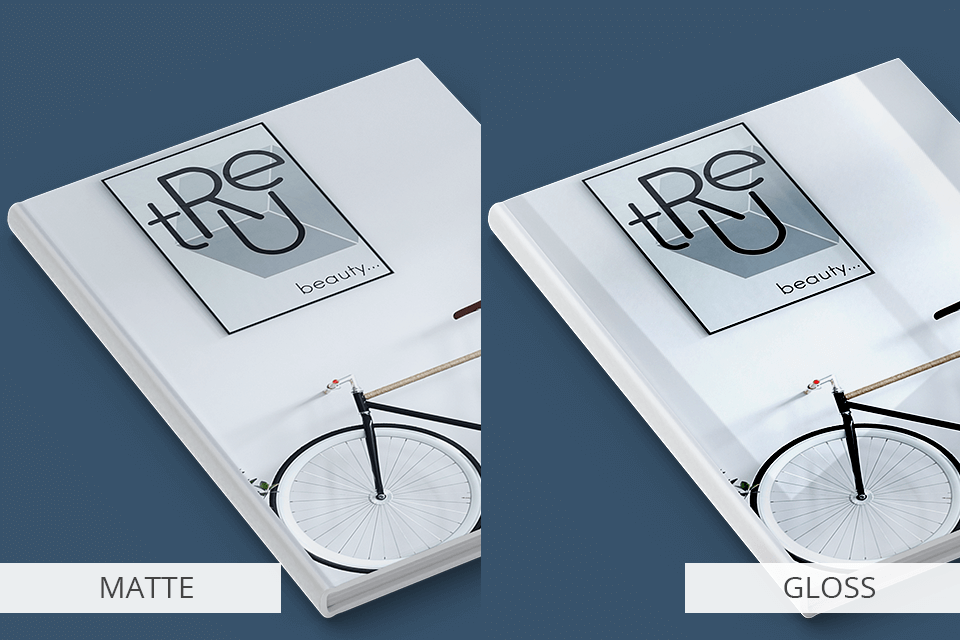
Matte and Gloss are the most widespread cover finishes. The universal combination is a satin paper cover and a matte lamination. Adding a gloss finish to a gloss paper will contribute to a shinier and more vibrant look of the cover.
It is impossible to laminate uncoated and recycled papers since the finish won’t be able to stick to them properly. So, if lamination is a priority for you, pick some other paper type.
You may also come across extraordinary cover finishes, like Spot UV and Gold Foiling. These call for a thorough print file setup. Because of the high setup expenses, such finishes are typically intended for extensive offset print volumes.
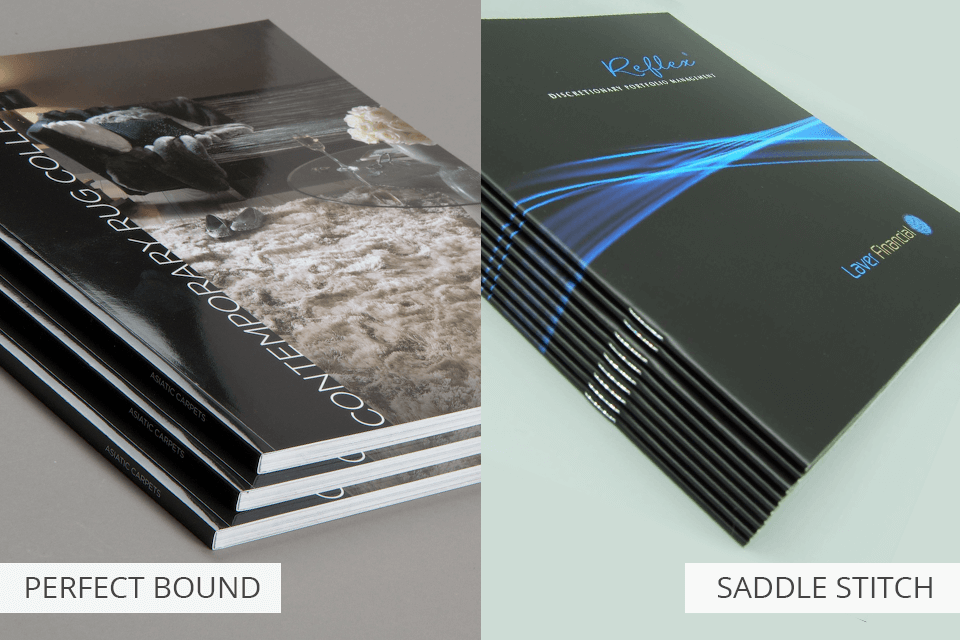
There is a widespread and cost-effective “saddle-stitched” or staple-bound method for binding photography zines. It involves two staples that securely link the pages of the zine. For a more expensive-looking zine, go for “perfect binding”. In this case, pages are stuck to a square spine, creating a paperback book as a result.
Staple-bound zines feature the largest number of pages since only the staples can withstand an extensive amount of paper at once. As for perfect-bound ones, they can’t hold such a big number of pages.
Otherwise, the spine area won’t be wide enough to stick enough paper to it. In some cases, a zine may feature such a great number of pages that staple binding can’t be applied to it. As an alternative, the printing service would offer perfect binding.
Mind that the selected binding influences the print file setup of the pages as well.

At the zine photography printing step, you may approach professional photo printing services or print it yourself if you own a photo printer for photographers. An inkjet printer is a preferred option.
If you are up for a DIY project, print the shots and glue them to pages manually. You won’t be restricted by printer paper sizes and will be able to freely experiment with the size of shots and pages.
In case you can’t afford to print copies of the zine, convert and sell it in a PDF format so that people can print the zine if they want to. One more option is to try Print on Demand where copies aren’t printed in advance. Printing of a copy begins only after a customer makes an order.
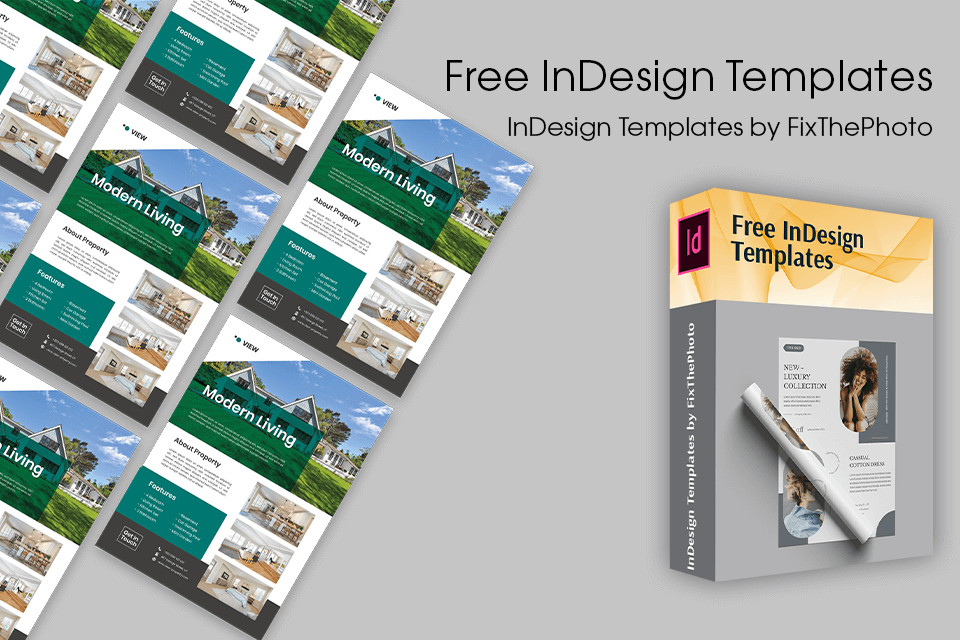
Do you want your photo zine to look more captivating in terms of its design? Explore our free collection of templates. Find a template to any taste and simplify the process of designing a photography zine.


