Combining 2D and 3D styles in various ways is never out of fashion no matter what design trends you adhere to. If you want to figure out how to use various 3D tools and features in Adobe Photoshop to create a 3D text effect, this guide is worth checking out.
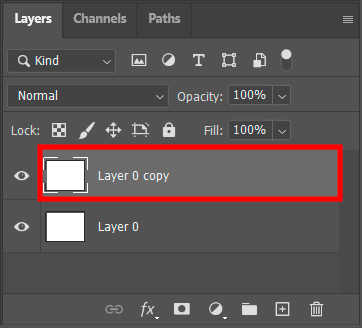
Create a new 800 x 600px document and duplicate the background layer.
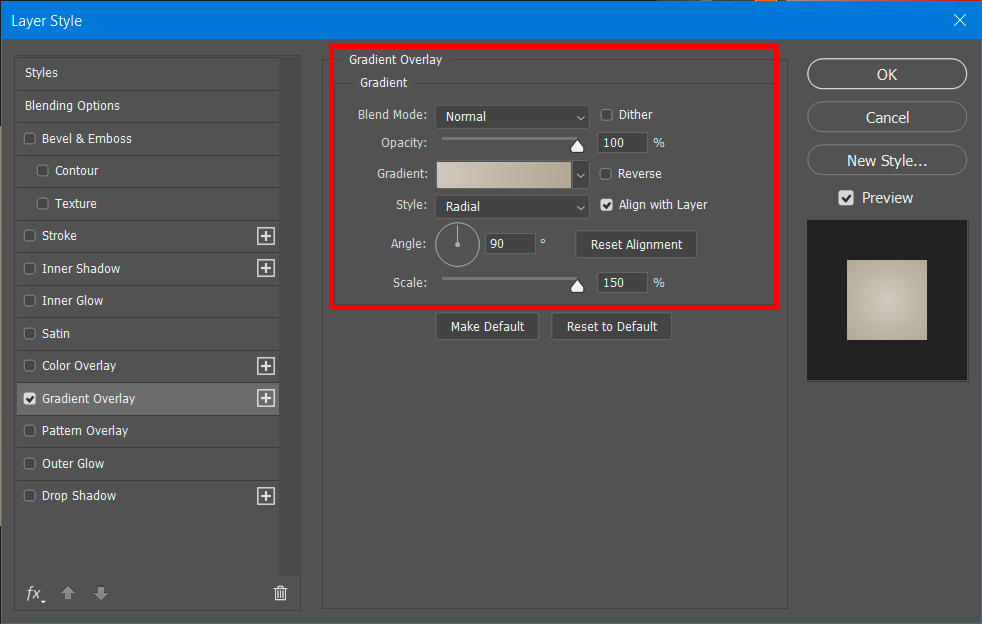
Double-click on the copy layer to apply a gradient overlay effect. Create a gradient using colors #c8c5b8 on the left and #aaa593 on the right. You can adjust colors based on your needs, but if you want to get the same text, follow this tutorial step by step.
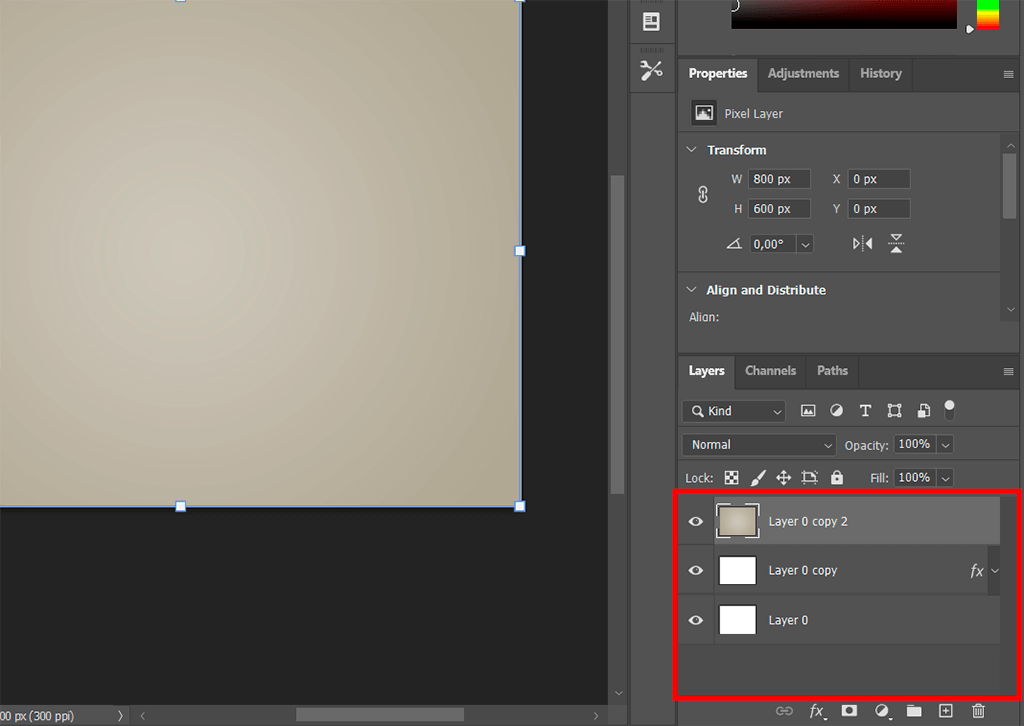
Duplicate the styled Background copy layer. Right-click the new copy > choose Rasterized Layer Style.
Note: If you use Ps CS6 or older versions, you need to group layers (Layers > Group Layers), and merge the group (Layer > Merge Group).
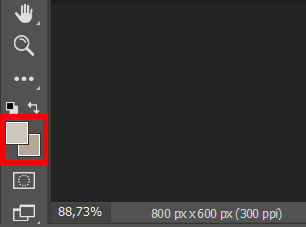
Set the foreground color to #c8c5b8 and the background color to #aaa593.
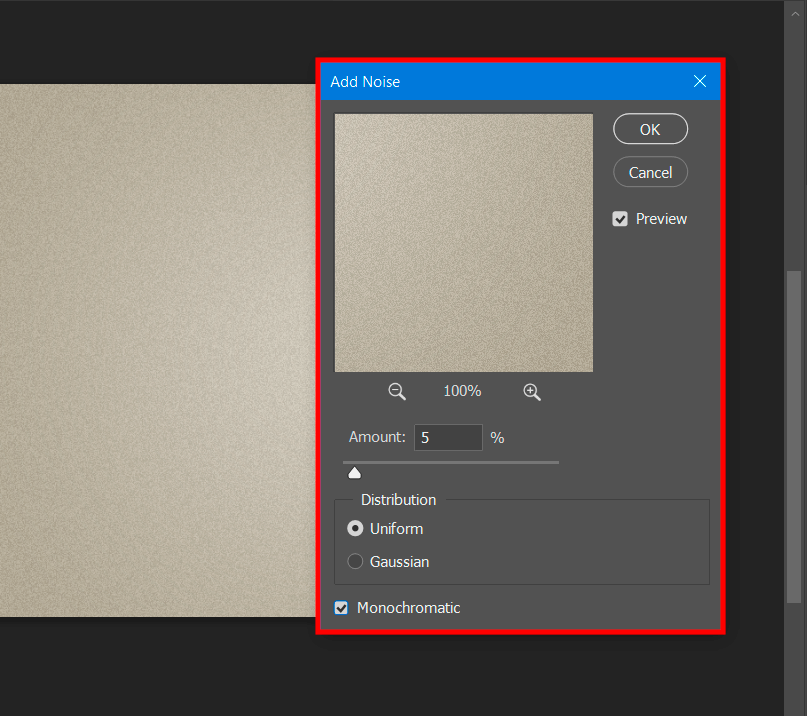
Go to Filter > Noise > Add Noise, change the Amount to 5 and the Distribution to Uniform. Tick the Monochromatic checkbox.
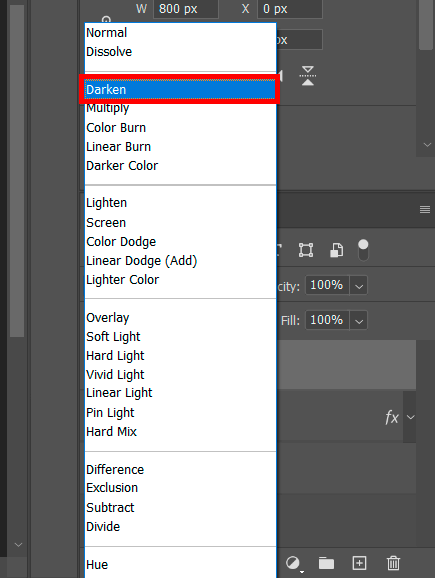
Change the Layer 0 copy 2 layer's Blend Mode to Darken. Thus, there will appear slight noise in the background gradient.
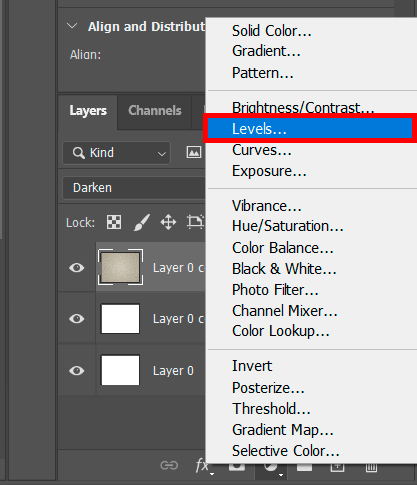
Go to the Layers panel or choose Levels > click the Create new fill or adjustment layer icon.
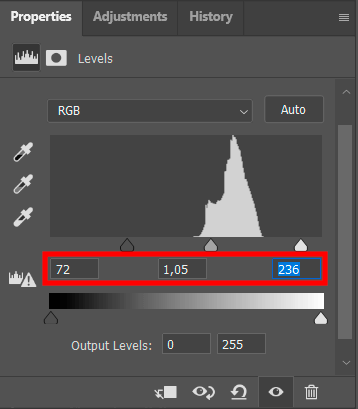
While creating a 3D retro text effect Photoshop, be attentive to these values. Change the Shadows to 72, Gamma to 1.05 and Highlights to 236. Thus, you’ll get the correct background color.
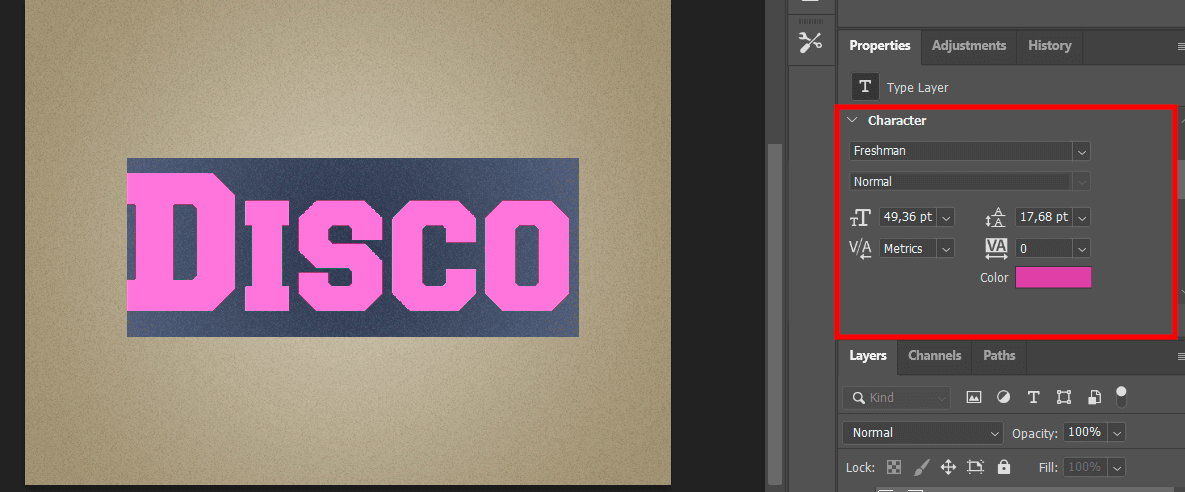
Write the text in capital letters, using the Freshman Normal font.
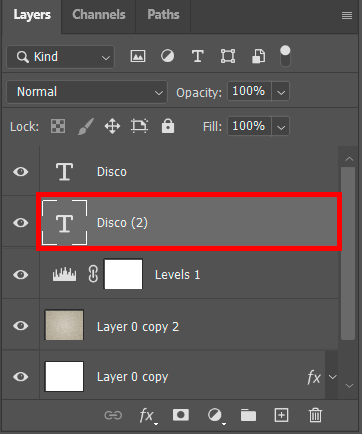
After you duplicate the text layer, drag the copied layer below it.
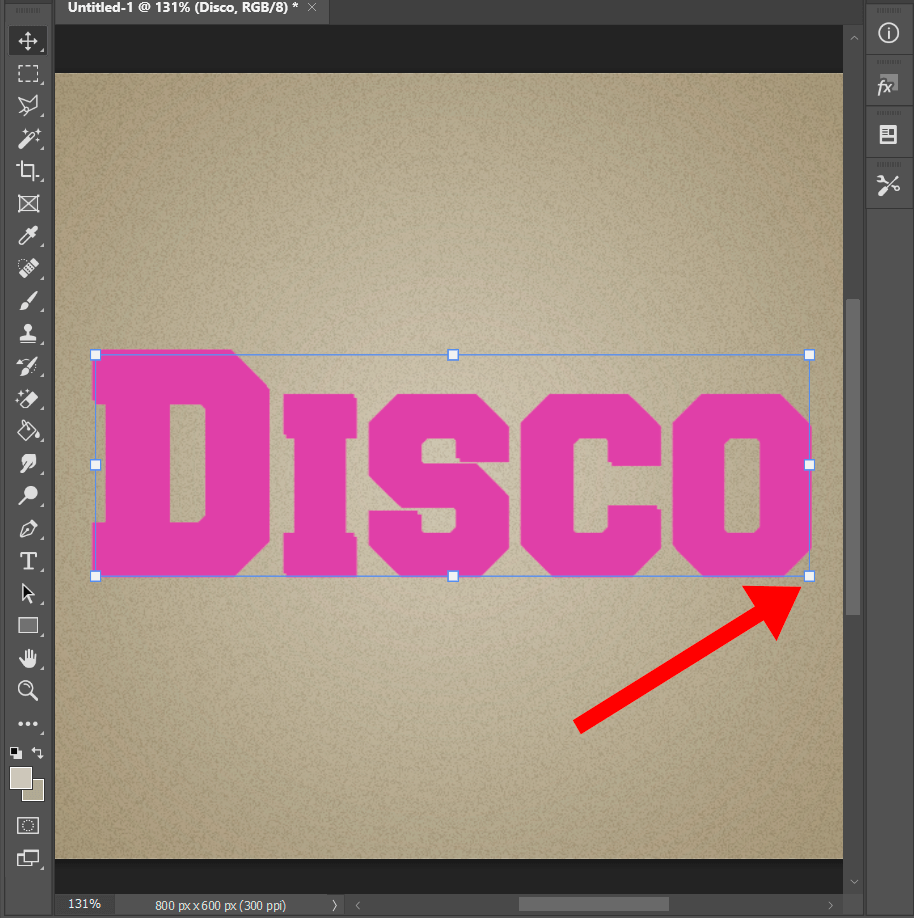
Go to Edit > Free Transform (Command-T) and enter the Free Transform Mode. Click the Right Arrow Key once and do the same with the Down Arrow Key. Drag the copy text one pixel to the right and one pixel downwards. Press the Return key to accept the changes.
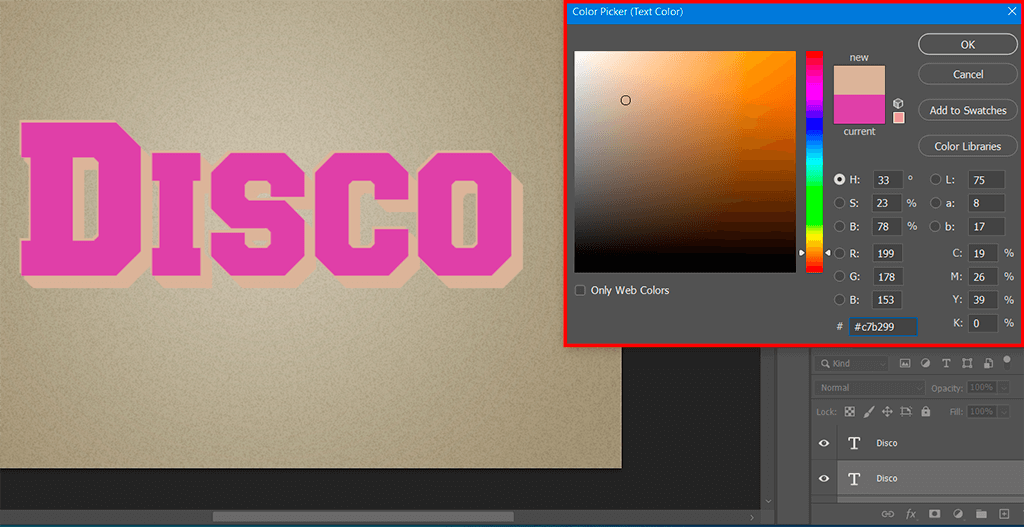
Click Option-Command-Shift-T (Alt-Ctrl-Shift-T for Windows) ten times to duplicate the transformation layer to create a 3D extrusion. Then select all the copied text layers and change the text color to #c7b299. Moreover, if you want to facilitate your workflow, you can also use Photoshop keyboard shortcuts. This way, you can perform the main tasks in an instant.
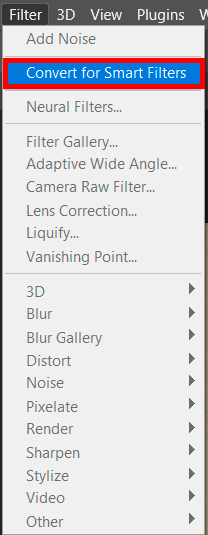
When all the copy text layers are selected, open Filter > Convert for Smart Filters. Change the smart object’s layer to 3D Extrusion, duplicate it, move the copy below it, and rename the copy to Shadows.
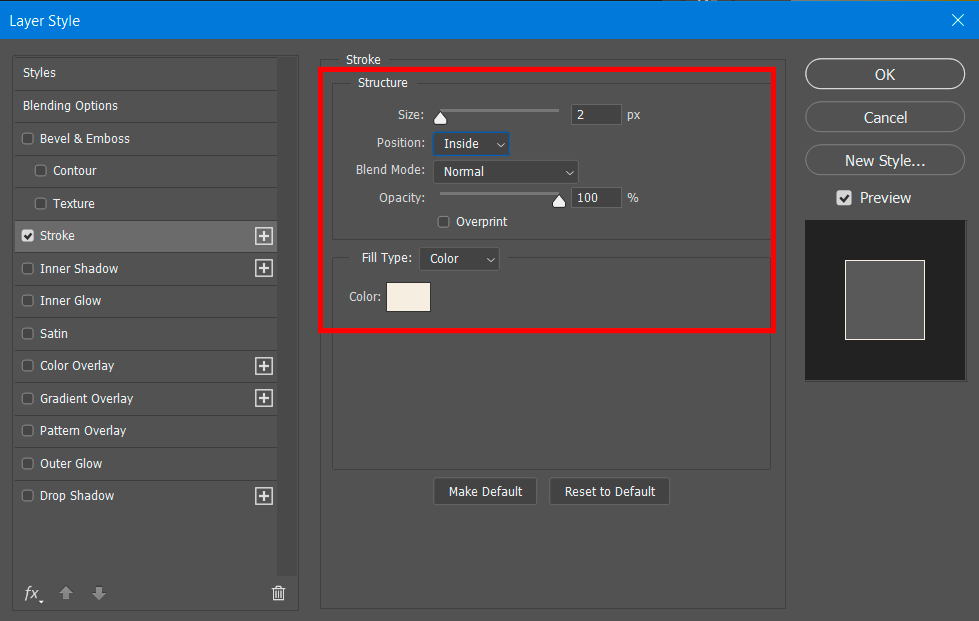
Double-click the original text layer to apply the next layer style. Add a stroke with the following settings: Size: 2, Position: Inner, Color: #f2eee1.
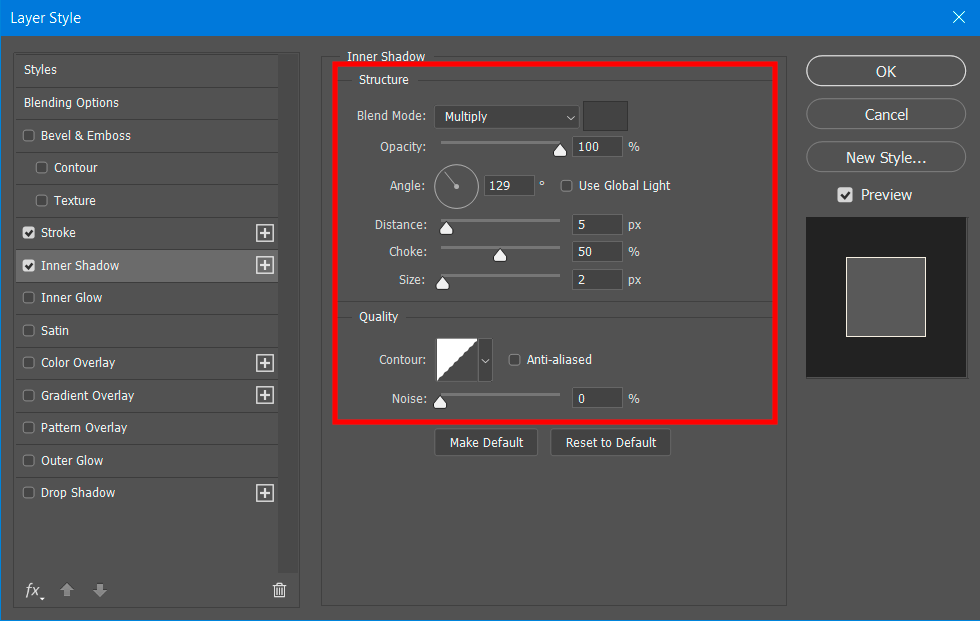
Add a drop shadow with the following settings: Color: #464646 Opacity: 100%, Uncheck Use Global Light, Angle: 129, Distance: 5, Swipe: 50, Size: 2.
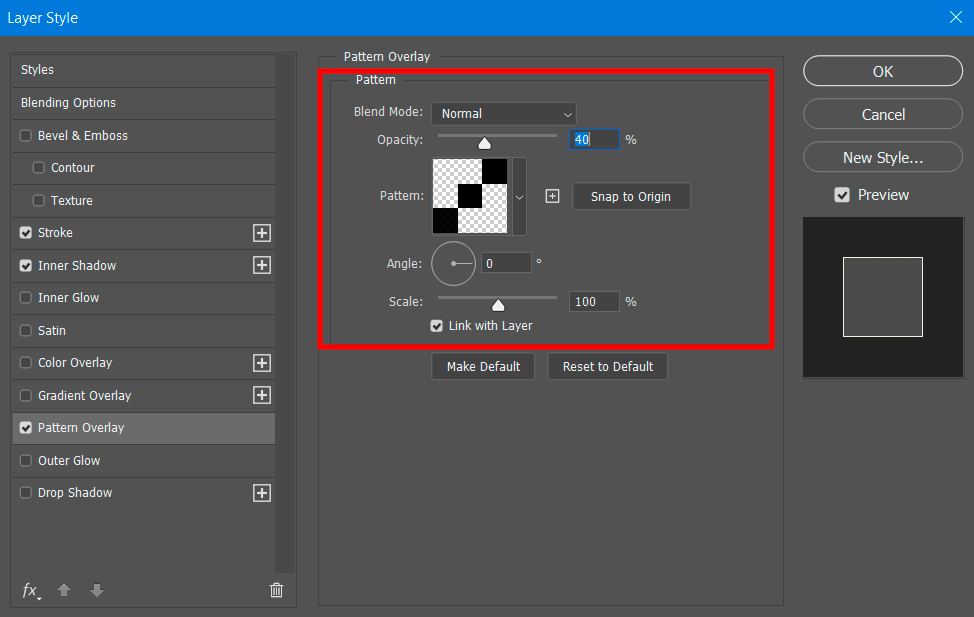
Add a Pattern Overlay with such settings: Blending Mode: Soft Light, Pattern: Thin Diagonal Lines.
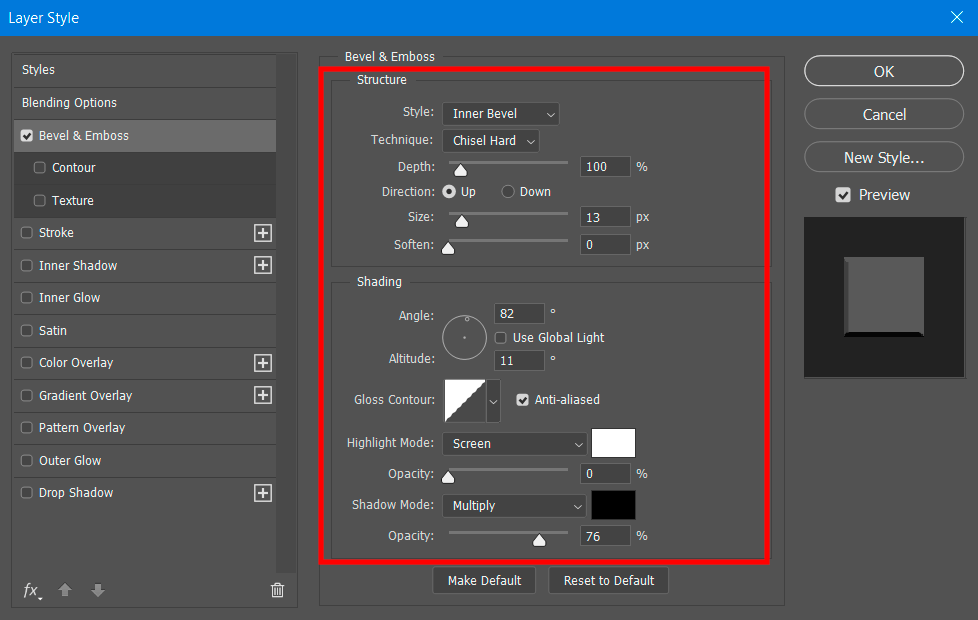
Double-click the 3D Extrusion layer to apply the following layer style: Add Bevel and Emboss with the following settings: Technique: Chisel Hard, Size: 13, uncheck the Use Global Light, Angle: 82, Altitude: 11, Check the Anti-aliased box Highlight Mode, Opacity: 0%.
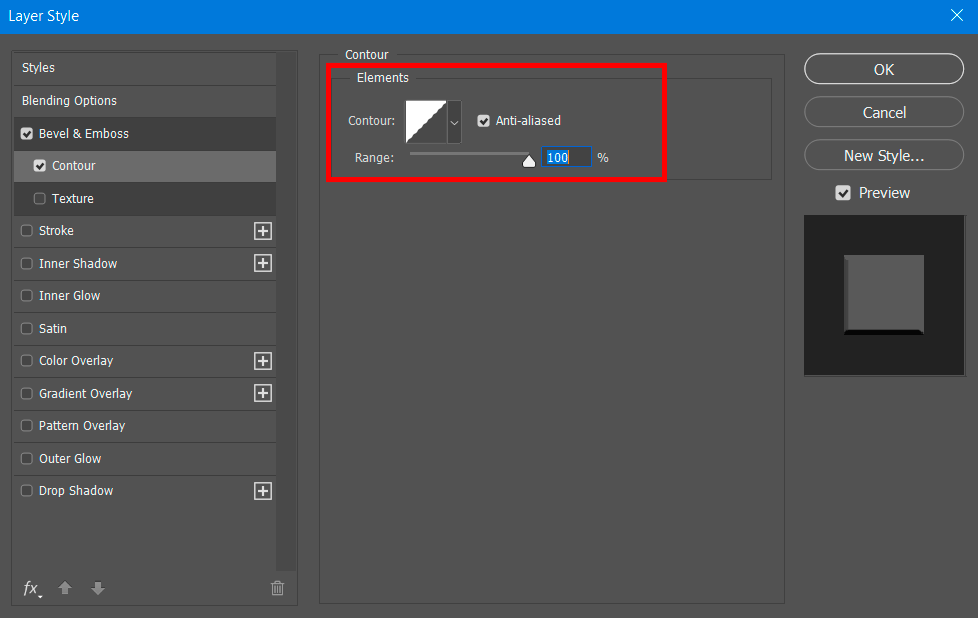
Add an Outline with the following settings: Check the Anti-aliased box.
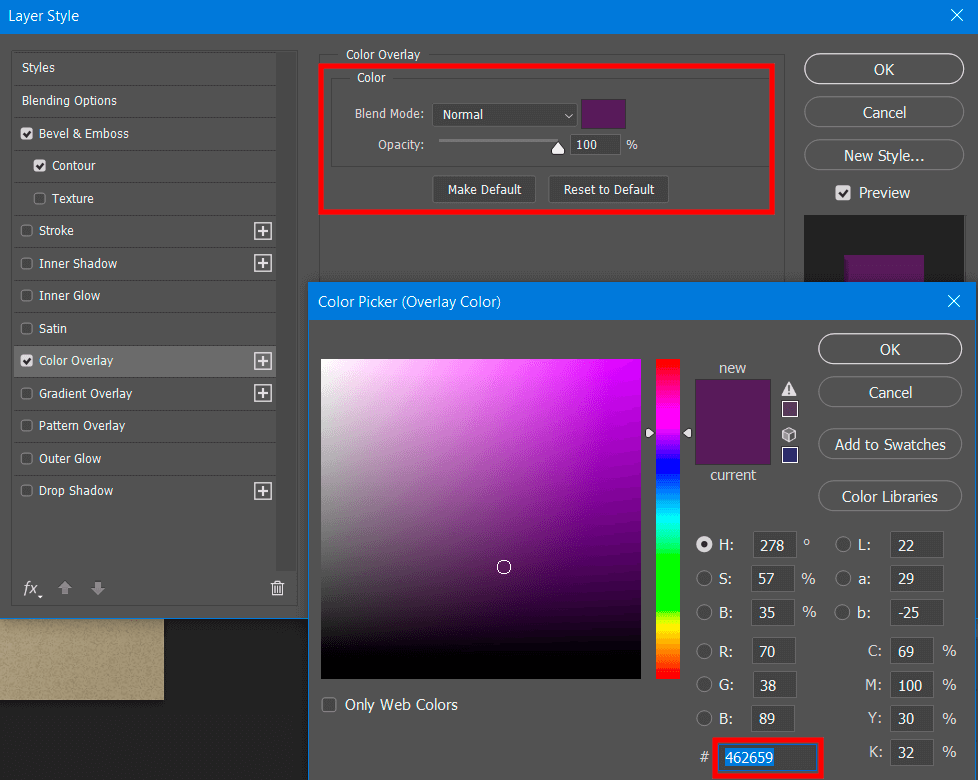
Add a Color Overlay with the following settings: Color: #462659. At this point, you need to select the extrusion color and change it the way you want. It is also possible to make an illusion of a flat 3D effect by mixing several effects. Moreover, you can modify the result, altering shadows of corners.
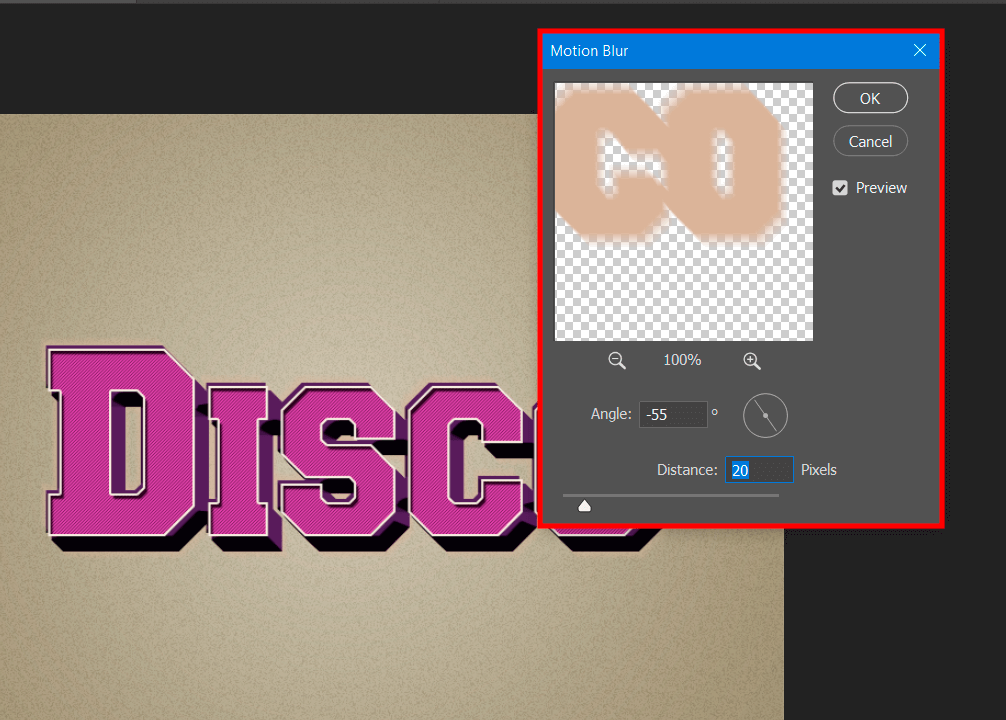
Select the Shadow layer, go to Filter > Blur > Motion Blur. Change the Angle to -55 and the Distance to 20. You need the angle to match the 3D extrusion angle.
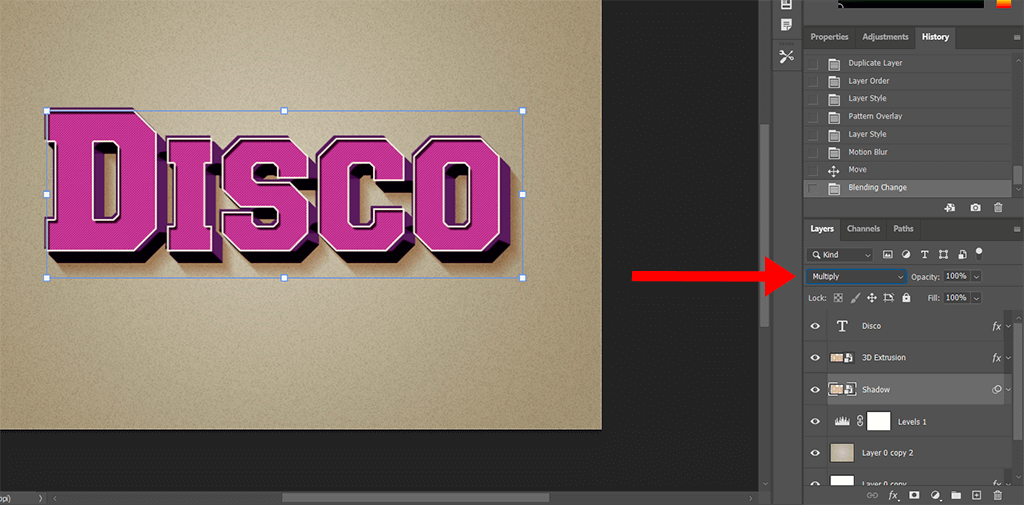
Change the Blend Mode of the Shadow layer to Multiply. Use the Move Tool to drag the shadow slightly to the side.
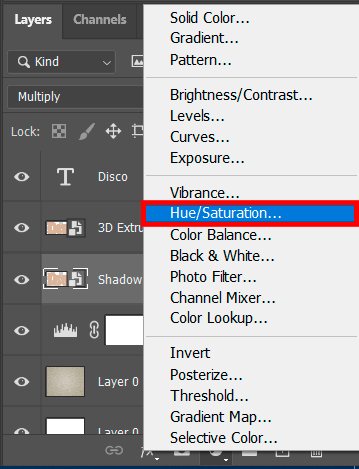
Click the Create new fill or adjustment layer icon at the bottom of the Layers panel and choose Hue/Saturation.
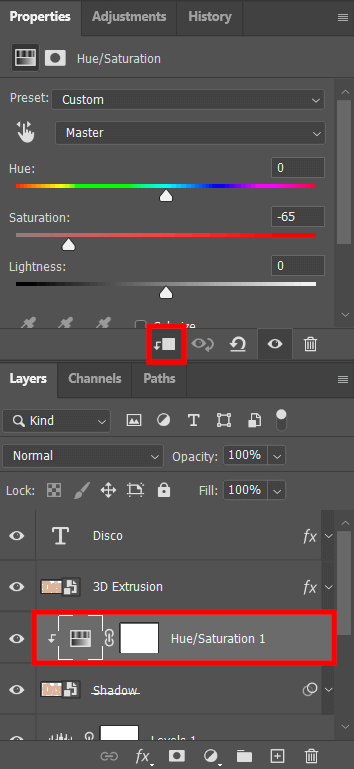
Go to the Properties panel and click the Clip adjustment to layer icon. Change the Saturation value to -65.
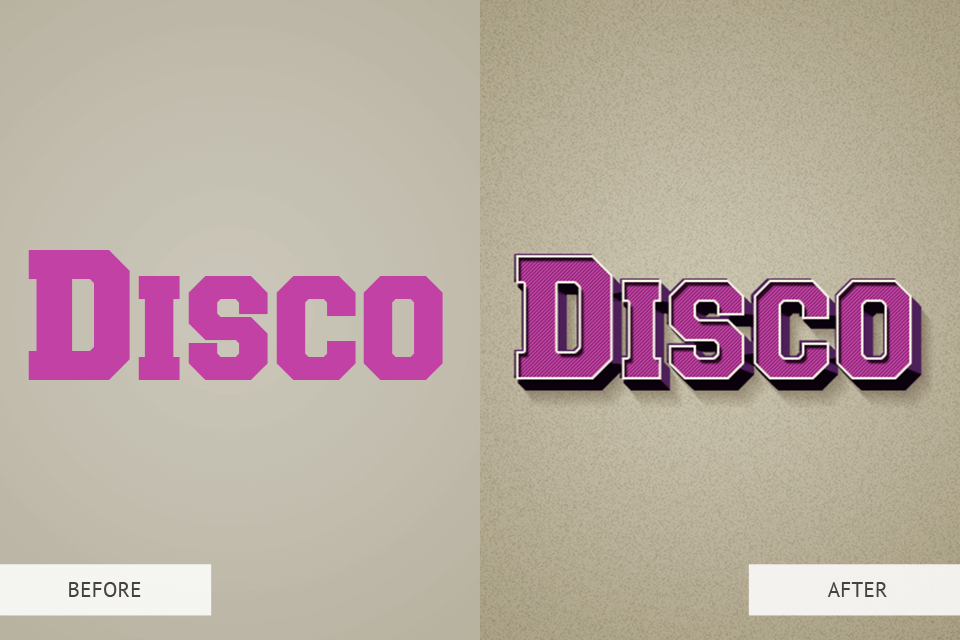
Now you know how to create a 3D retro text effect in Photoshop. This is a great way to explore new facets of typography and produce fantastic text effects.
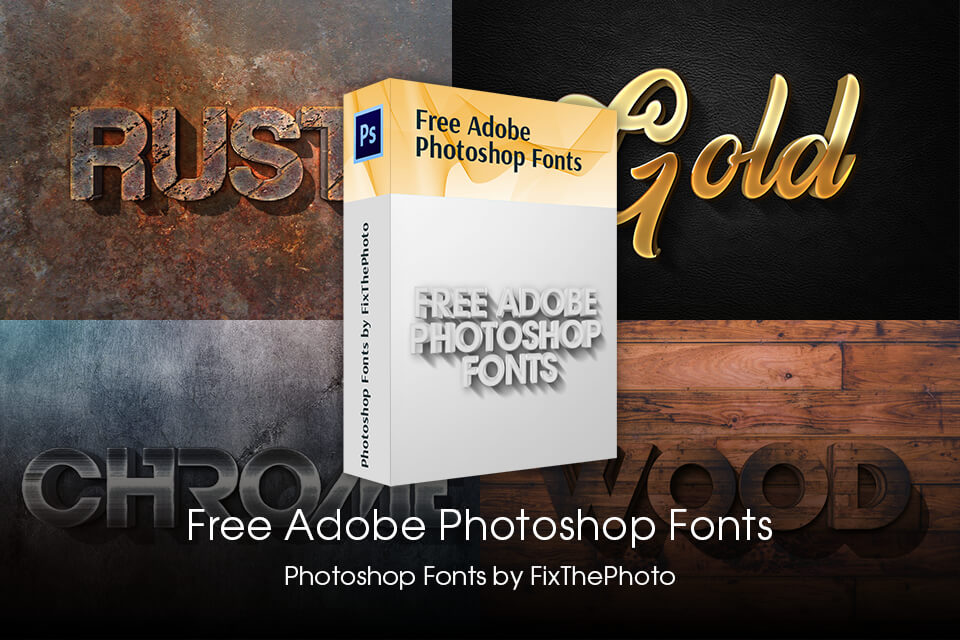
Creating 3D text in Photoshop is rather simple. However, if you want to create unique inscriptions, these fonts prepared by skilled designers will definitely come in handy. Take your time to examine all the fonts included in the collection and choose an ideal option for your project.
Make sure you know how to add fonts to Photoshop and embellish your images and designs with eye-catching fonts.
This is the most powerful and feature-rich program, which you can use to create and modify photos, designs, and web materials. You can fully control your 2D and 3D compositions and apply changes based on your aim. Photoshop is a part of Adobe Creative Cloud, so users can derive benefit from the latest updates right after they have appeared.
A word with a 3D effect applied immediately catches the viewer’s eyes and makes your layout unique. Volumetric 3D fonts are best suited for creating design labels and advertising banners.
You can easily cope with the task by pressing Ctrl + T (Free Transform) and moving the points that define the size of a photo.
This is a special feature, using which you can alter a specific element without affecting the rest of a photo/design. Many operations are performed with the help of the layers, so you’d better devote enough time to figure out how to use them.
When the downloading is over, go to the Font Book folder and move the new typeface there. This way, you can add a font to the Adobe library. Now, you need to start the software and select the Type Tool. Look through the dropdown list and choose the font you’ve downloaded there. Customize the size and color of a font to meet your requirements.