Discover how to add Gaussian blur in Photoshop if you are willing to insert a creative blurring, or produce depth effect by making the background of a picture blurry or remove noise in Photoshop.
The Photoshop Gaussian blur effect consists in a mild blur that seems like you are looking through an image through a semi-transparent screen. If you wish to apply text over a picture, a Gaussian blur also soothes the picture so that the text is different. Gaussian blur is also advantageous for lowering chromatic aberration, those colored edges at high-contrast pictures.
Before you start, download Photoshop free.
To open the picture, go to File>Open or Press CTRL+O. Select a desired picture and tap the open button.
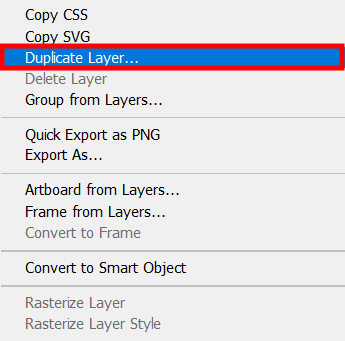
Click CTRL+J to duplicate the initial layer. You can also select the layer > Right Click and select Duplicate Layer. You will see a new layer over of the background.
It is necessary to make a backup picture of the original image. You may revert to the previous one just by removing the duplicate layer.
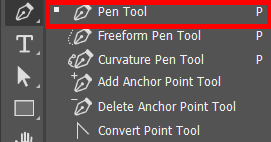
You can employ any Photoshop tool of choice to do this. At this point, I will create a path first. The Pen Tool is ideal for this case because the bottle of wine has a smooth and rounded form.
If the instrument panel does not appear, select Window > Tools to make it visible. You are also able to apply the Cmd + P combination.
Make a path around the object you aim to blur. Focus the object and ensure you keep it as mild and clean as possible.
If you commit an error, use combination Cmd + Z to make a step back (Ctrl + Z for Windows).
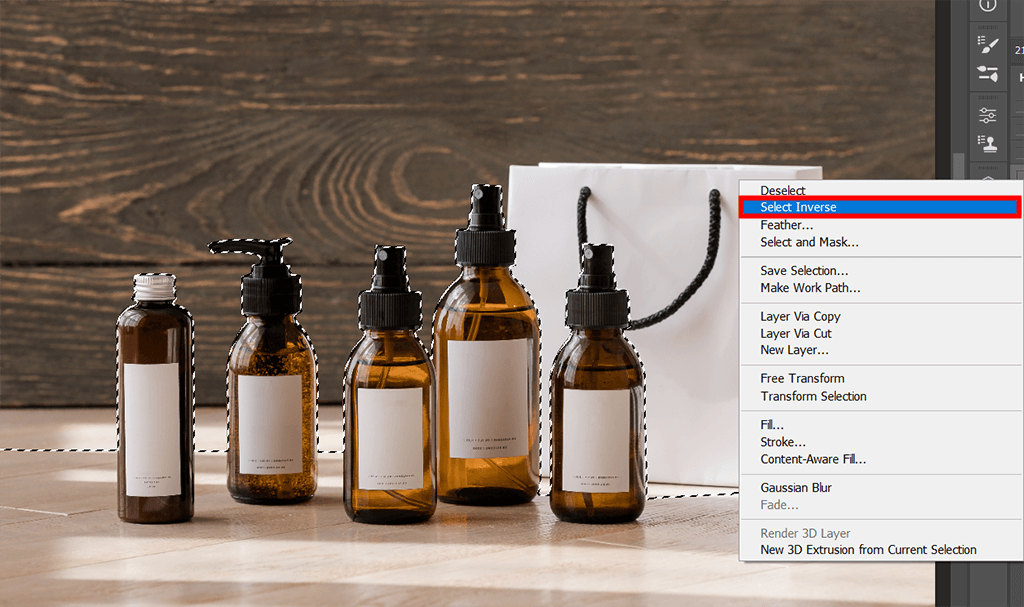
After you have chosen the desired area, it is necessary to transform it to a selection.
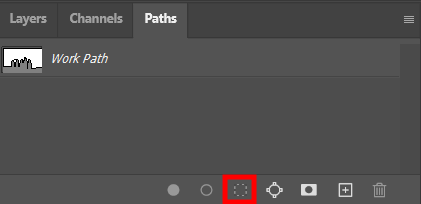
In the Paths dashboard, choose the path you have produced. If the panel does not appear, select Window > Paths. This will show the Paths dashboard.
Press the Load Path as Selection button to change the path into a selection.
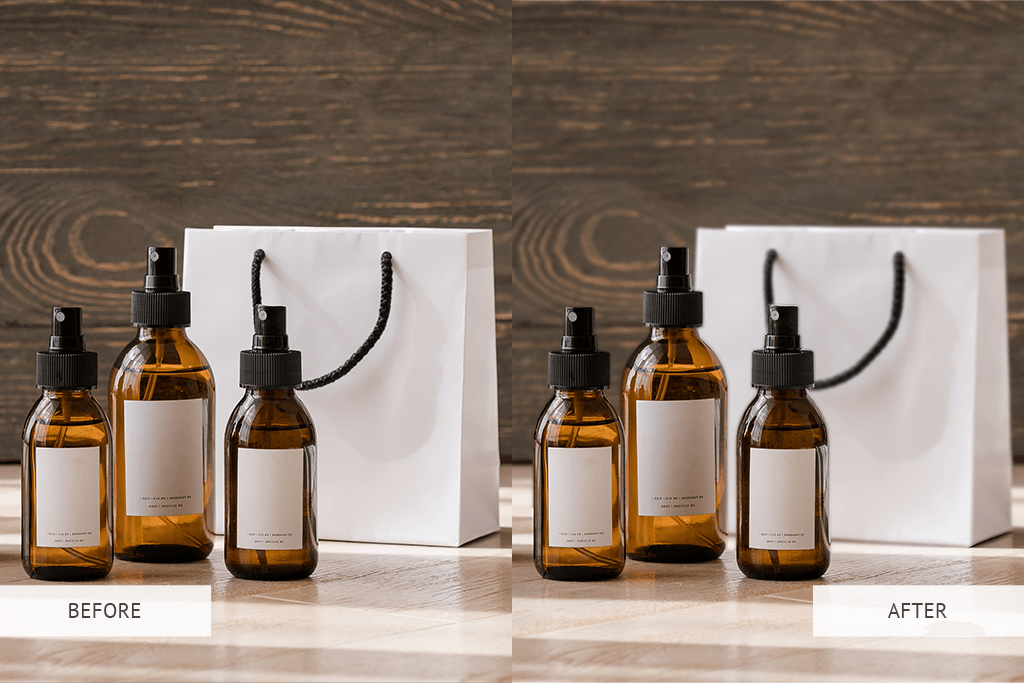
Once you are comfortable with the edges, press OK, and you can start employing the blur on the layer.
Before applying a background blur, it is better to use the Refine Edges instrument for your creative photography. Doing so, you can secure that the clear-cut edges of a blur effect will not deform your image.
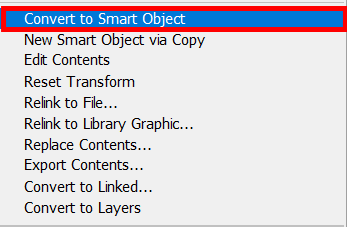
As an option, you can transform the layer to a smart object. It is not important whether you alter them or add smart filters to them. Smart objects safely keep the layer content.
In other words, any alterations to the object will not make any impact the layer itself.
Thus, any change you make to the background will be shown under the layer on the layers board in your photo editing software.
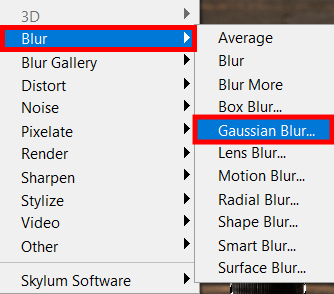
Choose Filter> Blur> and select Gaussian Blur to apply the Gaussian Blur filter.
You can move the picture in the Gaussian Blur window to search the object you are going to blur. If it seems too small, tick the Preview box, and the effect of the Gaussian Filter blur will appear in the image.
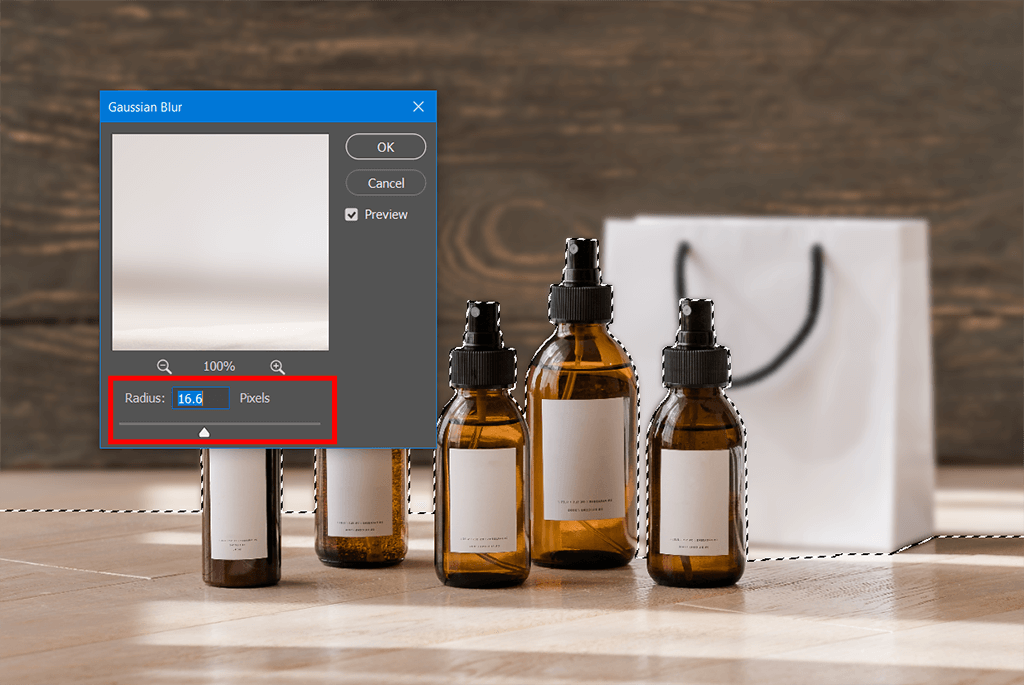
Move the Radius slider to the point you are satisfied with the blur amount.
In case you have to employ Gaussian Blur or any other improving tool professionally in a shortest possible time, refer to FixThePhoto retouchers. You can also request color correction, clipping path, background deleting/replacement, objects dragging, etc. The experts will make your ecommerce images appealing for customers.

Install Photoshop actions to improve your product pictures quickly and efficiently. Utilizing these steps, you hugely diminish the time spent on image post-enhancing.
There are more than 40 actions available in the set, which can help you improve colors and lighting in your images, increase contrast and significantly alter your photos.
No, there is no special blurring means in Photoshop. Nevertheless, there exist plenty of ways to produce a blur effect with the help of different tools and filters which the program offers, like the Gaussian Blur filter, Motion Blur filter, Radial Blur filter, and Shape Blur filter.
Named in honor of mathematician Carl Friedrich Gauss (rhymes with “grouse”), Gaussian (“gow-see-an”) blur is the implementation of a mathematical function to a picture so that it gets blurred. It soothes all the details. A type of low-frequency filter, Gaussian blur softens unequal pixel values in a picture by removing sharp outliers.
If you take a picture in poor lighting, and the outcoming image contains a lot of noise, Gaussian blur effect in Photoshop is able to soften that noise. If you want to apply text over a picture, a Gaussian blur can sooth the image so that the text looks more emphatic. You can also be more creative with this service. For a portraiture shooting, photographer Andres Gonzalez recommends employing a Gaussian filter to create a surreal photography.


