Want to learn how to use the HSL color panel in Adobe Lightroom? In fact, knowing this is important if you want to correct colors in images like a pro.
We have created this detailed tutorial for users with different expertise levels to help them master this tool and understand the intricacies of the process quickly. You will figure out how to make dramatic color changes, as well as subtle corrections.
Talking about Hue, we actually mean color in Adobe Lightroom. By moving the Hue slider, you can alter colors in your photo. The tool replaces initial colors with bordering ones on the color wheel.
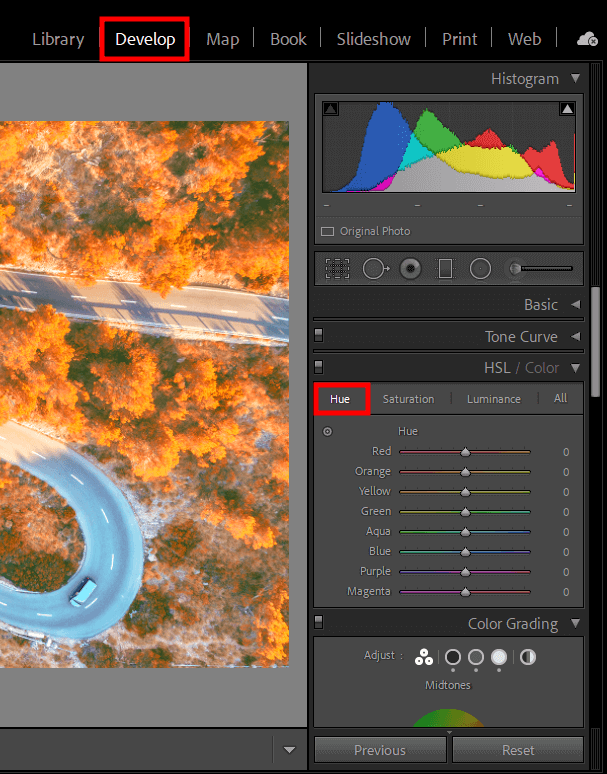
Open the Develop tab in Lightroom. You will see a color panel in the lower left corner. The Hue sliders are located on the first tab.
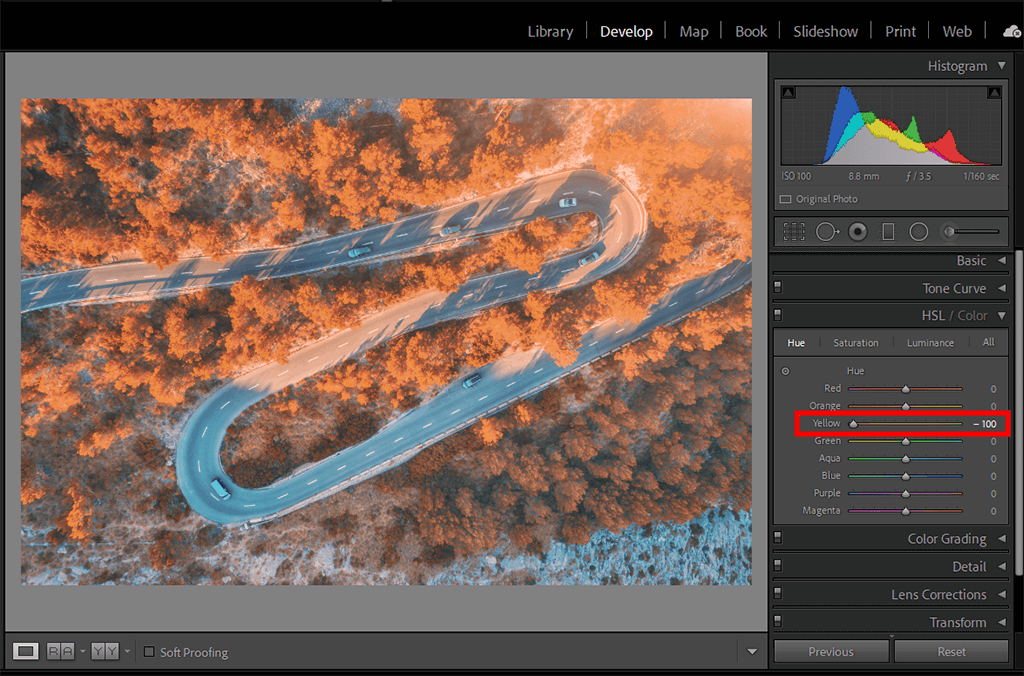
Upload your photo to the program. It is recommended to import RAW files into Lightroom to work with source images. Select the color you want to change. For instance, we selected yellow. By dragging the Hue Yellow slider from -0 to -100, we have changed yellow color in the photo to orange.
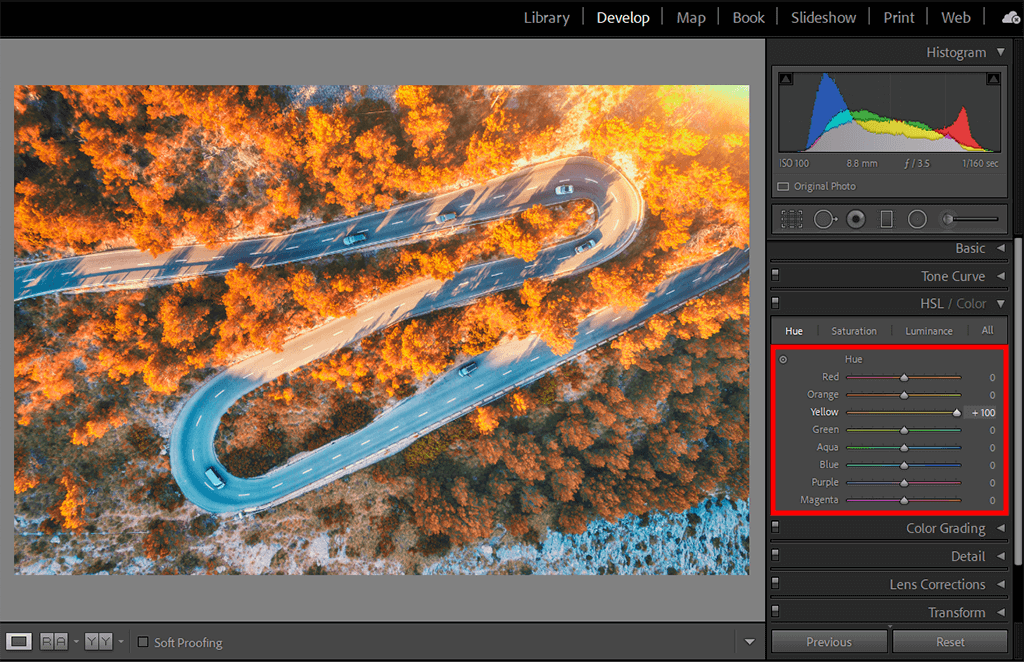
You can also increase or decrease the value of any of the colors presented in a photo, e.g., make blue more pronounced to emphasize the sky or the river, or intensify green to highlight nature and leaves.
People learning how to use the HSL color panel in Adobe Lightroom may feel confused when it comes to adjusting saturation. To do everything correctly, you should treat saturation as the parameter that makes colors more or less defined in a photo. By customizing this setting, it is possible to emphasize any color in the scene. Sometimes, photographers decide to decrease the saturation of several colors, to make the rest of the photo appear stronger.

Open the Saturation tab. It is right to the Hue section.
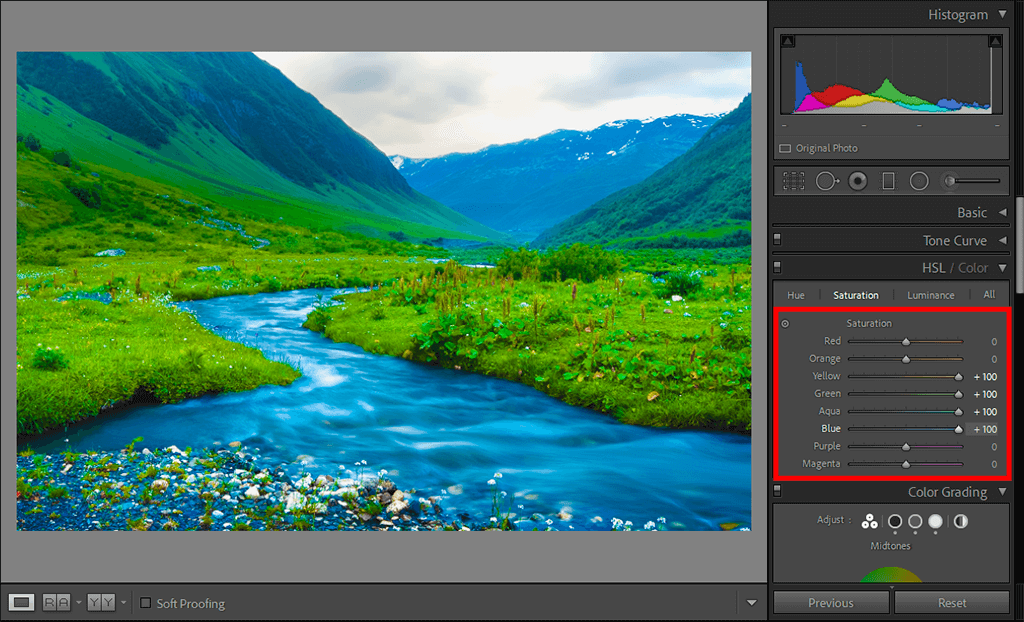
Putting the slider at +100, you can make your photo extremely saturated. This is a simple method to shift focus accents to a certain piece of an image.
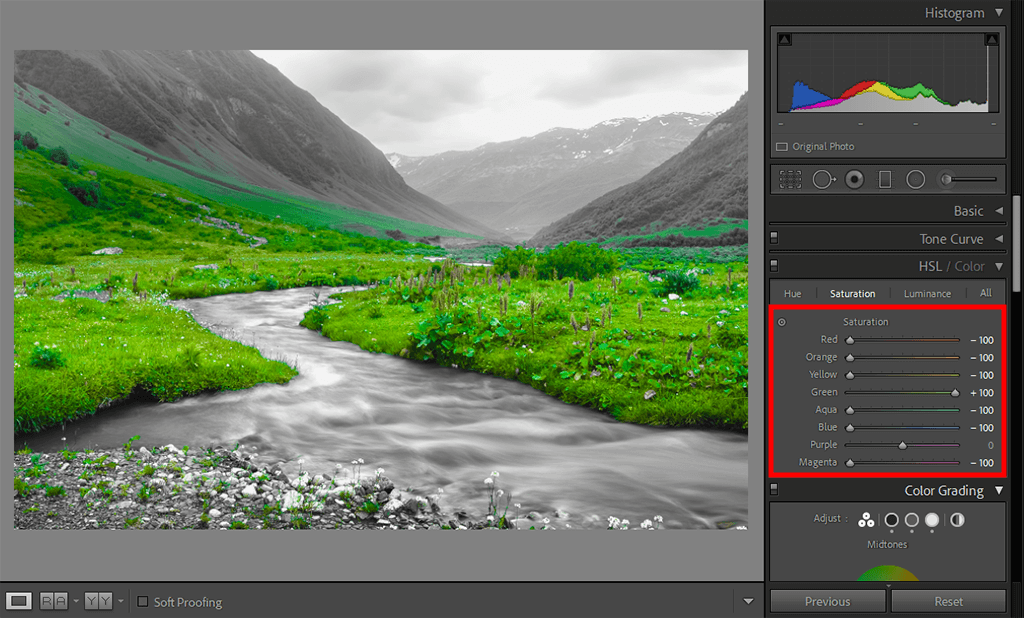
Doing the opposite adjustment, you will receive a discolored photo. For instance, you can keep green at +100 and choose -100 for all other colors.
Luminance denotes how bright a color is displayed in a photo. To better grasp how this parameter affects a shot, you can think of it as the Exposure slider for each separate color. It is very convenient to adjust Luminance when you batch edit in Lightroom. You should fine-tune this setting if you took photos in a limited color mode or when your pictures turned out overexposed.
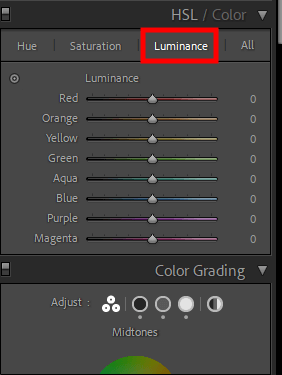
You will see the Luminance settings in the third tab of the HSL menu.

Let’s see how to use the HSL color panel in Adobe Lightroom by altering blue in the photo. If you drag the slider to +100, you will receive the lightest and brightest blue in all areas of an image where it is visible. The rest of the colors will be intact.
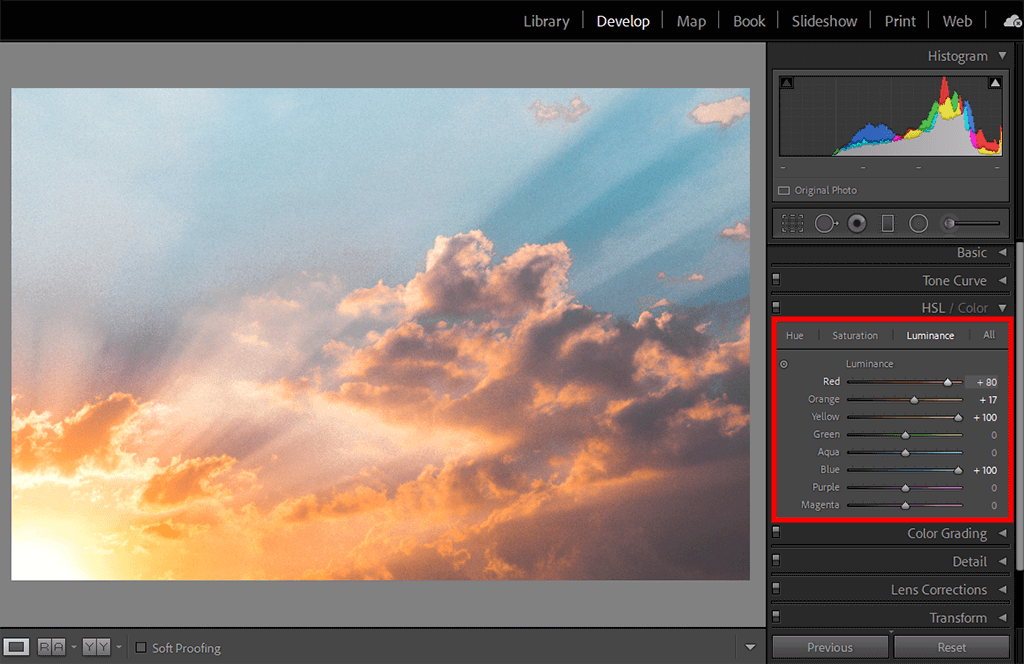
Change the position of all 3 HSL sliders Lightroom till you see the result that fully satisfies you. If you choose the max values for many colors, you risk receiving an overexposed image due to immensely bright colors. Of course, such values may work but only if a source photo is dark due to poor shooting conditions.
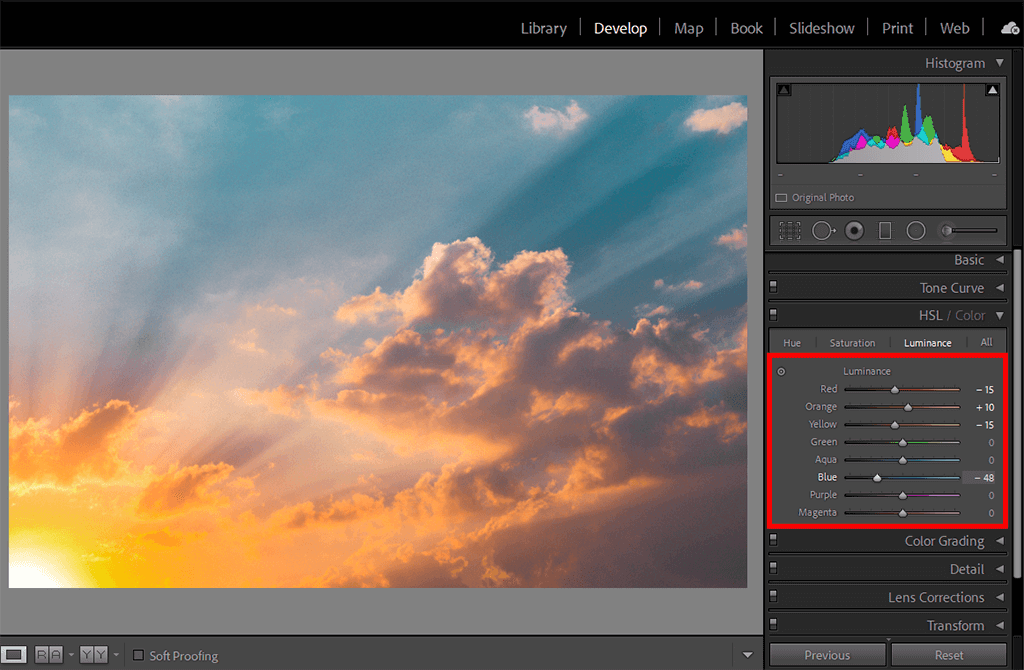
If you keep the brightness value too low, all image details will become dark (lose brightness). You can try this method if you want to improve overexposed shots.
The HSL color panel in Adobe Lightroom allows photographers to understand whether colors in photos look proper and what can be fixed. It models the way paints are mixed for getting specific colors. The lightness dimension shows how much black and white paint is needed for the mixture.
Hue stands for a degree on the color wheel from 0 to 360. 0 is red, 120 is green, and 240 is blue. Saturation is defined in %. 0% - a shade of gray, and 100% - the full color.
HSL is a very convenient tool for adjusting colors in photos. Unlike Hex and RGBA, which allow users to change colors by inserting specific numbers that stand for colors, here you can just drag sliders or enter percentages to get the needed saturation and lightness levels.
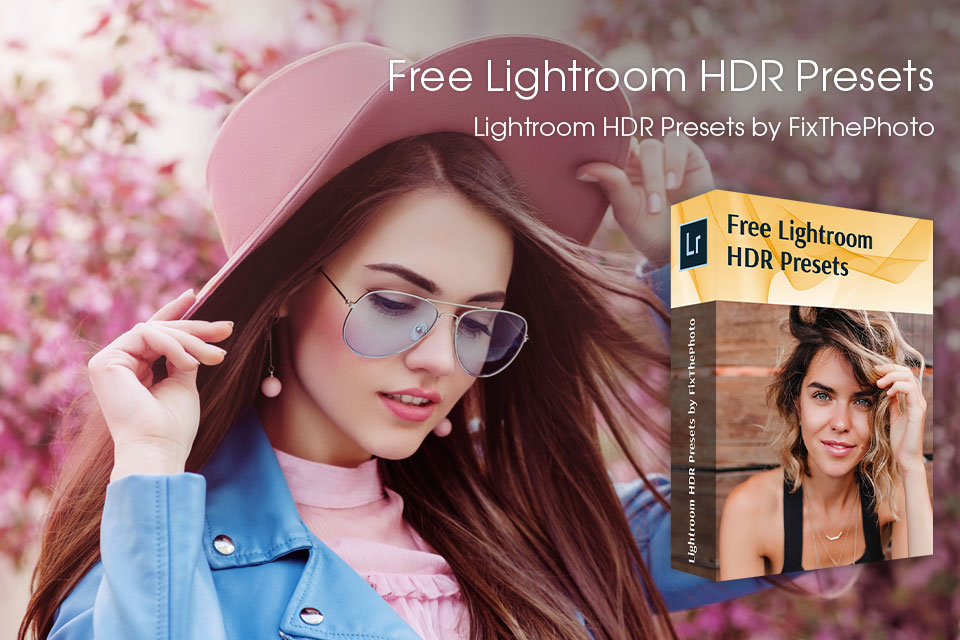
If you want to speed up and simplify your photo editing workflow, you can use a collection of ready-made presets. They have properly balanced HSL values based on tonality and photo shoot themes.
Using these presets, you can make your photos more colorful, reduce harsh shadows, correct exposure, brightness dark areas, and more.


