It’s quite common for photographers to go to Lightroom’s preset menu and feel overwhelmed by how many tools they can use. That's why it's essential to ensure all your software's presets are neatly organized. There are multiple methods you can master if you want to learn how to manage presets in Adobe Lightroom, from regularly deleting outdated and rarely-used presets to dividing them into folders and marking the best ones as favorites.
The simplest method to organize Lightroom presets involves pressing the + symbol in the Presets section of the Develop Module. Then, pick Manage Presets from the drop-down list. Now you’ll be able to pick the presets you use frequently while hiding the rarely-used options without completely deleting them.


The first thing you have to do when learning how to organize presets in Lightroom is launch Adobe Lightroom itself and go to the Develop module.
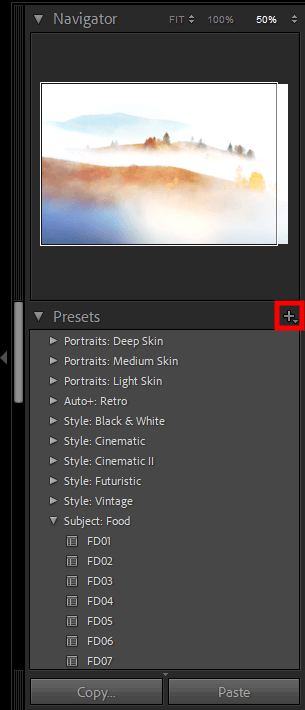
Once you’re on the “Presets” panel, click on “+”.
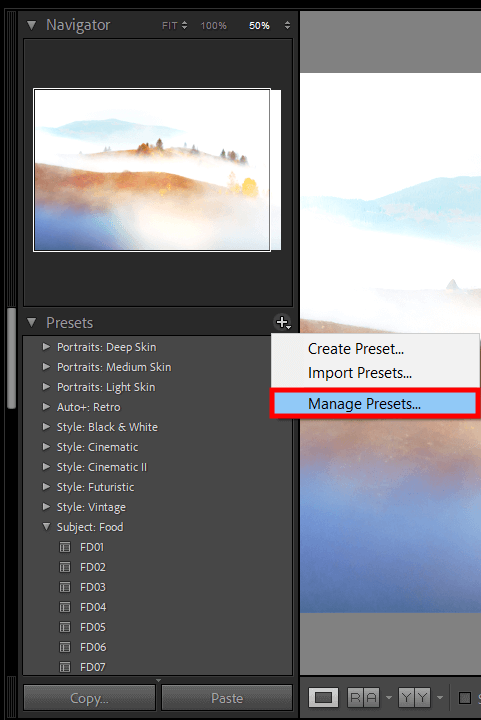
On the Presets panel, click the icon with three dots and choose Manage Presets.
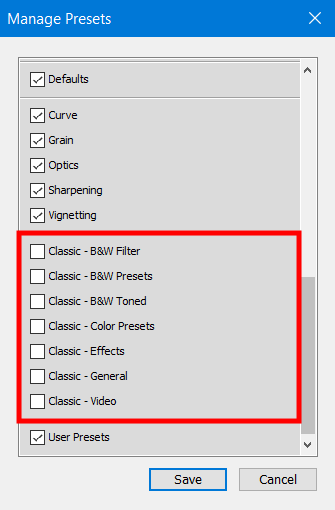
Once the Manage Presets window pops up, remove the checkboxes near the folders that you want to hide from the Presets menu (you can always make them visible again if needed in the future).
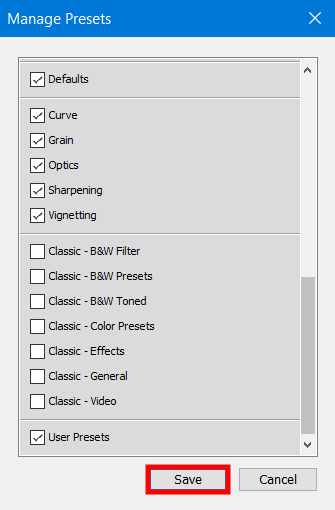
Press Save to preserve the changes and apply them to the Presets panel.
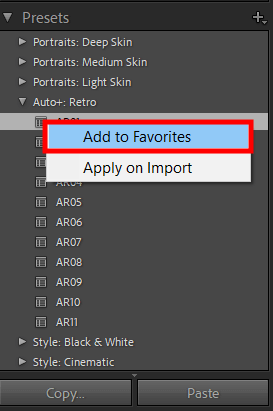
To accomplish this goal, click the right mouse button on the desired preset and select “Add to Favorites” from the pop-up menu.
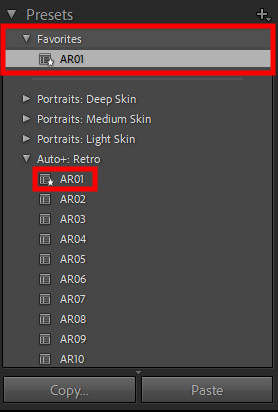
The preset will now be marked with a special symbol and the top of the Preset list will also now have a “Favorites” folder.
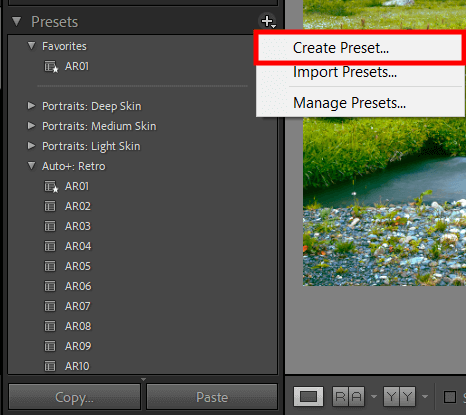
You can create your own preset in Lightroom by clicking the “+” icon and choosing Create Preset.
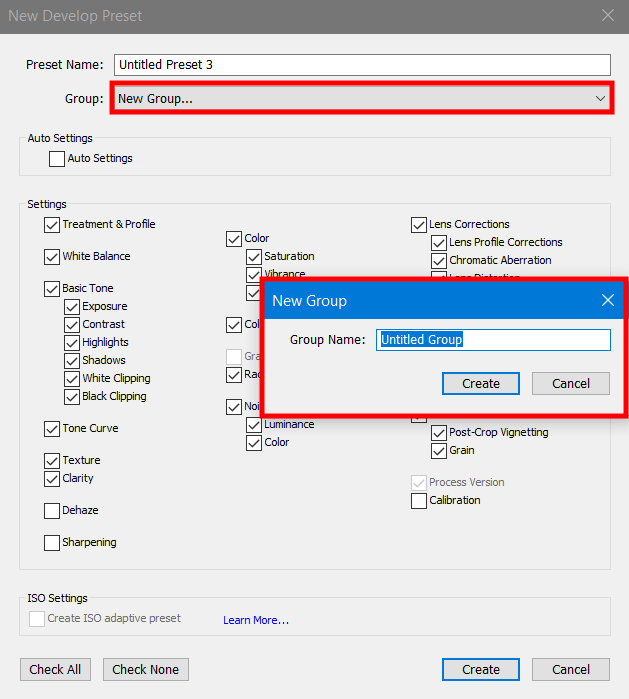
You’ll be taken to a dialogue window that will let you choose a group for storing the newly created presets. One of the options you’ll have when clicking on the “Group” drop-down menu is creating a “New Group…”. Once created, groups can be renamed or deleted as you see fit.
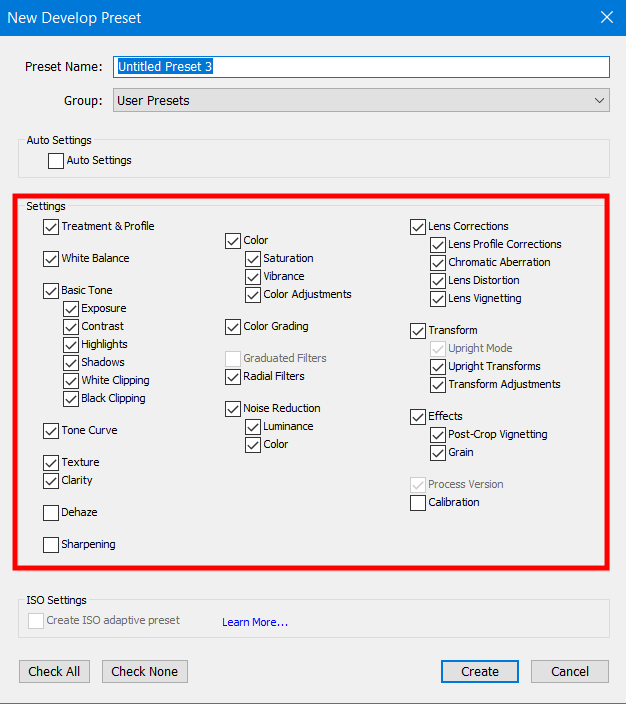
Once you’re done making the desired preset, press Create. Congratulations!
These presets will become a terrific addition to your collection that allows you to edit photos in Lightroom like a pro. They were all created by professional photographers and are perfectly suited for conveniently enhancing images in RAW and JPEG formats while being compatible with Lightroom versions 4-6, Creative Cloud, Classic, and Mobile.
A preset is a file that contains instructions for Lightroom regarding what specific development parameters should be applied to a photo. You can use presets to change the color, shade, contrast, sharpness, and clarity of your images among many other parameters. After you've applied a preset to a photo, you can continue enhancing it further by making various manual changes.
If you’re using Lightroom Classic CC 8.1 or a newer version, check out your Lightroom preferences (Top menu bar > Preferences > Presets > Visibility). If there isn’t a checkmark next to "Show Partially Compatible Develop Presets", add it and the missing presets should show up in the appropriate section.
By buying a preset collection, you can take advantage of the experience of other photographers who might be better at enhancing images. Investing in paid presets can also help get you inspired with new ideas and add the creative spark you need to find new ways to elevate the quality of your work.
Yes. After you’ve downloaded the purchased tools, one of the most useful Lightroom presets organization tips you can listen to is creating a backup of your collection on an external SDD or cloud storage like Dropbox or Google Drive. This can be achieved by pasting a copy of the zip file to the chosen backup drive or cloud platform.
Many photographers use presets as a starting point for enhancing their images. It’s worth noting that each camera, lens, and other variables like the lighting conditions can significantly alter the look of a photo so you often have to make appropriate adjustments. I suggest starting with a preset that you’ve liked and then tweaking parameters like exposure, shadows, and contrast until you’re happy with the result.


