This tutorial will teach you how to add light in Photoshop to fix various problems that might plague your images. There are multiple ways you can go about this, depending on the specific goal you have in mind. You can improve the lighting conditions, change the light source or add an additional one, highlight a specific object, add a fire effect, etc.
I suggest you employ one of the 5 methods described below, even though their overall number is much higher. Simply pick the most suitable option for your skills and needs.
This technique relies on applying the filters included in Photoshop.
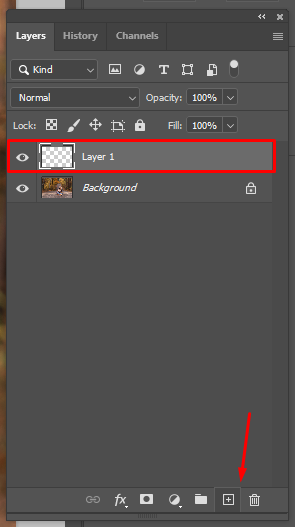
The first thing you have to do in this Photoshop tutorial is add a new layer. To do so, click the “+” symbol that you can find in the lower right corner. Alternatively, you can employ the Shift + Ctrl + N (Windows) or Shift + Cmd + N (macOS) hotkey combinations.
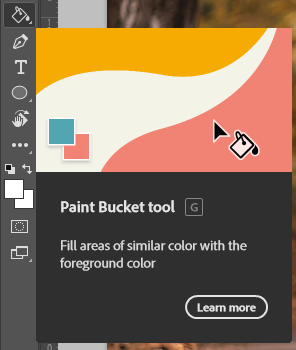
Pick the Paint Bucket tool from the toolset section on the left. You can also choose it by pressing the G key.
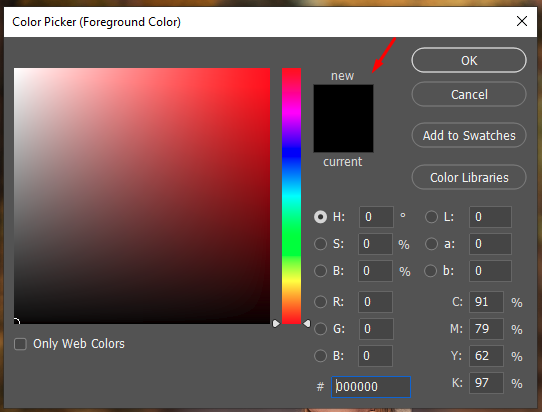
Next, pick black from the color palette.
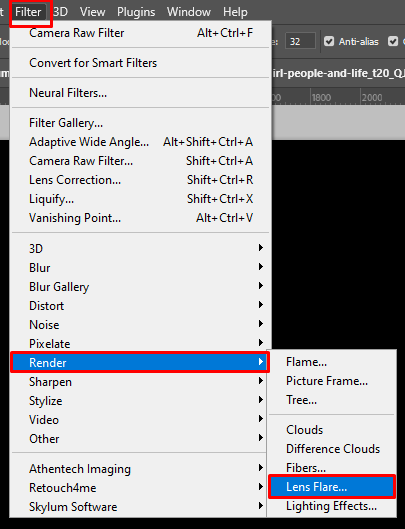
Now it’s time to go to the Filter menu. Here, you have to pick Render > Lens Flare.
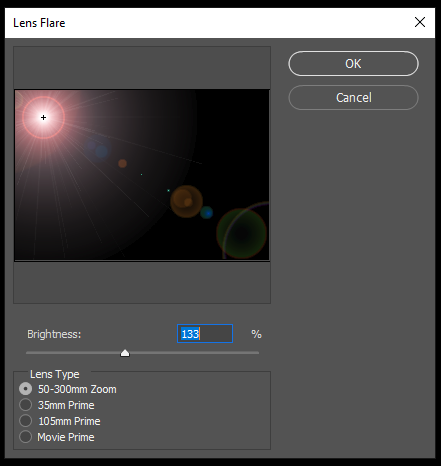
The next step involves picking the desired brightness level. This can be achieved by moving around the corresponding slider until you’re satisfied with the final look.
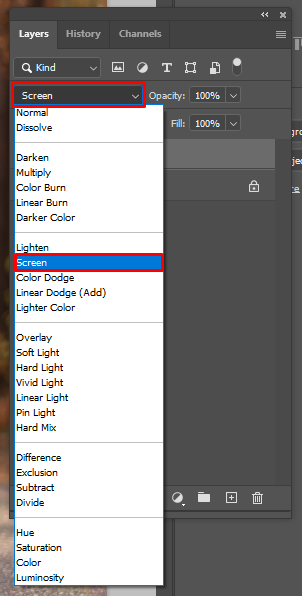
Next, you have to go to the Layers tool panel and pick Screen.
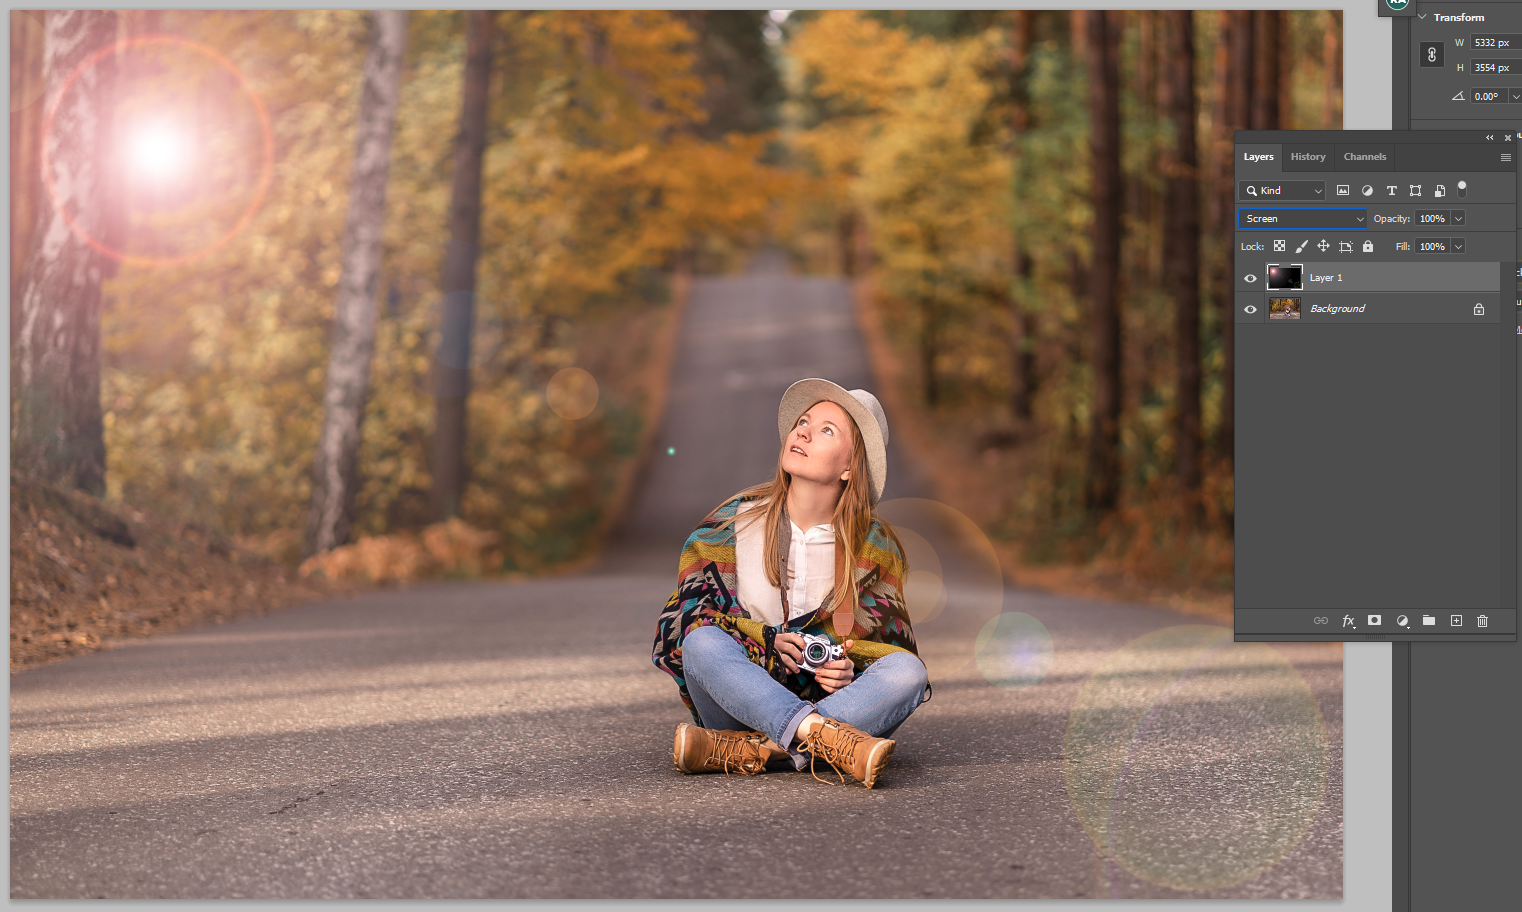
Voila! You can now view the light that was added to the image.
This method relies on using a brush for manually adding light to an image in Photoshop in the shape of sun rays, glares, sunbeams, etc.
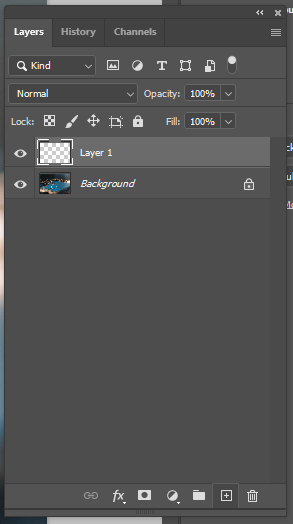
The first step is the same as it was in the first method – create a new layer.
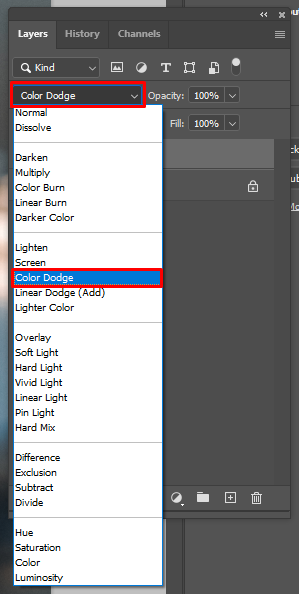
Next, you have to pick the Color Dodge option from the Layers toolset panel, which you can locate by clicking on the Layers menu on top.

Now it’s time to find the Brush tool, which is located in the toolset on the left or can be accessed by pressing В on your keyboard.
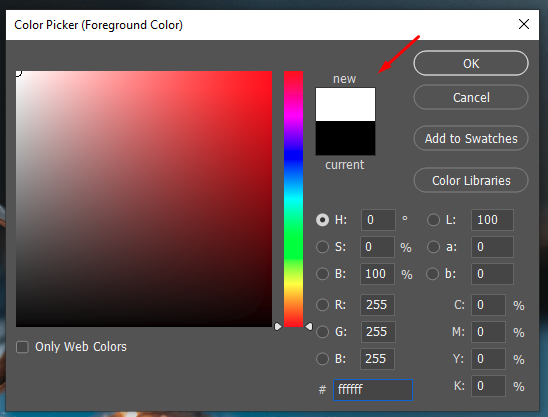
Set white as the foreground hue.
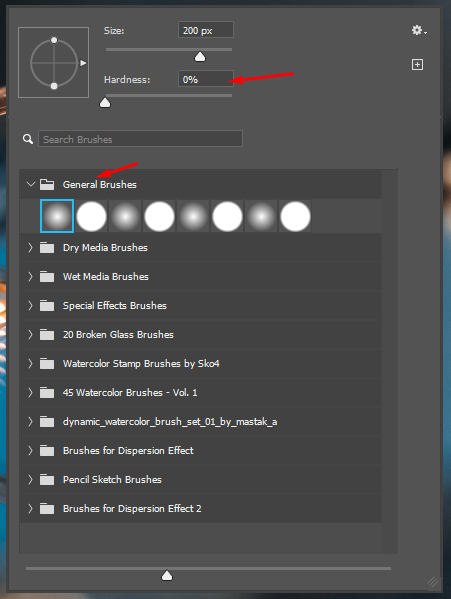
Next, tweak the parameters of the brush to prepare it for the following actions. You need to make it soft so reduce its hardness. For this method, you can get by with the brushes that can be found in the General Brushes folder, but if you want to install Photoshop brushes to expand the list of potential options, you can always do so.
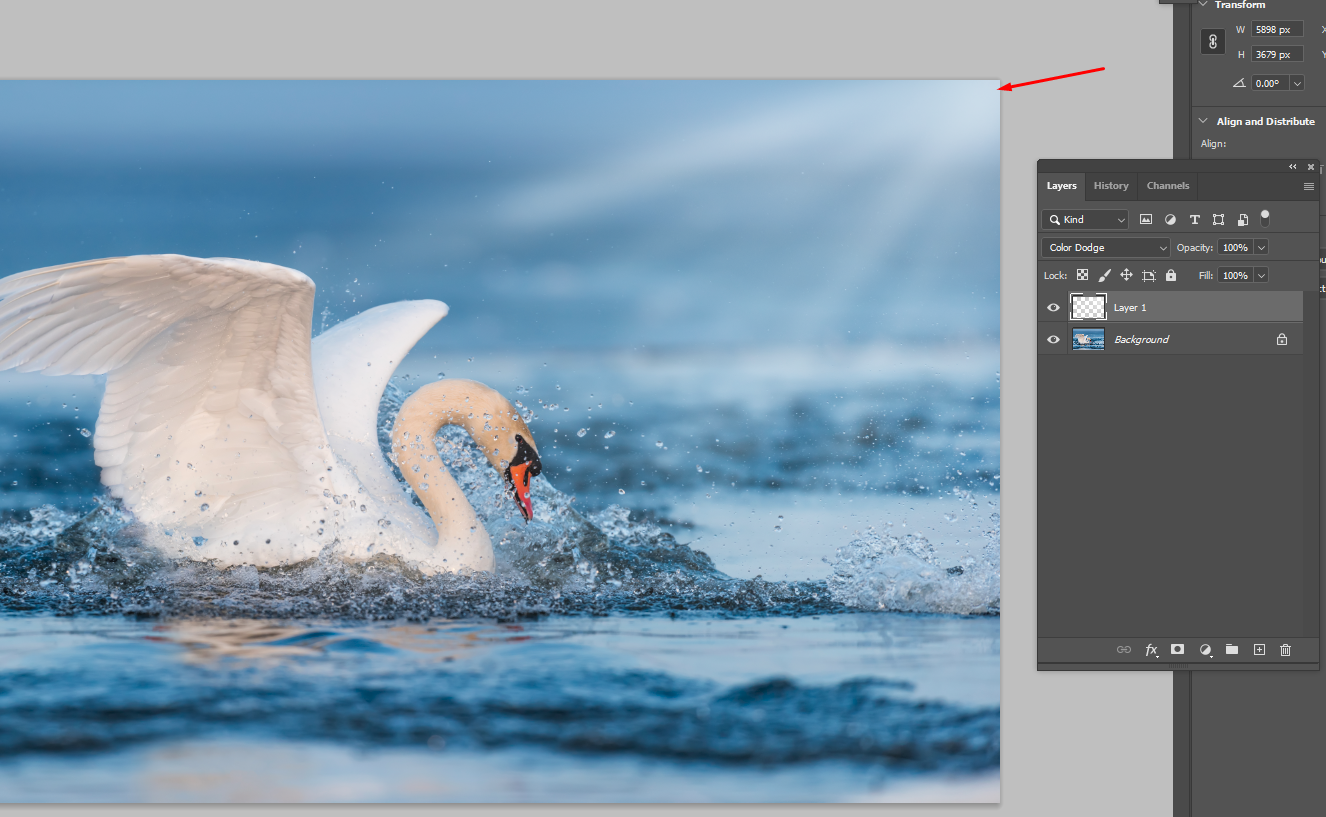
Now your task is to draw in the areas that you want to enhance with light. Add a couple of brush strokes and examine the result. If you’re not happy with how it’s looking, you can conveniently undo and redo all actions in Photoshop as you see fit.
If you want to highlight a specific object in your photo, using the preset method is probably the optimal choice.
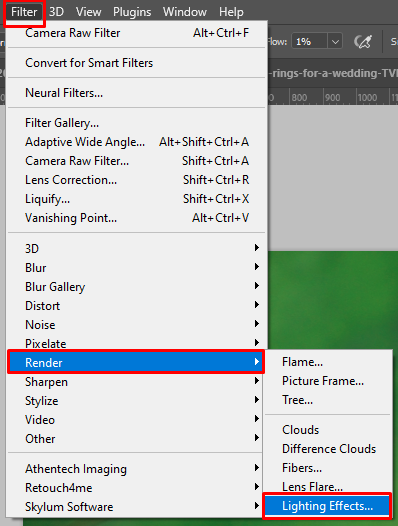
Begin by going to the Filter menu that you’re already familiar with. Then, click Follow Render > Lighting Effects.
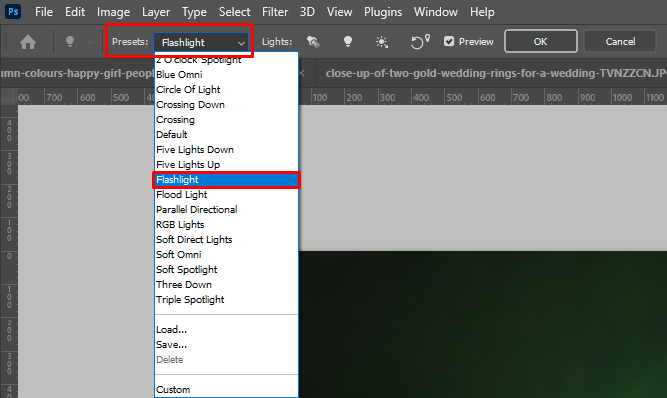
At this stage, you’ll be able to choose the Presets option. Pick Flashlight from the list of presented options.
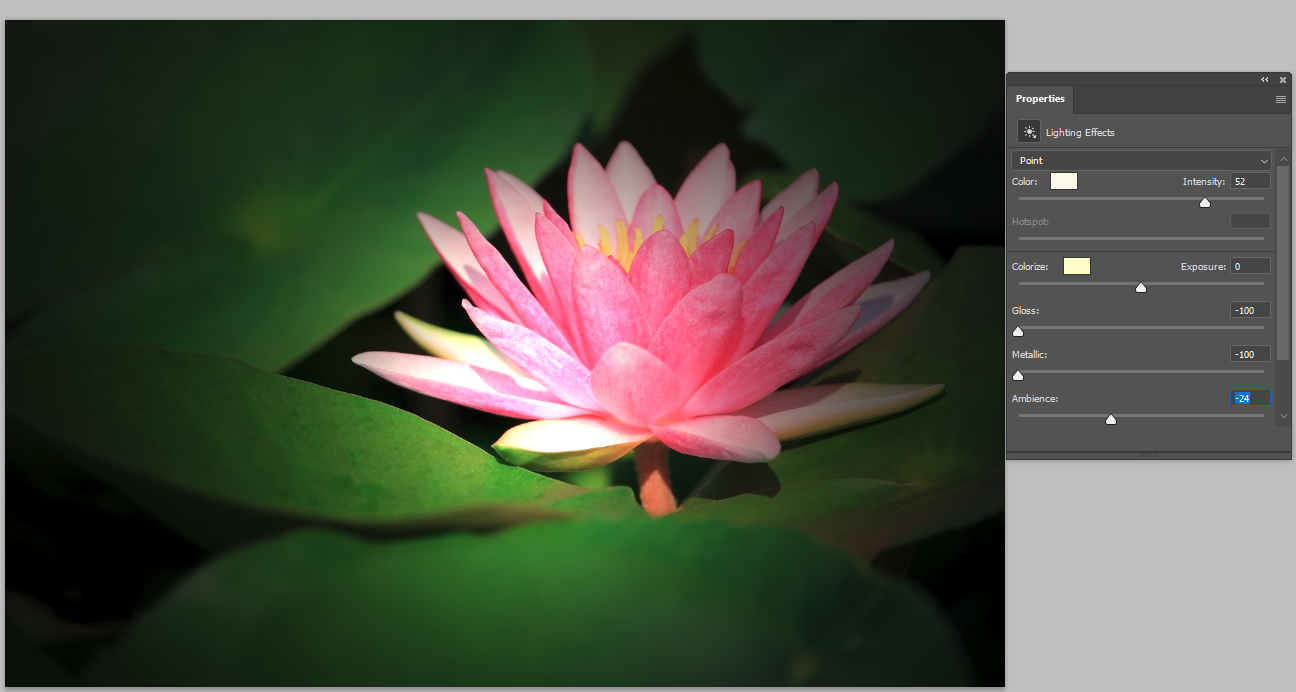
To make the desired object shine, tweak the main parameters of the photo. The Properties menu has sliders that you can move around until they more or less match the values in the screenshot above. That said, you can always adjust the sliders in a different way that suits your taste.
Once you perform the following actions, your photo will be enhanced with a visually appealing soft light that is heavily adored by photographers.
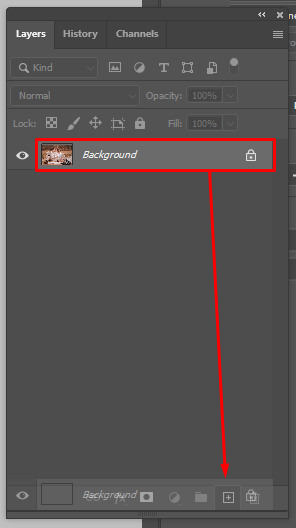
Create a copy of the layer by clicking the “+” symbol. Alternatively, you can use the Ctrl+J (Windows) or Command + J (Mac) hotkey combination, if you prefer relying on Photoshop keyboard shortcuts.
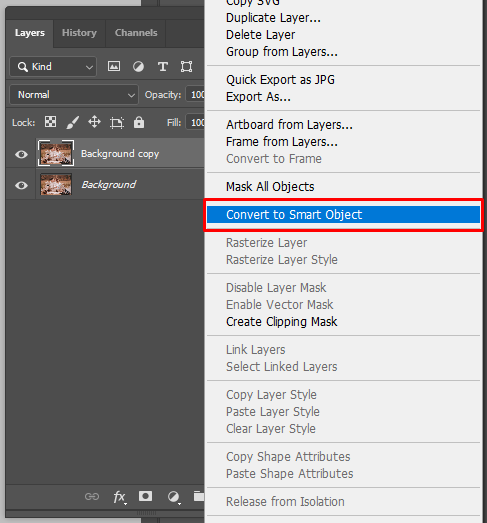
At this point, you have to create a smart object using the duplicate layer. Click the right mouse button and pick Convert to Smart Object.
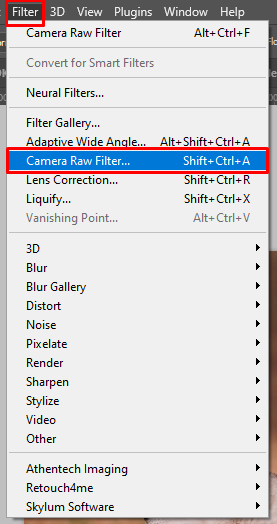
Next, go to the Filter menu again and pick the Camera RAW Filter option.
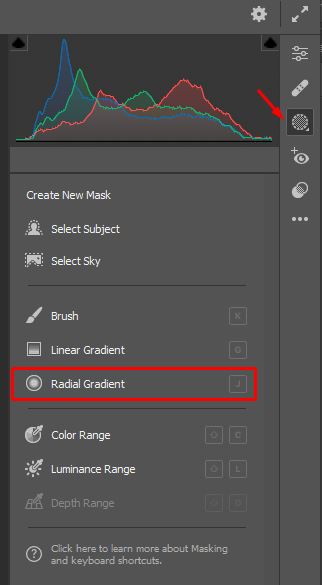
If you want to learn how to add lighting in Photoshop that looks realistic, you need to master the technique of making a gradient in Photoshop. Pick Radial Gradient from the list of available options.
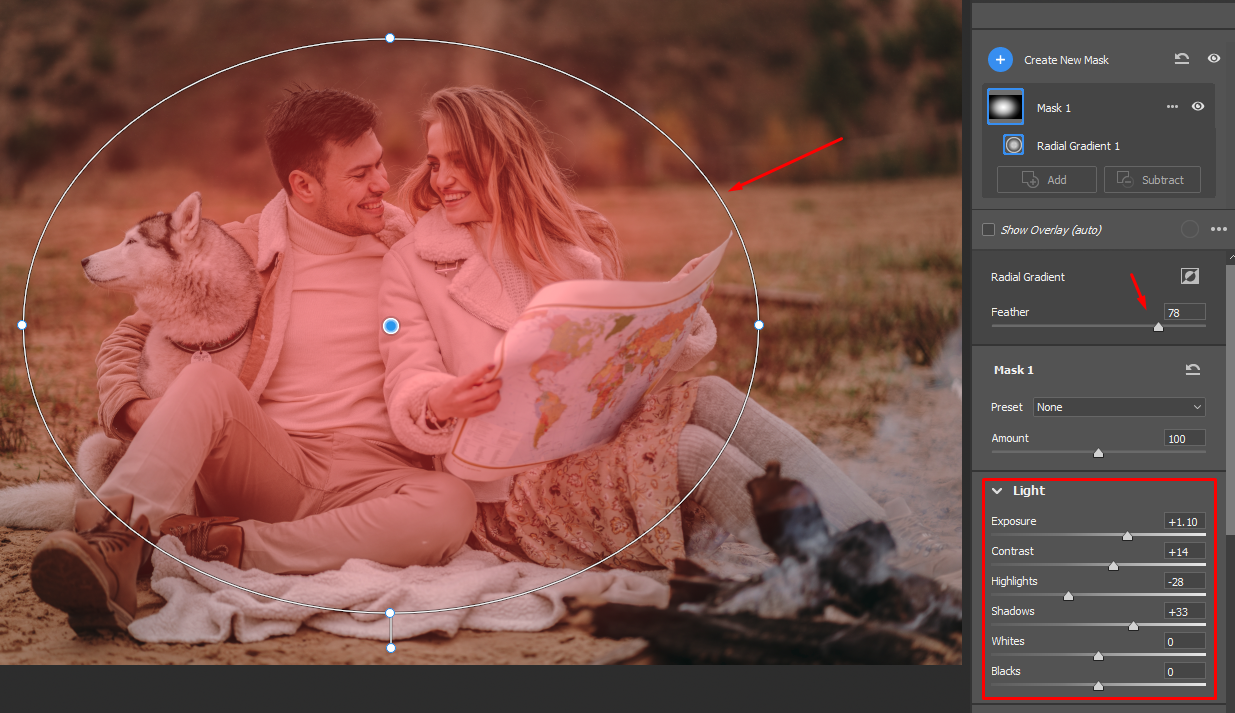
Once you’ve selected the gradient area, perform the necessary lighting adjustments. Tweak the Feather slider. Additionally, specify the desired values in the Light section by adjusting the Exposure, Contrast, Highlights, Shadows, Whites, and Blacks.
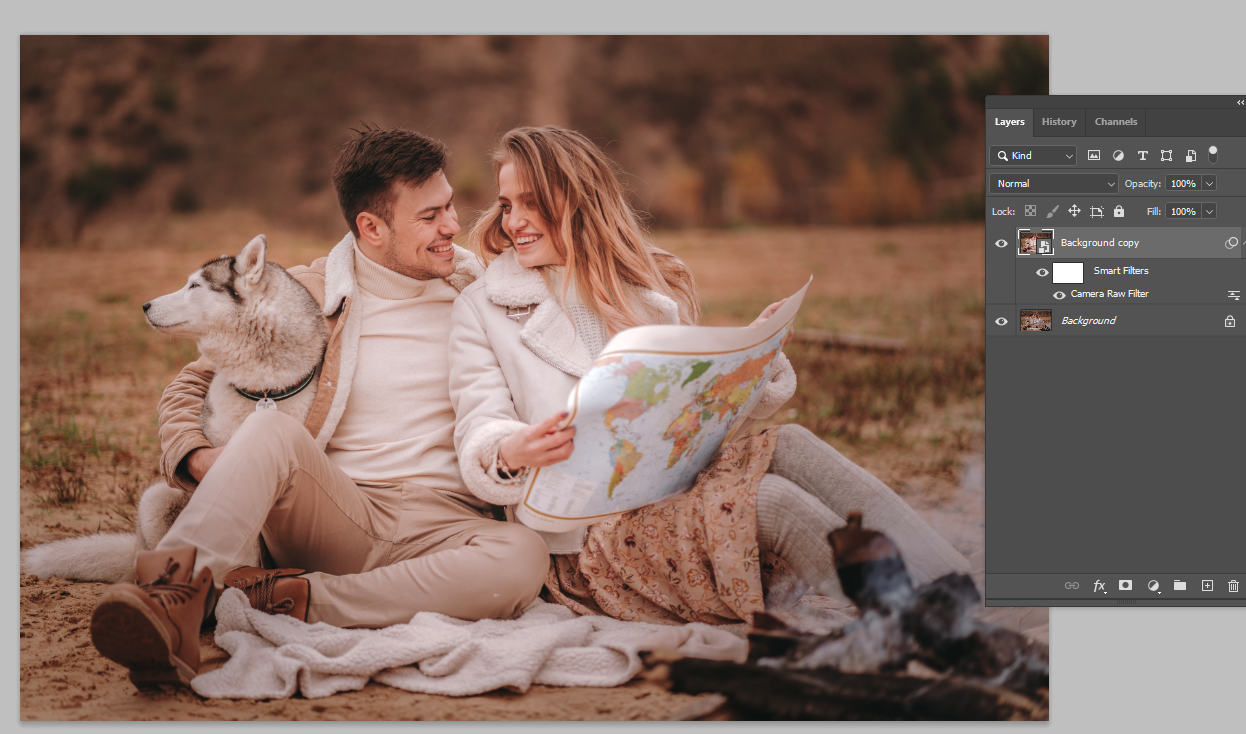
If you’ve done everything correctly, you’ll receive a pleasantly soft and natural light.
Another method relies on adding a separate light effect to your photo.
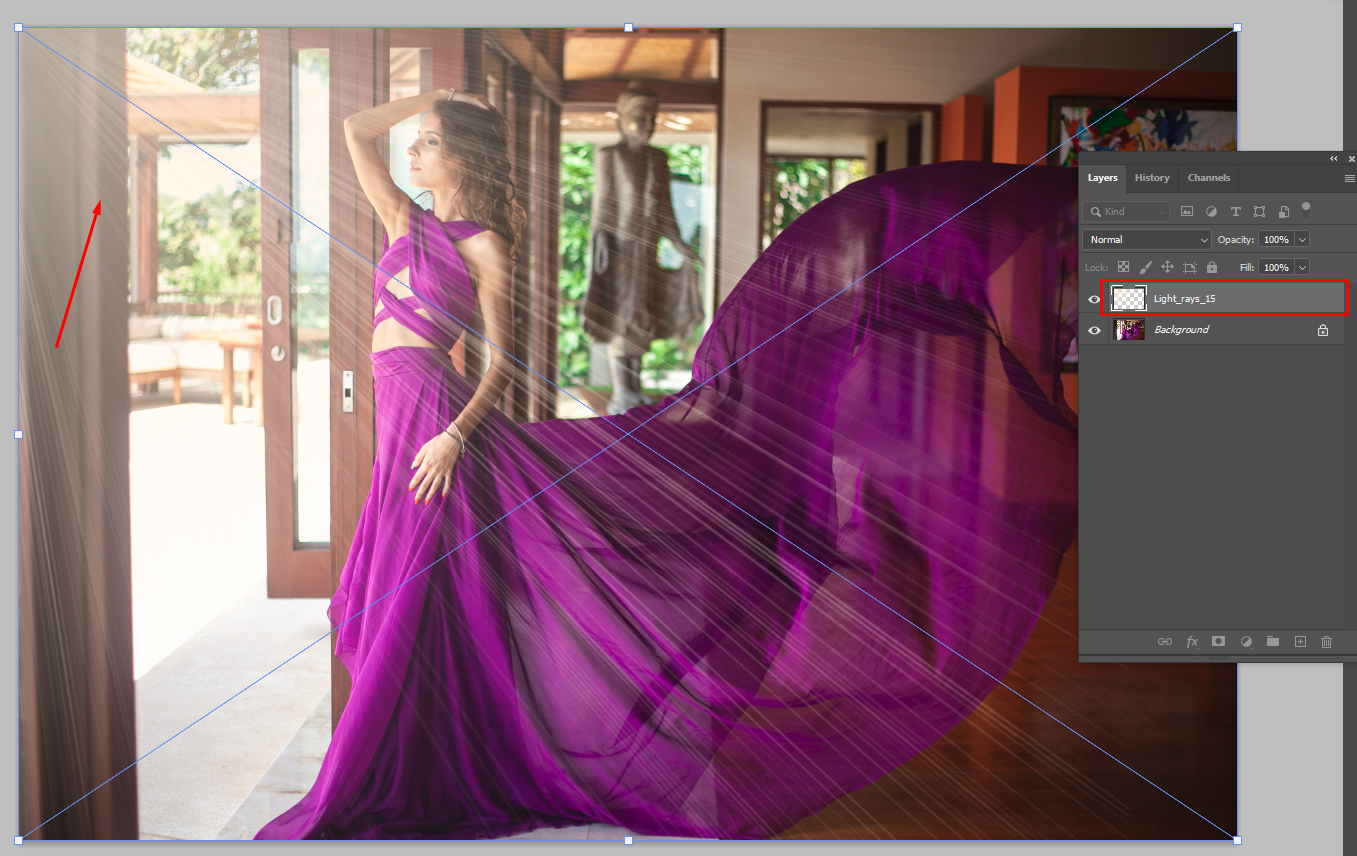
Add sun rays to a separate layer.
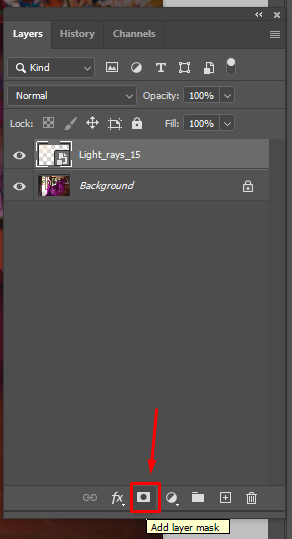
Upon selecting the required layer, pick Add layer mask. You can find this option in the bottom right part of the Layers menu.
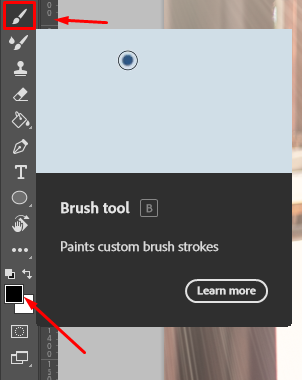
Choose the Brush tool and get rid of all unwanted parts of your layer mask. Remember that you should do so while having the black color selected since it is needed to remove all flaws. If you notice that you’ve accidentally deleted a part you didn’t want, change the color to white and fill in the missing area.
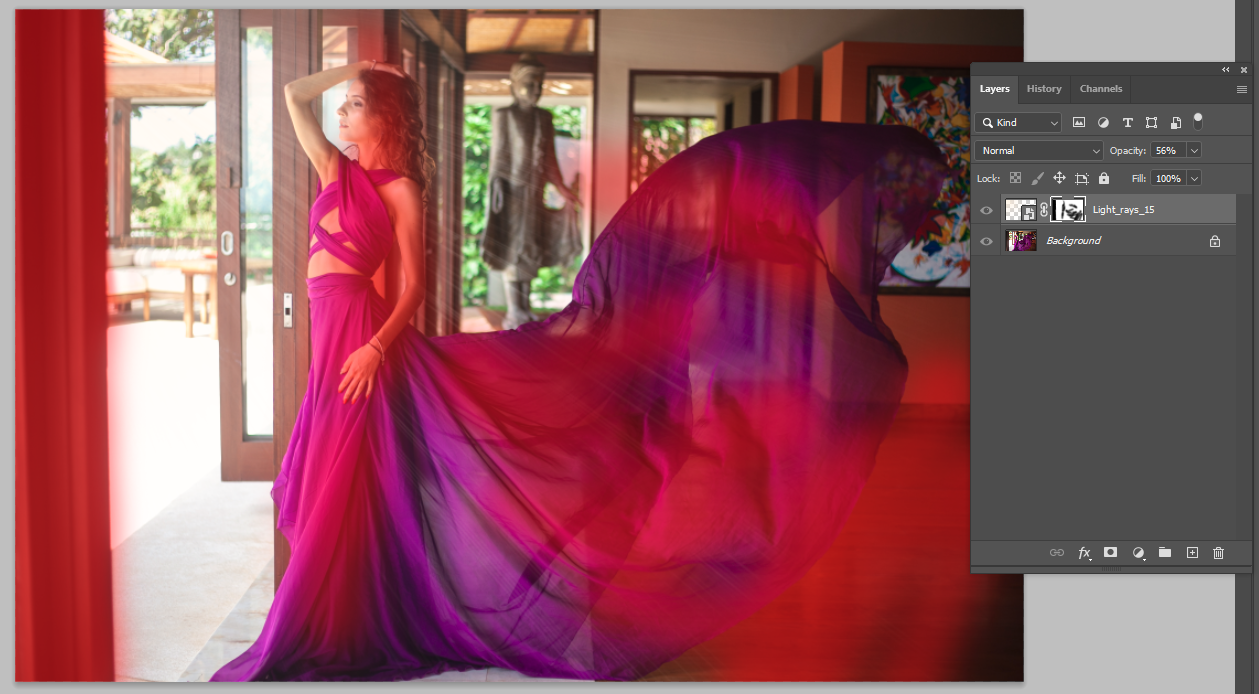
That’s it! If you like the received light leak effect, you can now export the photo in any format you need for future use.

If you want to learn how to add light in Photoshop with even less effort, you can take advantage of these premade bundles. These Photoshop actions will help you make your photos look more creative with the help of different effects. They are also capable of adding missing lighting to make your images appear more professional.