Do you need tips on aligning layers in Photoshop, or are you having trouble placing your image layers correctly in space? Is creating panoramic images something you need to master?
Below are two Adobe Photoshop best practices on how to align layers in Photoshop. These methods let you align the contents of layers and groups using the Move tool or the Auto-Align option.
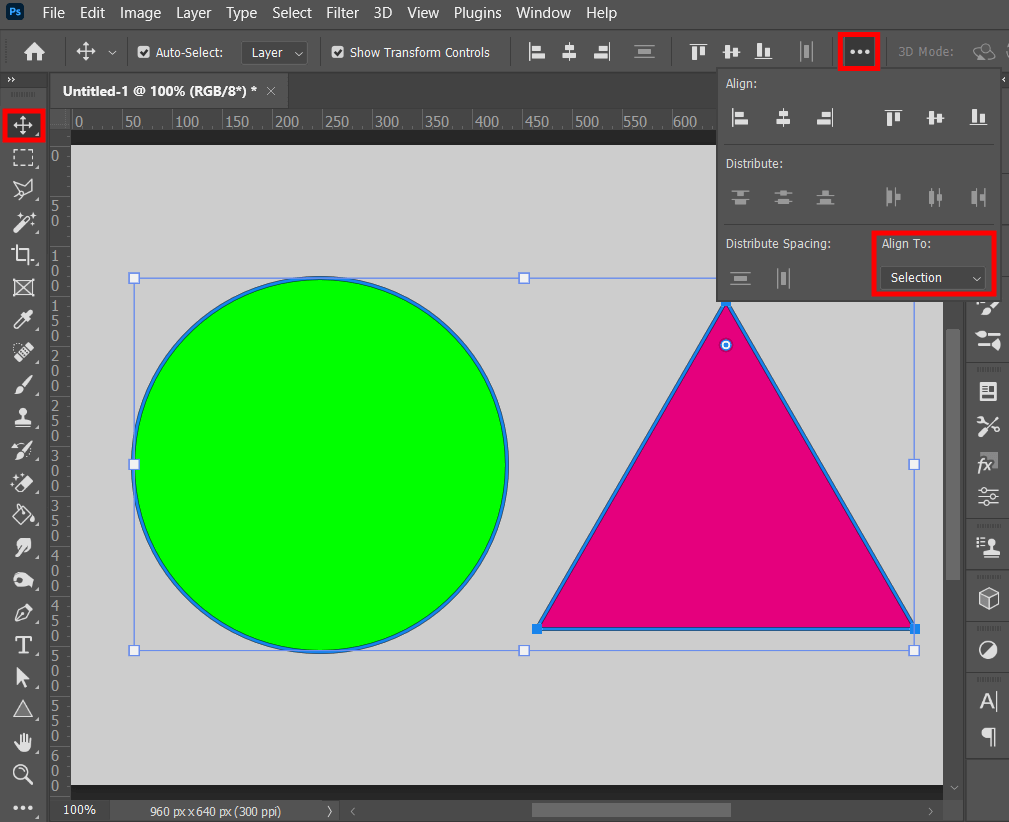
With the activated Move tool, open the Align and Distribute panel under the “three-dots” button. Then, pinpoint the Align to: setting. If this is set to Selection, you need to pick out an active selection marquee or multiple layers in the Layers panel for the Align buttons to be accessible.

To choose multiple layers in the Layers panel, hold down the Ctrl key on PC or the Command key on Mac and each layer you need. This procedure is akin to grouping layers in Photoshop.
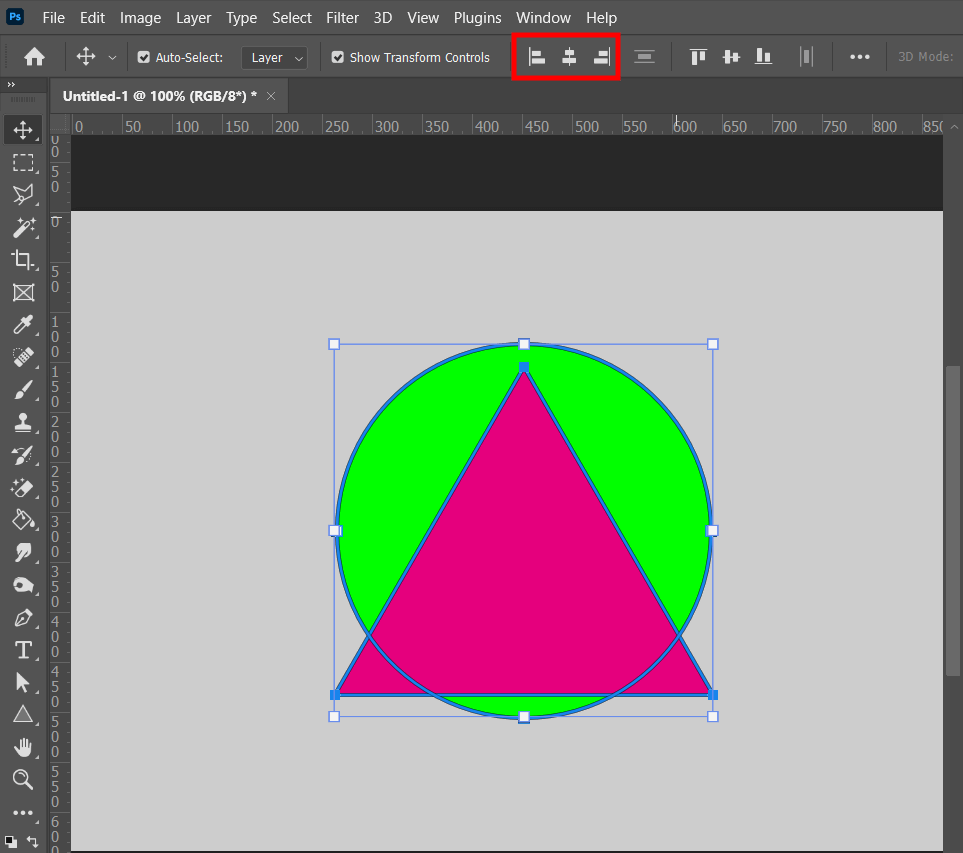
At this point, the process looks quite transparent: you can align layers in Photoshop to any edge or the center of your selection using the corresponding button. But you can also use another method from the next step.
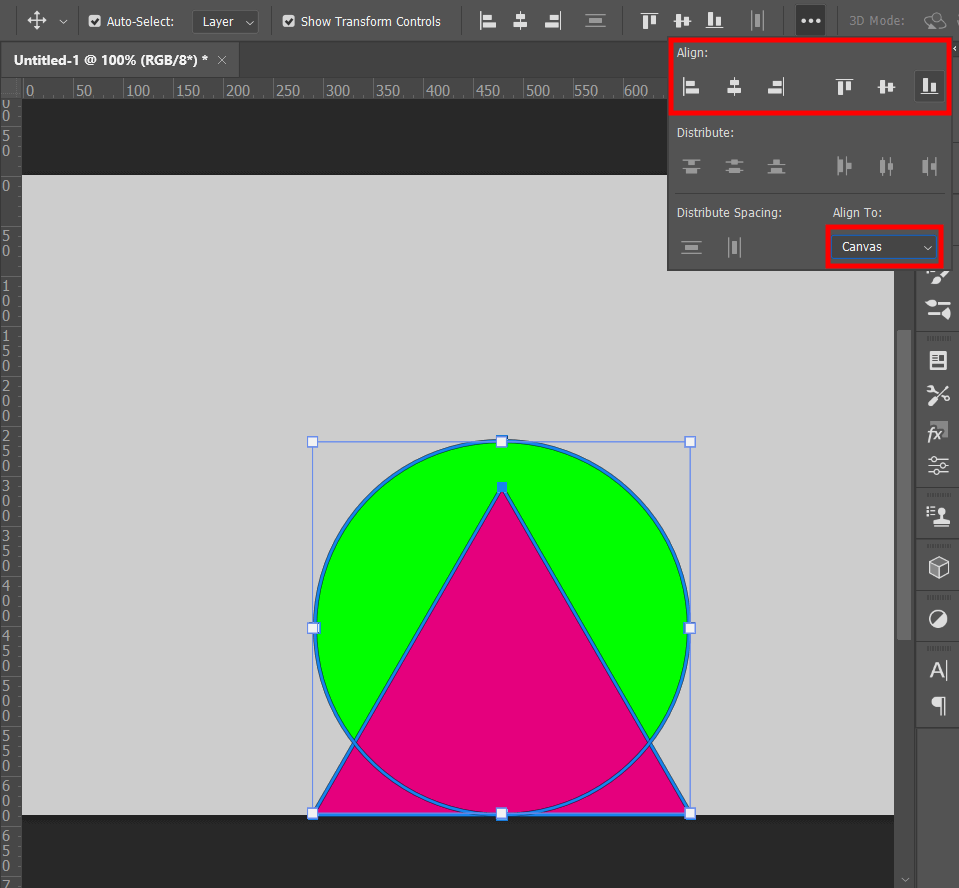
You don’t have to align in Photoshop using only buttons because you can also change the Align To: setting to Canvas to align one or more layers to the entire document, which is a great help in centering multiple layers neatly without having to do any calculations yourself.
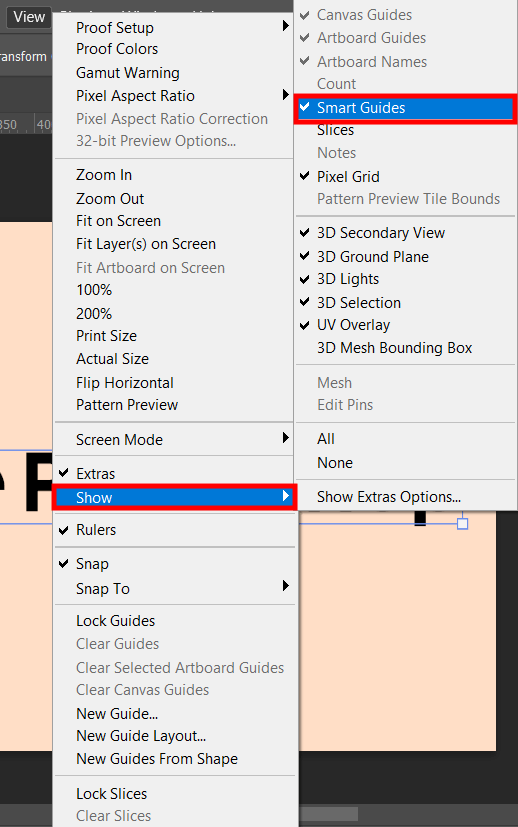
This step is optional because the Move tool may not give the desired results. In this case, the Smart Guides feature, available by default, can help you deal with an odd alignment situation, such as proving that two parts of the image keep the same distance from the document edges.
Taken together, the Move tool’s alignment features and Smart Guides are a great convenience that makes you forget what it's like to waste time calculating offsets and pixel measurements.
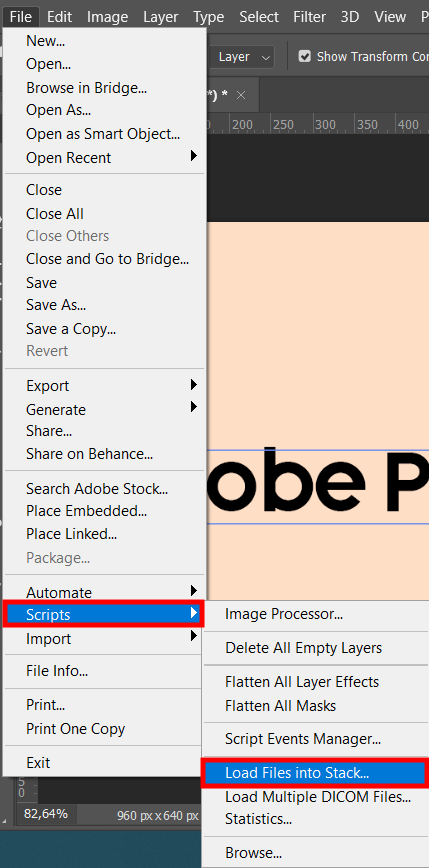
First, open multiple images as layers in Photoshop. Go to the File menu, choose Scripts, and select Load Files into Stack. When launching, Photoshop will open the Load Layers dialog box and provides easy-to-reach shortcuts.
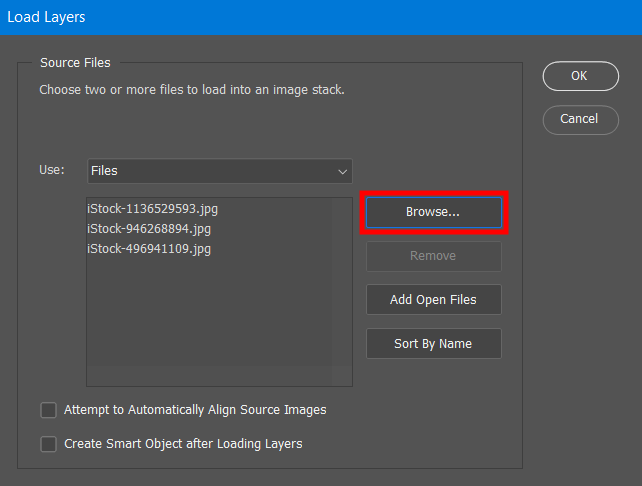
Click the Browse button and load files. You can also click Add Open Files, which will let you load the whole folder full of photos right away.
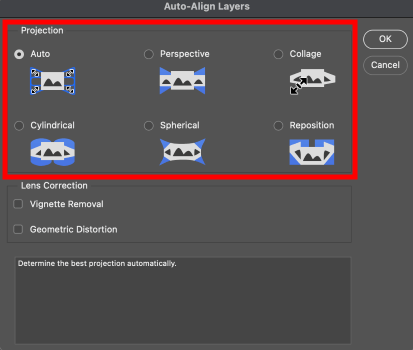
Once you see your photos as separate layers in the same document, go to the Edit menu and choose Auto-Align Layers. The Auto-Align Layers dialog box appears, offering you several alignment options from which you can pick out the ones you want.
Optimally, you should rely on Auto and let Photoshop choose a specific setting. Especially if you don't know which one you need since many of them are designed for creating panoramas. Click the OK button, and Photoshop will do its work in the background while scanning each layer for any alignments and setting up placement and shape if necessary.

You can stick to the individual tips laid down in these Photoshop tutorials and apply other tools and features to make your photos look different.
When it’s done, and your layers are finally aligned, consider high-quality retouching for the entire photo. With this kit, you can edit a whole bunch of images in no time and choose a fantastic effect. Try these actions and see how natural your photos can look once the lighting defects are eliminated.
Smart guides let you align layers in Photoshop very quickly without delving into manual instructions. When they're enabled, and you move layers around the canvas, Photoshop proactively shows you adjacent elements making it easy to get the best possible alignment.
Although they are enabled by default, Smart Guides are only visible when there is something to recommend. To check if they are still active, go to the View menu, then to the Show submenu, and make sure there is a checkmark next to the Smart Guides. If they are at work and you still don't see them, test that Extras is also enabled in the View menu at the top of the Show submenu.
First, select three or more layers. Then choose Layer > Distribute and select a command. Alternatively, you can select the Move tool and click a Distribute button in the Options bar. Select the desired distribution option.


