Shooting under adverse conditions can produce grainy images with a highly pixelated texture. The good news is that several methods can help you to get rid of the most undesirable noise in photos.

Still, the ultimate solution to the problem of how to make pictures less grainy is Adobe Photoshop. You can’t quite achieve the grainy effect of an image, but Photoshop lets you correct the blurry photo as much as possible because it comes with an integrated tool that reduces noise in images.
To reduce noise in Photoshop, you ought to launch your version of the software, select and import the photo you think is grainy, and then zoom in by 100% with the magnifying lens to verify how much noise is in the photo details.
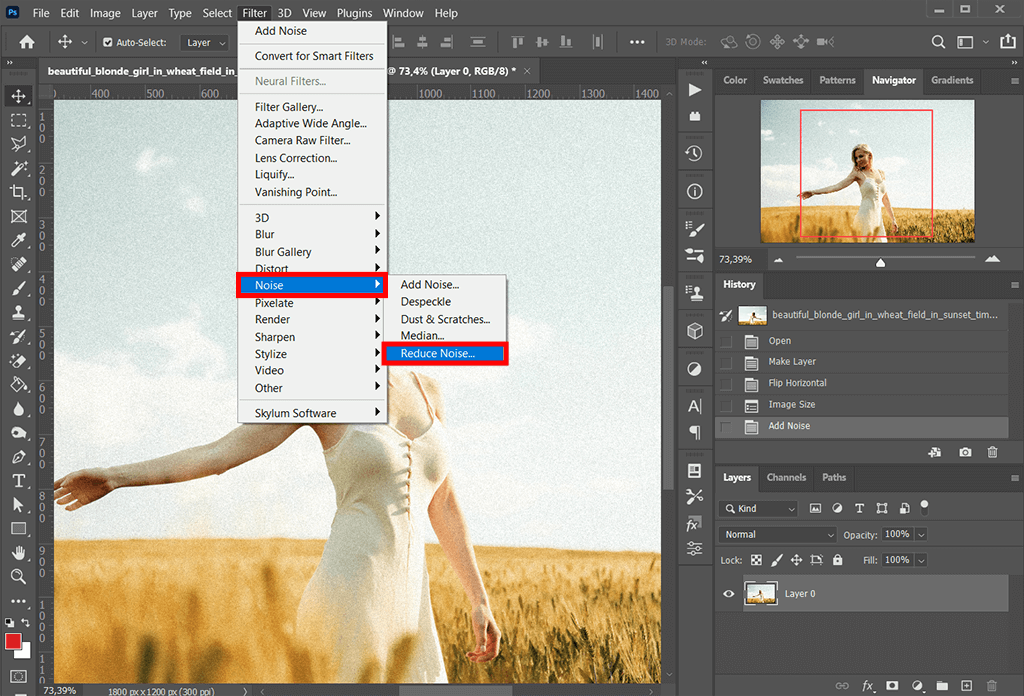
Click the Filter menu at the top of the Photoshop window and select Noise. Then choose Reduce Noise.
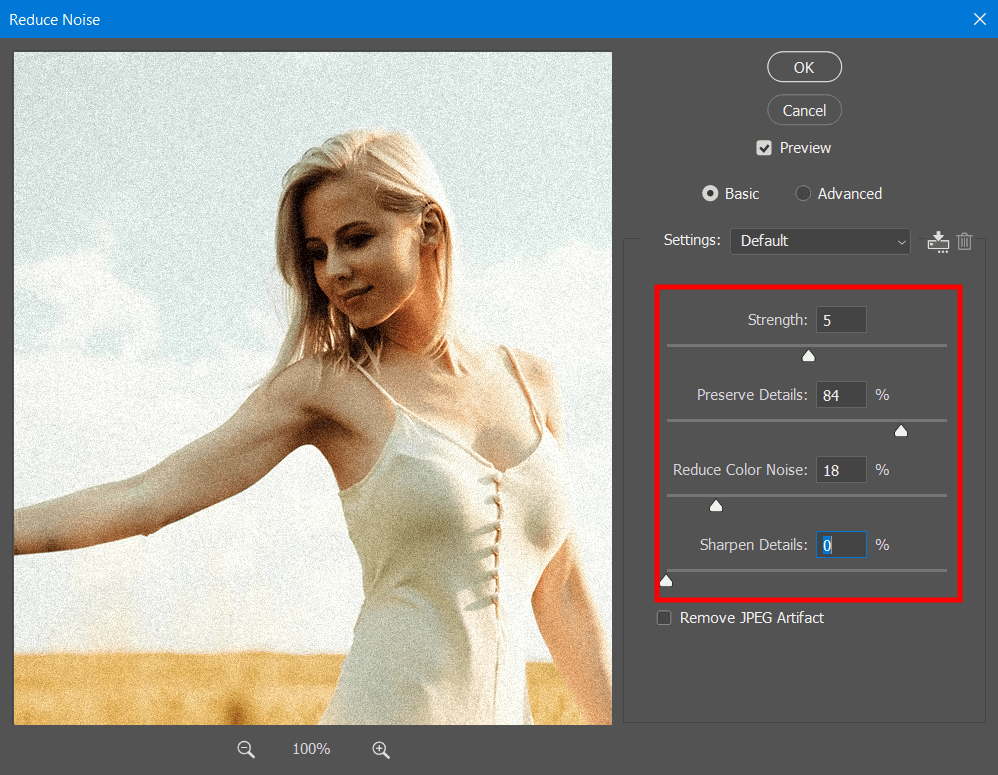
A pop-up window appears with suggestions for controlling the noise reduction sliders. As with removing noise in Lightroom, you’ll see four sliders: one for reducing color noise, a second for sharpening detail, a third for preserving detail, and a fourth for strength. Drag each of them left or right until your image looks as sharp as possible.
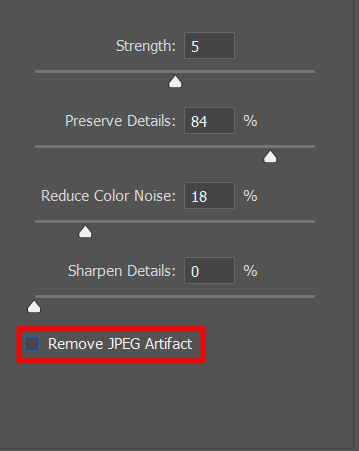
To display the preview, click on Remove JPEG Artifact.
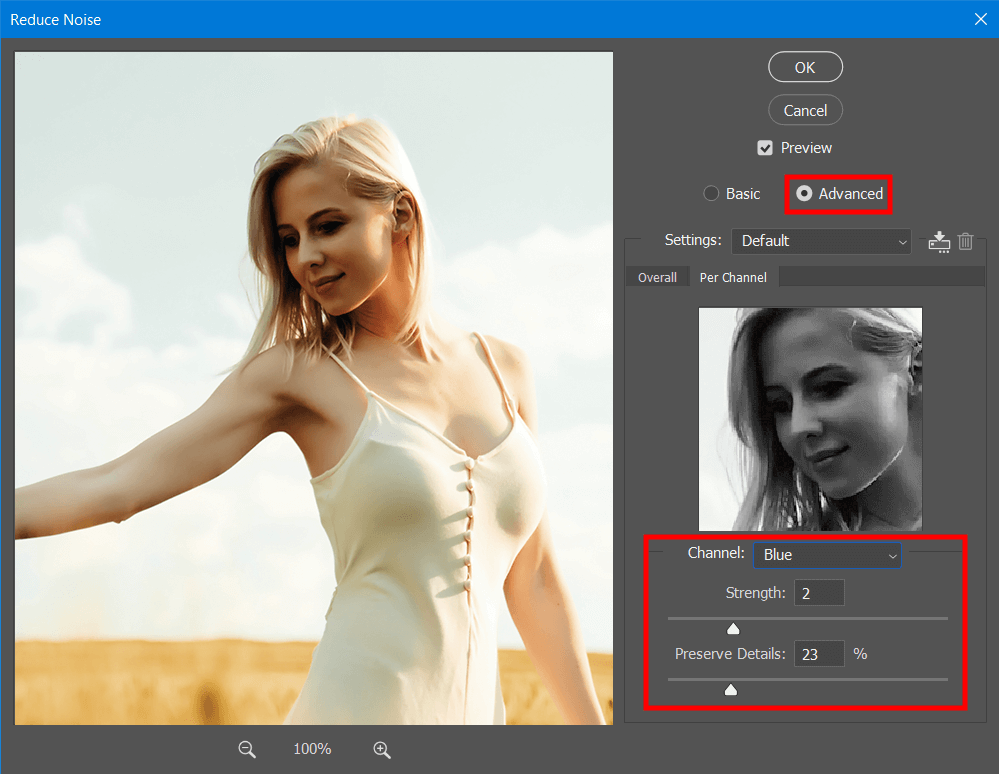
You can also adjust the noise settings in RGB by pressing Advanced and changing the slider positions.
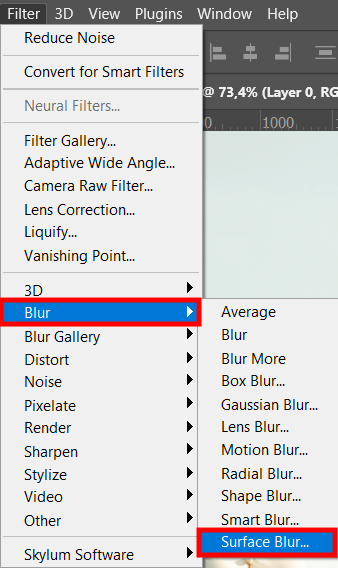
Another tip is to try the Blur tool. If the image looks grainy so far, choose Filter > Blur > Smart Blur to get a smoother effect.

A new pop-up window will appear. Here you need to move the sliders a little and press OK.
That’s it. Now you can compare the before and after images to see the effect and save the result if you’re happy with it. Go to File > Save As > Click Format > find the format you want in the list and pick it up.
To proceed faster you have to work with Photoshop keyboard shortcuts and press Ctrl+Shift+S/Cmd+Shift+S to do Save As.
If you already have noise reduction software, an external noise reduction plugin might cost less and be a more convenient option. Fortunately, some plugins can rescue photos considered unrecoverable by editing precisely selected areas, not the entire image. Here are some of them used by experts.
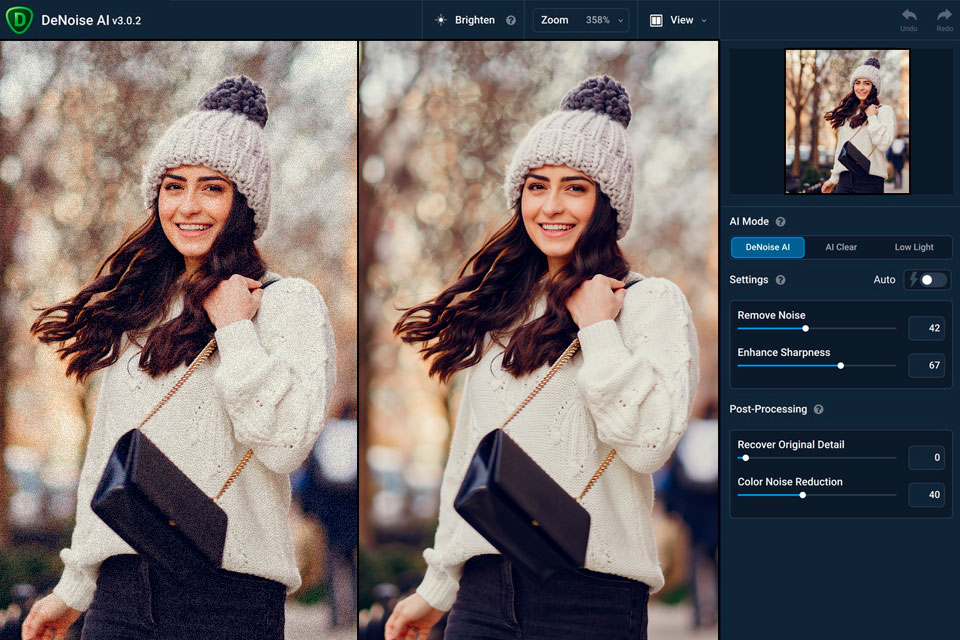
Topaz DeNoise AI is the best noise reduction plugin when you put all its functionality together. It automatically removes digital noise in grainy areas while preserving details. You can set up the noise removal with two basic sliders to get rid of noise and sharpen the image. In addition, Denoise AI includes advanced options, such as a low-light mode for high ISO images and masks to selectively apply the effect.
DeNoise AI is a plugin for Lightroom Classic and Photoshop (or any other program that supports these plugins) that integrates into your existing operation immediately. You can also use it as a standalone app with batch processing.
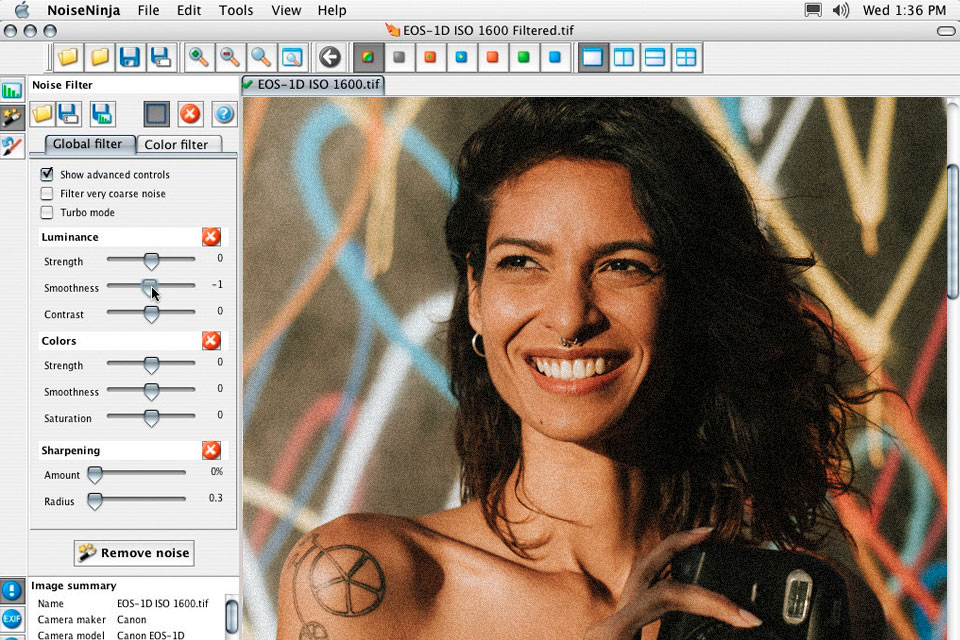
Noise Ninja is an excellent and small-size noise plugin that works very well to remove noise from images, especially in the dark areas on stacked backgrounds where I think it is always a particular problem. Noise Ninja is a great way to remove digital noise in the dark areas of your image. The nice thing about Noise Ninja is that it also performs selective noise removal with a brush-like mechanism, so you can take massive control over the area where you want to reduce noise.
Using Noise Ninja is quite simple. You can either use one of the preconfigured settings or apply the dropper to examine a noisy area customizing your profile.
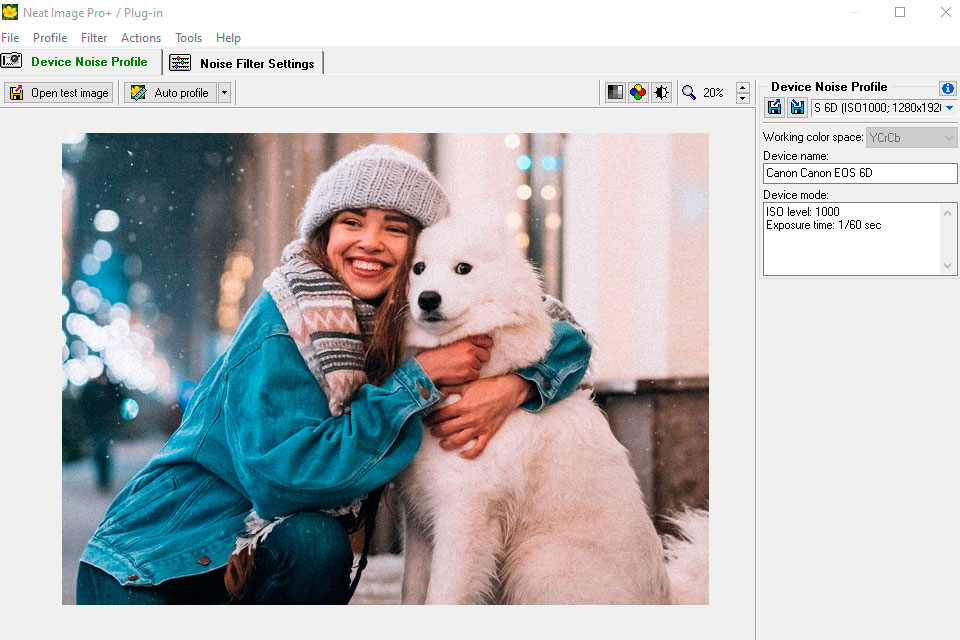
Neat Image software is designed to reduce noise in digital images. It also minimizes film grain, JPEG compression artifacts, and other errors. With the software you can enhance images from digital cameras, scans from negative and positive films, and scans from printed photos. It is available both as a separate program for Windows, macOS, and Linux and as a plugin for Photoshop.
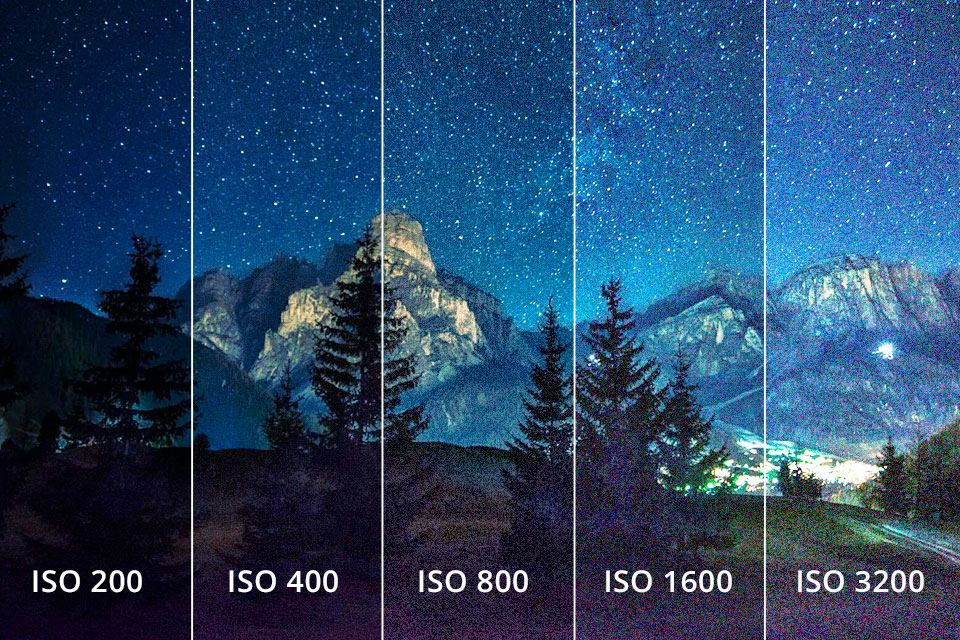
The essential cause of the noise is the camera sensor sensitivity or ISO settings. When you increase the ISO level, more noise is automatically generated. Therefore, it is best to shoot at the lowest ISO setting but maintain proper exposure. A low ISO setting is anything between ISO 100 and ISO 500. In this range, the grain in your photos won’t be as not as emphasized.
A high ISO setting is, for example, ISO 3200 or higher. If you go above this setting, you will notice a significant increase in grain. A low ISO setting will help improve the quality of your images in general and reduce the scope of noise reduction while post-processing.

When you shoot in low light, you’ll certainly find out that your photos are prone to grain. That's because such conditions force you to push your camera settings to the max. In doing so, shutter speeds will be reduced, and you'll have to choose a larger aperture and compensate with a higher ISO. To achieve this, you need to apply extra lighting.
A camera flash is an easy tool to try if you can afford to buy it. But it doesn't always fit every photographer's style.
A professional flash can be very expensive, and it takes some time to get used to it. Fortunately, you can also use the light sources around you, such as campfires, streetlights, or flashlights are just a few easy ways to reduce your ISO in low-light conditions. Any light source that illuminates your target and helps your camera see more detail is a clean match.

The darker your photo is, the more grain is visible, especially in the shadows. Insufficient brightness cannot "cover" the grain; it only becomes more visible. So, the next tip on how to make pictures less grainy is to overexpose the image slightly. To do this, you don't need the ISO settings, but other elements of the exposure triangle in photography.
Increase the exposure by one f-stop, and take a photo. As an extra measure, you can also slow down the shutter speed, although this may not work so well while shooting moving subjects with low light. This way, you can lighten the shadows in your image and make the details in these areas better visible.
Low resolution can make your photo look grainy. Always make sure you use a high-resolution to take a picture. And don't zoom in too much when you print the photo because you will make the image get blurry
There is also a clear correlation between graininess and cameras with smaller sensors and lower resolution. High-quality sensors in full frame cameras suggest billions of light-absorbing pixels to compensate for poor lighting conditions and are therefore also equipped with high ISO sensitivity.
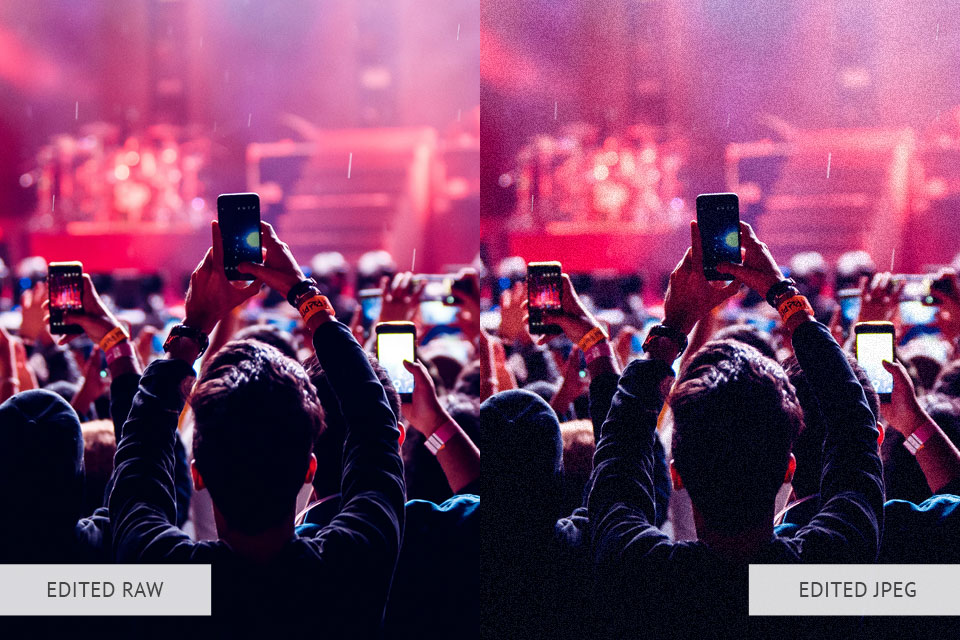
In case you are not familiar with it yet: RAW files are uncompressed image files with a much higher bit rate than JPEG files. In plain English, you can edit a RAW file much further in post-processing than a JPEG file. JPEGs are compressed - a process in which noise is baked into the images. It means that removing noise in post-processing is very difficult.
Although shooting in RAW format alone is not enough to correct grainy photos, it lets your margin get expanded in post-processing. This file type allows you to enhance shadows and reduce grain without worrying about artifacts.

Even though some aren’t happy with grainy photos, the others who like the look of film photos are curious about how to add grain in Photoshop and are looking for grain filter apps. If you are one of those who like this trend, you should consider this cluster of free tools as a must-have. These overlays are easy to use and install, giving you a film-like vintage dust in seconds.


