If you are a confident Lightroom user and are faced with the task of creating a panorama, then you no longer need to look for third-party software to handle it. The developers introduced this feature back in the 6th version of Lr, making a splash among users. Read my step-by-step tutorial on how to create a panorama in Adobe Lightroom CC by merging several photos with the Photo Merge tool.
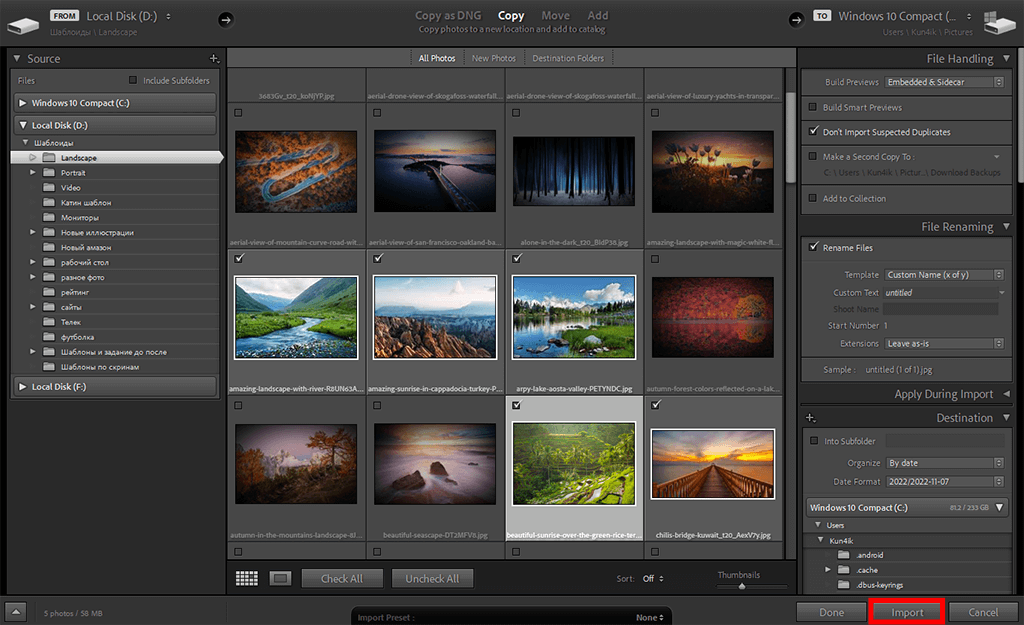
The first thing you need to do is import RAW files into Lightroom. Select all the source photos that you are going to merge into a panorama. If the necessary files are located in a row, then simply click on the first and last photo while holding the Shift key. Otherwise, hold down Ctrl if you’re on Windows, or Cmd if you’re on iOS, and click on all the photos you want.
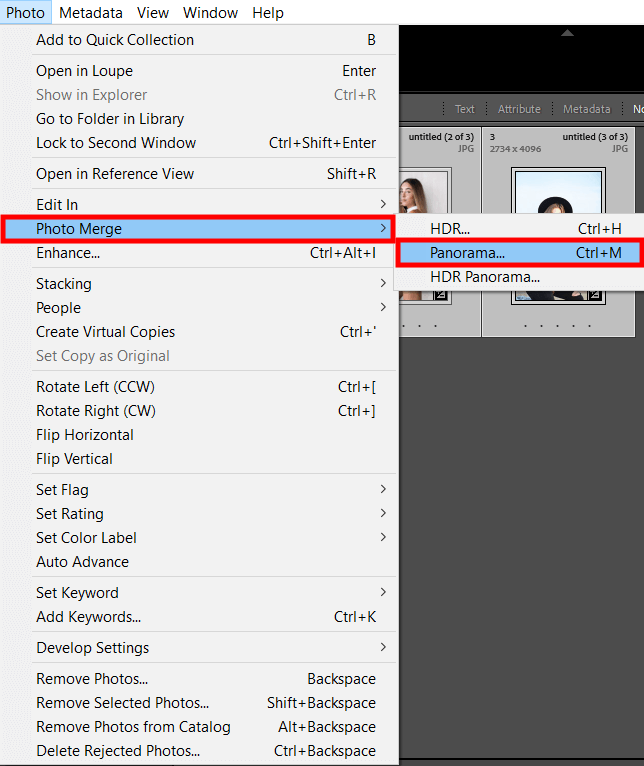
Next, you need to turn to the Photo Merge tool. It offers users two functions – create HDR photography and panorama stitching. As you already understood, the latter interests us within this tutorial. If you are working on a standard exposure photo, then you need to click Photo > Photo Merge > Panorama. Alternatively, you can just press Ctrl+M/ Control M to get the same result.
If your photos are exposure bracketed, then you should choose the following: Photo > Photo Merge > HDR Panorama. Alternatively, you can try Single-step HDR Panorama merge via Smart Previews.
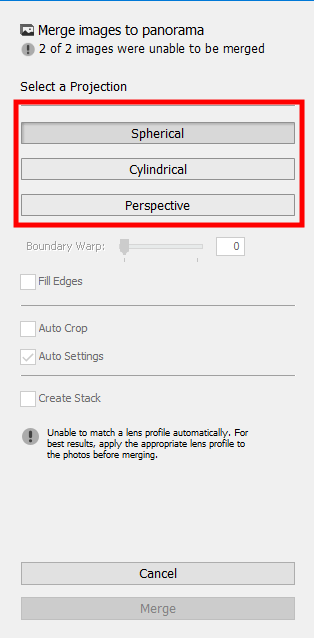
When you go to the Panorama Merge Preview / HDR Panorama Merge Preview dialog box, you will see various layout projection options. Each of them is great for panoramas of any orientation and even for HDR panoramas. I like that, unlike most photo stitching software, stitching panoramas in Lightroom is a no-brainer task, preventing even a beginner from getting bogged down in a bunch of settings and parameters, while getting attractive and high-quality panoramas.
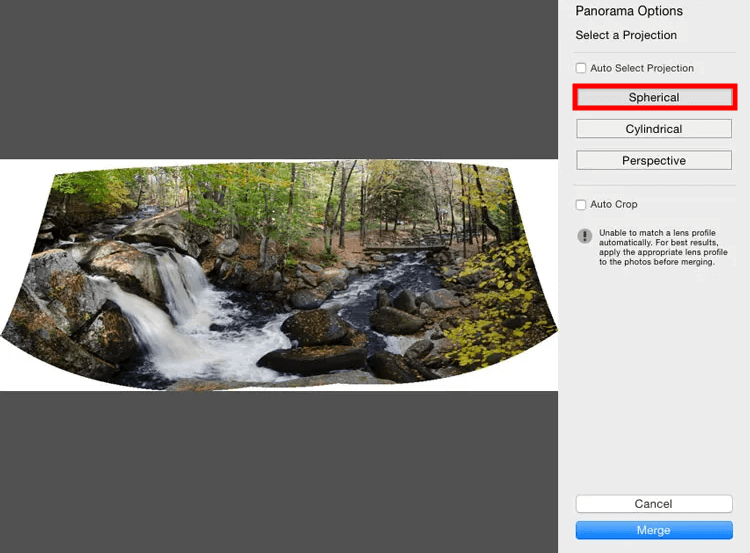
The standard option is spherical, and for a reason. Most of the panoramas created in the program are just that. That’s because this option can align and transform your photo as if it was mapped to the inner part of a sphere. This is a perfect choice for wide or multi-row panoramas, as well as HDR panoramas. If you’re photographing up close, the spherical projection will look as natural as possible and won’t stretch your picture.
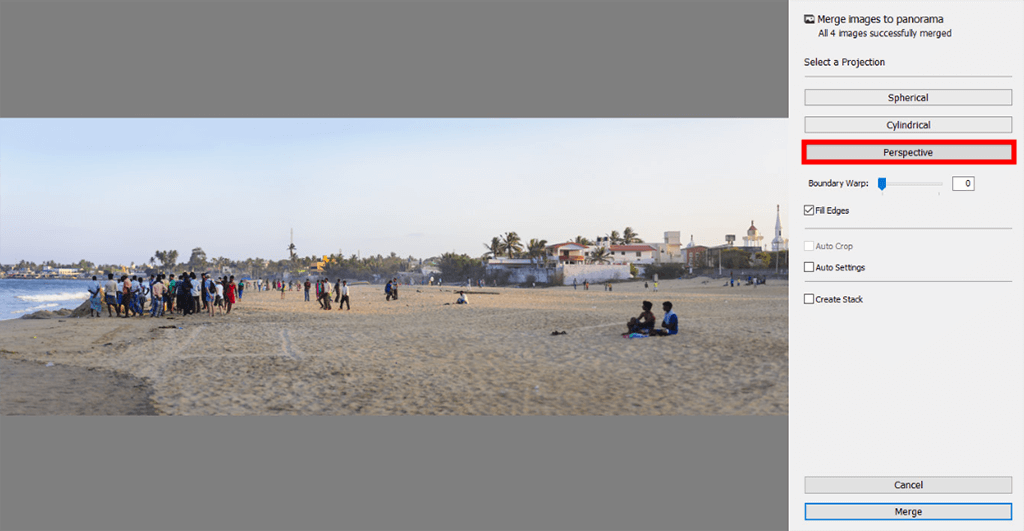
If you are wondering how to make a panorama in Lightroom for architectural photography, then the Perspective setting is what you need. It works great with both ordinary and HDR panoramas, projecting it as if it were mapped onto a flat surface. Unlike spherical projection, it does not round out straight lines in the image, but it does distort them at the edges, which can ruin your wide panoramas.
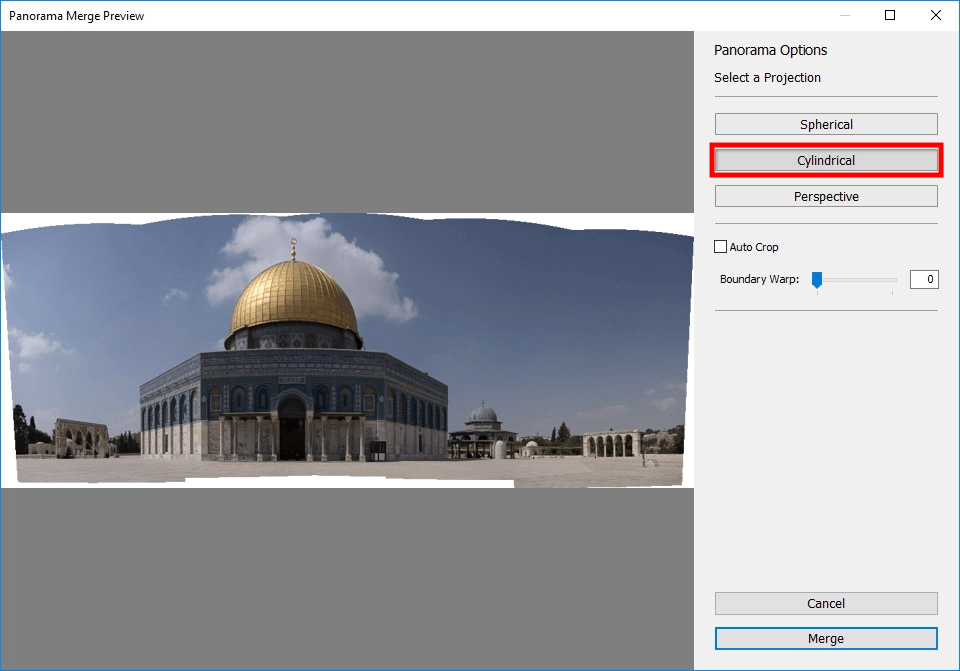
The last parameter on the list is Cylindrical, projecting the panorama as if it were plotted inside a cylinder. It will suit wide panoramas/HDR panoramas thanks to keeping straight vertical lines.
After creating a panoramic shot, you may notice jagged edges. You can fix this by cropping jagged borders with the Auto Crop tool. However, be aware that you may lose key elements and subjects in your shot.
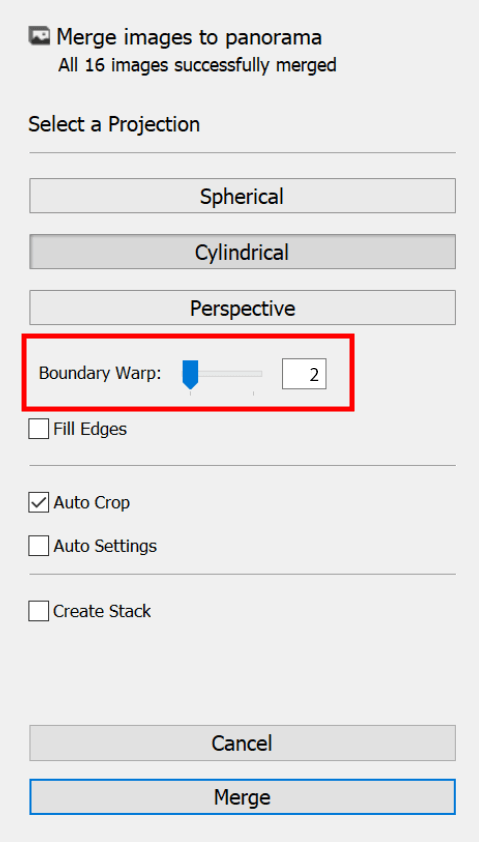
While customizing your panorama in Lightroom, try different values from 0 to 100 for the Boundary Warp slider. Its purpose is to fill the canvas by warping the panorama. It helps to preserve the content of the photo at the edges of the merge, which you can lose if you decide to crop the photo. Move the slider to achieve the desired result. The higher its value, the denser the edge of the panorama will fit with the surrounding rectangular frame.
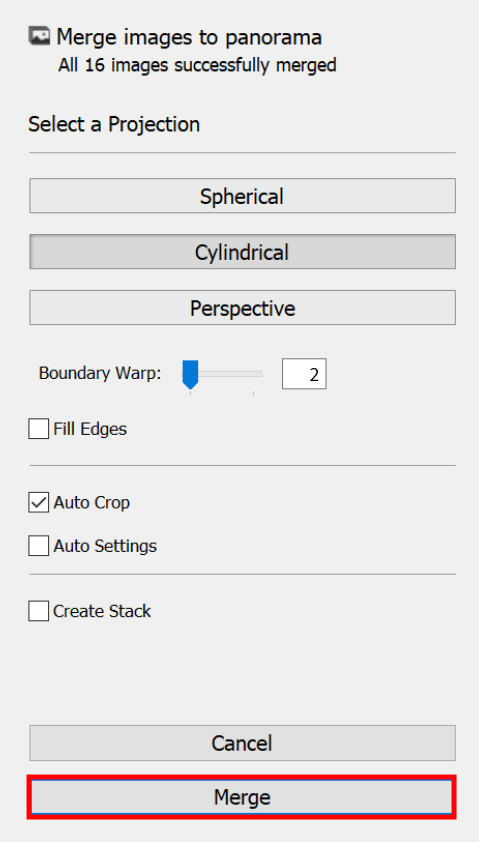
Upon completion of all the necessary settings, you need to click the Merge button to have Lightroom create a panorama / HDR panorama and locate it in the catalog.
One of the advantages of this process in Lr is that the panorama is saved as a new RAW file. This gives you more freedom to enhance your shot. Applying all Develop module options to your panorama is available in the same way as for separate photos.
If you do not want to figure out how to create a panorama in Adobe Lightroom CC on your own, entrust this task to professionals. They will not only make an eye-catching panorama from your photos, but also improve the output: make the colors more attractive, and also fix any exposure issues.
This tool is designed to stretch the borders of a photo, fill the canvas neatly, and preserve all of its content. This prevents you from losing key objects in your panorama.
Try the Auto Straightening option, which will not cause any difficulties. All you have to do is press Auto and wait a bit while Lr tidies up your uneven skyline.
HDR Panorama in Lightroom is designed for bracketed shots. This is a series of frames with multiple exposures, but with the same angle, which is different from the same exposure for each shot in the panorama. HDR Panorama results in a better balance of exposure and color tone than normal Panorama. This is because Lr first combines different exposures before merging different shots. This results in more attractive tones and focus range.
In the case of a series of bracketed shots, they should all come with the same exposure offsets. That is, if the first set is offset by +1, for example, then all subsequent sets from which you plan to create a panorama must also have the same offset. At the same time, the exposure value of each set may differ, but the exposure offsets must be the same for all.
If you want to organize the images that you will use to create a panorama, then you can stack images in Lightroom. This option groups related photos for easier control in the Library module. By selecting this option, Lr will start grouping individual photos into a stack along with the stitched panorama. Thus, you will have a ready-made separate set of photos for the future recreation of the panorama.
Save your editing time by using this set of tools to enhance the colors in your landscape shots. They were developed under the guidance of experts, so they fully meet the requirements of this particular genre and can improve your photos in a matter of seconds. Both beginners and true professionals will benefit from these tools, as they greatly simplify and speed up the process of working on photos.


