If you constantly work with Ps, knowing how to set scratch disks in Adobe Photoshop is crucial, as it helps avoid mistakes. It’s vital to ensure fast performance, especially when your workstation device is outdated or less-than-prompt.
The error message 'Scratch disk full' often indicates that there is no longer enough storage space on your hard disk, which is used as a scratch disk, to perform a task. This article provides an overview of scratch disks in Ps and the method of configuring them to speed up your performance as high as possible.
A scratch disk is a hard disk or SSD that temporarily stores data while Photoshop is running. Such as portions of documents and their respective states in the History panel that overcharge your RAM. By default, the primary Photoshop scratch disk uses the operating system of your device.
If you have more than one drive or partition, make sure that you select the products with maximum speed and free space as your scratch disk(s). You can also fix Photoshop lagging with a 'scratch disk full' condition by picking out extra drives as scratch disks.
For best performance, connect the scratch disks to a compatible port with the highest possible bandwidth. The bandwidth limits of various ports can differ:
It is a good practice to use different drives: one to locate the scratch disk and another — for the files you’re editing.
The storage volume a Photoshop scratch disk might have depends on the tasks you are performing with this photo editing software. The storage volume of a Photoshop scratch disk depends on the tasks you perform with this image-editing software. The Photoshop desktop needs free space on a scratch disk of 6 GB at least.
If you’re performing simple tasks with built-in brushes or default editing tools, you need at least 10 GB of free space to store such changes. However, if you're working with complex projects that involve using multiple layers, adding effects, or creating Smart Objects, ensure you have no less than 20 GB of free space for your scratch disks. You may also need more additional space, depending on the files you're working with (for example, RAW files require more space than JPG files).
However, because RAM storage is more efficient than the scratch disk, you should make sure that Photoshop has the RAM it needs to operate and perform, and that the scratch disk is not overloaded too quickly. Therefore, it makes sense to think about expanding the RAM.
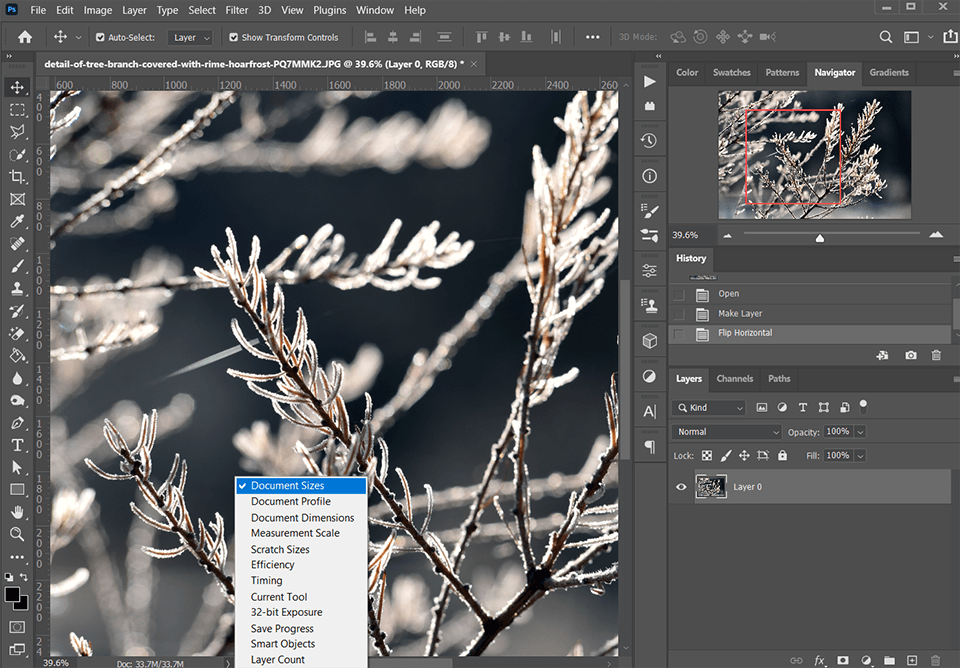
Use the status bar to check efficiency, scratch sizes, and document size. In the lower-left corner of your Photoshop documents, you find a status bar that displays information about your image, the efficiency, and the size of the scratch disk in Photoshop. Click the arrow on the right, and pick out the status option you want to check.
You can evaluate some of them to get an insight into how Photoshop works in terms of storage space. Under Document Size, you can check the file size of a particular document. Whereas the first unit indicates the size of the document, and the second is the size of the flattened file. If you know the size of the open documents you're working on, you can determine the amount of memory Photoshop requires.
The efficiency is showed as a percentage. When the efficiency percentage falls below 100%, it means that Photoshop is recording data on scratch disks. The lower the efficiency percentage, the longer it takes to record data on scratch disks, and the lower the Photoshop efficiency.

Scratch Sizes show the whole amount of memory used by all open documents (left number) and the amount of RAM available to Photoshop (right number). The less of the available RAM the open documents use, the less you rely on scratch space, and the better Photoshop runs.
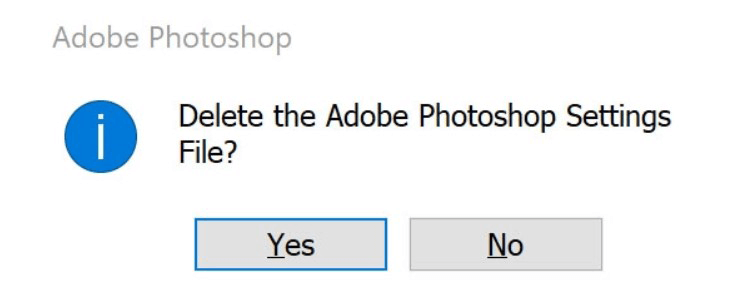
Sometimes an error or contorted preferences file in Photoshop can harm your scratch disks. And this is why I recommend resetting the preferences to properly set up scratch discs later. To reset Photoshop preferences, you can hold down such Photoshop keyboard shortcuts as Ctrl + Alt + Shift (Windows) or Cmd + Option + Shift (Mac) while the program is launched. Since this action resets the settings, you should, if possible, back up your settings before resetting them.
Making sure Photoshop has the memory it needs to work efficiently and that your scratch disks are set up correctly can take a lot of time to get Photoshop working the way you need it to. For all Photoshop users, it’s crucial to pay attention to efficiency, to know where their scratch disks are located, and to know what to do if Photoshop detects a scratch disk error.

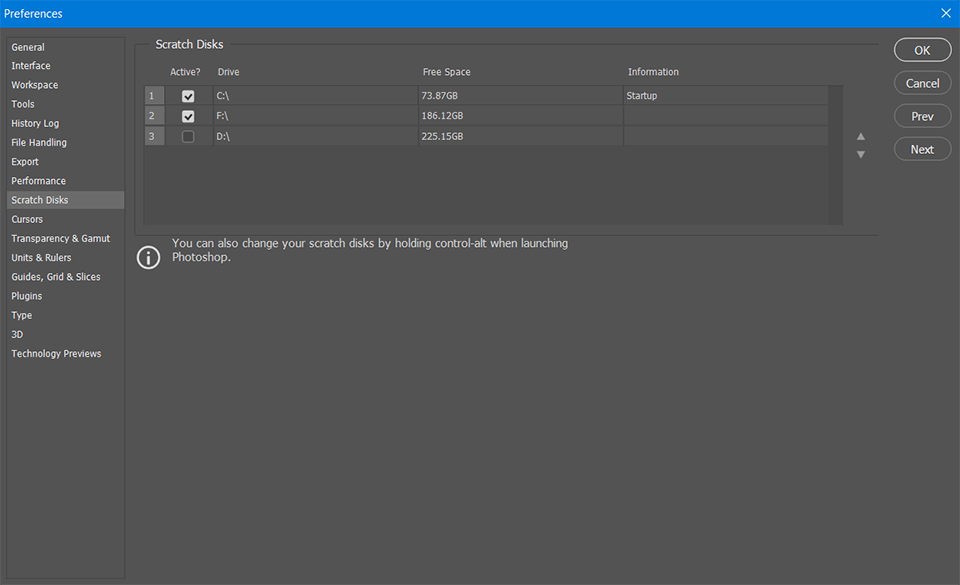
The first step in this Photoshop tutorial is to open the Edit menu and select Preferences. Once it’s open, chose the Scratch Disks option. For Mac the way looks like this: Photoshop > Preferences > Scratch Disks.
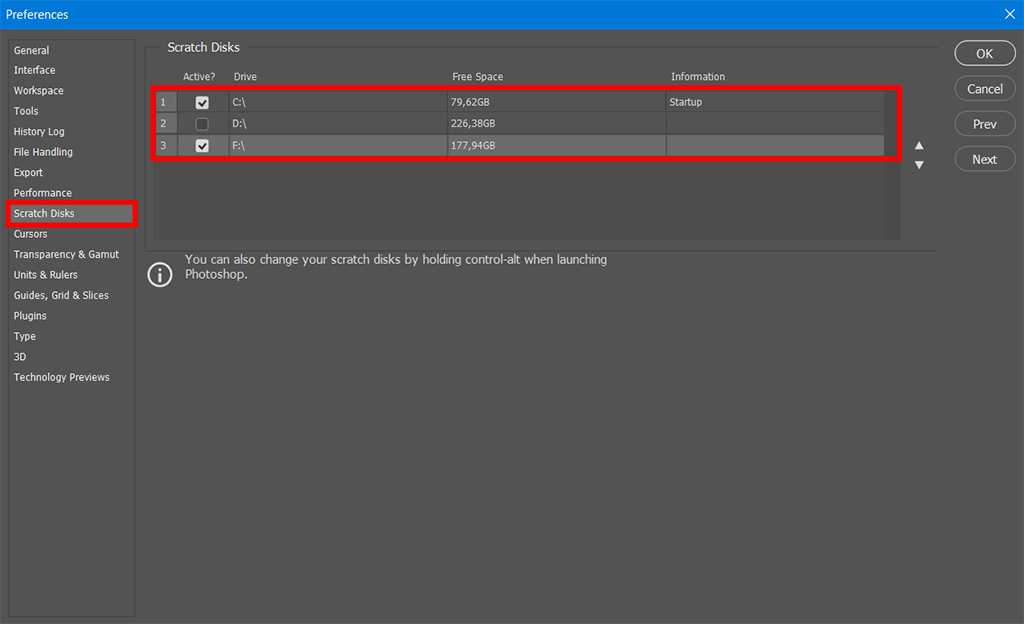
In the dialog window Preferences, select or deselect the Active check box to enable or disable a scratch disk. To change the scratch disk order, click the arrow buttons.
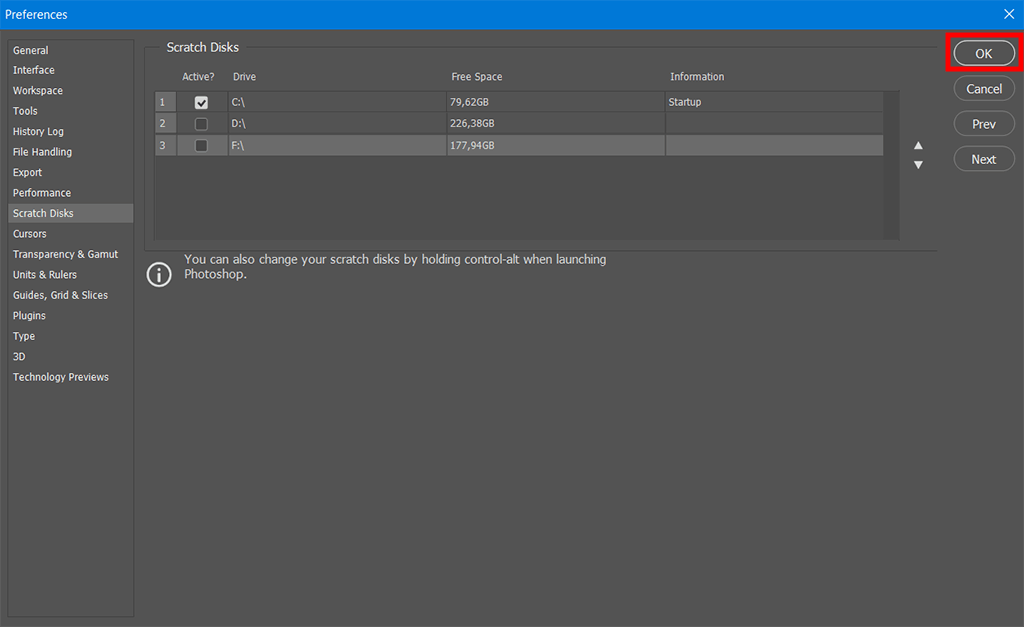
After you’ve selected the options you want, press OK. To apply these changes, restart Photoshop.
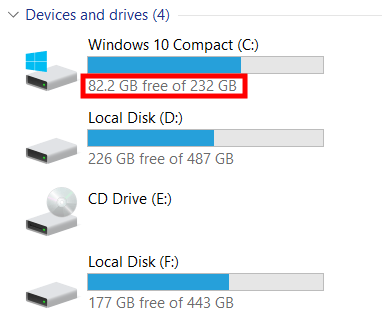
You can estimate free space on your computer at the menu Devices and drives. The minimal amount of space on your scratch disk should be 6 GB for the Photoshop desktop. However, this is the minimum, while the accessible space Photoshop checks on the scratch disk, which is 6 GB, must be subtracted from the actual amount of the free space on the disk.
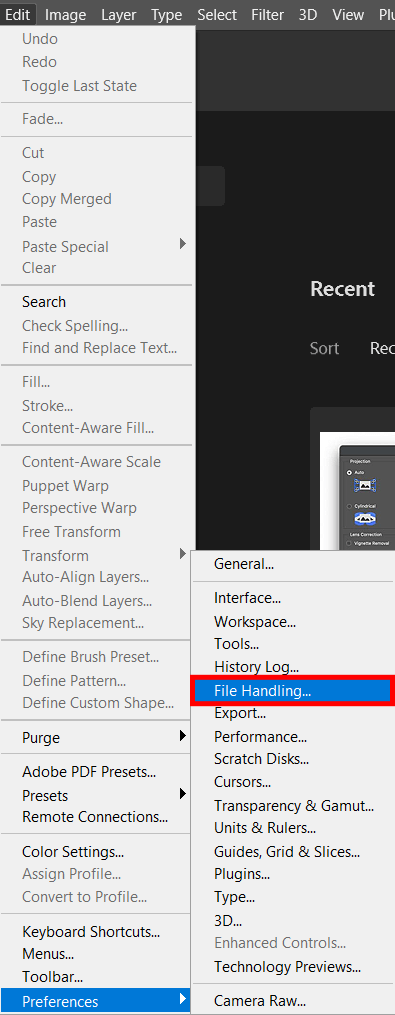
You can bate the size of the temporary Photoshop file (from scratch) but at the risk of disabling automatic recovery by cutting off Automatically Save Recovery Information: Edit (Win) / Photoshop (Mac) > Preferences > File Handling.

After opening File Handling, you can set the options for saving files. Put a checkmark next to the option Automatically Save Recovery Information Every and select the number of minutes.
That's it! Don't forget to estimate the free space on your scratch disk to avoid Ps malfunction.