Instagram was launched on October 6, 2010, and started as a social network where people shared their selfies and food pictures. In just a couple of years, Instagram became an enormous platform for promoting all kinds of services.
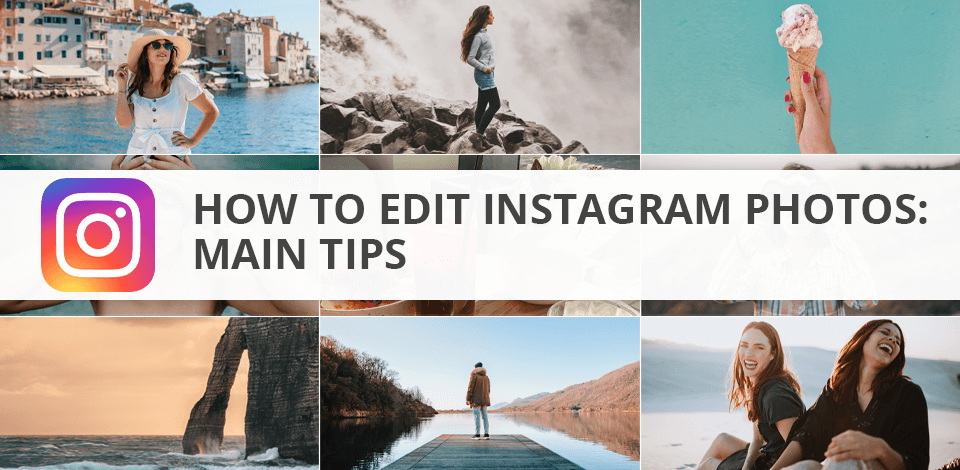
Nowadays, Instagram has over 500 million active users per day. As a result, more and more people are interested in learning how to edit Instagram photos to make them look beautiful and professional. Since Instagram is a visual platform, posting high-quality images is essential for building a successful Instagram marketing strategy.
The easiest way to ensure your image will look great is to take the photo with a camera for Instagram. If you don’t own a professional DSLR, be sure to pick a smartphone that comes with a terrific proprietary camera like the iPhone 13 Pro, or the more reasonably priced Samsung Galaxy A12.
Give preference to taking photos in natural lighting, otherwise, it’s advised to shoot in HDR mode if you want to get the colors right.
The same principle is true for close-up and outdoor portrait photography. Pick a photo that will look good in your Instagram feed. Keep in mind that if the image is too small, it might appear blurry or suffer from rough textures once uploaded.
Pro Tip: If the image's resolution doesn't meet Instagram's requirements, it will look blurry regardless of how much editing work you've put into it. Additionally, keep in mind that photos can't be edited once they are posted. Your image should be at least 1080 pixels wide to be displayed properly. The app will crop the photo as a square automatically but you can tweak it to keep the original width or height if needed.
When learning how to edit photos for Instagram, try to stick to a certain color scheme. You can do so by using similar backgrounds, objects, or filters. Nowadays, Instagrammers also love to use retro film filters and vintage effects that you can see in traditional film photography. Additionally, Instagram users tend to add a lot of beige, neutral, and cream tones to their photos. This picture editing trend gives the image a vintage look and a sense of elegance.
Top Instagram photographers and bloggers play around with tones, adding a new one to each line on their Instagram feed. Such an approach allows you to ensure your profile looks stylish and is easily digestible. This method is also suitable for segmentizing and categorizing products if you’re using Instagram for business.
A stylish feed with a clear structure looks dynamic, eye-catching, and increases your chances of attracting more viewers. That’s why I want to explain what patterns you can use to transform a chaotic collection of photos into an aesthetically-pleasing arrangement.
Columns. This idea has you selecting a unique style or theme for each column. For instance, one column can feature useful posts, for example, about skincare, the second one – photos with friends, and the third one will contain all other posts, for instance, the implementation of various portrait photo ideas. The main thing you have to take care of is ensuring all columns match each other at least in some way.
Diagonal. Such a layout looks original and helps guide the viewer’s glance from one post to the next. The highlighted diagonal can contain backgrounds with titles or live photos. This arrangement requires you to upload images in a specific sequence so be sure to prepare a content plan ahead of time.
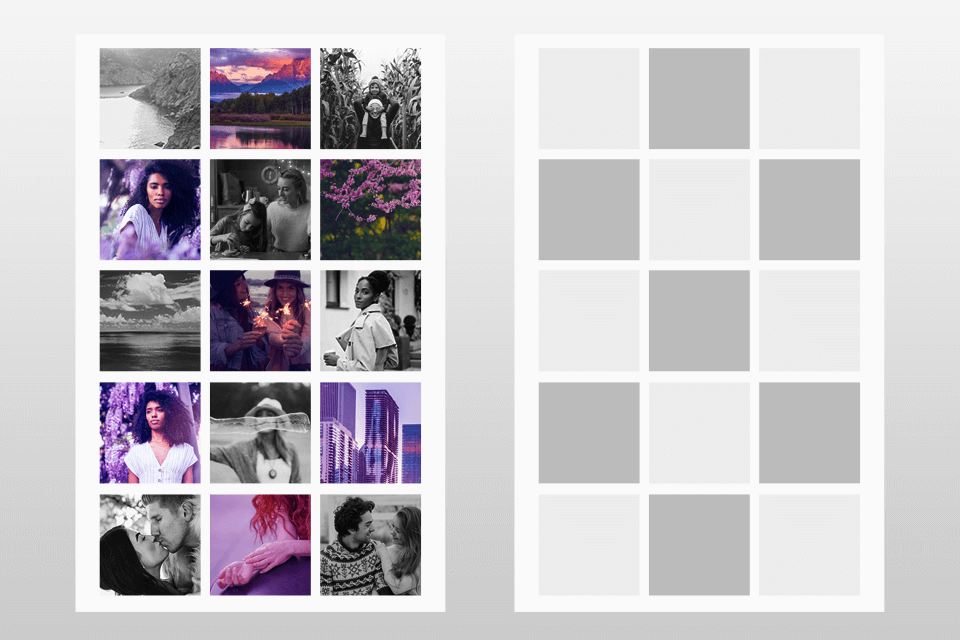
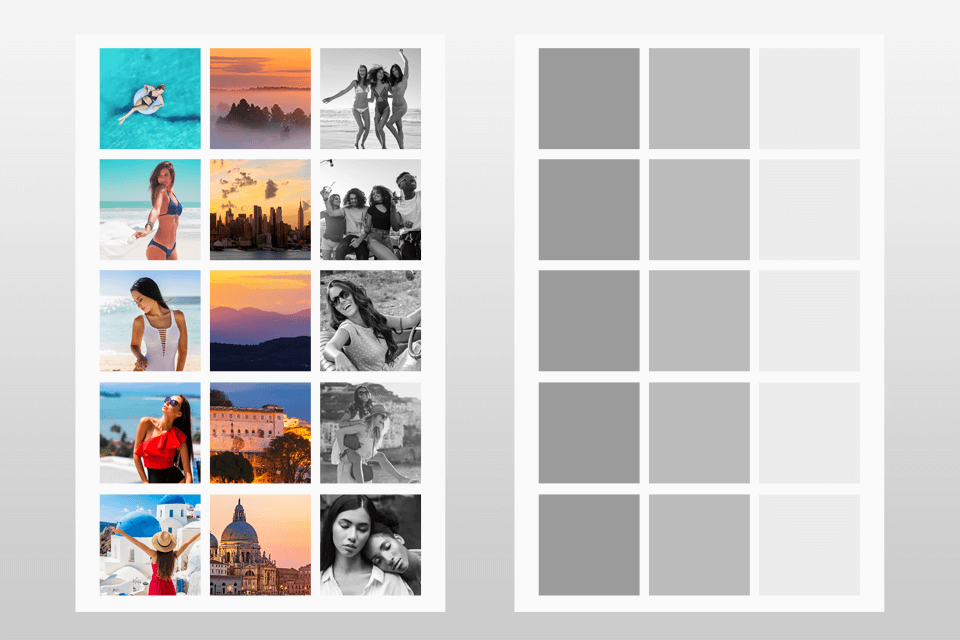
Checkers. One of the easiest layouts to implement that looks dynamic and original because of its contrast. Some examples of complementing combinations include colored and black-and-white images, single-tone and ornamental posts, portraits and landscapes, backgrounds, and photos. Simply post images of both types sequentially without having to worry about planning out your posts ahead for a week.
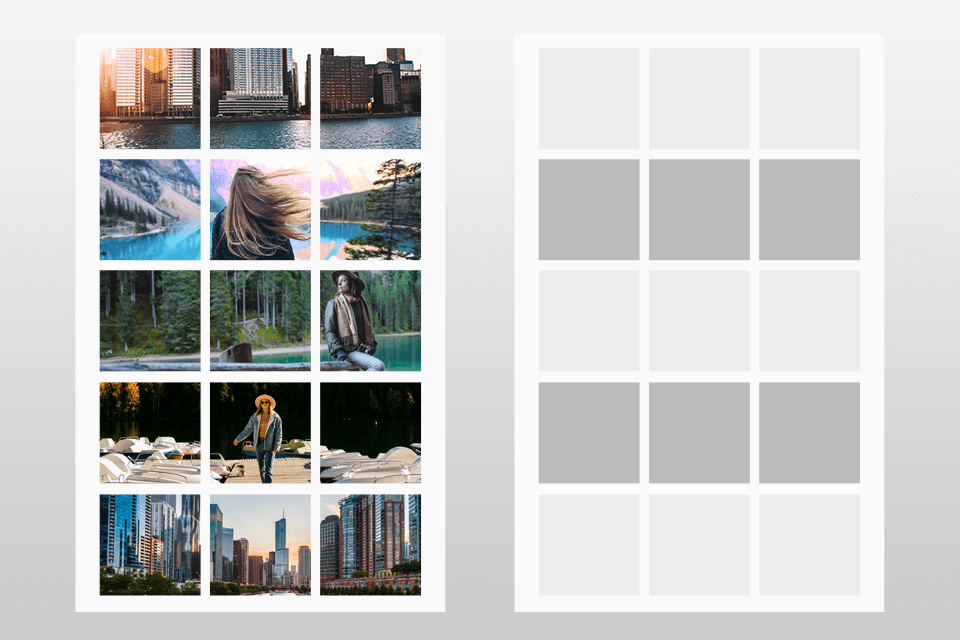
Horizon. This layout also uses columns just horizontally. You can either post 3 photos in the same style or split a panoramic image into 3 parts. The only downside is that you have to post 3 images in one go to maintain the overall feed structure. That’s why this option is better suited for visual-heavy blogs that are led by photographers, designers, or fashion boutiques. If you spend any time on Instagram, you have likely come across the acronym NFS. You might be wondering what does NFS on Instagram mean. NFS stands for “Not for Sale” and is commonly used by photographers to indicate that their work is not available for commercial use. It’s important to understand this term when using Instagram for business purposes, as you don’t want to infringe on someone else’s intellectual property.
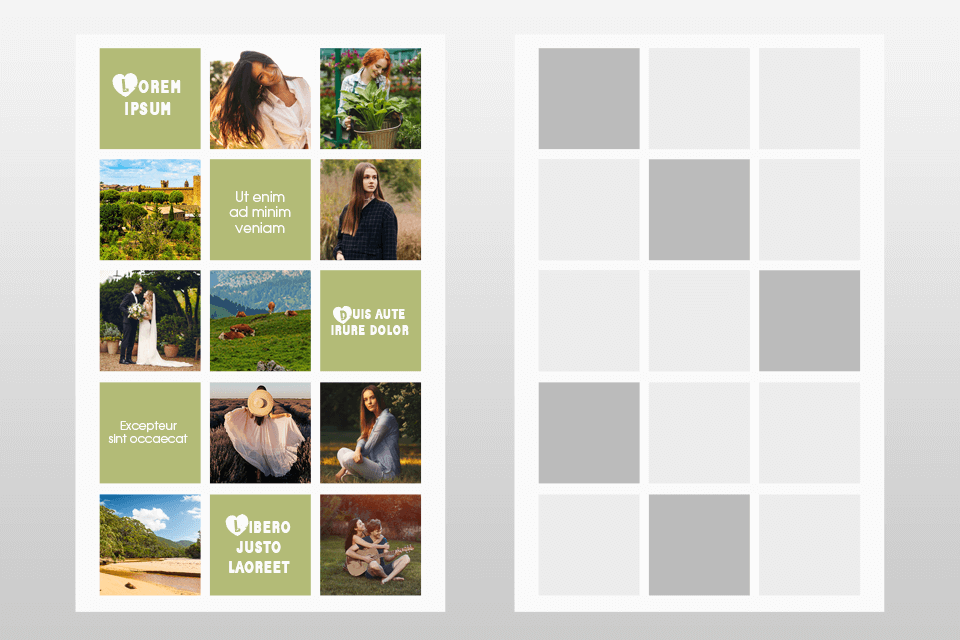
Pro Tip: Consider using the Instagram PUZZLE grid template to make a feed layout that will catch the attention of your target audience and introduce them to your product or services in a unique, aesthetically-pleasing manner. Such an Instagram photo edit layout is perfect for travel and lifestyle feeds, fashion boutiques, photographers, etc.
If you want to guarantee all your Instagram photos are clear and detailed, you have to make sure you’re using the correct sizes. Currently, Instagram’s max supported resolution is 1080x1080. If your photo won’t look good as a square, you can bump the resolution up to 1080x1350.
In terms of occupied memory, Instagram sets the cap at 30Mb. It’s recommended to upload images in JPEG or PNG formats. If the file is too large, compress it before uploading. You can employ Caesium for this purpose, which is a convenient utility with an open code designed for compressing PNG, JPEG, and BMP images.

If you don’t possess the necessary retouching skills but want to have a successful Instagram, it’s a good idea to entrust Instagram pictures editing to professionals. Experienced retouchers will quickly enhance your photos while relying on all the latest techniques and Instagram trends. You’ll receive professional images that will boost the engagement you receive on all popular social media for photographers, including Instagram.
Our retouchers rely exclusively on the best photo editing software for PC, like Photoshop and Lightroom to deliver top-tier image editing results.
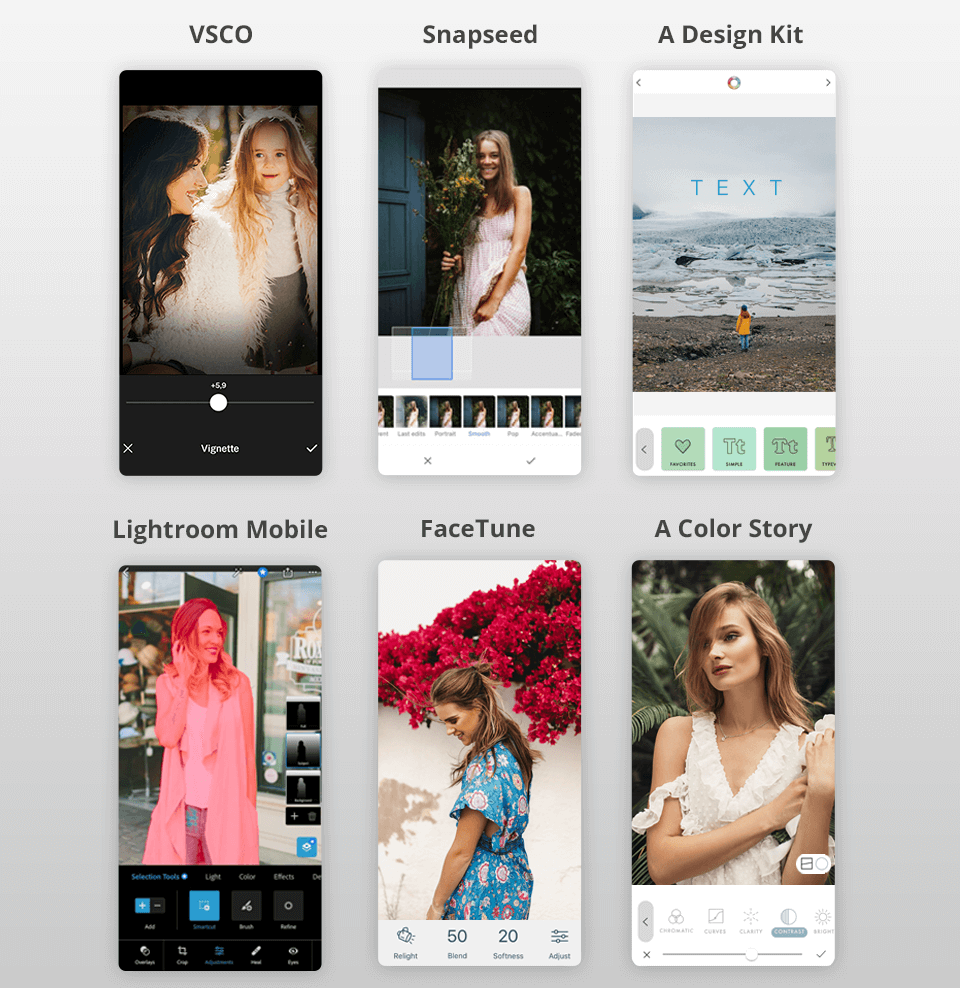
Every instablogger has several apps that allow them to change their photos until they are barely recognizable. Usually, their collection includes VSCO, Snapseed, Facetune, A Design Kit, Lightroom Mobile, and A Color Story, which are among the most popular Instagram photo editors available on iOS and Android.
VSCO is regularly mentioned by photographers as one of the best free photo editing apps available on smartphones, particularly because of the offered library of premium, high-quality filters. It’s also supplied with a handy image editor and an integrated camera with expanded settings.
Snapseed comes with an array of original filters and effects, but it’s mainly used for its Photoshop-esque feature set that includes ambiance, selective adjustment, and brush tools. It even lets you delete people from images and isolate separate objects to edit them without affecting the entire photo.
A Design Kit includes funny stickers, realistic brushes, and different backgrounds. It allows you to draw textures as well as add simple designs and funny stickers to your photos.
Lightroom Mobile allows you to perform professional image editing straight on your smartphone or tablet and share your photos with other users. You’ll have access to amazing shooting capabilities, high retouching quality, and a variety of tools for high-precision image editing, for instance, VSCO Lightroom presets.
FaceTune is made specifically for retouching and enhancing portrait photos and selfies. It lets you add makeup, minimize wrinkles, highlight specific facial features, improve skin tones, whiten teeth, etc.
A Color Story provides an impressive collection of over 120 effects and professional tools that encompass such settings as functioning curves and HSL. The app also has a grid preview feature that allows you to plan how your Instagram feed is going to look in advance.
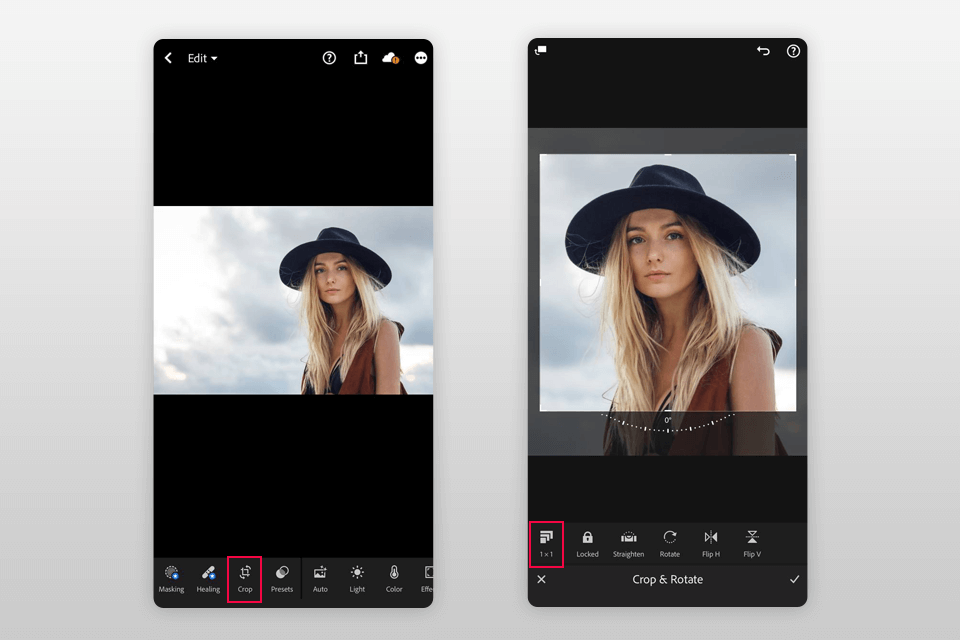
Even though Instagram can crop the uploaded photo automatically, it’s best if you do it yourself in an image editor. This will help you preserve a higher photo quality and center the different image elements as you see fit. You can do that in one of the photo editing apps for Android or iOS, as well as with the help of products like Lightroom and Photoshop.
You can also fix any compositional issues like rotating the photo to even out the horizon line. Crop the images while following the 1x1 aspect ratio for square images and 4x5 for portraits.
If the original photo is under or overexposed, you can fix that issue in an image editor. However, you should approach this task cautiously since it’s very easy to ruin a photo by whitening bright areas or leaving behind underexposed dark parts.
This is also the stage when you should adjust the contrast. Depending on your idea, you can smoothen the contrasts to put both the dark and bright areas in the same tonal range. Alternatively, you can strengthen the contrast to bring out the highlights and emphasize the shadows or dark areas.
Pro Tip: You can also adjust the exposure manually using the Camera app. Open it and tap on the focus point. Once tapped, you’re going to see a square or a circle around the focal point. To adjust the exposure level, tap any part of the screen and swipe upward or downward. The former will brighten the image while the latter will make it darker.
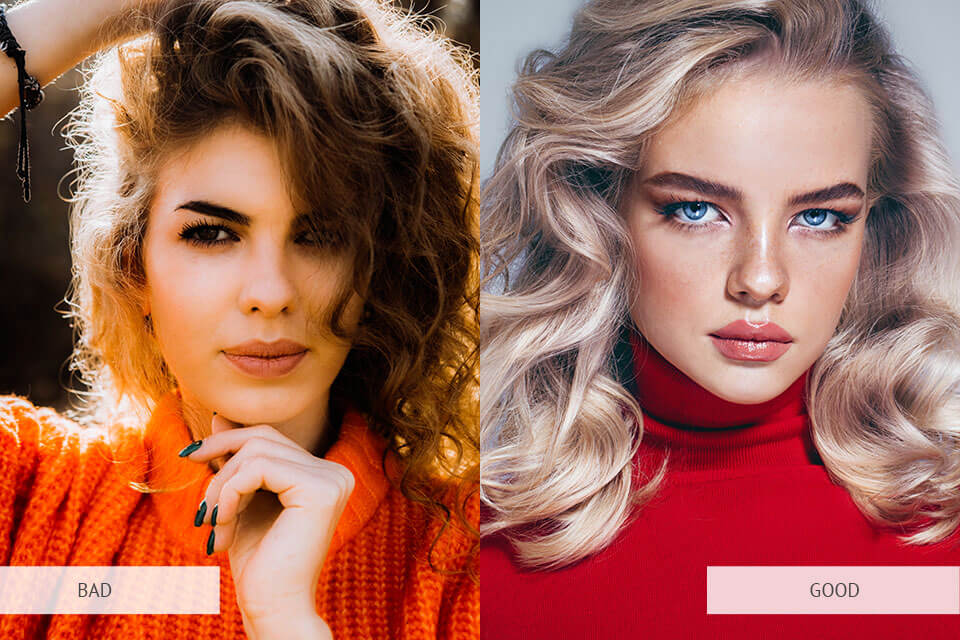
When it comes to portrait photography, it’s important to preserve the natural skin tone. You can perform all kinds of image manipulations you want with the main settings just don’t go overboard with the skin retouching.
When browsing through photos of popular Instagrammers, you’ll notice that they all follow this unspoken rule so that no one can accuse them of promoting unrealistic body beauty images. Even if the color scheme of a photo is heavily altered, the skin tones remain natural. Alas, if you want to simply rely on cool filters and automatic adjustments rather than doing the editing manually, you're bound to ruin the skin tones in some of your images.
Pro Tip: VSCO has a built-in skin tone slider that allows you to smoothen the skin hue without going overboard. This feature is also handy for fixing color casts without applying destructive filters. Another way is to employ the HSL tool to specify the skin color values and then adjust the sliders accordingly.
When learning how to edit pictures for Instagram, you have to tread particularly carefully when working with white balance. It’s no secret that no light source can cast entirely white light, which is why it’s essential to understand the different possible color temperatures that affect the white balance. For instance, a sunset photo will have a warm light while overcast skies will make the image colder.
Tubular fluorescent lighting creates a cold white light, which you can replace with a warmer tint by employing a regular table lamp. Poor white balance can lead to issues when displaying white and grey image parts as well as severely distort the skin tone color.
Pro Tip: The aforementioned Snapseed app allows you to perform automatic white balance correction. Simply select “White Balance” on the main panel. If you’re unhappy with the automatic result, you can make manual adjustments using the provided sliders.
Increasing the sharpness of a photo allows you to make it look crisper and more detailed. Most advanced apps come with several sharpening features. Start by tweaking the overall sharpness level (from 0 to 100). Begin at 50% and try going in both directions until you’re happy with the result.
Try out the extra sharpening tools included in your editing software to see what effects you can get. Clarity can be a particularly efficient tool if you want to emphasize the edges of some objects to give a photo more punch.
You have to pay close attention to each part of the shot to determine the effect of every sharpness adjustment. While highly-detailed photos aren’t a necessity for Instagram, they are a must-have if you want to enlarge and print your work.
Note: Increasing the sharpness won’t magically fix an out-of-focus photo. No editing feature can make such a miracle. Additionally, if you boost the sharpness too much, you might create an unnatural halo effect around different objects.
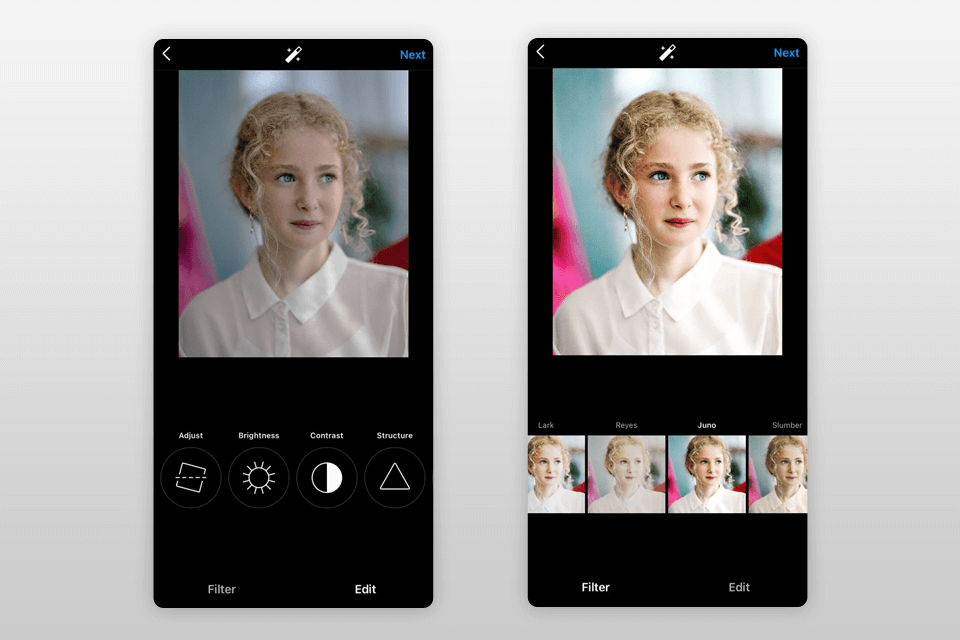
These filters will not only alter the tones in your images but also their entire feel and mood. Check out some of my go-to filters and discover how you can edit pictures for Instagram with their help:
Moon Filter. If your goal is to achieve a trendy B&W effect that emphasizes the shadows and makes the image more vivid while adding a vintage feel to it, this is the filter for you.
Valencia Filter. It adds warmth to the image while creating a vintage atmosphere without completely washing out the colors.
Crema Filter. This effect desaturates the image and creates a creamy, vintage vibe. It looks particularly great when applied to images without overly bright colors.
X Pro II Filter. This filter boosts the contrast and applies vignette edges while increasing the overall saturation. It provides the best results with travel photography.
Lo-Fi Filter. This is a great option for urban and travel photography. It increases the overall saturation while adding substantial depth to the shadows.
Lark Filter. This tool desaturates reds and strengthens blue and green tones. It’s a great choice for landscape and street images.
Hefe Filter. This unique filter creates a vintage effect while adding a darker frame and applying a yellow tint that makes the photo more mysterious and attention-grabbing.
Pro Tip: You can also create an unusual effect, like a Paint Splash Effect in Photoshop with Natalia Seth. Thanks to this lesson, you will learn unusual and trendy image editing techniques that will decorate your Instagram with unusual photo compositions.
If you want to share the picture immediately, then do it after providing all the relevant information. Add a geotag, caption, and tag any relevant Instagram users. Finally, click the “Share” button.
If you are not quite ready to publish the photo but want to save the changes, pay attention to this great trick. Turn on the airplane mode on your device. It allows using Instagram as an image editor without sharing the results with your followers. But first, make sure you have saved the original pic. After that, turn on airplane mode.
Android devices. If you have an Android phone or tablet, then you need to swipe down from the top of the screen, and then from right to left. Find the “Settings” menu and choose "Airplane mode". Turn it on. That's all.
iPhone/iPad. Activating the “Airplane mode” is done in a few simple taps. Swipe up from the bottom of the screen and tap the airplane icon. You can also just go to “Settings”, then “Wi-Fi”, and turn “Airplane mode” on.
Finished? Well done. Now you need to return to the editing screen and click on the “Share” button. Finally, you will see a message about the file upload failure. Don’t worry as the edited image will be automatically saved to the gallery.
These Photoshop filters will allow you to increase your Instagram following and gather more likes. The provided tools will be useful to anyone who runs an Instagram blog, eCommerce store, or wants to catch up with the newest trends.
With the help of these filters, you can ensure all your photos look professional and are edited in the same style. They're applicable for most photography genres including portraiture, travel, event, etc.


