After editing, you probably want to evaluate the changes made and compare the original and output pictures. The before and after Lightroom feature is a great option to see how well you've done your job. You can activate it by pressing the backslash key [\]. Once you do this, you can see how the image has changed after all your manipulations.
Below, I'll share a few simple tips on how to view before and after in Lightroom, how to customize this feature, and some useful keyboard shortcuts for a quick workflow.
To get started, you need to go to the Develop Module of Lightroom. To do this, you need to select an image from the Lr Libraries and press [D] on your keyboard. Then you can follow the steps below. Keep in mind that the before and after option is not available in the Library or other program sections.
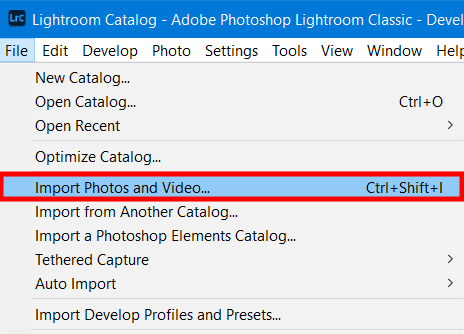
Launch the program and open the image you want to edit.
Mac and PC users can press the \ key on their keyboard to see how the photo looked before the changes. You will notice the “Before” tab in the upper right corner of the preview window. Now you can see what the photo looked like before your edits. To return to the improved image, you need to press the same \ key again.
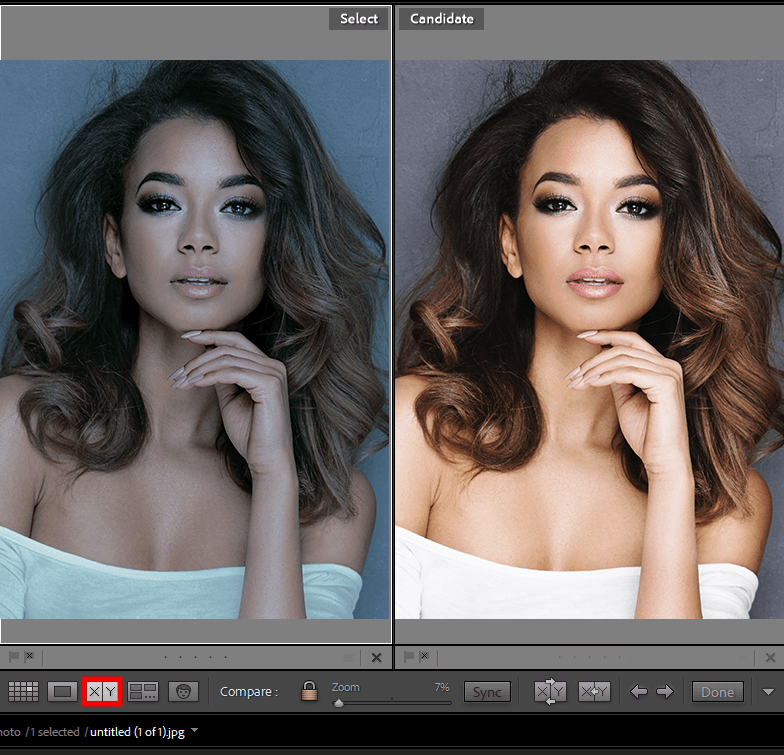
In some cases, you should see both pictures (the edited and the original) side-by-side. You can get this view in two ways. First of all, you can click on the X|Y icon in your toolbar. When your toolbar is not shown, you need to press T on the keyboard. Alternatively, you can open it inside the Develop Module by following this path: View > Show Toolbar.
Sometimes, a X|Y button is not seen in the Develop Module (it can be on the bottom left). Find the small triangle under the photo and click on it. Then choose View Modes from the drop-down menu. As a result, you can choose the before and after Lightroom view you want.
Another way is to press Y on your keyboard. You will instantly be taken to the Left/Right picture comparison. To go back to the edited picture, you need to press Y again.
In this mode, the original image will be on the left side while the edited image will be on the right. This before and after Lightroom comparison option works great with tall pictures like portrait-oriented photos
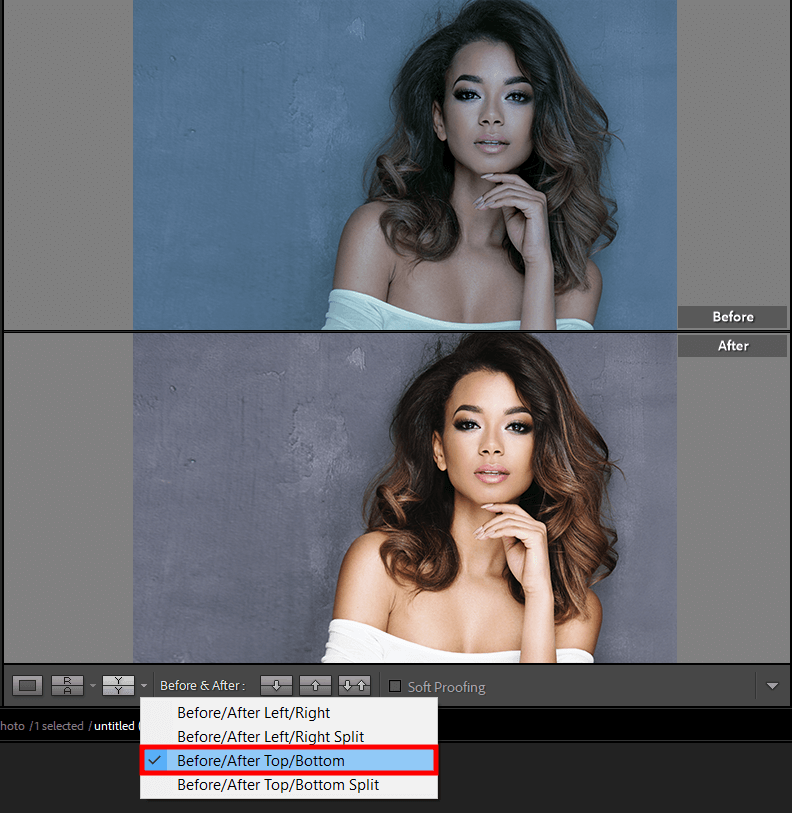
The Top/Bottom view is another way to check how well you've edited an image. To get to it you open the Before & After tool and select Before/After Top/Bottom. Mac users can press the [Option + Y] combination while [Alt + Y] is suitable for Windows devices.
You will see your original photo on top and the modified one on the bottom. I recommend using this view mode for horizontal images.

Using Split Screen view is another way to check your editing results. To switch to this mode you can use Lightroom before after shortcut (Shift + Y) or select Before/After Left/Right Split from the Before & After tool.
With this view option, you can see the whole image in two parts: the original and the edited one. This mode will come in handy when you want to be sure that you don't make too many changes.
Plus, you can see your photo in this mode from Top to Bottom. To activate this option, you need to select Before/After Top/Bottom Split from the Before & After tool or use the following keyboard shortcuts: [Alt + Y] on Windows or [Option + Y] on Mac.
This shortcut is similar to the top and bottom before and after view. Remember if you selected the top/bottom split option manually, you will get the same shortcut to this view. In cases where the standard top and bottom view is activated after clicking the shortcut, you should use the Shift + Y combination to change it to the horizontal split-screen view.
This Lightroom tutorial includes only 3 steps because unlike the desktop version, comparing before and after pictures in Lr Mobile is easier. The downside is fewer viewing options than the desktop version. Here are a few tips on how to see before and after in Lightroom Mobile.

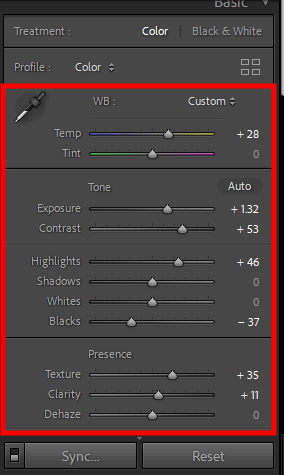
Edit your shot to make the photo brighter and increase contrast.
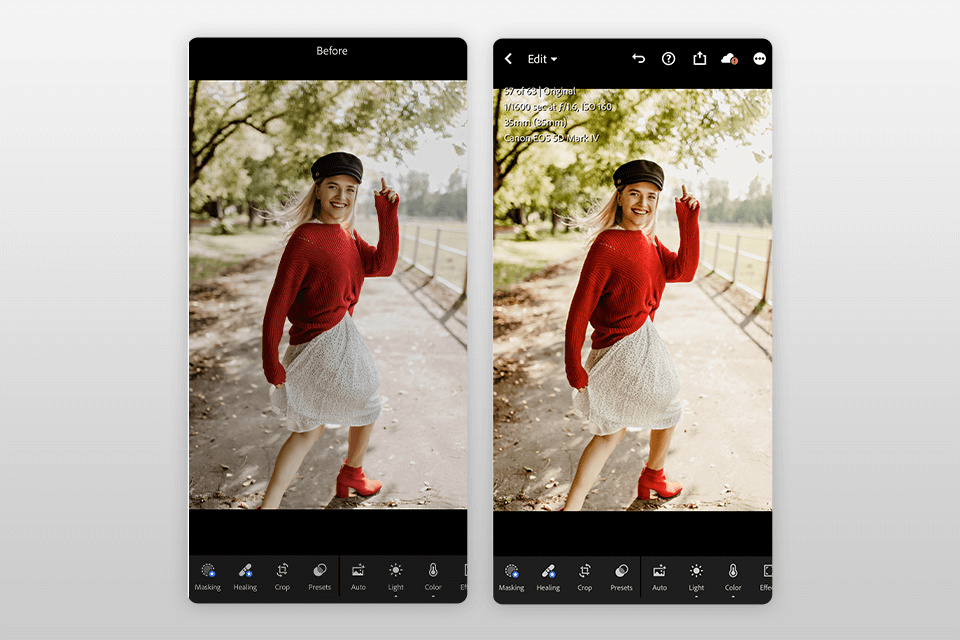
To compare the modified photo with the original one, you need to click and hold on your image to toggle the “Before” picture. To return to the “After” version, you should let it go. You can switch between before and after previews as much as you want.
Yes, you can. Follow these steps: Launch a Before & After comparison view. Get a list of your past manipulations for this photo by selecting History from the left side panel. Now you can switch any edit from the Before section list by clicking and dragging it. As a result, you can compare your final photo with any edit you've made.
This software does not contain sliding before and after preview options. You can get a similar preview using the Left/Right Split option. Press Shift + Y to enter this mode. It allows you to watch your image slide down the center but you can't do it back and forth.
To activate the full-screen view you need to right-click on your photo and select Create Virtual Copy. Choose the virtual copy image and press Command/Control + Shift + R to reset it. You can also use the F key to switch to full-screen and toggle the before and after photos with the arrow keys. Press F once again to return to standard view. When you're done with the virtual copy, select and delete it.

You can improve photos in Lr not only manually, but also using ready-made plugins. With their help, you can make your photo brighter, more contrast, add a matte effect or turn a photo into a shot from a movie in one click. This collection contains 500+ amazing presets. You can use them with all Lightroom versions.