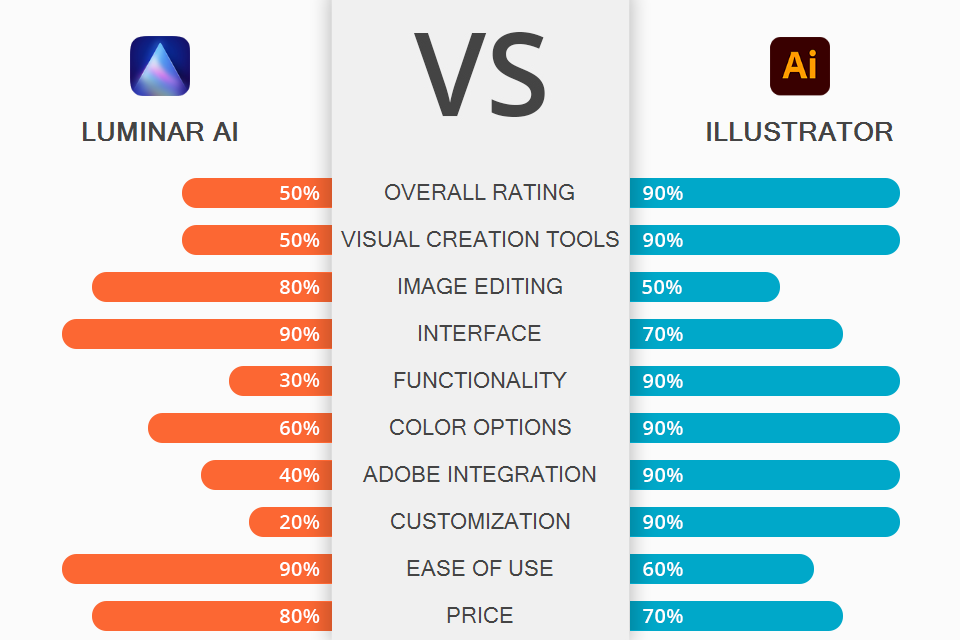
Picking a side in the Luminar AI vs Illustrator battle when it comes to producing visual assets for social network posts as well as branding elements for your business is rather difficult. While Illustrator is far more advanced and feature-filled, Luminar also has a lot to offer while being far better suited for beginners. However, is its functionality broad enough or should you stick to using professional-level software?
Illustrator is an Adobe product that was created for producing vector illustrations, logos, icons, typography, and all kinds of other complex graphic projects.
Luminar AI is a rather straightforward editing choice, with most of its features being based on AI technology. The software also has a modest toolset for creating visual assets like collages, layouts, etc.
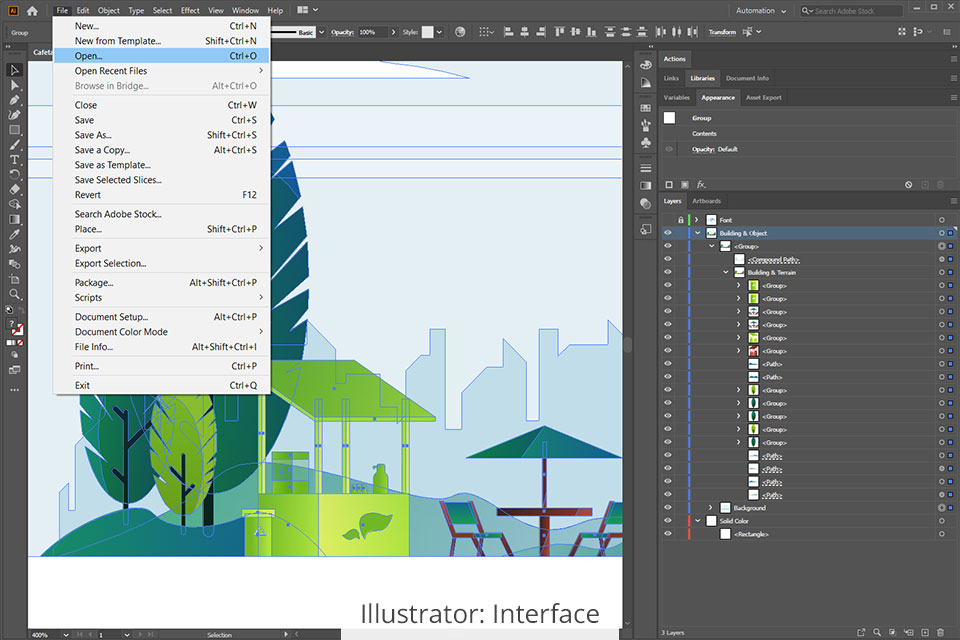
Illustrator offers a familiar UI that resembles most Adobe products. At first glance, it might seem like mastering this software will be extremely problematic, especially if you’re a beginner.
However, once you spend a couple of hours working in this environment, you’ll notice how intuitively everything is arranged and organized. In any case, you can always turn to the Illustrator tutorials on the official website or look up some specific information online.
You design and adjust your projects with the help of different elements like panels, bars, and windows that are all a part of the workspace. Illustrator can be customized to fit your exact needs by picking one of the available workspace presets or designing one for yourself manually.
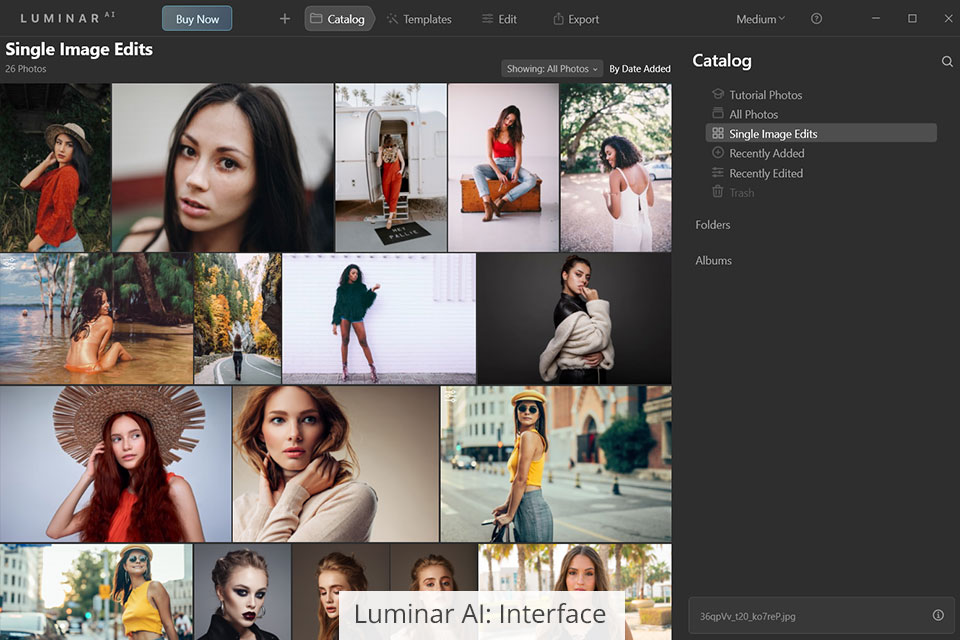
Luminar AI employs a modular system that ensures it’s extremely user-friendly since every module includes tools that are required for handling specific tasks. The software provides two primary modules – the Library and Edit view. The user can flip between them any time they want.
Unlike Illustrator, Luminar’s UI feels intuitive and convenient right out of the gate and requires a lot less time for you to figure out its feature set. The Top Toolbar comes with general and frequently used features. The Side Panel can be found to the right of the main workspace and contains all available adjustment tools, layers, and the histogram. The Side Toolbar is supplied with an array of image editing features. Lastly, the Preset Panel contains single-click presets and can be found at the bottom of the workspace.
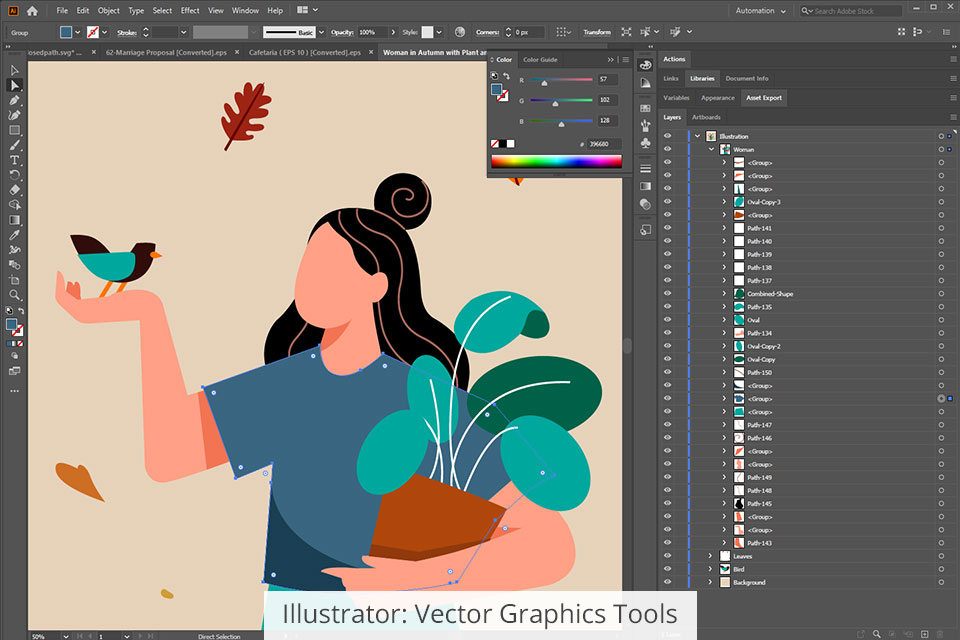
Illustrator is a pro-grade vector graphics software that you can use for producing breathtaking graphics, vectorizing drawings, typography, and creating artistic effects. It offers a huge selection of tools that are packed into a single solution while Luminar AI’s graphic design toolset is rather limited.
You can rely on this solution to design all kinds of vector artworks while employing points, lines, curves, and shapes that are driven by mathematical formulas. Regardless of how much you scale a vector illustration up or down, you won't notice any loss in quality or pixilation, meaning you can resize the project as you see fit at any time. Unlike Illustrator, Luminar AI is designed for working with raster images that consist of colorized pixels that lose their quality when you’re trying to scale up a picture.
You can employ vector graphics tools to create any illustration you want. The software contains sets of adjustable brushes, pens, pencils, paintbrushes, and an array of other key tools.
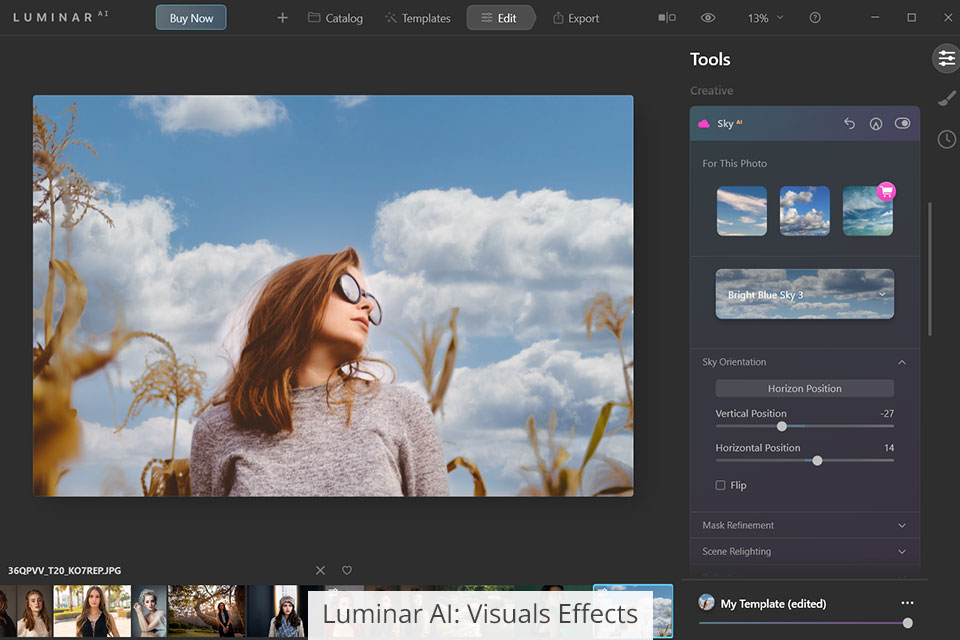
Luminar AI is primarily designed for processing of images but it also offers a selection of features that will help you transform your photos into visual masterpieces that you can use for creating ads and social media posts. The newest version of this solution has introduced masking and layers that let you design artistic layouts and collages.
In contrast to Illustrator, this solution doesn’t offer the tools necessary for creating graphics from scratch (as it only includes a single round enhancement brush) but it can still be employed for enhancing or removing the background or separating different parts of an image. You can use photos to create complex visual assets, replace the sky with the Sky AI feature, add textures, and much more.
Meanwhile, the Composition AI tool allows you to conveniently tweak the composition, crop the image, or alter its perspective. Additionally, once you employ the Structure AI tool, your image will become clearer and more detailed. Unlike some of the more complex software like Adobe Illustrator that force you to spend hours of your time making manual edits, Luminar AI lets you change the look and feel of an image in just a couple of clicks.
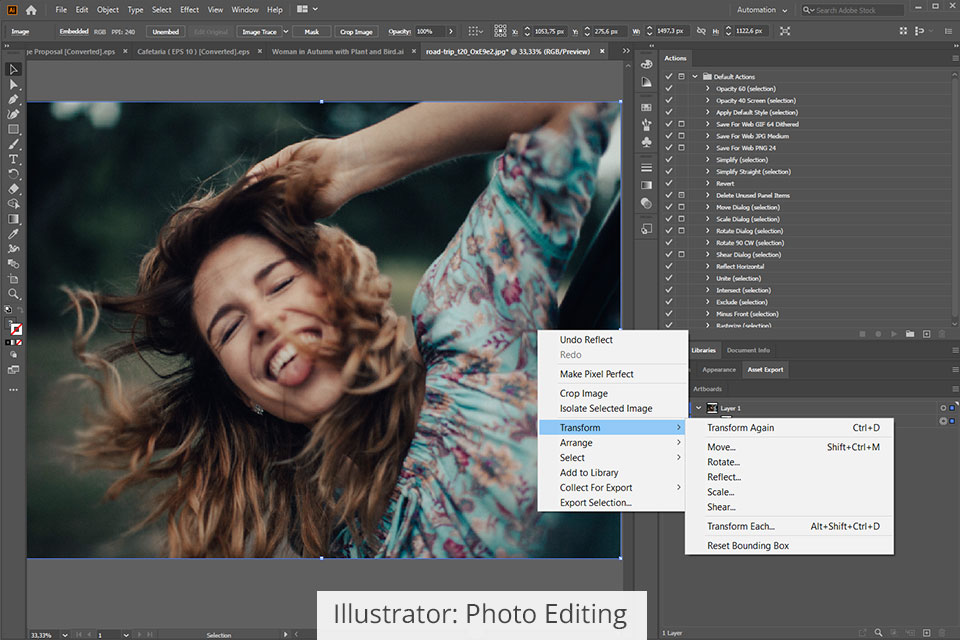
Illustrator isn’t considered picture editing software but it still offers some features that you can use to adjust the colors of your photo, crop it, or enhance it with special effects. A particularly handy feature included in this solution is one that lets you transform bitmap pictures into vector files. You can employ the Image Trace feature to convert a bitmap photo into a vector image in just one click before you continue editing it without any restrictions.
To ensure the processing workflow is as simple as possible, Illustrator lets you save shortcuts. This pretty much sums up everything you can do with raster images in Illustrator so if you’re interested in having access to more tools, consider using Luminar AI.
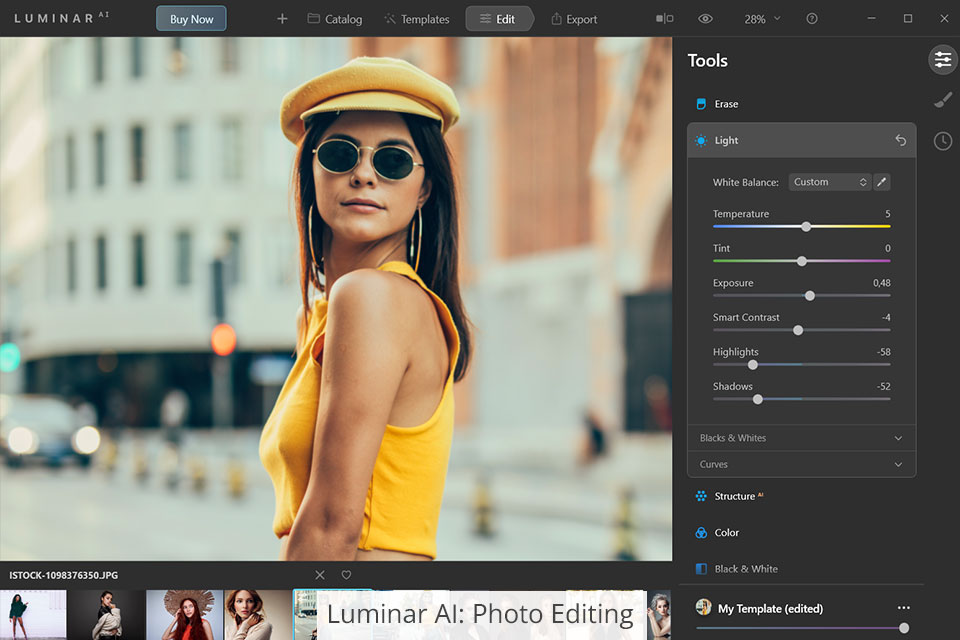
Since it’s an AI photo editor, Luminar AI is supplied with automatic features designed for processing both JPG and RAW photos. If you want to enhance a portrait photo, you can employ tools like Face AI, Body AI, and Skin AI. For instance, if you apply Body AI, the software will automatically locate the body in the photo and will allow you to enhance its various parameters with the help of intuitive sliders.
Luminar AI offers a variety of templates that automatically detect the subject of the photo and suggest an appropriate editing toolkit. Additionally, this software allows you to save the implemented settings as presets for future use, while Illustrator forces you to perform the same edits each time from scratch.
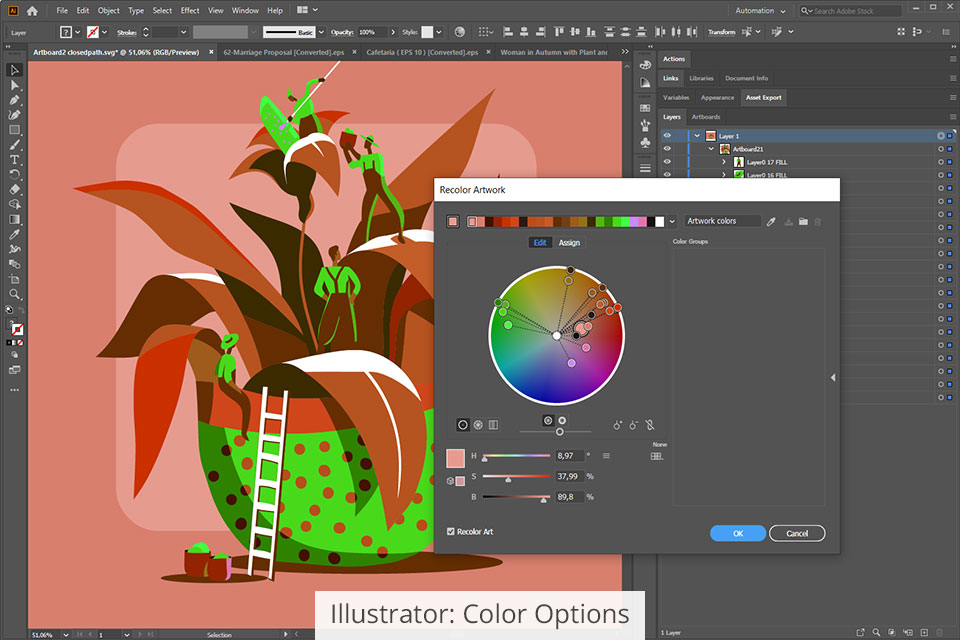
Illustrator allows you to work on graphic design projects in one of two color modes CMYK and RGB. You can use them to color your vector images for both digital and print purposes.
Employ the Fill tool to easily color a shape or its part in just one click. You can also benefit from customizable brushes that let you add contours or simply color the drawing while adjusting the width and size of a brush. The list of provided brushes includes quick fill, eyedropper, ruler, gradient, grid, and inkblot.
Additionally, Illustrator provides capabilities for creating color swatches and producing gradients. If you’d like to alter the color of the entire project, that can be easily done in this software. You can pick the required tones with the help of the Color Picker feature, which makes this solution the superior choice in the Luminar AI vs Illustrator comparison since the latter only offers automatic color parameters.
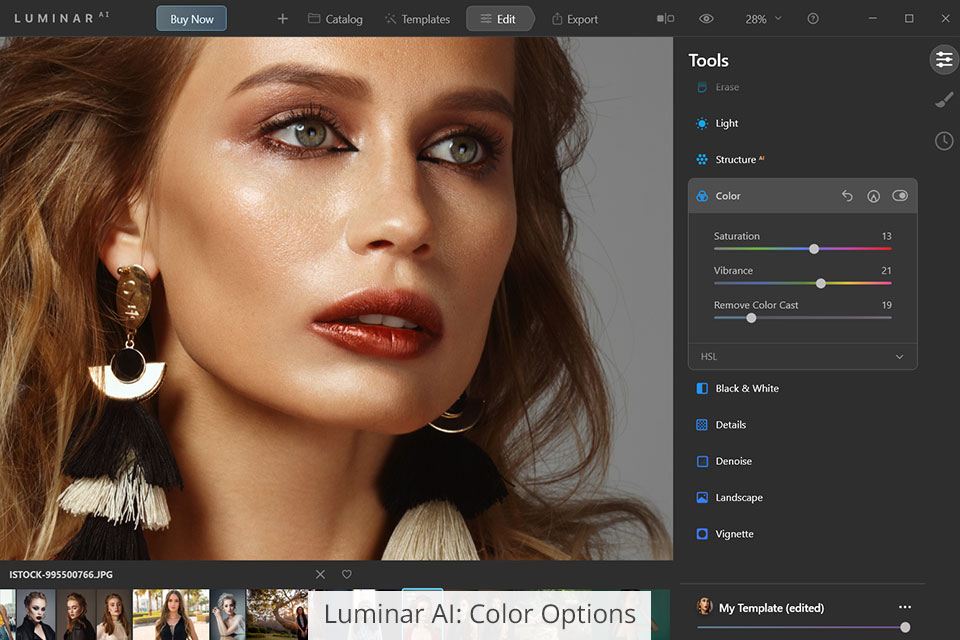
Luminar AI provides automatic color settings, meaning you won't have to waste any time creating an aesthetically pleasing color palette for your image. The Color Harmony AI feature can be applied to selectively improve the cool and warm colors in a photo. This tool lets you boost tone contrast and vibrancy as well as achieve artistic toning effects.
The Develop feature encompasses all standard color correction parameters: white balance, temperature, tint, exposure, contrast, shadows, blacks, and so on. To make an edit, you first have to select a brush, pick the image area you’d like to adjust, and then tweak the photo by dragging around different sliders. You can also employ AI-based tools to change the contrast, saturation, brightness, and other relevant settings.
Since Illustrator is a part of Adobe’s family, you can easily integrate it with other products under the same umbrella to broaden its functionality. Its potential integration with Photoshop is particularly important, as it allows you to work with raster images whenever needed. When integrated with Lightroom, you’ll see additional color options pop up in Illustrator’s toolset. Lastly, Adobe Fonts provides creative fonts that you can use for your vector graphics.
Luminar AI can be employed as either a standalone utility or a plugin for Lightroom and Photoshop. In the latter case, you’ll significantly expand your editing and graphic design capabilities since you’ll be able to create complex visual projects with all the in-depth customization parameters you need.
Examine the unique functionality provided by each software to determine whether you should pick Luminar AI or Illustrator for your visual projects:
Illustrator offers:
Luminar AI includes:
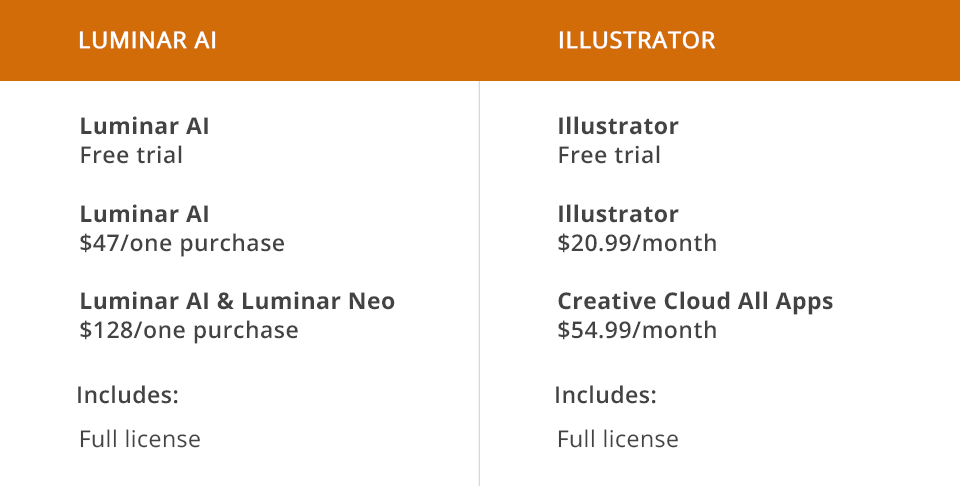
Illustrator offers a 30-day free trial version to all its users. Once the trial expires, you can purchase Illustrator either as a standalone app or as part of an Adobe product bundle.
All Adobe plans are offered as subscriptions. You can get Illustrator for $20.99 a month. If you’d like to purchase it along with other software, go with the Creative Cloud All Apps plan for $54.99 per month.
Luminar AI can also be used for free during a 7-day trial. Once you’re certain you’ll be satisfied with the offered functionality, you can get the full edition of Luminar AI for $47. The developers also offer an extended bundle that includes Luminar Neo. You can get both tools for $128.
Illustrator is a pro-grade solution for creating vector graphics that is primarily aimed at artists, graphic designers, students, photographers, and small to moderate-sized companies. It’s often employed for designing branding assets as well as highly-detailed visual projects and illustrations.
Luminar AI is a beginner-friendly pic editor that is filled to the brim with AI-based tools. It’s a great choice for beginner photographers and social media users who aren’t interested in manual settings and tools required for in-depth image enhancement.