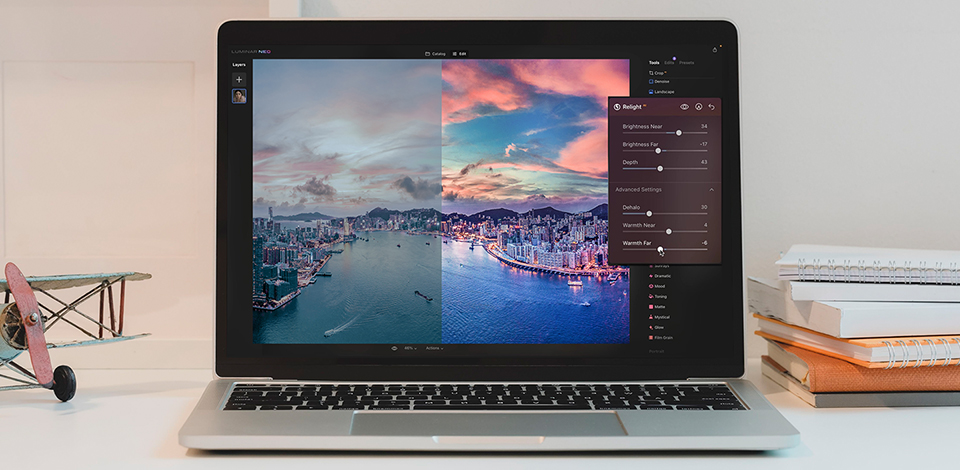
People, who are into professional editing, laud Luminar Neo features and tools a lot. Experts particularly like the possibility to relight a scene, replace the sky, remove distracting elements, and perform fantastic portrait enhancements in a quick and efficient way thanks to the AI-based nature of the software.
What’s more, there is a huge collection of image editing tools, which exceeds that available in analogs. This post covers the most demanded features of the program that you are sure to like from the get-go.

This automatic photo editor works wonders when it comes to defining objects in images and evaluating the overall depth. Based on the data collected, you can precisely select specific elements and parts of a picture.
The best thing about using this tool is that the process is automatic, so you may forget about manually selecting items. Just scroll through the list and choose the needed element.
Pro Tip: If there are any issues with detecting areas/objects, you can resort to brushes. They perfectly cope with improving different parts of a photo and controlling the masking process.
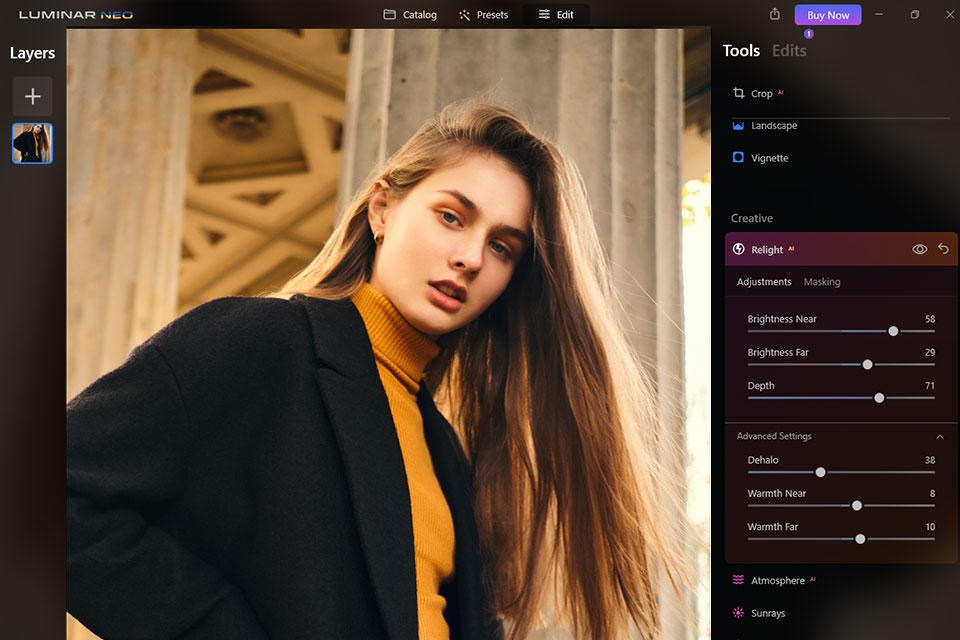
Retouchers, who use Luminar Neo as their main tool, claim that its Creative section is constantly updated and instruments presented there surpass similar tools in other programs. For instance, Relight AI allows users to alter the brightness in a specific part of a photo, without affecting the rest of the frame. All measurements are accurate thanks to embedded 3D AI mapping.
You can apply Dehalo, as well as near and far warmth. Such effects work well both in portrait and landscape images. In the photo below, you can see that a model in the foreground is brightened, while the background is kept dark.
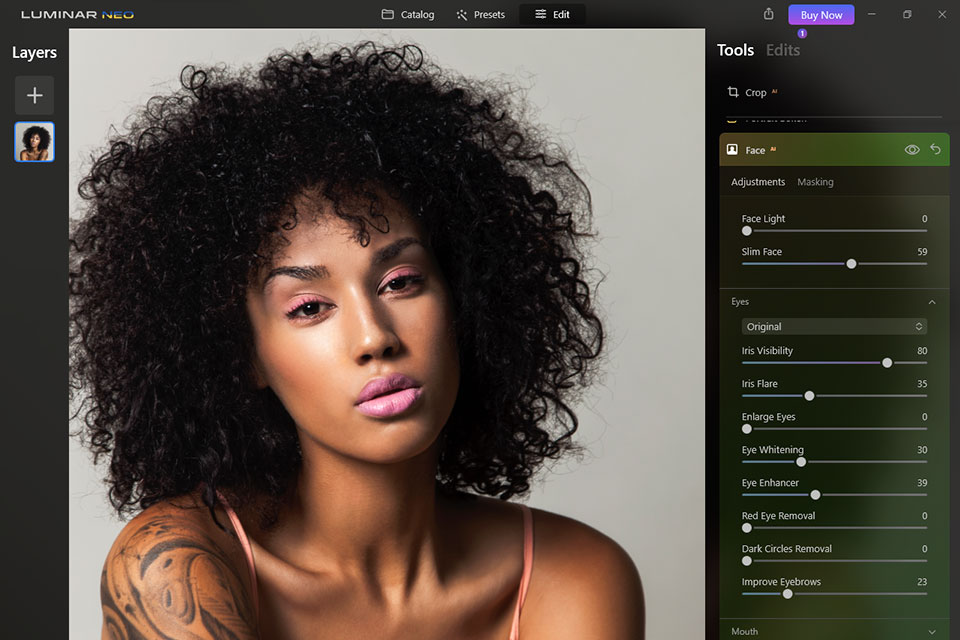
This is undeniably the most feted Luminar Neo feature by those involved in portrait editing. The collection of Luminar AI instruments is extensive but Face AI is indispensable for advanced work with portraits. Using it, you can lighten a model’s face, make eyes larger, slim some areas, etc. Such manipulations boil down to dragging sliders.
Besides, it is possible to change the color of the model’s eyes in an instant. In fact, you only need to choose another color and click “OK”.
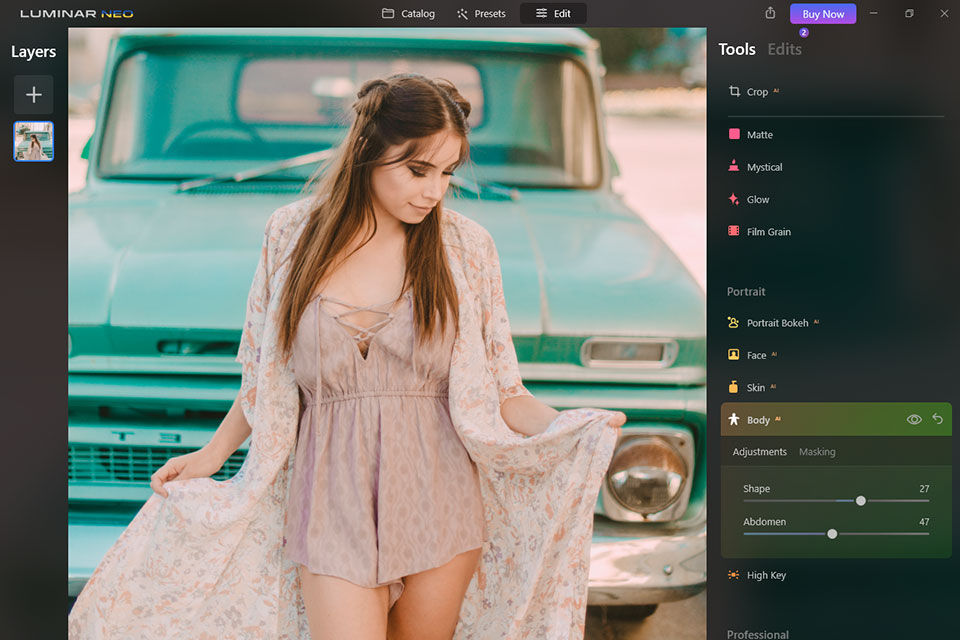
Editing a person’s body in photos is a tedious task and you have to make accurate corrections to prevent artificiality. Fortunately, the process becomes simpler in Luminar Neo. Using the Body AI that operates in human-aware technology, you can preserve lifelike shapes and curves in all your pictures.
Besides, if an image looks strange because of lens distortion, you can fix this issue as well. Adding or removing weight is also a no-brainer task.

This Luminar Neo feature is presented by 2 sliders – AccentAI and Sky EnhancerAI. The former is actually a slider version of the Auto Tone button. By moving this slider, you can change the tone, color, contrast, and other settings.
All enhancements are accurate since they are performed according to AI analysis. Sky EnhancerAI detects the sky and improves colors, makes clouds more voluminous, intensifies sunrise/sunset, etc.
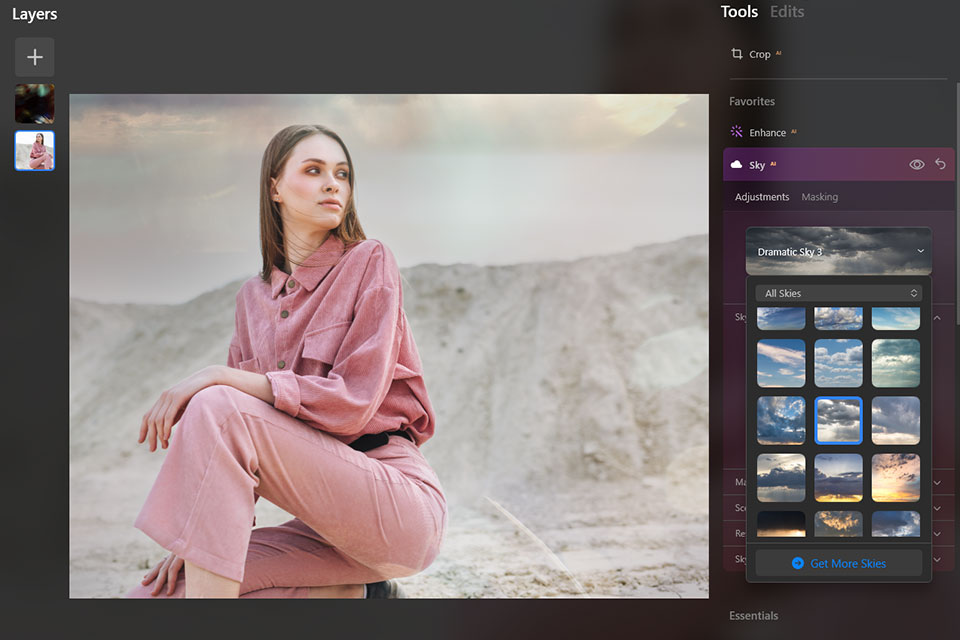
If you have ever tried to select some areas in a photo manually and then get down to masking, you surely know how long and frazzling the process can be. Besides, it requires the utmost attention to detail, which is a problem if this is your 100th photo. Knowing this hurdle, the developers added a handy Portrait Background removal feature, which can expedite your workflow a lot.
Once the background replacement is over, the software instantly defines the color combination and RGB components in the background and customizes the foreground objects for natural match-up.
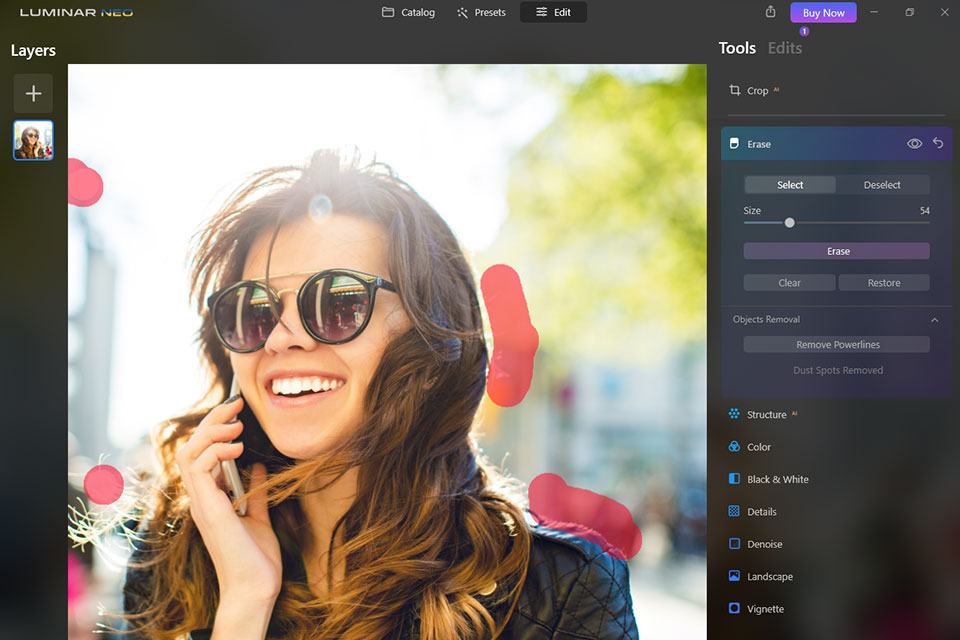
As the name suggests, this instrument appears on the stage when you need to remove dust particles in photos. It is located in the Erase tool, which is absolutely logical. The procedure is automatic and you are likely to cope with the task quickly as this correction is needed for some images only.
If you’ve noticed that you use it for several pictures in a row, then it’s high time to cleanse your camera and lenses.
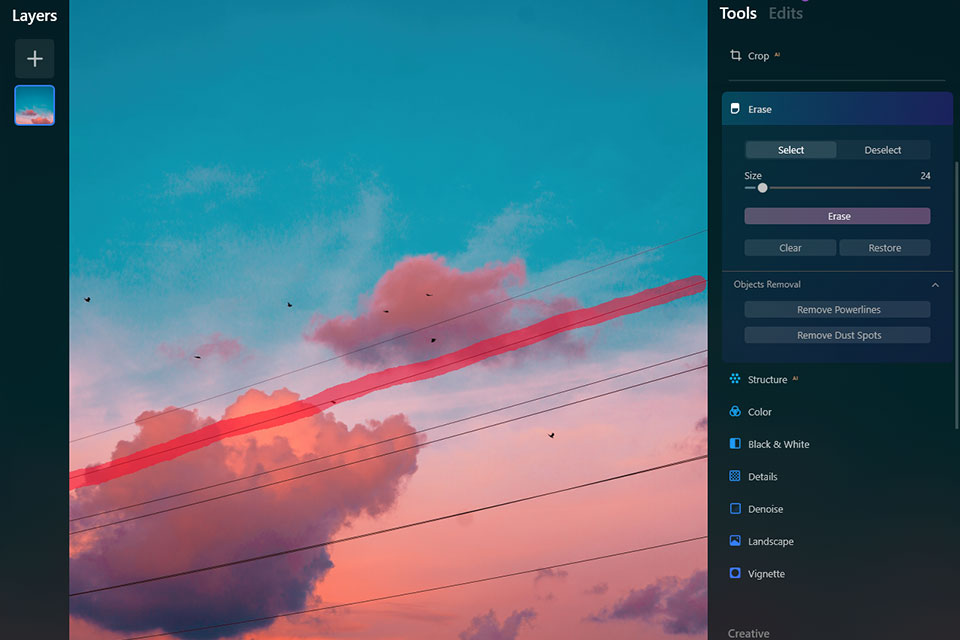
You need to go to the Erase section again to find this tool. Retouchers and photographers typically use it when editing landscape photos that will look neater and more beguiling with power and phone lines deleted.
However, keep in mind that such polished and realistic results are possible only if power lines are located against the sky. When they are in front of buildings, ornate details, trees, etc., the result is unpredictable.

Photographers frequently feel bushed when they need to manage lots of digital photos. The process of uploading files from various devices/locations takes some time, but arranging them all in different folders can become a nightmare. With this in mind, the developers of the software did their best to make image management a breeze.
You need to launch the program and head to the left side of the window. There you will see the “Catalog” module, which consists of 5 locations that auto-update based on your actions:
Hovering over any title, you will see the number of images in the case. The “Recently Added” & “Recently Edited” show a drop-down list with the dates when actions took place. Keep in mind that the “Folder” level contains any folder from your hard drive that you can import to the program.
Last but not least are the “Albums” that remind Lightroom Collections. Using this Luminar Neo feature you can combine your uploaded images into separate thematic albums.
Pro Tip: You can add as many photos to an album as you want or select several images and then unite them into an album by right-clicking and choosing the corresponding option. For some reason, the drag-n-drop approach doesn’t work in this case.
When you first open this photo editing software, you will notice the Develop panel that houses all standard features and tools for working with images. The right side is occupied by such settings as Exposure, Highlights, Shadows, Smart Contrast, Curves, Blacks & Whites, Sharpness, Color, Noise Reduction, and Optics. There is also a separate group with a manual barrel, pincushion slider, and Defringe.
If you usually shoot in RAW and are doubtful whether there are any Luminar Neo features for dealing with these images, calm down. The program offers Auto Distortion correction, Auto Fix Chromatic Aberrations, and the Professional section with sliders for controlling Highlights, Midtones, and Shadows. Besides, there are Curves with RGB selectors and WB settings, along with a well-developed Eyedropper.
Though there are no Auto settings for lighting and color correction, the Enhancer tool fully replaces them. Dragging this slider, you can change the intensity of any effect applied. When I tested it with my HDR photo, I received cool results with saturation and contrast being gently boosted.
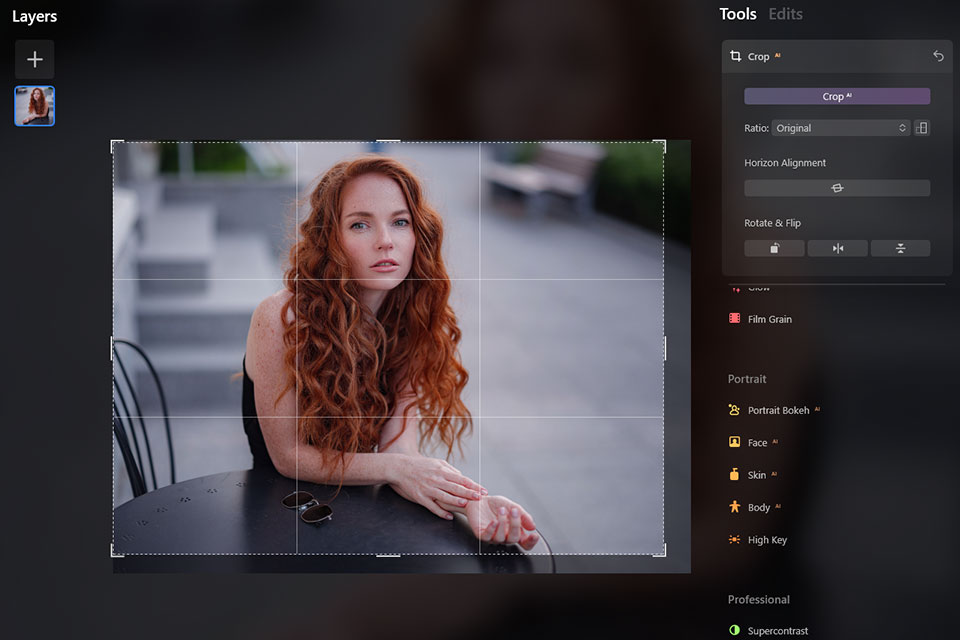
I want to draw special attention to the Crop tool. Thanks to the AI nature, it automatically detects an object and suggests suitable cropping (check out below). It can cut out distracting pieces without affecting the core element. The crop category also contains Horizon Alignment, but it performed poorly with my photo and the horizon line remained tilted.
Note: I was a bit disappointed when I saw that the developers removed the Clone tool. In fact, it is present in Luminar AI and they promise they will return it in the first Neo update. But they don’t announce any time intervals.
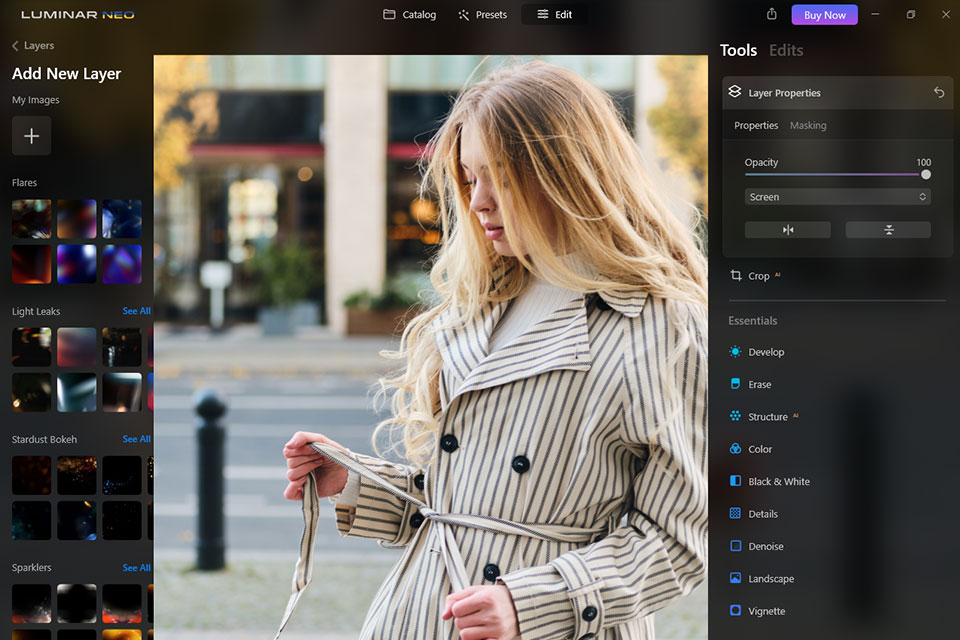
If you are fond of experimenting with photo editing techniques or are engaged in double exposure photography, you will undoubtedly appreciate the availability of layers in this software. With the help of layers, you can add multiple photos and create fantastic compositions. Though layers were zapped during the Luminar 4 > Luminar AI upgrade, we have them back in the Neo version.

This photo editing software for beginners can scan a photo and recognize a model’s face or any other element to suggest possible corrections. Applying them is easy as you can use presets stored in the separate module next to the “Catalog”. Flick through and choose a preset that can highlight the genuine beauty of your image. The most popular options are “Experimental” and “Influencer”.
If you are on the fence about what presets are best suited for your particular picture, make use of the “For This Photo” option and the program will automatically choose and apply a filter after evaluating a shot.
I like that the software recommends presets very competently. For instance, if you are editing a landscape image, it will suggest such filters as “Scenery”, “Easy Landscapes”, or “Sunsets”.
Besides, by clicking on any preset category, you will see similar variants on the side. If you don’t like the applied effect, click the arrow to return. To save favorite presets in a separate place, click the heart icon next to every effect.

Luminar Neo is one of the best AI photo editors thanks to a variety of cool features. If you want to expand your image editing possibilities even more, download these overlays. They are suitable for photos of different genres and let you fix issues that are impossible to quash during shooting.