Luminar 4
VERDICT: Skylum Luminar 4 has a simple UI and includes tools similar to Lightroom arranged in the same places. However, unlike this Adobe program, Luminar allows you to fully customize the menu layout. In other words, you can freely choose where each tool will be located.
This AI photo editor offers a complete set of tools for deep color correction and basic retouching using convenient modules. You get AI sliders and an excellent level of control, but the operating speed leaves much to be desired. It is significantly slower than its older counterparts Lightroom and Photoshop.
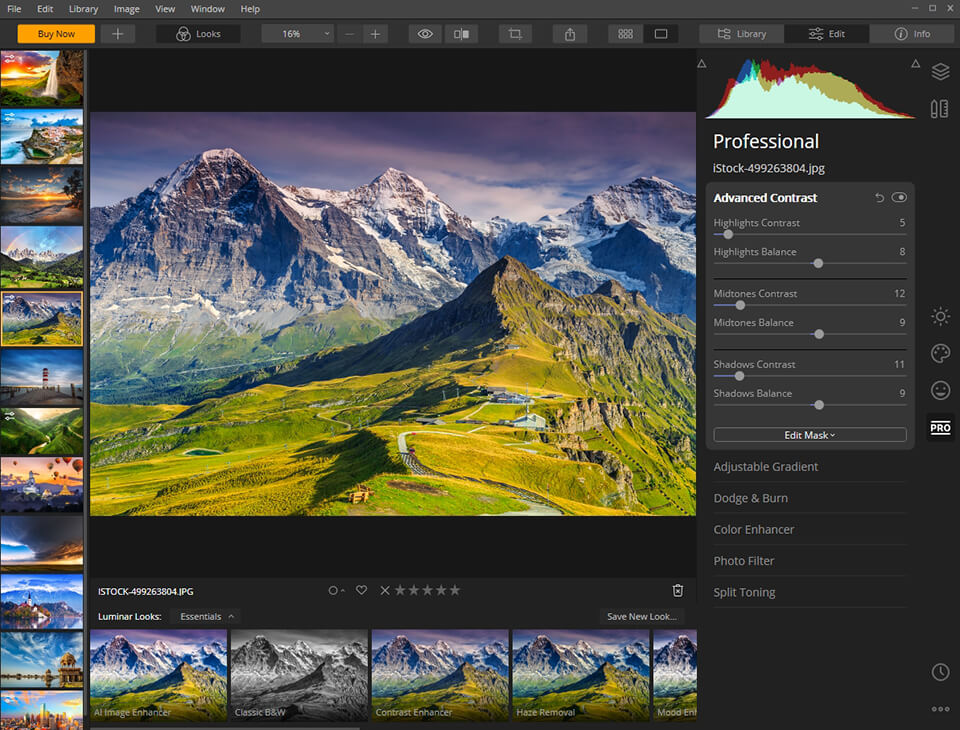
Similar to Ps, Luminar 4 has layers, masking (including brightness masks), blending modes, various filters, and advanced features such as LUT display. Luminar supports all currently existing RAW formats. That’s why a lot of professionals consider it to be a mix between these two Adobe programs.
Don't miss out on this incredible offer from Luminar to celebrate their anniversary. With this 50% discount, you can get twice the benefits when you download the software.

Luminar software is designed to edit photographs, convert RAW files, and manage image folders. You can use it either as a separate program or as a plugin for Lightroom and Photoshop.
This photo editor has a simple interface and tools placed in various modules that make it easy, even for beginners. It offers a fully customizable toolbar. People download Luminar because of its simplicity and its similarity to Lightroom and even Photoshop.
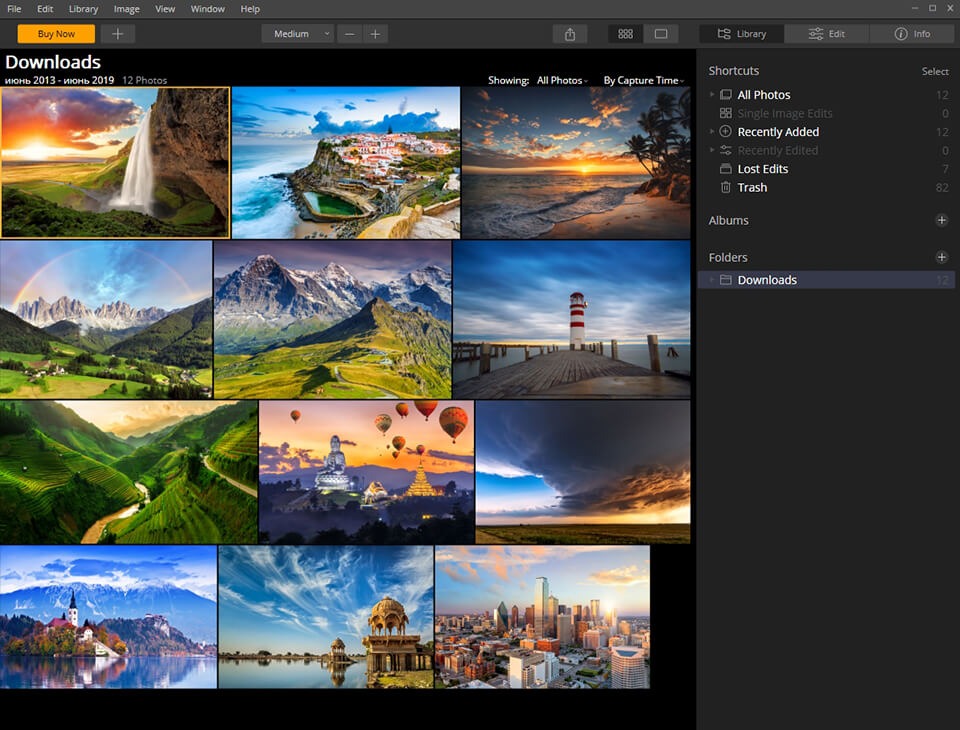
This function allows you to organize, view and sort out photos as well as import them from external hard drives and synchronized cloud storage.
The Photo Panel includes everything to organize stock photos. Sort pictures by year, month and day as well as quickly find the images you need. In addition, you can always make a backup copy of the Library.
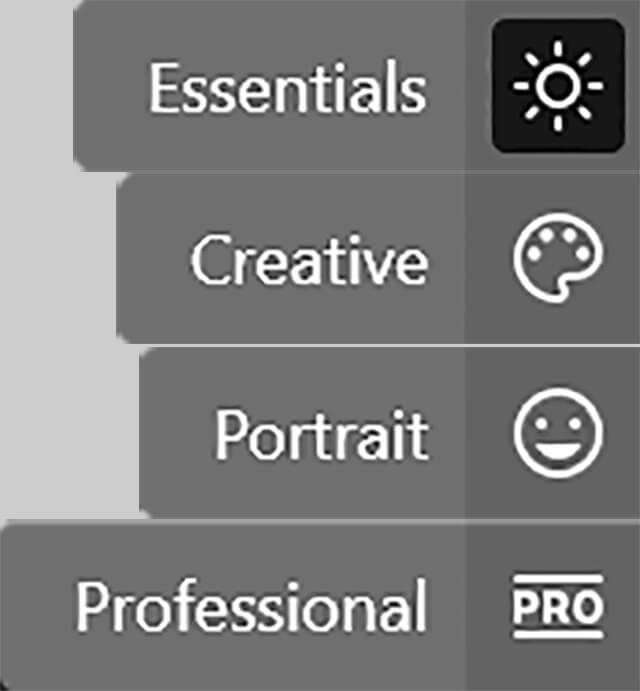
I also liked that the toolset in Luminar Mac and Windows is separated into tabs. You can select tools for portraiture, color settings, street, landscape, or aerial photography, and many others. I think that’s very convenient since you’ll only see the tools you need, which streamlines the picture editing process and makes it easier.
The program also includes a professional tab. After opening this mode, you’ll have access to all tools available in this image editing software.
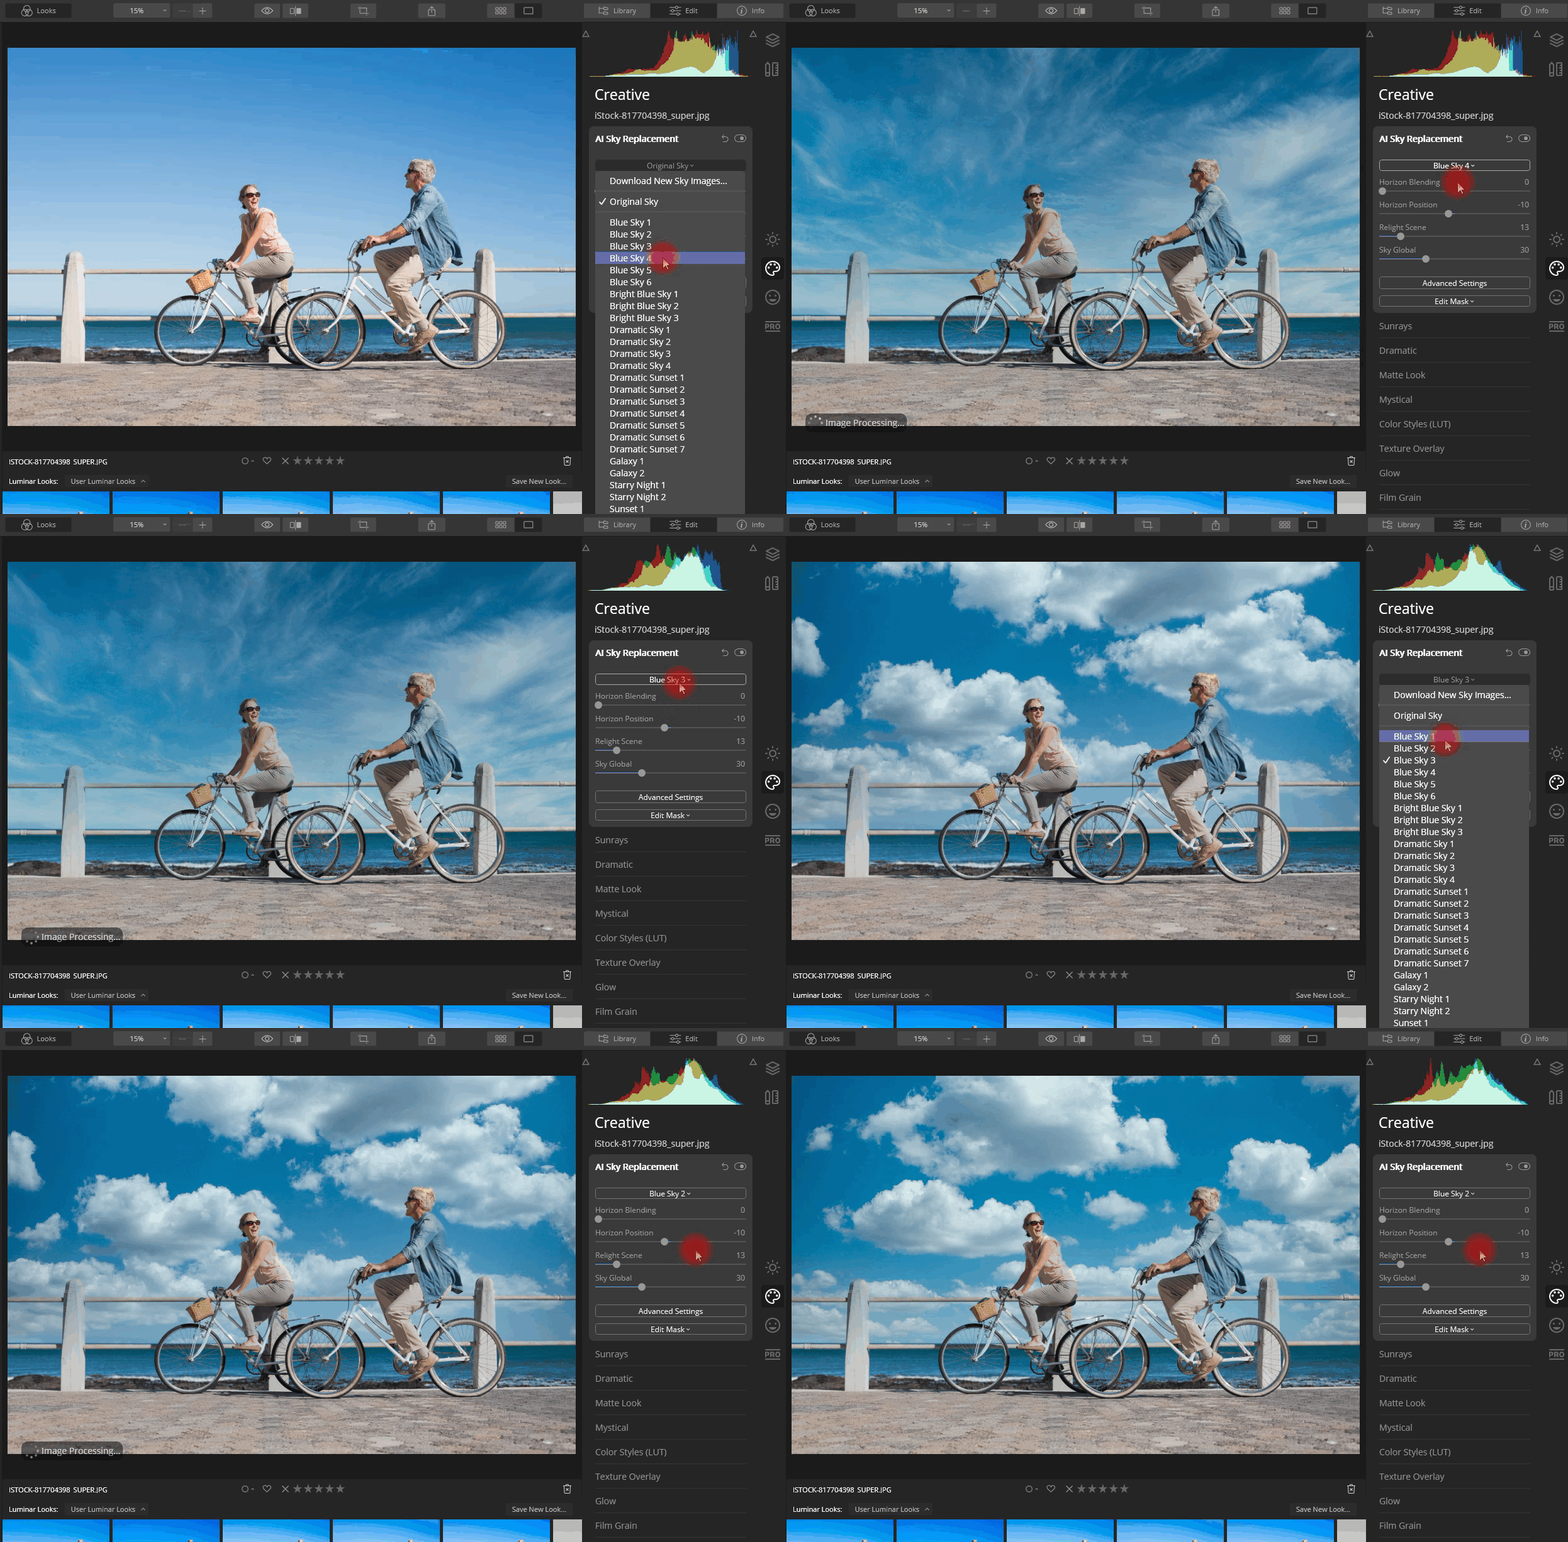
Skylum Luminar 4 made a dream of all landscape photographers come true. Now it is possible to replace the sky using artificial intelligence technology. That is, you don’t have to make selections or create masks.
Instead, it’s an automated process by which intelligent selection algorithms selects only the sky, leaving tiny details like leaves, grass, birds, or hair alone.
The Sky Replacement Tool also removes artifacts like halos and hard edges. It even relights the entire photo, that way the original image matches the new sky. It will even choose the best orientation of the replacement sky, that way it looks and feels realistic when paired with the original image.
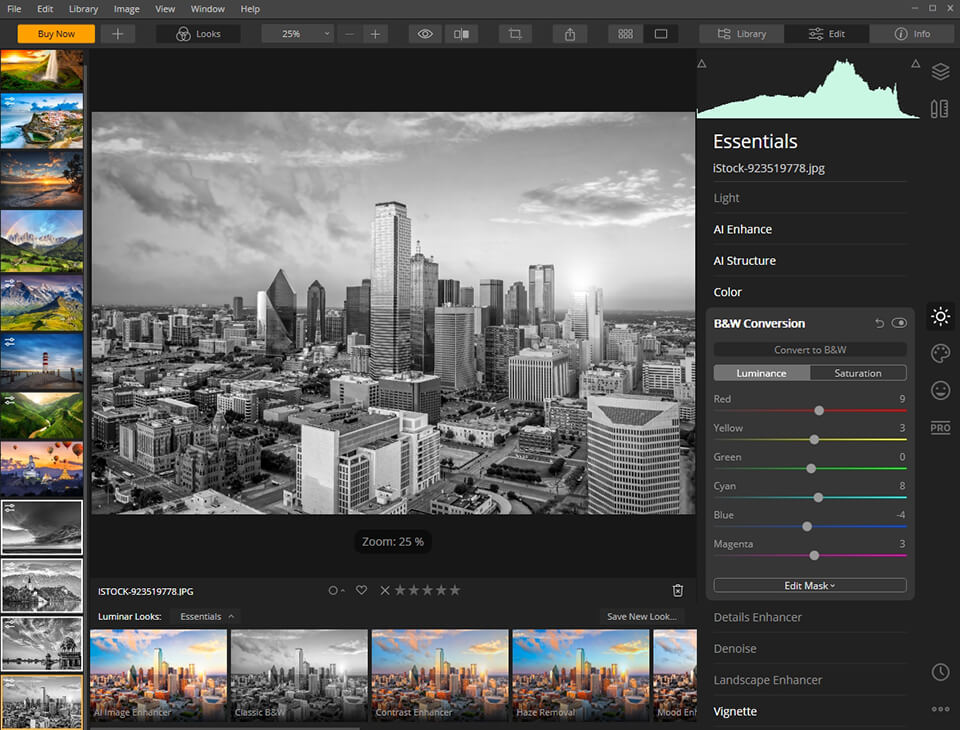
Luminar allows you to edit images either one by one or in batches. When using batch editing, you can apply various presets and filters to multiple photographs simultaneously, adjust their settings, etc.
The collection of tools offered should satisfy a regular user who’s looking for universal control options, although they are quite limited in some cases. For instance, noise settings are limited only to brightness and color sliders, while chromatic aberration can only be removed by using a single flag instead of combining various color sliders to achieve different shades.
AI Portrait Editing is amazing. You can use several tools that give you full control over the photo editing process, while all changes are made automatically using the sliders.
Luminar opens up extensive opportunities for portrait editing such as eliminating the red-eye effect, whitening eyes, enhancing the face, adjusting the details of the lips, etc. You can adjust the sliders to get the perfect look in your portraits.
In addition, Luminar 4 features AI Skin Enhancer, which uses AI technology. It allows you to find all the skin areas in a photo (face, hands, legs, etc.)
This tool relies on artificial intelligence technology and allows you to improve your photo impressively by using a single slider.
I’ve done some experimenting with it, and once I set the boost slider to the max, I’ve noticed a dramatic improvement of my image. It added clarity and smoothness to the hair, as well as some shadows to the eyes.
I liked that you may use the Dodge & Burn tool that is available in Luminar for PC, even though it’s often neglected by photo editors who mainly do color correction.
It has a single “Amount” slider that allows for making the photo clearer. Sadly, this slider isn’t well designed compared to in Photoshop, forcing you to set maximum values to see any kind of effect.
Luminar contains particular tools that you will not find in any other similar program.
My Luminar review wouldn’t be complete if I didn’t mention one of its most interesting tools. It’s located in the middle of the top bar and creates a real-time slider that allows you to see your changes in “before/after” mode. Moreover, it isn’t limited only to filters, you can also use the tool to adjust white balance, which is a feature missing in Lightroom.
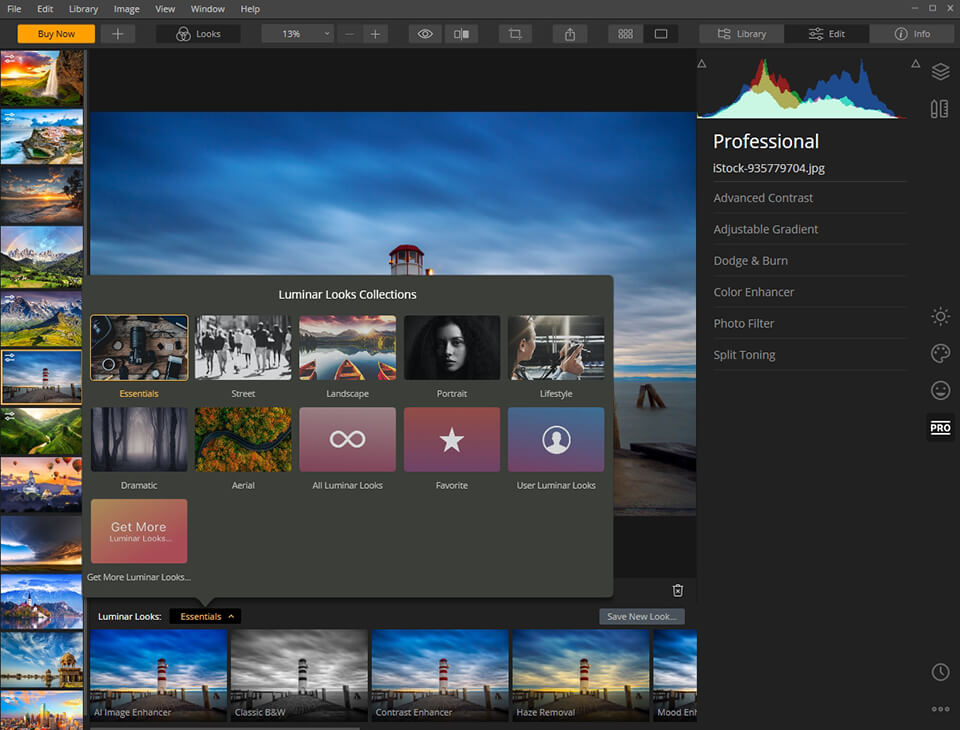
Luminar is supplied with presets (looks). Each workspace is built from various filters that you can use to perform an array of image corrections, from shadows to curves adjustments.
In Luminar have is the ability to save your settings, which allows you to edit images faster in the future. At the bottom of the module, you can find a Save Filters Presets button. This is a very handy feature if you’re a wedding photographer who constantly has to edit hundreds of images.

Download these Luminar presets to edit photos easy, fast, and professionally in several clicks. Highly recommended for travel, landscape, and street photography.
One of my favorite things about the Luminar photo editor is that it allows for adjusting different panels so that you can quickly alter the workspace by adding or removing sections, zooming in and out of images, and cropping or transforming them from the same panel.
For instance, you can create a workspace to perform initial alterations and color corrections before creating a new layer and using the noise-reducing workspace. Next, you can move onto another layer and workspace related to increasing the sharpness of your photo.
Such an approach allows you to customize Luminar in a way that you feel in complete control over the editing process. You can adapt the program to fit your image retouching style perfectly and remove any unnecessary elements or functions.
Each applied effect, automatic function and preset has a small button that allows you to disable a layer and its effect on the overall image. Even such destructive processes as cloning and retouching are performed on a separate layer, so the original pixels aren’t changed.
The History panel allows you to view all the manipulations. If you suddenly made a mistake, just cancel one or more previous actions. The photo editing history is automatically saved in the Library, so you can always get back to work later.
Luminar is rather flexible. You can use it as a standalone application, a plug-in for Photoshop, Lightroom, Aperture or an Apple Photos extension. In any case, it has the same interface and runs in a pop-up window. You can use Luminar alone or in conjunction with other Macphun applications.
Luminar features a very accurate and fast RAW Develop Engine. It can work with digital negative image format (DNG) as well as RAW images taken on cameras of all major brands.
The program supports panoramas Advanced DNG and HDR RAW files. You can also add your own custom profiles to it. Luminar applies any lens corrections automatically based on recommendations for your camera.
The price is another very important factor that allows Luminar to stand out in Luminar vs Photoshop battle. Unlike Adobe products, this image editing software doesn’t have a monthly subscription fee.
To buy Skylum Luminar, you have to make a one-time payment, and you can use it as long as you need while receiving various add-ons and new features for free. It offers you a 60-day money back guarantee if you didn’t like working with their app.

Luminar 4 now costs $89 for new customers / $74 for owners of previous versions of Luminar. FixThePhoto and LUMINAR suggest you download LUMINAR 4 today and get a permanent 10$ OFF on LUMINAR.
Since I don’t want to be too wordy, I’ve drawn a small comparison of Luminar with other, equally popular, photo editing apps.
Luminar is a great program for managing layers, workspaces and filters. It’s likely you’ll have an easier time learning Luminar, plus, some of the offered filters are completely unique, such as the latest AI-based filter as well as Dehaze, Golden Hour, etc. You can use it to perform professional-level image editing quickly and easily.
I’d say that Luminar is more suitable for people who never use Photoshop and don’t need the expanded Affinity functionality. Affinity has tons of tools for graphic design that aren’t present in Luminar. It’s more similar to Lightroom or DxO without lens correction, but with layer support.
Actions applied in Luminar are indestructible. Filters are applied on top of each other and can be changed sequentially. Also, you can return to an image and its multilayered parts only if the image was saved in Luminar with the program’s native extension.
Is Luminar a real Lightroom replacement? Not exactly, but I can see it becoming a viable alternative in the near future. Luminar libraries offer the basic functions needed to organize your photographs but don’t have the expanded features found in Lightroom.
I personally miss the ability to sort images by metadata or hide JPG and RAW info. This is enough for me to stay loyal to Lightroom in Luminar vs Lightroom competition.
That being said, I have to give credit to Skylum for all the effort they’ve put in during the last two years. The image editing quality offered is much better, and the RAW processing tool is more accurate than before.
However, some other areas can still be improved such as sharpening and noise reduction. Another aspect you have to take into account is that Luminar is perfect for beginners due to the inclusion of many presets that make the life of photographers, who are new to image retouching or don’t want to spend a lot of time editing, easier.
Think that Luminar isn’t suitable for professionals? As mentioned in this Luminar photo editor review, it offers layer support (which isn’t found in Lightroom without opening your file in Photoshop) and includes many expanded settings that may come in handy during in-depth image post processing.
That being said, Lightroom remains the most complete product for both professionals and enthusiasts who want to have more control from the moment they import the photographs to their publication. While it doesn’t have built-in layers, you can use Photoshop for that, same as Aurora HDR from Skylum.
Let’s not forget that adding Photoshop to your Adobe plan is a serious decision for anyone who’s into serious image editing. Overall, I recommend using Lightroom as your main program for professional photo color correction and basic photo editing.
Luminar is a professional but cheap photo editing software for Mac and Windows created by Skylum Co. for professional and amateur photographers.
Luminar 4 designed in November 18, 2019
No, Luminar 4 is the latest version of this Skylum’s photo editing software.
From $79 to $129 for Bundle.
Yes. The program lets you edit RAW and JPEG files.
No, it isn’t, but many retouchers prefer Luminar over Lightroom because of a simple interface, some picture editing features, and its outright payment instead of the Adobe’s Creative Cloud subscription and a monthly payment.
Luminar is created for editing photos, Aurora is a professional HDR picture editing program. These software were designed and produced by Skylum Co.
They are absolutely different photo editing software for various usages. Adobe Photoshop is designed for all creatives (digital artists, retouchers, designers, photographers, web-designers, etc.), but Luminar is recommended for photographers and beginning retouchers.
As I have already mentioned, you can create presets and import them to the program. Our retouchers have bundled first-class presets which you can download absolutely for free.
Luminar includes a handful of automatic functions to quickly enhance portraits, but using this preset you can significantly simplify your photo editing workflow with several clicks.
In our imagination, pictures taken during sunset appear warm and full of golden tones. However, it happens that there are mostly blue tints in the photo rather than golden ones. Use this preset to correct the white balance and add a pleasant golden glow to your shots.
Every photographer and retoucher dreams of having the “Make it beautiful” button in the image editing software. This preset can serve as such a button.
If you’ve already decided to download Luminar and start working with it, watch the following tutorials and video comparisons by people who have edited photos with this photo editor.