If you plan to learn how to edit photos in Luminar Neo but don't know where to begin and whether it's worth downloading at all, I'll help you make sense of the software's main features. This state-of-the-art editing tool is based on AI technology and provides an array of functions that ensure the editing process is as simple and fast as possible while requiring minimal effort on your part.
I'll introduce you to the most popular and important Luminar Neo features, explain their key characteristics, and show what kind of results they can help you achieve.

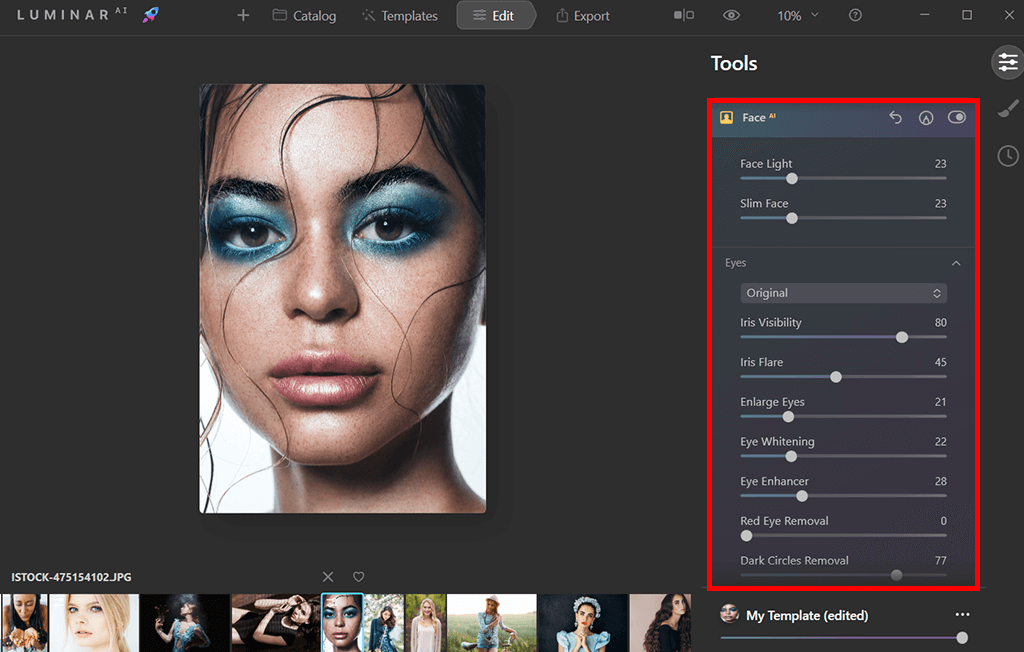
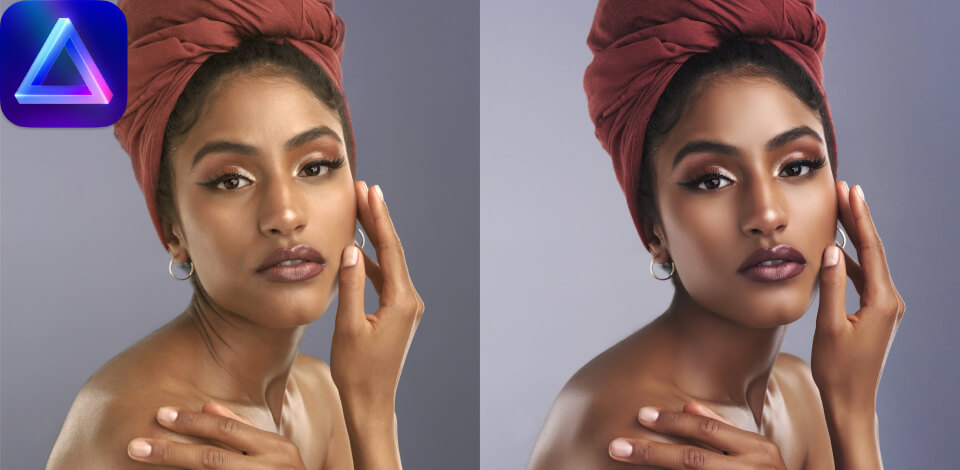
The Face AI feature in Luminar Neo relies on facial recognition tech to select the face, eyes, and mouth of the model and ensure those areas look vibrant, eye-catching, and smooth in a matter of minutes. Meanwhile, manual editing that relies on using textures and brushes will take up about 35 minutes to achieve the same result.
This feature is smart enough to detect side portraits while providing users the opportunity to imitate a flash or reflector directed at the model. It also offers a handy tool for contouring and shaping the face to make it smaller, thinner, or smoother in a realistic manner.
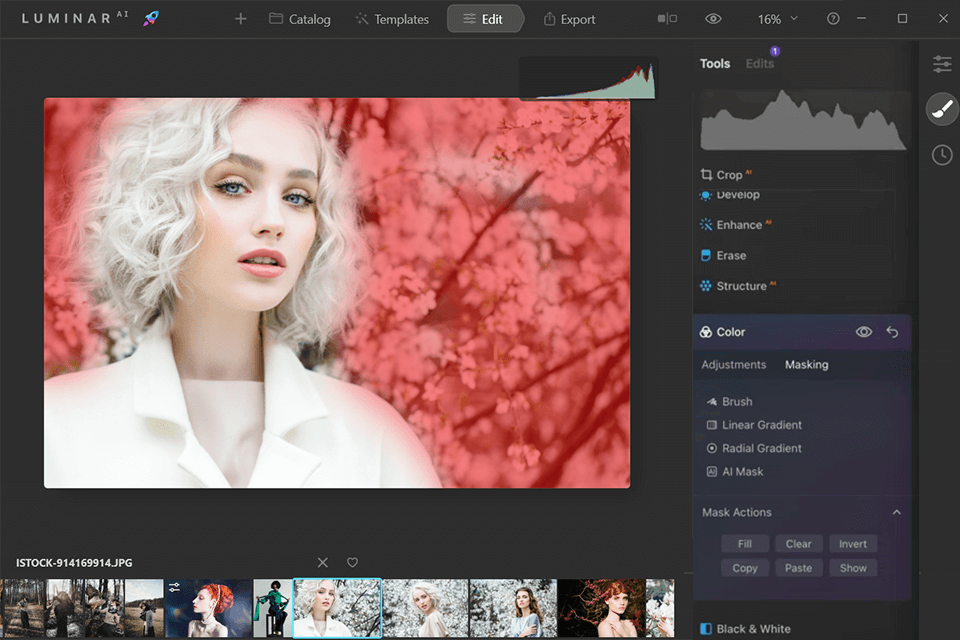
The Mask AI feature allows you to skip all the time you’d usually waste manually masking specific areas and go straight to editing. The advanced intelligence behind this technology can recognize up to 9 individual elements in an image: humans, sky, architecture, cars, water, plants, mountains, and different types of surfaces. The created mask can be tinkered with in the toolbar should such a need arise.
Luminar states that as time goes on, artificial intelligence will learn to recognize and select an even larger number of elements. This feature also contains manual masking tools like the Paint, Radial, and Gradient masks that can be employed for dealing with various flaws or when the AI fails to recognize a specific element accurately. Additionally, you can edit photos with Mask AI in Luminar Neo to display, fill, clear, copy, and invert the created mask.
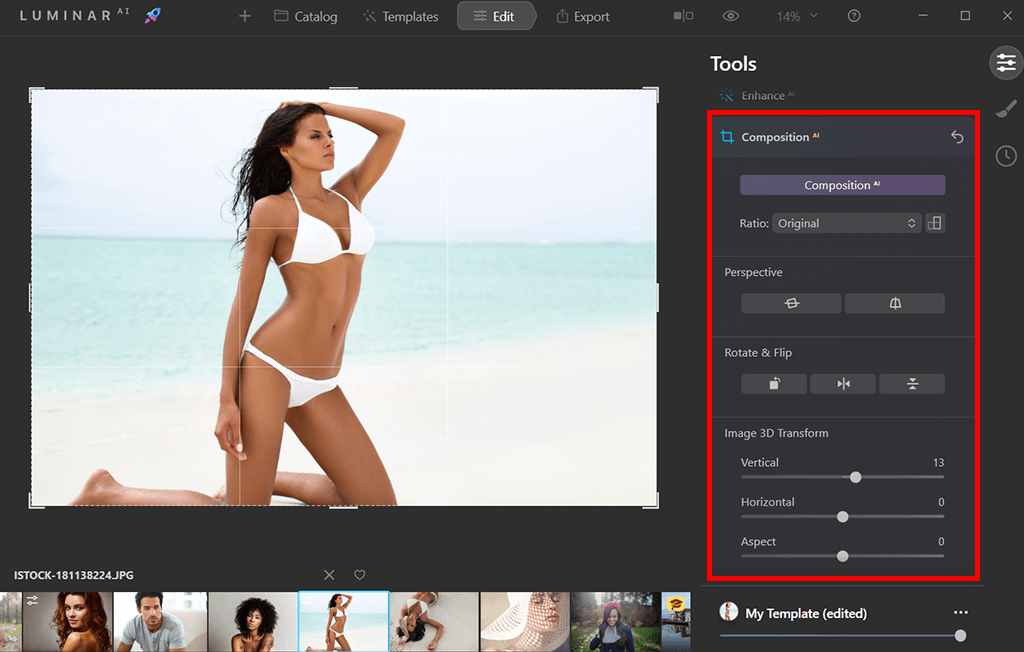
Depending on whether you plan to print the edited photo, or post it on your blog or social media page, you might need to set it to a certain aspect ratio that is likely not the default setting of your camera. To deal with this issue, you can either tweak the parameters of your camera or simply use Luminar Neo instead.
The Composition AI feature can automatically tweak the composition and crop the image while allowing you to fine-tune the result. It lets you conveniently implement the rule of thirds in photography, and other photography composition techniques. This tool can also be used for making single-click horizon alignments and straightening vertical lines to achieve a more harmonious composition.
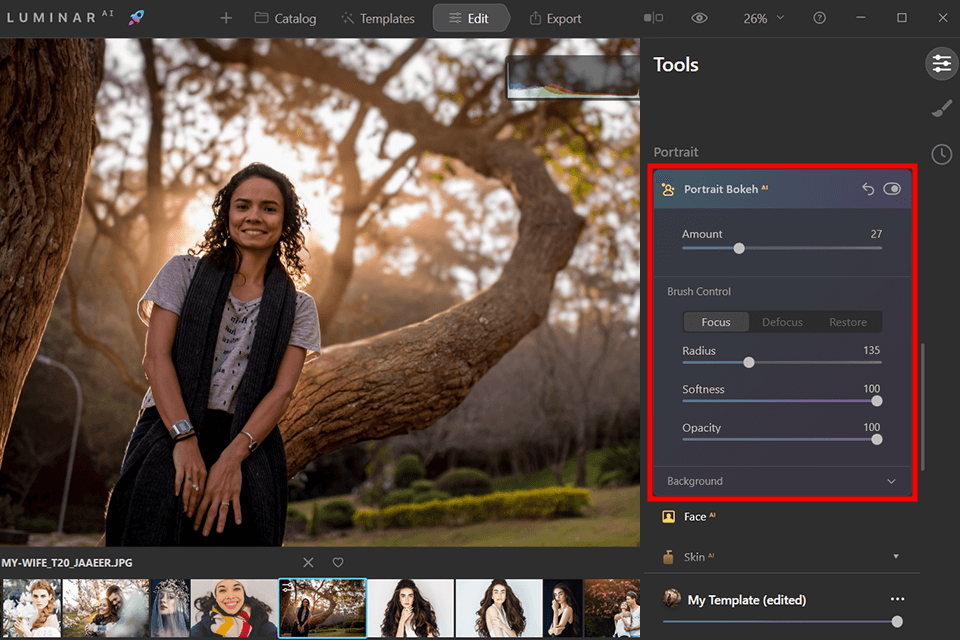
When taking portrait pictures, it’s often recommended to slightly blur the background to create what is called bokeh photography. The provided Portrait Bokeh AI feature excels at replicating that effect and producing a soft, creamy backdrop blur that will further emphasize the model. You can apply it to virtually any portrait photo regardless of whether it was taken with a lens for portraits or the lighting conditions.
I also like how masterfully the AI detects people in the shot whether they are in a group or an unlikely place while automatically generating a mask that will separate them from the backdrop. Luminar also provides tools for adjusting the depth of field, softness, and glow of the bokeh effect.
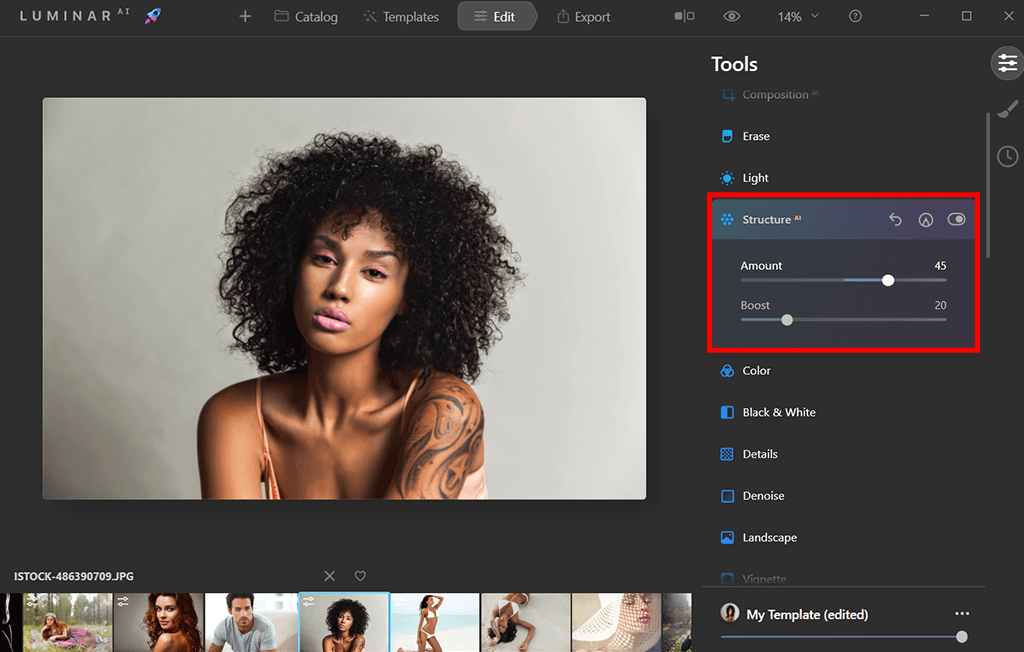
Structure AI serves to help you enhance the detail and clarity of your photos. This feature can be used for either increasing the amount of detail or smoothening the image. It’s also Luminar’s key tool for boosting the contrast and making the photo more popping.
It’s an incredibly powerful AI photo editor that employs content-aware algorithms to apply separate adjustments to different areas based on their content. This tool is also human-aware and designed to ensure the subjects don’t end up looking overprocessed while maintaining their natural skin color and texture.
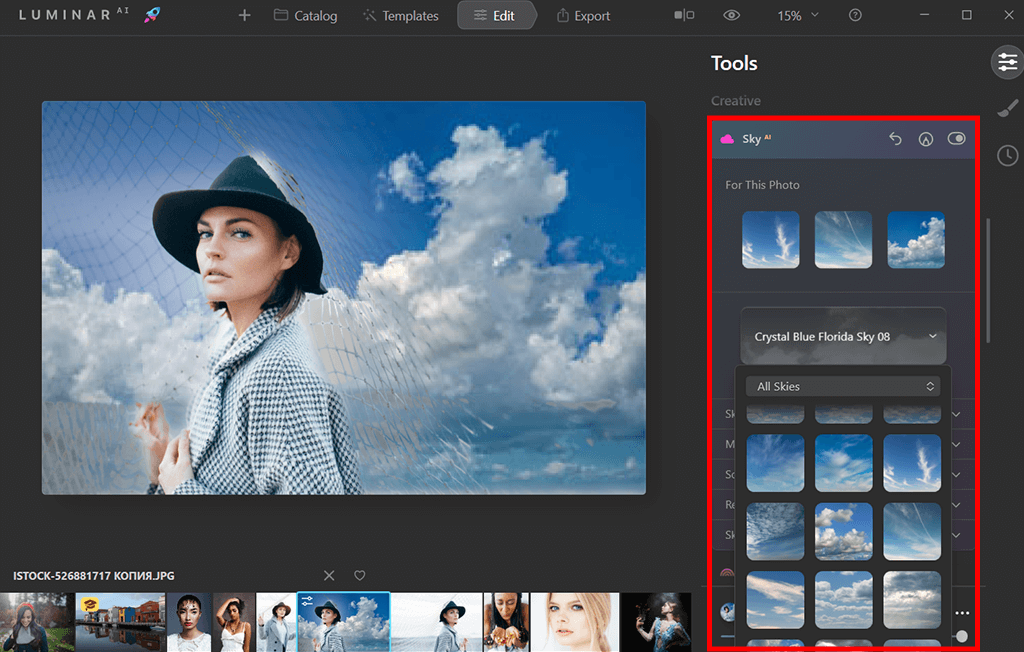
If the skies in your pictures don’t look appealing because the weather was bad on the day of the shoot, you can swap them out by using the Sky AI feature. This photo editing software for PC excels at getting rid of flat or overbearing skies while also providing sliders that allow you to customize the result. By relying on AI, this tool automatically detects the sky area in the photo, replaces it, and makes other subtle adjustments to ensure everything looks realistic.
This feature is extremely user-friendly, as the artificial intelligence handles the detection, masking, and color adjustment processes to produce a natural result while you only have to tweak a couple of sliders to fine-tune the edited image. Sky AI’s settings for blending the horizon and other details are also a fantastic addition.
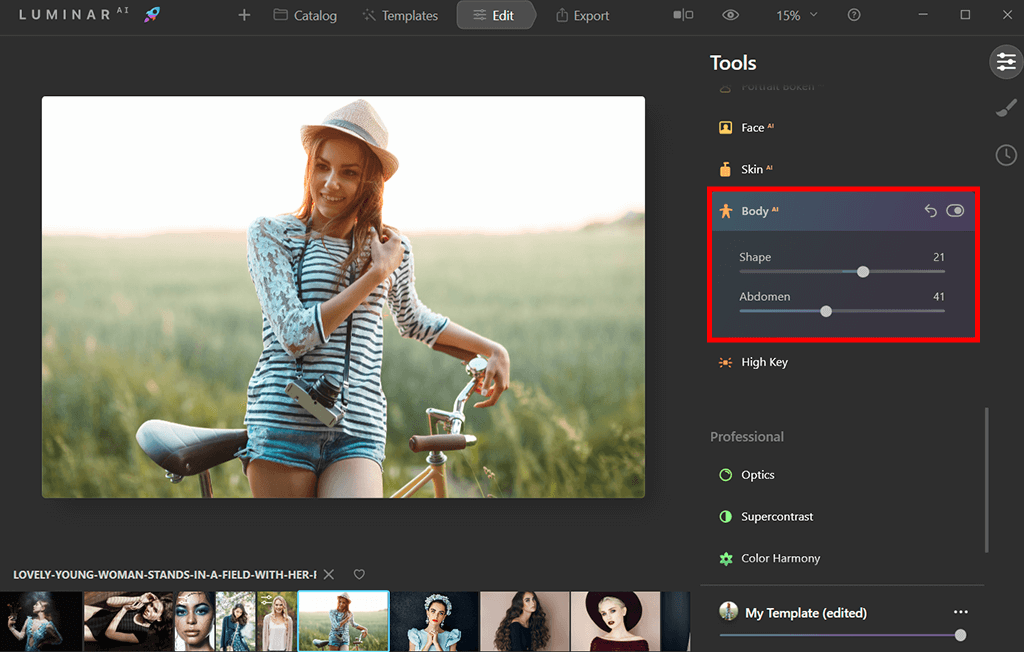
The Body AI feature can perfectly recognize a person’s body regardless of its position and lighting conditions. With the help of a single slider, the tool lets you change the shape of their figure to make them slimmer or more voluptuous.
You can achieve fantastic results without ever having to resort to various body slimming apps or spending hours with Photoshop’s Liquify feature to achieve a similar result. The adjusted shape looks natural and you’d never even guess it was edited in any way.
The main purpose of this tool is to adjust the torso and abdomen areas of the body. To do so, the AI contours the model’s body while compensating for potential lens issues and unappealing angles.
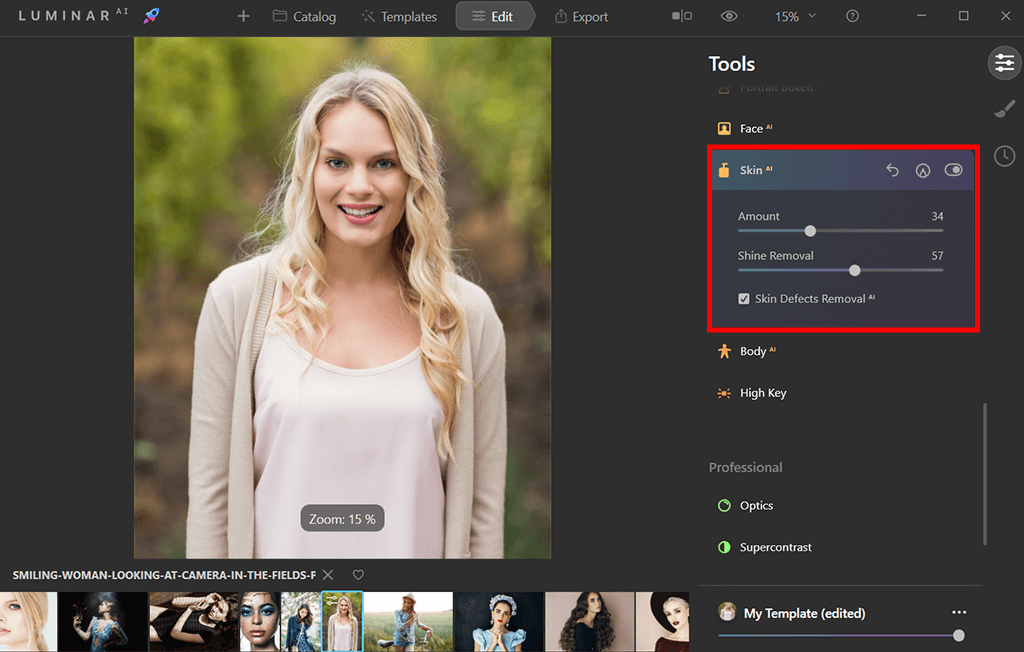
The Skin AI feature examines your photo before automatically improving and beautifying the subject's skin to ensure it looks smoother and is void of glares, blemishes, and pores. Meanwhile, you, as the user, get to decide to what degree the content-aware changes are made.
Thanks to tools like this, Luminar Neo can be considered a fantastic photo editing software for beginners. Additionally, Skin AI excels at dealing with common skin flaws like acne, freckles, etc. It's also great at smoothing the skin while ensuring other elements like the model's hair or eyelashes remain highly detailed.
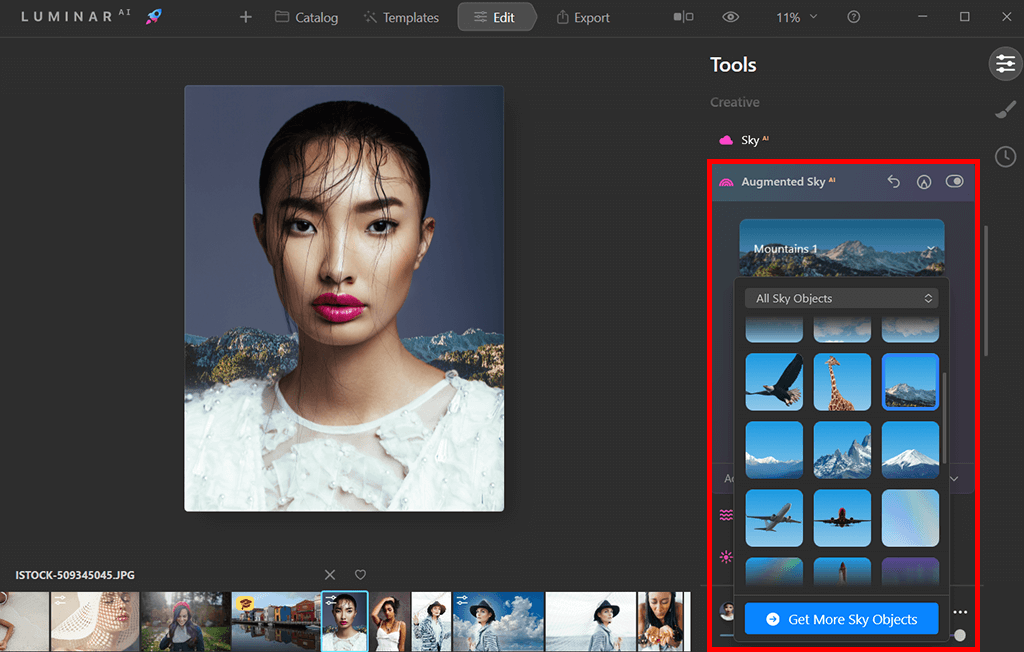
If you want to enhance the skies in your image with elements like clouds, planes, mountains, or birds, then you have to learn how to edit photos in Luminar Neo using the Augmented Sky AI feature. This tool detects the sky in the photo and applies the desired object to the selected area while allowing you to perform texturing and other manipulations.
The added element will fit naturally even if the image has a busy background with buildings and trees and you don't even have to do any masking or work with multiple layers. The artificial intelligence also analyzes the lighting in the photo and ensures the added element is naturally lit. Other than a healthy selection of standard objects, the tool also lets you upload custom elements, which is a godsend in the long run.
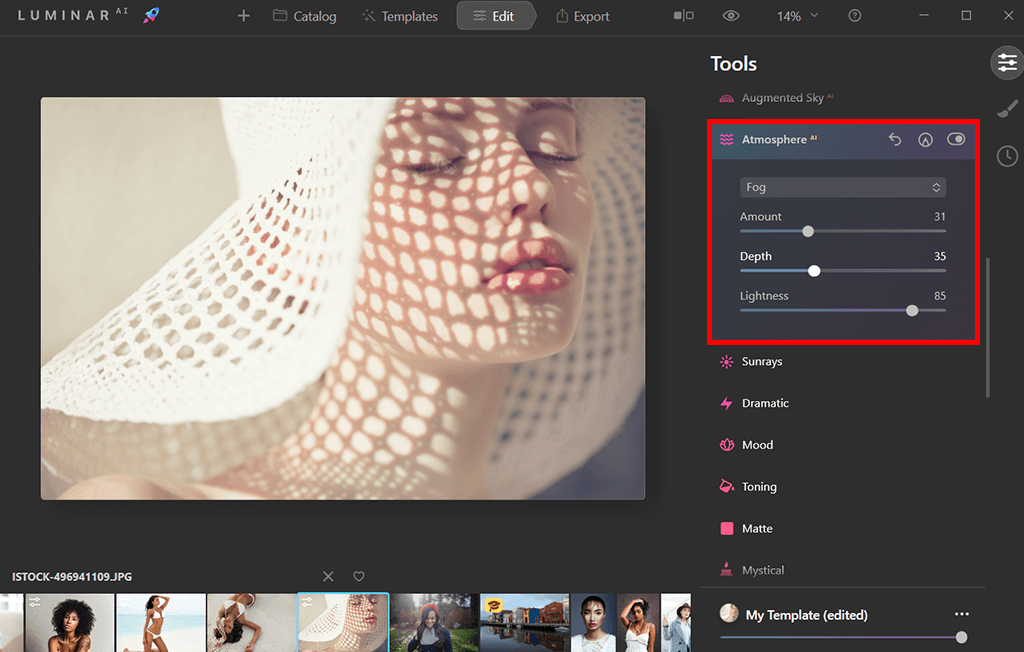
The Atmosphere AI tool relies on content-aware technology and depth masking to add fog and mist to the backdrop and/or the foreground of your photo. This intelligent feature makes sure the subject of the image isn’t obscured by the added haze while guaranteeing the overall scene still looks realistic.
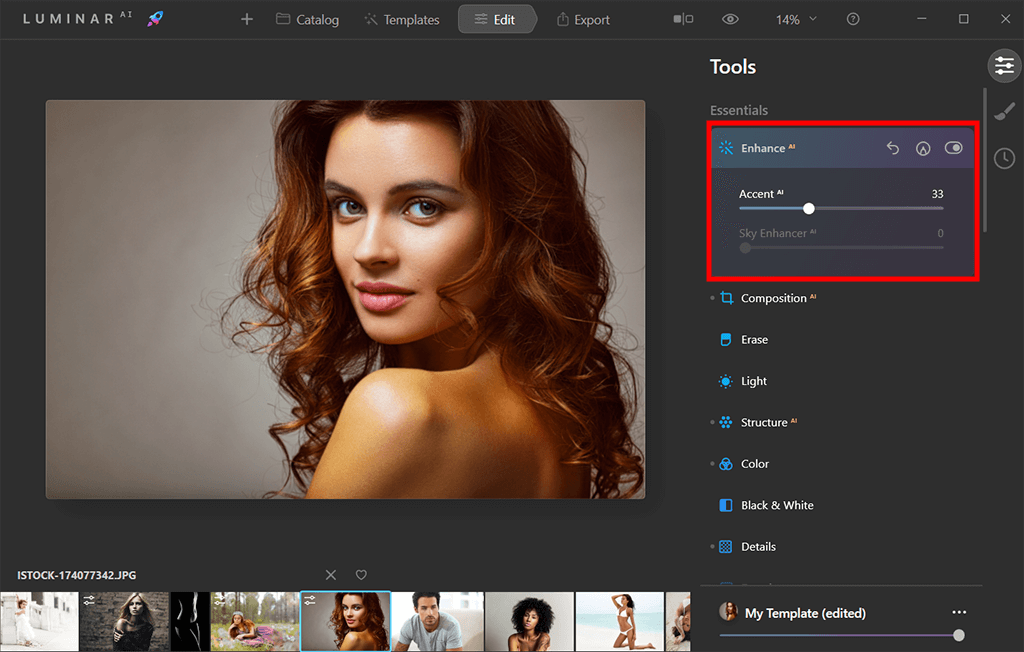
The Enhancer AI offers two handy features that rely on artificial intelligence to improve the look of your photos: Accent AI and Sky Enhancer AI. You can use it to automatically scan your photo and instantly deal with all detected issues while having the ability to adjust the number of applied corrections.
The Sky Enhancer AI recognizes and examines the skies to enhance their texture, color, and level of detail. Meanwhile, the Accent AI tweaks over a dozen of different parameters while allowing users to improve the shadows, highlights, contrast, tones, saturation, and exposure of their photos.
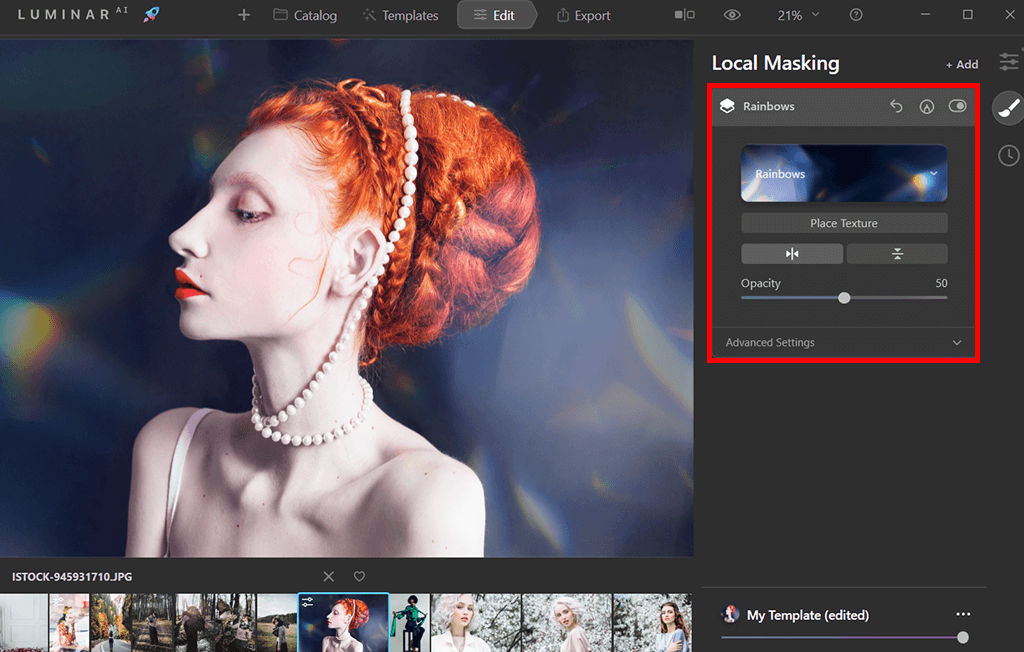
The Local Masking tool allows you to layer several edits. It can be useful if you want to apply precise edits to a photo or tweak different parts of an image separately. You can even apply several edits of the same type should such a need arise. The tool lets you pick between a Basic adjustment and a Texture overlay depending on your goal.
Editing photos in Luminar Neo using this feature is incredibly simple. You simply have to pick from the Paint, Radial, and Gradient Mask options in the menu and choose the desired mode (Focus, Defocus, Restore) to add or delete the effect.

Luminar Neo lets you create breathtaking photos by using presets that can be applied in a single click. These presets provide a fast and efficient way to completely change the look of your images while dealing with all existing exposure and color issues. Adding them to your workflow will speed up and simplify the editing process even further.


