Bokeh Photography Guide: 27 Tips and Examples
When you purchase through affiliate links on our site, we may earn a commission. Here’s how it works.
Bokeh photography implies taking an image and making its background blurred, so the final picture acquires a peculiar aesthetic and magical feel making your subject more distinctive. Photographers like experimenting with the bokeh effect because it is a sure way to make their works visually eye-pleasing.
27 Bokeh Photography Tips
Interested in how to do bokeh photography? Read this article with easy-to-understand and effective recommendations and you will understand how to master this technique.
1. Shoot with a Large Aperture

You may achieve a bokeh photography effect, using both Aperture priority (Av) and Manual (M) Camera Modes. Remember that you need a smaller DOF, which implies a wider aperture.
Actually, stick to the largest aperture (smallest f-number) available on your lens. When you have the largest aperture possible, you can focus on a certain object, leaving the rest of the scene in the un-sharp zone.
So, everything surrounding the focal point is blurred, which is how photography bokeh look. Select a minimum of f/4.
- Find out more about aperture and depth of field.
2. Use a Fast Lens

A lens speed and a lens max aperture (smallest f-number) are interdependent values. The bigger the max aperture is, the fastest the lens you get (f/4 is slower than f/1.8). If you use a fast lens, a sensor gets more light, allowing you to reduce the depth of field.
In such a way, you can be sure that out-of-focus areas will be aesthetically beautiful. A lens with a very small aperture (e.g. f/11) is considered to be a “slow” lens because the portion of light reaching the sensor is very insufficient.
So, if you aspire to create a very prominent bokeh photography effect, invest in a fast lens, for example, Canon EF 85mm f/1.8 USM.
- Examine the rundown of the best lenses for portraits.
3. Consider the Blades in the Lens

A diaphragm of a lens has a certain number of blades, which successively open and close (and create an aperture) when you take a photo. The shape of the bokeh depends on the number of blades.
An octagonal bokeh effect appears in photos, if your lens has the minimal number of blades, while models with more blades produce gentle, more rounded bokeh. Of course, you can choose any lens you like. However, most people agree that a beautiful bokeh is the one with rounded shapes.
4. Use Lenses with Long Focal Length

It is hard to name the best bokeh lens from Canon or Nikon, but there are some models that are definitely more efficient at producing a bokeh effect than others. You should remember that a larger focal length = smaller DOF.
A model with a focal length of 200mm and more produce greater blurred areas. For instance, a 14mm lens has a greater DOF at f/4 than 400mm.
So, go for greater focal length if you want to get softer bokeh. With zoom lenses, you need to choose the maximum focal length available. If you use, for example, 18-55mm kit lens, you can expect more blurriness at 55mm than 18mm.
If your regular companion is a telephoto lens (85mm and more), you can step back as the lens’ length compensates the distance, without spoiling a bokeh effect.
5. Use Fast Shutter Speed

In the AV mode, you can use customized settings of 1/60 seconds and faster or allow your camera to define a shutter speed itself. If you choose an incorrect setting, namely, too slow shutter speed, the background will be blurred too much and the circled light effect will get spoilt.
As a result, the photo will look dark. Many novices think that using a higher f-number may save the situation. But the only correct way out is to increase the ISO value.
6. Use AV Mode

While doing bokeh photography, you need to remember to keep an aperture wide. That’s why, enabling the AV mode is a smart decision. In this mode, you can select an aperture and the camera itself will set the corresponding shutter speed.
You may forget about annoying attempts to come up with proper exposure as the device will handle the task for you. When the aperture is defined, press the shutter. Simple like that!
However, in some cases, a camera may go wrong and select incorrect exposure setting. Don’t hesitate to use the exposure compensation button (symbols -/+ on the camera’s body). This way, you can determine how light/dark your photo will be.
7. Use iPhone’s Portrait Mode

Not only professional DSLRs with a wide-angle lens are suitable for bokeh light photography, but iPhone, starting with 7 Plus, will also serve the task. Such phones come with the Portrait mode capable of mimicking a bokeh effect.
Just make sure your iPhone has a dual lens. In such a way, you can decide which part of a photo will be out of focus and which one will preserve all the details clearly seen.
The Portrait mode is very helpful for this task, as it allows focusing on certain areas of a shot. So, activate the Portrait mode and start taking bokeh images.
- Choose the best iPhone camera accessories.
8. Choose an Interesting Background
If you want your pictures to stand out among hundreds of bokeh images HD, you need to take care of the background. Find something interesting to look at, as plain backgrounds attract little attention both in everyday life and being blurred.
To understand what can work, examine successful bokeh photos. You will probably notice that even with a blurry background, some items (light orbs, patterns and texture) remain recognizable.
An ideal place for shooting is a location that you will choose for an urban photo without hesitation. Street and car lights, garlands, bright showcase and signboards will perfectly suit your needs.
If you stumble upon a lake, a river or a pond and there is light reflecting in the water, don’t miss a chance to snap a shot.
9. Distance Between Subject and Background

To get a photo with greater bokeh effects, you should increase the distance between the background and the subject. In most cases, the farther your object is located from the background, the more mesmerizing bokeh you get.
Talking about the distance, I mean meters, not a few steps. Making the distance bigger, you can even use smaller shutter speed, e.g. f/8. and still end up with a very prominent bokeh.
This recommendation is of invaluable help if you are fond of bokeh photography, but can’t afford to buy a fast lens.
10. Get Close to Your Subject

To cover half of the frame or even more with bokeh, you need to minimize the distance between the background and the subject. This works especially well, if you use a lens with a short focal length, for instance, 50mm. The good news is that even used lenses produce the desired effect. You can learn how to choose a good used lens that doesn’t cost a fortune in the Photodoto blog.
- Make use of this portrait photography guide.
11. Choose the Focal Point Manually

The focal plane is primarily affected by the focal point you choose. Don’t concentrate your lens on one and the same part of your subject all the time – try various angles and diverse focal points.
Remember to disable the Autofocus point selection. Don’t allow your camera to determine the focal point, you should do it yourself, evaluating the situation.
12. Set Subjects on the Same Plane

If you take a bokeh portrait and there are several people interacting in the frame, you need to locate them on the same focal plane and have them touch at some point. For example, you can ask them to stay, holding hands.
Then focus a camera on their fingers. In the situation, when you photograph several people, raise the f-stop value so it matches the number of subjects, but don’t get beyond f/4 to make sure everyone is in focus.
- Take advantage of these group photo ideas.
13. Use Backlit Lighting

If it is the first time you take photos with a bokeh effect, you can simply direct the light source at the background and ensure it is constantly on. The result will be pretty good.
But if you want to create something really impressive, you should demonstrate a bit of ingenuity and find glowing and small light sources like traffic and street light, Christmas garlands, candles, or even sun rays penetrating through the leafage. This will bring you nice, soft, rounded bokeh effects.
- Follow these backlit photo tips.
14. Add Bokeh in Photoshop

Some bokeh photographers use special tools to add a dramatic vibe to their images during post-processing. Want to do the same? Repeat the following steps:
- Choose a portrait and a photo with bokeh (there shouldn’t be other objects).
- Open both pictures in Photoshop. Place a bokeh photo over a portrait. Regulate the size if needed.
- Set the opacity – approximately 50%. The portrait should be visible below another image.
- Read more about how to download Adobe Photoshop for free.
15. Use Custom Shapes
There are photos on the net that look especially catchy because they contain blurring not of a regular form but in the shape of hearts, stars, etc. Though manufacturers don’t make lenses that can produce such an unusual effect on purpose, you can buy a bokeh kit to achieve it.
You can also create a special attachment for the lens and enjoy an artistic result. Once you get a bokeh kit or use your hand-made “filter”, open an aperture as wide as possible, set an exposure and start photographing.
You will see that your background is covered with blurry shapes matching the one you’ve chosen.
16. Use a Reflective Backdrop
A surefire way of creating a bokeh is to use a reflective backdrop. Tinfoil, cloth with shiny finish and sequins, tinsel are perfect options. By directing colorful lights at the backdrop, you can achieve even more unpredictable bokeh PNG results.
17. Use a Crystal Ball

If you’ve grasped the basics of bokeh photography and got the hang of the above-mentioned techniques, you can level up your shooting game by incorporating crystal balls into your photos.
You have to spend some time to figure out how to photograph them, but the result is worth the effort.
- Learn crystal ball photography tricks.
18. Play with Rain

Nature has its own phenomenon that looks striking in photos without additional decorations. Light and water drops belong to such things.
Taking bokeh pictures through a window when the weather is rainy, you immediately understand what fantastic results you can achieve without wasting money on various props.
The shooting spot doesn’t matter a lot – your home, a nearby café, a car, a bus, etc. You can even step outdoors and snap several shots. Water drops mixed with natural lights result in beautiful, natural bokeh.
19. Use Fairy Lights

One of the easiest ways to get a bokeh photography effect is to use fairy lights. They are convenient to arrange, but the amount of lighting they produce is enough to take a dramatic photo.
To understand how to shoot fairy light and get a gentle bokeh in the background, look through the works of Brandon Woelfel.
20. Capture Landmarks

Most landmarks and tourist attractions have been photographed a hundred thousand times from all imaginable perspectives and at different periods. If you come to a picturesque place and think of taking an image of a local sight, don’t be predictable. Try showing the spot following the bokeh photography principle.
21. Capture Dewy Grass

Grass is a wonderful subject for bokeh images, especially if you photograph it in the morning when the dew hasn’t disappeared yet. Actually, these small water particles are transformed into gentle bokeh circles in images, contrasting against greenish and juicy grass blades. If you want, you can complement the scene with other props.
22. Use Bokeh as Subject

If there is nothing you can use for a bokeh photo, why not treat a bokeh itself as a subject? Going this way, you can take fantastic, interesting and a bit abstract pictures as well as understand “What is bokeh” better.
23. Silhouettes Against Bokeh

Silhouettes photos look very atmospheric and intriguing, but if you manage to combine them with a bokeh effect, you will definitely impress your clients.
24. Incorporate Pets

Add a touch of cuteness to your bokeh images by combining it with pet photography. The allure of the bokeh technique makes images featuring cats, dogs, rabbits and other animals especially appealing.
Bokeh perfectly matches pet photos taken outdoors. Since many pets have greyish fur that easily blends with the surrounding, you can bring your little friend in a focus by blurring a background.
25. Capture Macro of Nature
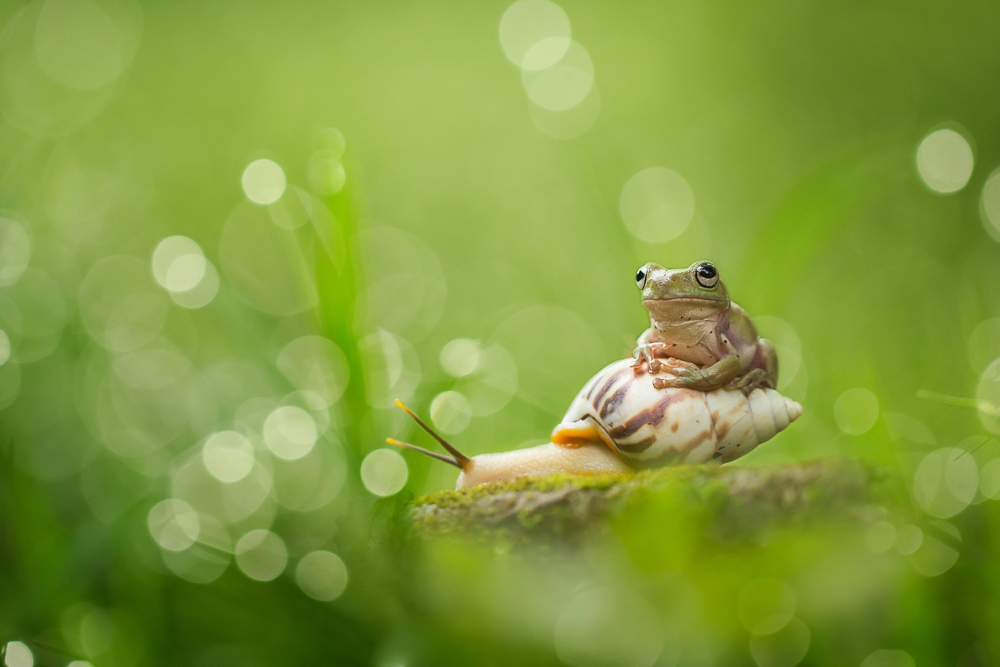
If you want to show the gracefulness of nature and concentrate on its peculiar items, you can mix bokeh and macro photography.
Shooters resort to such an approach when they take macro flower bokeh images as well as shots of insects since a blurry background adds a textural contrast to the frame.
- Experiment with these macro photography ideas.
26. Capture Still Lifes Indoors

The majority of bokeh photographers look for subjects outdoors, where there are many colorful and beautiful objects. However, you can find something interesting for your bokeh image inside if you incorporate still life photography concepts.
Since you have complete freedom when it comes to choosing the background and posing your subject for still life photos, you have numerous options for snapping wonderful bokeh shots.
27. Use Apps and Editors

There are many bokeh effect apps both for Android and iPhone photographers, who want to achieve that particular look in their shots. I prefer using Bokeh Lens (iOS), Real Bokeh Light Effects (iOS, Android), and After Focus (iOS, Android).
If you need a bokeh photo editor online, try BeFunky Photo Editor, or PicMonkey Photo Editor. Both programs allow you to delete the bokeh or paint on it.
- Check more photo editing apps for Android.
Bokeh Photo Effects Freebies
The bokeh effect is undoubtedly very beautiful, but, at the same time, challenging to get the hang of. Fortunately, FixThePhoto experts have created handy overlays, which you can use to embellish your images with blurry particles.
Loving Hearts

Make your wedding images even more romantic with the help of the heart-shaped bokeh.
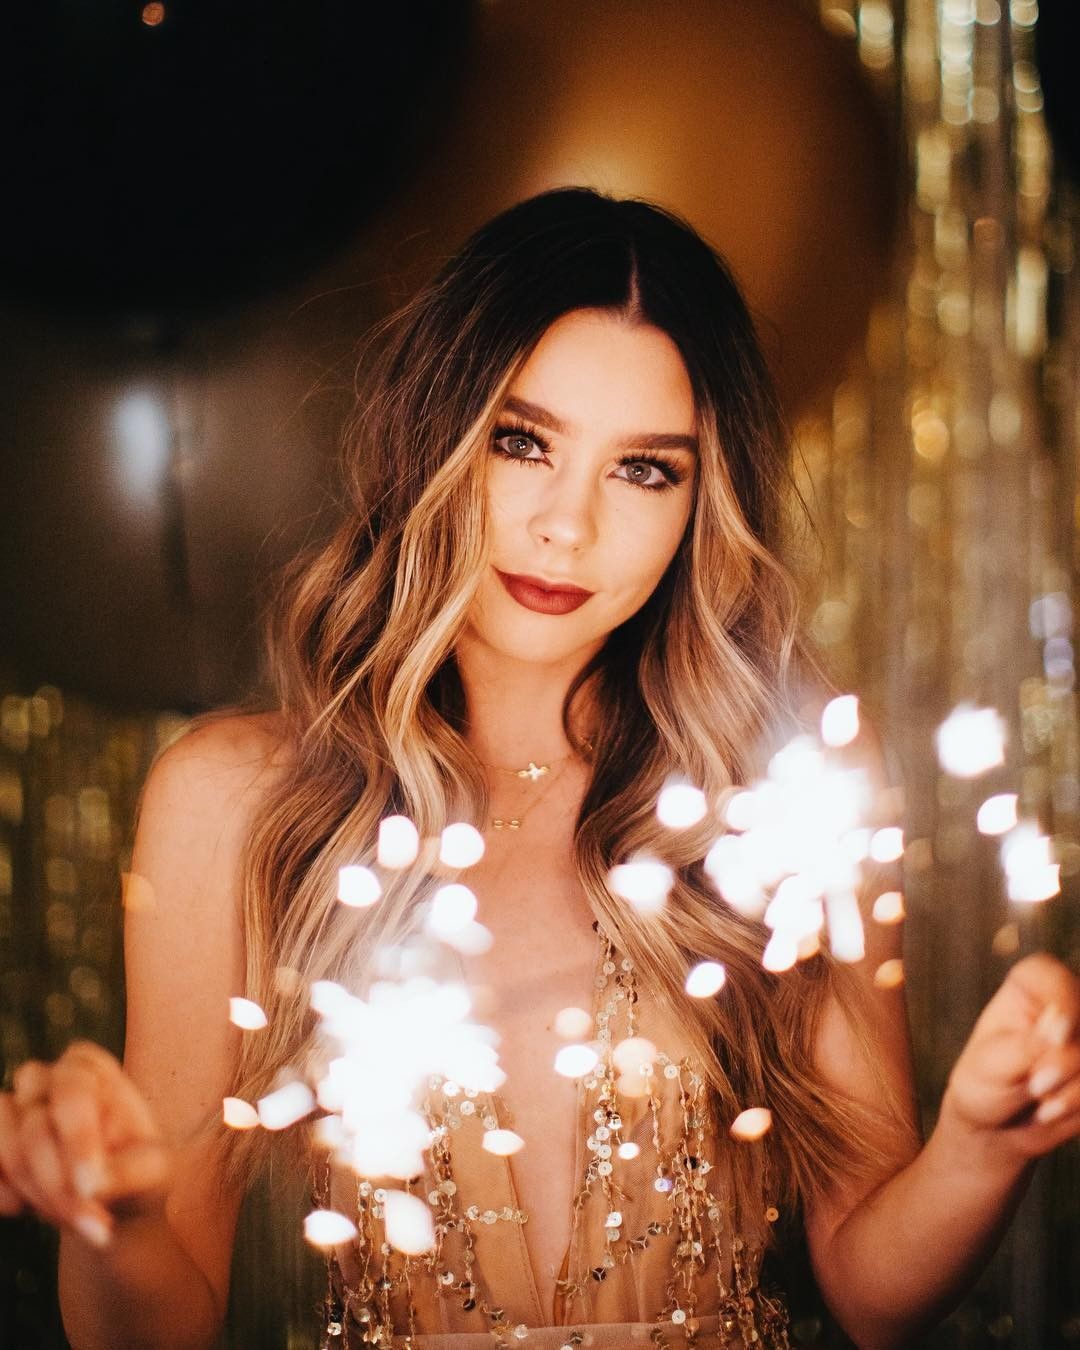
Party Glows

Conceal the distracting elements in the background using this overlay. The photo will look catchier and brighter.
Angel’s Glare
Another overlay for wedding photographers. Apply it if you want to make your picture softer and lighter.
Light Blur
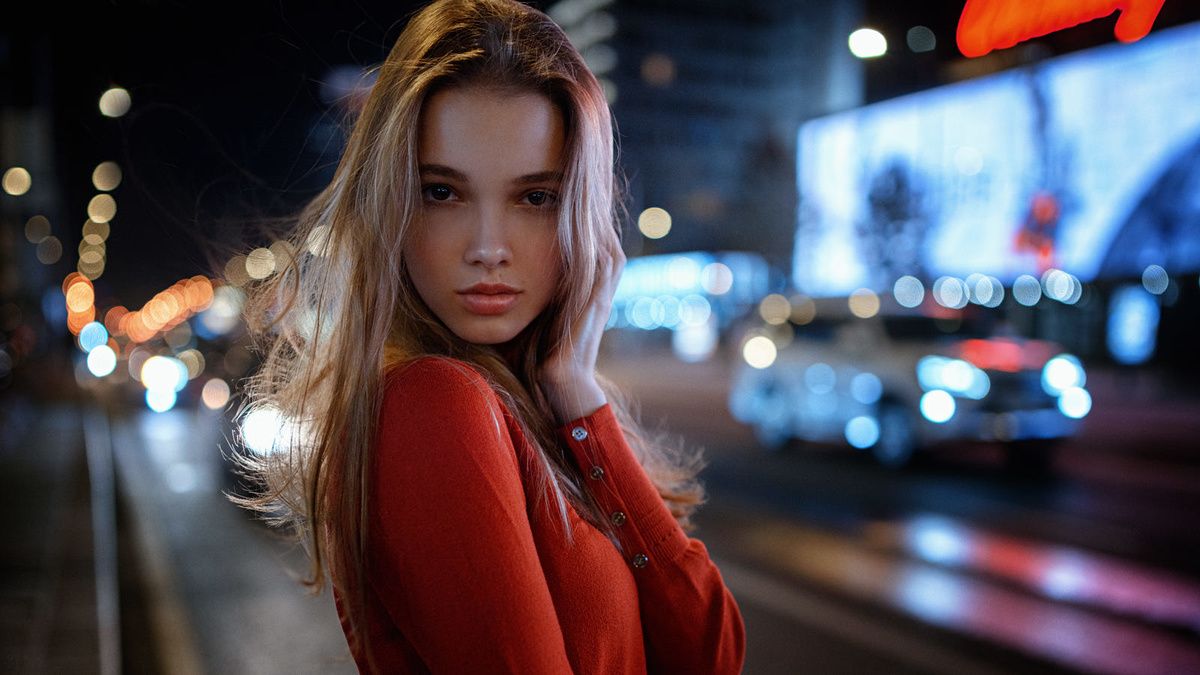
Have you taken an urban photo and now want to focus viewers’ attention on the person in the foreground? Make use of this overlay. It is also an ideal variant for a bokeh portrait if you want to boost warm shades.
Night Mood
Those photographers engaged in nighttime or evening photography will appreciate the “Night Mood” overlay. The edited picture will look brighter and warmer.


