Luminar AI Assistant
Whenever I try to use AI tools while working on FixThePhoto projects, I realize that I need to use so many different features, sliders, and editing options that I spend more time on editing tasks than I should. As a result, my workflow becomes unnecessarily complicated.
This is why I decided to test the Luminar AI Assistant to see whether it would allow me to handle my daily tasks more efficiently.
I had some prior experience with Luminar, as I often used it to make quick portrait edits and enhance travel photos, landscapes, and other pics that required subtle finishing touches before publication.
I knew how to use some simple editing tools. However, I would occasionally find myself in situations where I knew the result I wanted but had no idea which tools to use.
For instance, I may decide that I wanted to make the lighting in a portrait photo warmer. However, even though I knew that I needed to configure some settings, I did not have enough time to experiment with the sliders to achieve the desired result.
Besides, I would often need to transform the mood of a photo, make it look more cinematic, change the atmosphere, or make it look as if it was captured during the golden hour. In such situations, I would realize that there is no single tool I could use because I needed to perform more complex adjustments.
This is when I discovered the Luminar Neo AI Assistant.
The unique advantage of this feature lies in the fact that I no longer need to search for the right tool through Luminar's interface. I can use a simple text prompt to describe the result I want to produce. The Assistant can recommend the best edits, explain how to use specific tools to produce the output I need, and perform simple adjustments automatically, after which I can refine the resulting image manually.
Even though I do not consider the AI Assistant Luminar Neo a replacement for manual editing tools, I believe that it could be an excellent solution for situations when I understand what result I need to achieve and want to learn how to use specific tools to get the output I need.
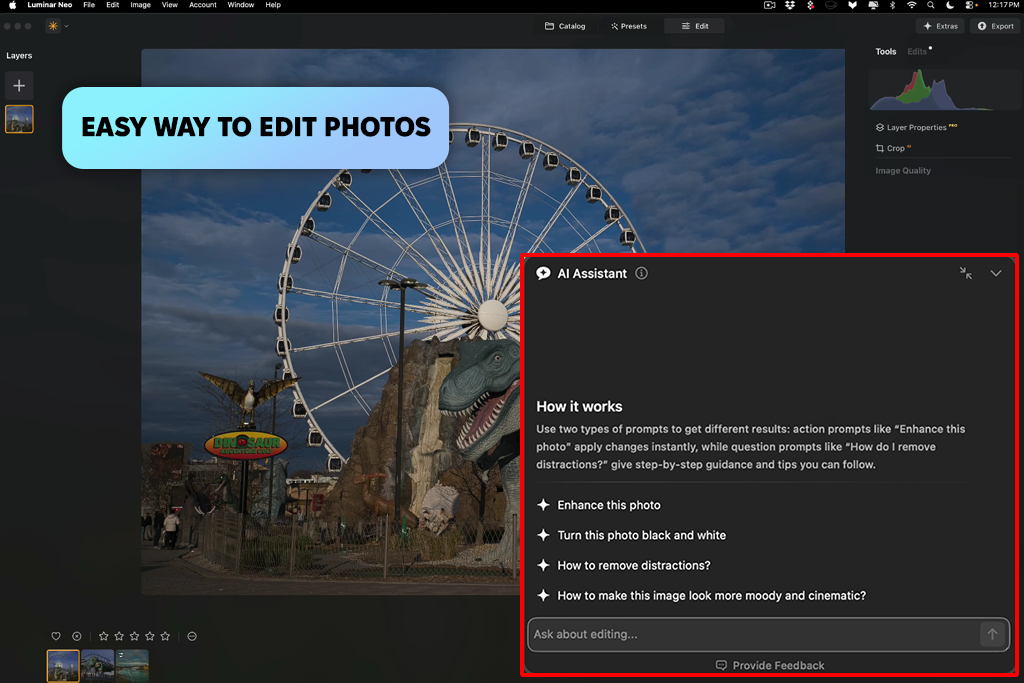
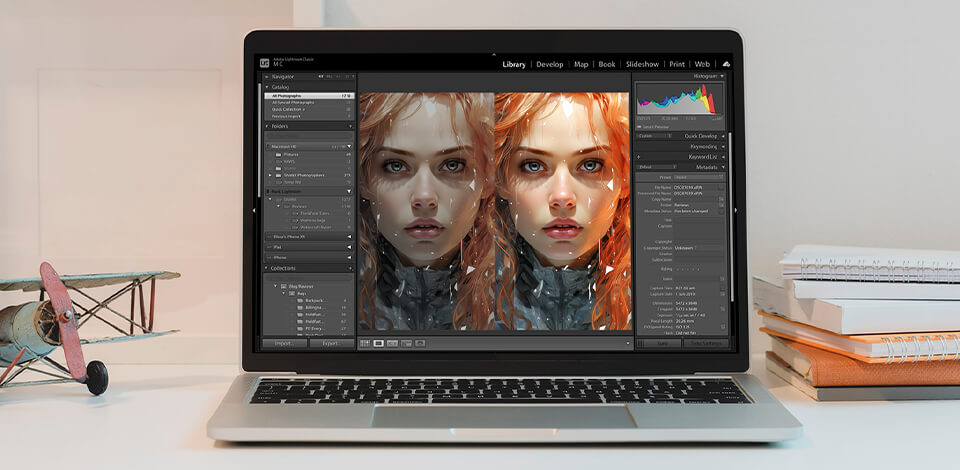
The Luminar AI Assistant is an AI-driven solution integrated with Luminar that was built for those who want to streamline their photo editing workflow. It can analyze your text request and make helpful suggestions that will allow you to enhance a specific photo.
The Assistant makes it unnecessary to spend time watching countless tutorials or looking for online guides. I no longer need to read long articles to learn how to perform various lighting adjustments if I simply need to edit a portrait with flat lighting. This AI feature can help me understand how to enhance a specific photo.
I can ask the Assistant how to edit my image and then choose the most relevant suggestions. Besides, I can ask how to fix a specific problem and use the Assistant to get helpful tips.
This feature is suitable for two different purposes:
Skylum advertises the Assistant as the solution designed to generate editing suggestions and provide step-by-step guidance. It can also automatically provide up to three suggested edits with previews and brief descriptions. Besides, it can recommend the most suitable tools and suggest helpful shortcuts.
I believe that such capabilities make the AI Assistant a more valuable option than one-click AI enhancement apps.
When I decided to test the AI Assistant, I did not want to use Luminar to enhance my photos automatically. I realized that it could be more useful than regular AI photo editors.
I wanted to check whether this solution would allow me to maintain full control over my pictures.
When I need to enhance a portrait, I want to understand how to preserve natural skin texture, make the eyes brighter, add some warmth to the skin, and adjust contrast to achieve a more dramatic effect.
However, when using the Luminar AI photo Assistant, I wanted to learn how to simplify the first stage of my editing workflow.
I did not need to start adjusting exposure, contrast, color temperature, saturation, and details right after opening an image. I could describe the desired result in plain language and get suggestions regarding the portrait adjustments I needed to make.
The Assistant is especially useful for the following situations:
I did not want to use the AI to edit my photos automatically. However, I wanted to check whether it could help me expedite my workflow.
The Assistant can be accessed directly from Luminar. It cannot be used as standalone photo editing software. After opening a photo, I can write my request to generate suggestions with the help of the Assistant.
Even though it may seem similar to AI chatbots, the main difference lies in the fact that it analyzes the image I need to edit. I can ask for general suggestions on how to enhance my photo or describe the specific result I want to achieve.
By writing specific prompts, I can get more practical recommendations.
For instance, instead of writing something like "enhance this photo," I use more specific requests. I may ask the AI to add some warmth to my portrait photo and keep the skin tones natural. It allows the Luminar Neo AI photo Assistant to come up with more useful suggestions.
Besides, I can continue the conversation instead of writing a new request after every edit. It allows me to achieve the result I need gradually. I might perform an overall enhancement and then decide to make the lighting warmer or apply a cinematic effect.
Such functionality makes my editing workflow more intuitive, as I do not need to write many commands.
At first, I was worrying that the Assistant might function like an advanced preset system. I did not want it to analyze my request and recommend the same adjustments for typical cases. However, I was pleasantly surprised by the capabilities of its conversational interface.
I discovered that the Assistant analyzes each photo in the context of my requests and considers what output I want to achieve.
When I asked it what steps I needed to take to enhance my photo, it recommended several approaches I could follow. I could compare these suggestions and use the techniques I needed for my photo.
It’s essential to choose a suitable approach depending on the type of photo. There is no single way of enhancing pictures of all types. For instance:
I consider the Assistant a creative editing partner instead of fully relying on this automated tool while editing my images.
The important part: the AI can recommend specific editing directions, but I am the one who chooses the most suitable approach. I do not need to blindly follow AI-generated suggestions. I can compare them and choose the most suitable approach for editing my image in a specific style.

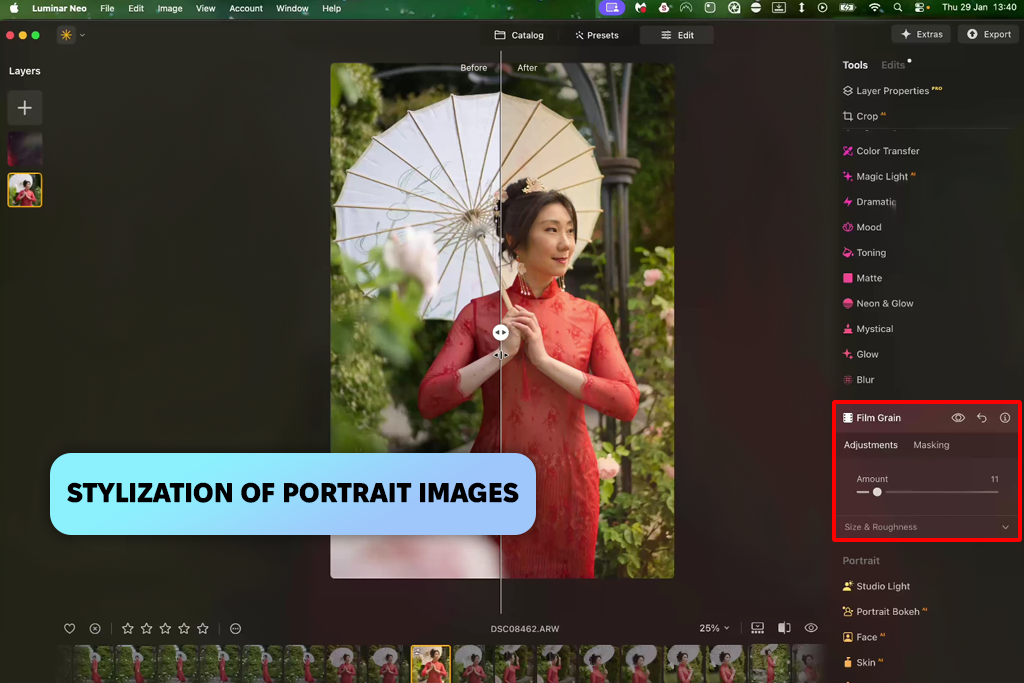
While testing this artificial intelligence software, I chose a portrait with a well-balanced composition that required some enhancement.
There were no exposure issues, but I noticed some things that were impacting the way the image looked:
In most cases, I prefer to start by fixing the exposure and white balance. Then, I adjust contrast, color, and other settings.
This process could be quite time-consuming, which could be especially frustrating in situations when I do not need to perform complex edits but want to enhance a photo before further editing.
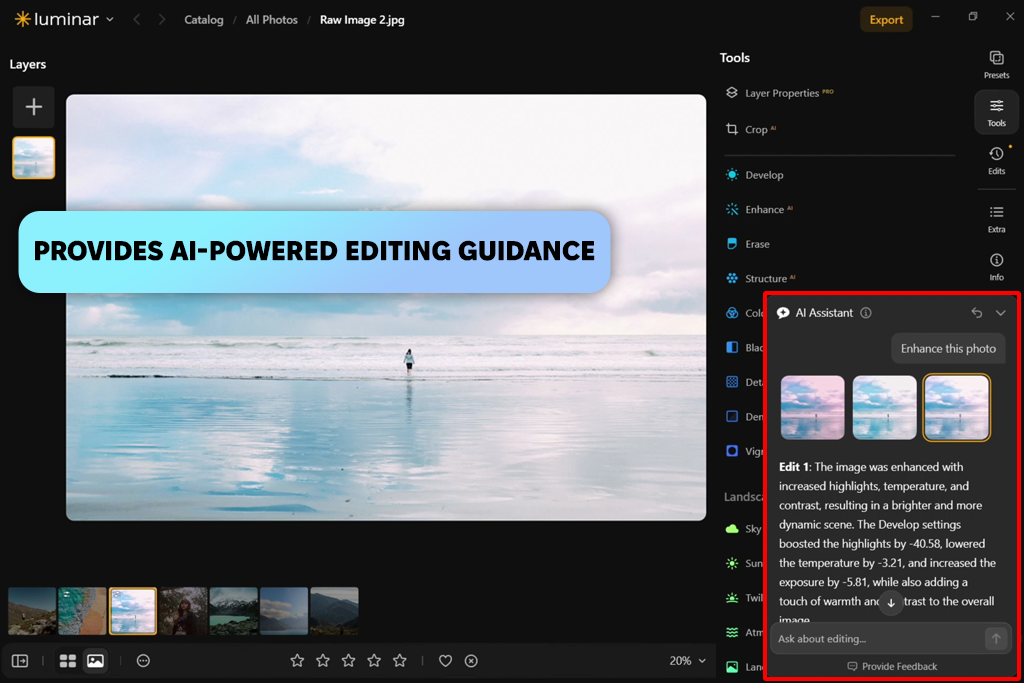
I asked the Luminar AI editing Assistant how I could improve the portrait and used its recommendations when making the initial edits.
I was pleased by the fact that I did not need to rely on automated presets and could simplify routine tasks while maintaining full control over the result. I could compare several versions and choose the best editing directions for each particular case.
My workflow looked like this:
Original photo → AI recommendations → choose a direction → manual edits → the output
The best thing about using this AI tool for designers and photographers is that I could continue editing my image manually afterward to make the adjustments I needed. I changed specific settings and fixed various issues to give my portraits a polished feel.
While testing the Assistant, I discovered that its main advantage lies in the fact that it makes it easier to achieve the exact output I need. Instead of using it to edit an image with one click, I use it to create an image that can be used as a visually appealing starting point. Then, I can further enhance the result manually.
The best thing about this is that I do not need to fully entrust photo editing tasks to the AI:
I highly value this balance between automation and control because it allows me to make the most out of AI automation without relying on such tools too much.
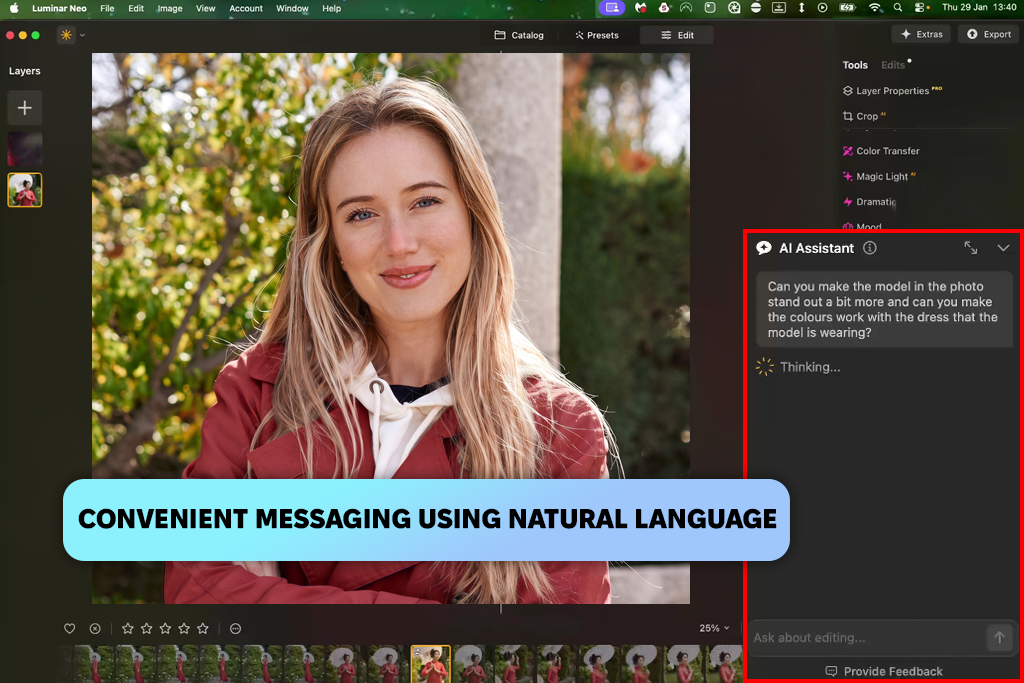
I quickly realized that it’s better to describe the mood and atmosphere instead of asking the AI to improve the technical quality of my photos. While testing the AI Assistant, I asked it what steps I needed to take to make my photo look as if it had been taken around sunrise.
One should make multiple edits to achieve this effect manually and adjust the following:
Normally, I would need to experiment with those settings to achieve the result I needed.
However, while using Luminar’s AI tool for content creation, I could describe the visual effect I was interested in and get helpful suggestions for making the right technical adjustments. I asked it how I could achieve a warmer, more atmospheric effect to make my photo look as if it was taken in early-morning light.
As a result, I discovered how to make the tones warmer and add a golden-hour effect to my photos. The best thing about the Assistant is that it suggests how you can move different sliders to achieve the result you need. It was easy for me to tell what output I wanted to achieve and wait for the suggestions generated by the Luminar Neo AI editing Assistant.
This approach helped me transform the way I think about photo editing.
I no longer think:
"I need to adjust the temperature, highlights, shadows, and saturation."
Before editing a photo, I consider the output I want to achieve:
"I want to make a photo look as if it was taken at a warm sunrise."
The Assistant allows me to choose the right editing direction. I like using it when I do not know which settings I need to adjust to achieve the result I need. I explain how I need the photograph to feel, and it suggests the potential steps I need to take.
Next, I can keep editing my photo and come up with different interpretations of the same idea. For instance, I can use the following words while writing a prompt:
This makes the Assistant perfect for expediting my workflow and experimenting with new ideas.
Sometimes I understand what result I want to achieve but do not know which editing techniques to use. Before the AI Assistant was released, I used to search for tips and tools that can streamline photo editing for beginners. However, now I can describe the result I want to achieve and use the Assistant's tips to master new techniques that can help me improve my photo.
I do not use the AI to enhance photos automatically. However, it helps me to understand which techniques I need to use to edit a photo the way I imagine it.
I never consider the Assistant a one-click editing tool. However, this feature is invaluable for my needs when I want to experiment with different creative approaches and maintain full control over the output.
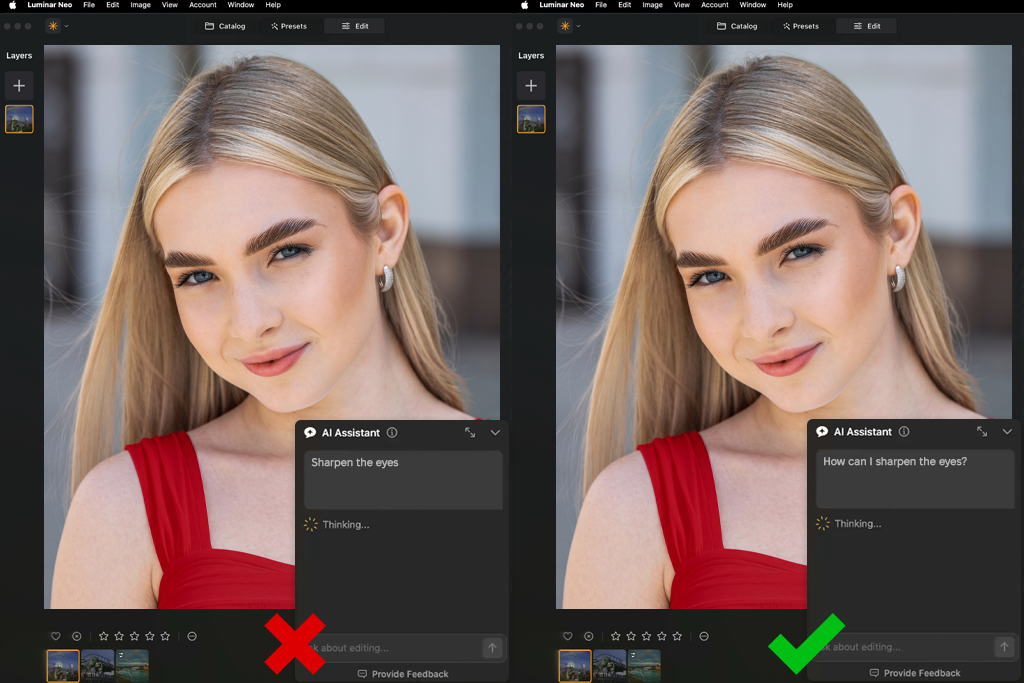
While using AI generative fill tools, I do not always need them to perform actual editing instead of me. This is why I enjoy using the AI Assistant, as it allows me to understand how to edit my photos in a certain way by myself. I never ask it to solve an issue automatically, but I use it to get helpful suggestions on how to improve my editing workflow.
For instance, if I see that the eyes in a portrait look a bit soft, I can ask:
"How can I make the eyes sharper?"
Instead of increasing sharpness automatically or relying on AI image sharpener tools, I use the Assistant to understand which Luminar tools I can use to achieve a better effect. It allows me to get the result I need without telling the AI to increase sharpness. I understand what features I should use and why specific edits may be necessary.
While using a tool that was built specifically for editing facial details, I can build my skills and learn how to use Luminar more efficiently. It will make it easier for me to handle similar problems in the future.
While using the Luminar AI Assistant for photo editing, I learned how to navigate the editing interface. Instead of blindly trusting the AI, I learn how to solve problems in my own way and develop the skills that are necessary for using the software at an advanced level.
I believe that using the AI in such a way is more useful than simply asking it to edit images automatically. I use the Assistant to learn how to solve various issues and improve my ability to handle complex tasks on my own.
Even though I mostly focused on portraits during my test, the Assistant could be useful for enhancing other types of photos as well.
While editing landscapes, I use it to perform professional atmosphere, color, contrast, haze, and sky adjustments. It’s better to improve landscape images with multiple subtle corrections instead of trying to achieve a dramatic effect. This is why it’s important to describe the desired mood with high precision.
With travel photography, it is crucial to focus on speed. I often need to enhance hundreds of photos captured during one trip. In many cases, they require simple edits. I prefer to use the Assistant to understand how to fix exposure, color, or white balance. It allows me to expedite my workflow and avoid spending too much time on manual editing tasks.
For street photography, I prefer to focus on creative direction. While writing a request, I prefer to ask how to achieve a more cinematic or dramatic effect, which allows me to create multiple versions of the same scene.
With wildlife photography, I would prioritize detail, subject visibility, contrast, sharpness, and choosing the right enhancement tools.
The Assistant may not be equally suitable for every photography genre. However, it could be surprisingly helpful when I communicate clearly what result I want to achieve.
While using AI-driven tools, one should be especially careful when editing portrait photos. Unlike a landscape or architectural photograph, a portrait includes a lot of visual information that impacts our perception. Even subtle edits impacting skin texture, facial features, colors, or lighting can make a person look less natural.
When used in the right way, AI can save a person a lot of time. You may need to improve several aspects of a portrait at once. For instance, you may need to fix uneven lighting, make the skin look clean, make the eyes sharper, and enhance the colors. The AI Assistant can help you understand how to handle these tasks and achieve a better result.
For instance, you can use this tool to enhance a portrait captured indoors near a window. The face may look a bit underexposed. Besides, you may need to change the color temperature while editing the background and make the skin tone warmer. General enhancement may help me fix exposure and contrast while adding some warmth. Then, I assess the output and decide whether it needs further manual improvement.
Some portraits have good lighting but can benefit from increased definition. To enhance them, I ask the Assistant about the following:
"How can I emphasize the eyes without increasing sharpness for the whole portrait too much?"
This request is more specific than a generic phrase "improve the portrait." A more detailed request allows me to understand which tools I might use while editing a portrait manually. I can use them and maintain full control over the intensity of each effect.
I would not rely too much on AI tools while editing portrait photos. It’s easy to produce output with unnatural skin textures. While making subtle edits in regular AI apps for iOS and Android, you can notice that faces do not look realistic enough.
Here are the main things I focus on after using AI while enhancing photos:
For instance, if the source photo has naturally visible skin texture, I wouldn't use the Assistant. I would prefer to remove imperfections manually and preserve the details that make the skin texture look natural. Even though it might be useful to add sharpness to the eyes, I would not want to make them too crisp and draw attention from the rest of a portrait.
If you want to enhance portraits in a natural way, you can use Fix The Photo Body Editor & Tune to improve skin texture, edit facial details, tweak tones, and adjust sharpness subtly. You just need to upload your photos and describe the result you want to achieve.


I often use the Luminar Neo AI Assistant for photo editing when I need to choose the right direction and make initial edits, after which I examine and fine-tune the output manually.
For instance, the Assistant may help you enhance a portrait, but the skin will look unnaturally smooth. Instead of discarding the result, I can adjust the relevant effect.
I use the same approach when enhancing different parts of the portrait. For example:
This approach is much more efficient, as you don’t need to rely on automated adjustments too much and can control the output with better precision.
Another advantage of Luminar is that it is easy to integrate with an Adobe-focused workflow. You can use Luminar as a plugin with Adobe Photoshop and Lightroom Classic. This solution is especially suitable for photographers who already use Adobe software and want to access the AI-driven tools available in Luminar.
For instance, I could use Lightroom to organize my images, edit RAW files, adjust the exposure, and improve the white balance. I could then open this photo in Luminar to use AI-assisted retouching tools, tweak lighting, enhance colors, or make other creative edits. The AI Assistant will help you choose the most suitable tools and editing approaches to achieve the desired result.
This solution is especially useful in situations when I have a well-structured workflow in Adobe and don’t want to switch to third-party editing software. I prefer to use Adobe to handle the most familiar part of the workflow and then use the AI tools available in Luminar. Next, I can fine-tune the output manually.
It does not make sense to make the Assistant the central component of your editing workflow. However, it can help you significantly streamline your editing processes. I often use it when I do not understand how to proceed and need to get some suggestions. Then, I can edit the result manually.
Even though I was impressed with this feature, I would not use it for every task. I prefer to edit my images manually when I need to achieve higher accuracy.
For instance, if I need to enhance a portrait, I prefer to examine the output at 100% zoom to check whether skin texture looks natural. I need to check the eyes, hair, background edges, and color transitions personally. AI can help me achieve passable results, but the output quality is usually insufficient for professional delivery.
I also do not believe that it’s possible to use the Assistant to learn how to use every tool. The current version is limited, making it less suitable for those who want to learn how to use Generative, Merge, and Enhancement tools. The Assistant can help me choose the most suitable editing tools, but it won’t show me how to use every feature available in Luminar.
Before deploying the Assistant, one should understand that it functions as an AI editing companion, and not as a standalone application. This is why it does not make sense for me to choose between AI and photography.
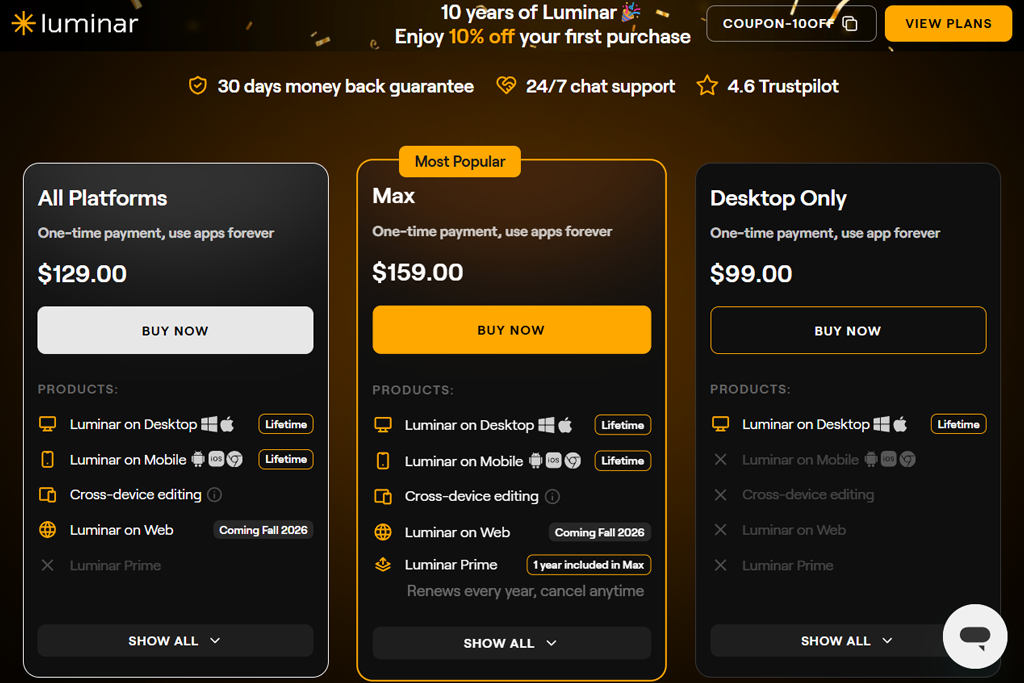
You can access Luminar AI Assistant from Luminar, as it’s not sold as a standalone tool. This photo editing software for beginners can be accessed through a one-time purchase. There are different plans available, so that you can choose the right option depending on whether you are interested in desktop editing or want to edit your images from different devices.
The Desktop Only plan costs $99. It allows you to get permanent access to Luminar on Windows and macOS, as well as use the AI Assistant and other AI tools without paying extra for the first year.
The All Platforms plan costs $129 and allows you to use Luminar Mobile, edit your images on different devices, and access Luminar Web when it gets released. This plan will be especially useful if you need to switch between desktop and mobile devices without disrupting your editing workflow.
The Max plan costs $159 and covers every feature available in the All Platforms plan. Besides, it includes one year of Luminar Prime. Prime allows you to use extra AI tools, new features released during the subscription period, and use an extensive collection of creative assets.
All versions have a 30-day money-back guarantee. Besides, users can access 24/7 chat support. The AI Assistant is included with the Luminar plans, which means that you don’t need to purchase it separately.
Luminar AI Assistant is an AI-driven solution available in Luminar that was built for photographers who want to understand photo editing and handle tasks with ease. There is no need to know exactly which tools to choose, as the Assistant recommends the best editing features or workflows. This feature allows you to quickly edit photos in Luminar.
The Assistant streamlines the editing workflow, but it does not enhance images automatically, which makes it different from AI-powered one-click editors. It was designed to recommend the most suitable tools, perform specific edits, or choose certain approaches that you can adjust as you see fit.
Yes. This virtual assistant answers user questions regarding editing tasks. For instance, you may ask, “How can I make a dark face brighter?” or “How can I give a dramatic feel to the sky?” The Assistant can recommend specific Luminar features and explain how you can use them.
Yes. Less experienced editors rely on this feature because it allows them to edit their visuals without mastering every tool available in Luminar. You may ask questions and follow the recommended guidelines to learn how to navigate the editing interface and use specific techniques without studying Luminar tutorials.
Yes. You can use it when editing portraits, as it will help you understand how to choose the right tools for tweaking lighting, making colors richer, enhancing facial details, or improving the overall appearance of a portrait. However, you will still need to make some edits manually to maintain natural skin texture and preserve facial details.
Luminar Neo has special plugins for Adobe Photoshop and Lightroom Classic. It allows photographers to use Adobe software for organizing pictures or making initial edits, then import enhanced photos into Luminar Neo to access its AI-driven editing tools. It’s better to integrate the Assistant into the broader Luminar workflow instead of using it as a standalone Adobe feature.
Not quite. The Assistant can streamline your editing workflow and help you understand what steps you need to take next. You can use its guidelines to edit your image and make manual edits to achieve the output you need.





![7 Best AI Fraud Detection Software [{{%year}} FixThePhoto Choice]](http://fixthephoto.com/blog/images/gallery/news_main__preview_29429.jpg)