Atmosphere AI in Luminar
By introducing mist or fog to an image, you can easily make it come across as more cinematic, atmospheric, and volumetric, but achieving a realistic effect manually can require a lot of effort. Atmosphere AI in Luminar streamlines this task by leveraging depth-aware artificial intelligence to generate fog, mist, layered fog, or haze while preserving the visibility of all essential elements and making sure they are naturally separated from the effect.
I use this feature for landscapes, forests, mountains, and outdoor portraits whenever I conclude that the original photo feels too clear or flat. Atmosphere AI examines the shot and employs content-aware and depth masking to figure out where the effect needs to be applied. As such, I could add the atmosphere in the foreground, background, or to the entire scene without completely obscuring a person, tree, building, or other crucial elements.
The renewed UI helps access Atmosphere AI more conveniently straight in Luminar’s main workspace. The newest update is available in version 1.28, so you have to ensure your software is up to date before you can take advantage of the latest Atmosphere AI edition. Once you’ve upgraded, you’ll enjoy improved controls that will make it simple to try out various atmospheric effects and establish the desired mood without complex masking.
Skylum Luminar is releasing its 2026 updates in two waves, with the Summer Interface Upgrade already out and a bigger Fall Upgrade scheduled for later this year. The summer update prioritized ensuring the solution felt cleaner and simpler to use, while the upcoming release will introduce new creative features, including a huge upgrade to Luminar Atmosphere AI.
The first thing that caught my eye when using the newest version was the improved interface. The layout now feels a lot more minimalistic while making it easy to navigate the available features, including GenTools, masking, and presets.
The performance was also significantly improved, as exporting can be up to 25% quicker, masking consumes 33% less RAM, and preset previews can load up to four times faster. Moreover, Luminar now supports multiple new cameras like the Panasonic Lumix DC-L10, Sony A7 V Compressed RAW, and Sony A7R VI.
During my test, I focused on experimenting with Atmosphere 2.0 Fog in the Fall 2026 upgrade. Rather than just adding a fog layer on top of a photo, it’s meant to react to the lighting and colors already featured in the shot, achieving more realistic depth and integration.
It’s a particularly good fit for landscapes, forests, and other atmospheric pictures where I wanted to enhance the mood without making it look unnatural. Moreover, the Fall update will deliver Crop 2.0, improved Enhance AI, AI Assistant 2.0, and a Web Editor, with some tools offered to everyone and others provided in a paid upgrade for eligible users.
There are three Luminar lifetime licenses for you to pick from: Desktop Only ($99), All Platforms ($129), and Max ($159). I appreciate the fact that these are single-time purchases, meaning I don’t have to worry about yet another recurring subscription.
The Desktop Only plan provides a lifetime license for Luminar on two Windows or macOS devices, along with access to all released features and future upgrades, enhancements, and bug fixes. All Platforms offers the desktop license as well as Luminar Mobile for three devices, Luminar Web, and cross-device editing. The Max plan includes everything from All Platforms, along with Luminar Prime and one year of access to an ever-expanding collection of over 2,900+ presets, 490+ LUTs, 490+ overlays, and 70+ skies.
When it comes to Luminar Neo Atmosphere AI, it isn’t a separate plan or add-on. The Desktop Only and All Platforms plans both provide access to it, while Max also includes new features released while your Prime subscription is active.
I think Atmosphere AI in Luminar Neo is particularly helpful in situations when you’d like to set a specific mood or add depth without wasting time on creating complex masks by hand. It’s an especially great fit for:
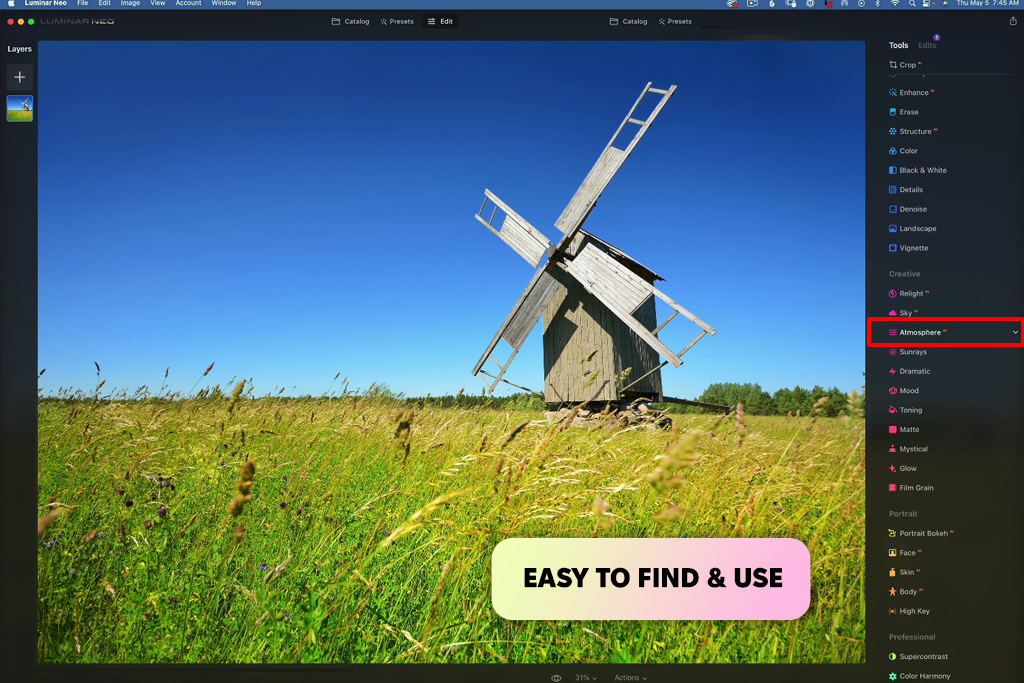
I tend to turn to Luminar AI Atmosphere AI after I'm done making all the essential edits to my image. Finding this tool is pleasantly simple, and I can conveniently add various atmospheric effects before adjusting their intensity and placement.
Step 1. Open the photo in Luminar Neo and click on the Edit module.
Step 2. Go to the Creative section in the right-side panel and pick Atmosphere AI.
Step 3. Select an effect from the Mode menu: Fog, Mist, Layered Fog, or Haze.
Step 4. Tweak the Amount slider to fine-tune the intensity of the effect.
Step 5. Leverage Depth to adjust where the atmosphere is added to the photo.
Step 6. Change Lightness to ensure the effect looks brighter or more subtle.
Step 7. If needed, employ masking to add the atmosphere only to specific areas.
Tip: It’s a smart habit to use the Mood tool and its Luminar LUTs after you’re done with Atmosphere AI to merge and blend the original photo with the new elements.
“I enjoy using Atmosphere AI since it allows me to add realistic fog and mist without creating the effect manually. The Depth setting is especially helpful for separating the foreground and the background.”

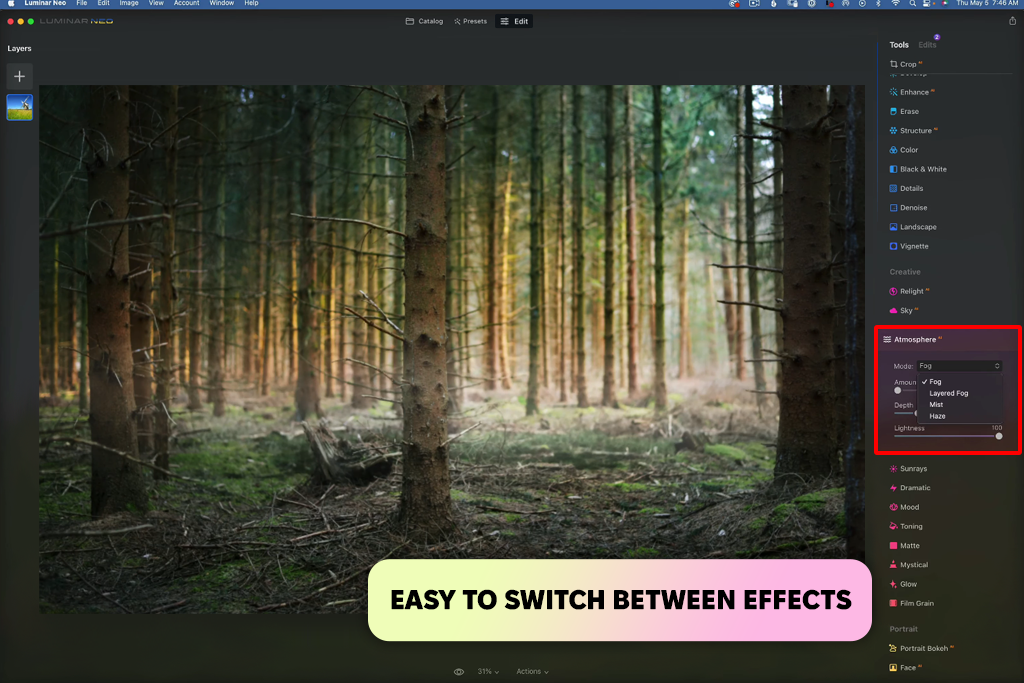
The Mode allows me to pick what type of atmosphere I’d like to apply to the image. Luminar AI photo editor provides four options, and I choose the one that matches my vision and the scene the best.
Fog. I pick this if I need a more impactful effect that can cover most of the scene. Luminar Fog AI effect is a great fit for setting a mysterious mood in forests, mountains, valleys, or cloudy landscapes.
Mist. I apply Mist AI in Luminar Neo to get a softer and more subtle effect. It can introduce a tasteful hazy feel to morning landscapes, lakes, or outdoor portraits without drawing too much attention to itself.
Layered Fog. This option generates a lower, ground-level atmosphere. I appreciate how Luminar can layer fog for woodland paths, roads, fields, and valleys since it can ensure the foreground and background look more separated.
Haze. Haze is more subtle and is the recommended option if you just want to soften the environment and create a bit of atmospheric depth. Consider adding Haze AI in Luminar Neo for distant mountains, city views, or bright outdoor pictures.
I typically try out two or three Modes before choosing which result looks the most realistic. The same image can look completely different with Fog versus Mist, so testing different options before moving on to the sliders can prove to be very time-efficient.
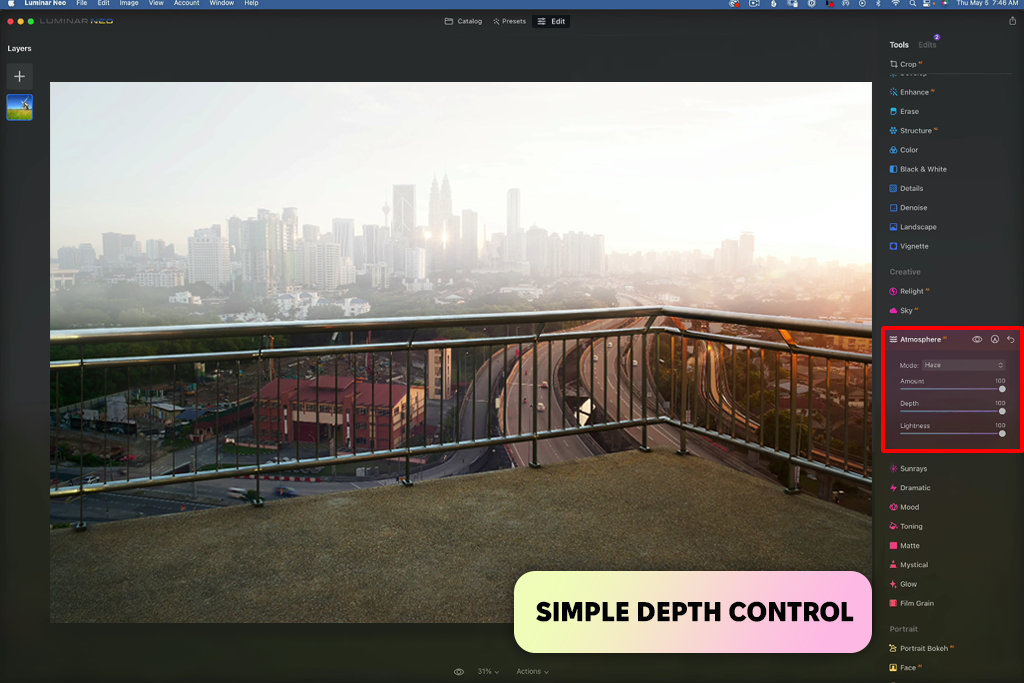
Once I pick the effect type in the Luminar Atmosphere AI tool, I tweak the three primary sliders to adjust its strength, depth, and brightness. I tend to tinker with one setting at a time since even a subtle adjustment can noticeably affect the mood and depth of the image.
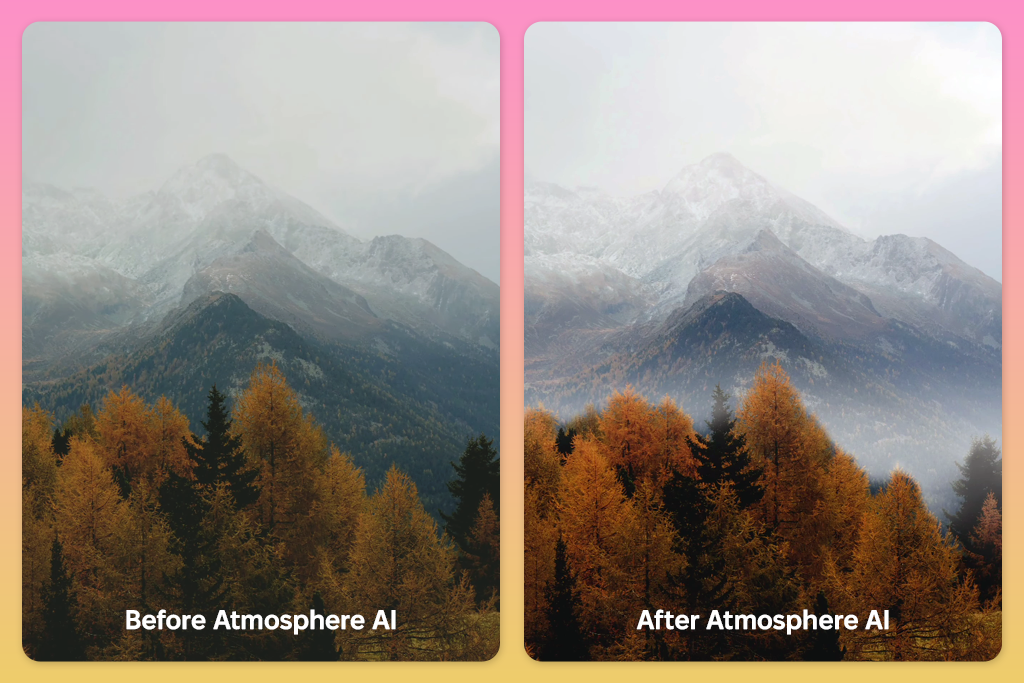
I tested Luminar Atmosphere AI with different kinds of pictures, including landscapes, forests, and outdoor shots, and I noticed the biggest difference when the photos already had some depth between the foreground and background. Rather than just generating a white layer and adding it on top of the image, the effect separated distant elements and made the environments look more dimensional.
I received the most believable outputs when using this photo editing software for PC and macOS whenever I chose fairly subtle slider values. Mist was perfect for bright morning landscapes, while Layered Fog made forest paths and valleys look more grounded and eerie. For mountain pictures, boosting the Depth allowed me to make peaks look more distant, ensuring the environment felt more spacious.
Additionally, I tried using Atmosphere AI for images with people and trees in the shot. The algorithm identified these elements and ensured the effect didn’t obstruct them completely. I could easily set the desired misty mood without worrying about the primary subject.
I concluded that Atmosphere AI is at its most useful when you focus on making subtle adjustments and adding finishing touches instead of creating dramatic effects. If you set a moderate Amount with the optimal Depth and Lightness combination, the atmosphere will match the scene more naturally without requiring any manual tinkering on your part.
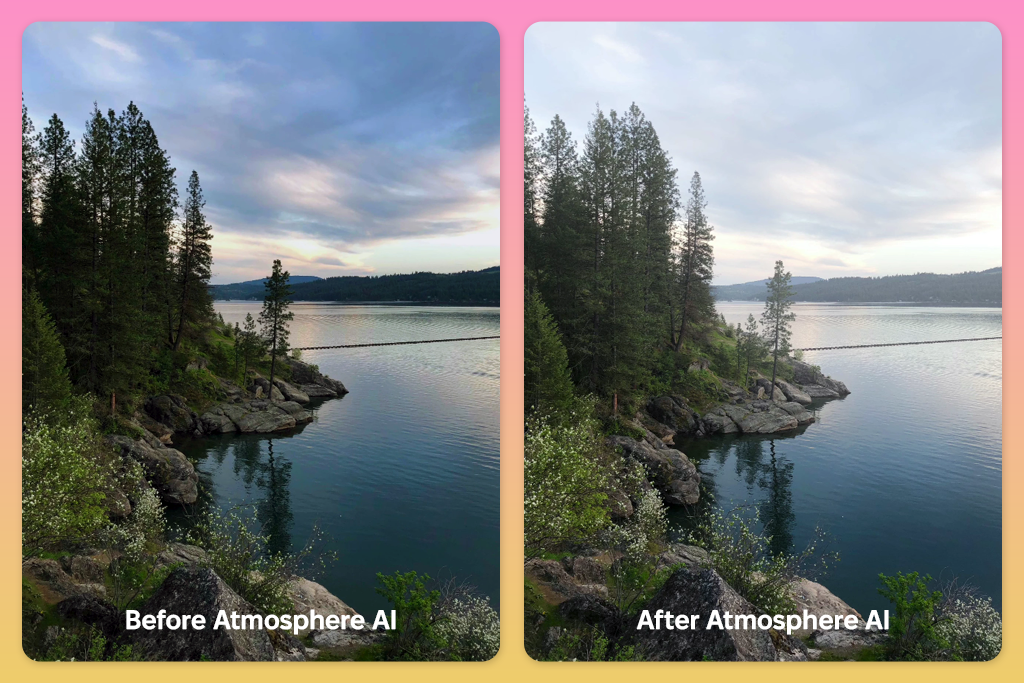
“I believe Atmosphere AI is perfect if a landscape feels a bit flat or bland. A bit of mist or haze can make a huge difference with minimum effort.”

During my test, using Luminar Neo Fog AI felt quite simple, but there are some caveats you need to know. Firstly, Luminar is paid software, meaning this automatic photo editor might not suit you if you just want to occasionally add some fog or mist to a couple of images and aren’t interested in any of its other features.
Additionally, how realistic the output looks is largely determined by the quality of the original photo. Images with proper foreground and background separation provide the AI with more material to process, while overly flat or busy shots might demand more manual involvement. In such situations, I typically decrease the Amount and adjust Depth instead of trying to add Fog AI in Luminar Neo more aggressively.
It’s also worth remembering that the Luminar Fog AI effect is meant to streamline the process, not completely remove manual editing. If I want complete control over where the fog is added, I tend to combine Atmosphere AI with masking or other editing features.
“Luminar layered fog AI is intuitive enough for making fast edits while still allowing me to fine-tune the output by tweaking the Amount, Depth, and Lightness. My main advice is to avoid creating an overwhelming effect since it can quickly start looking artificial.”

Even though it’s very easy to use Fog, Haze, and Mist AI in Luminar AI, my colleagues from FixThePhoto and I encountered several minor mistakes that can lower the quality of the result:
 Yes, if: You’d like to easily add natural-looking fog, mist, haze, or depth to landscapes and outdoor pictures.
 Not if: You don’t have much need for atmospheric effects or want unrestricted control over each detail.