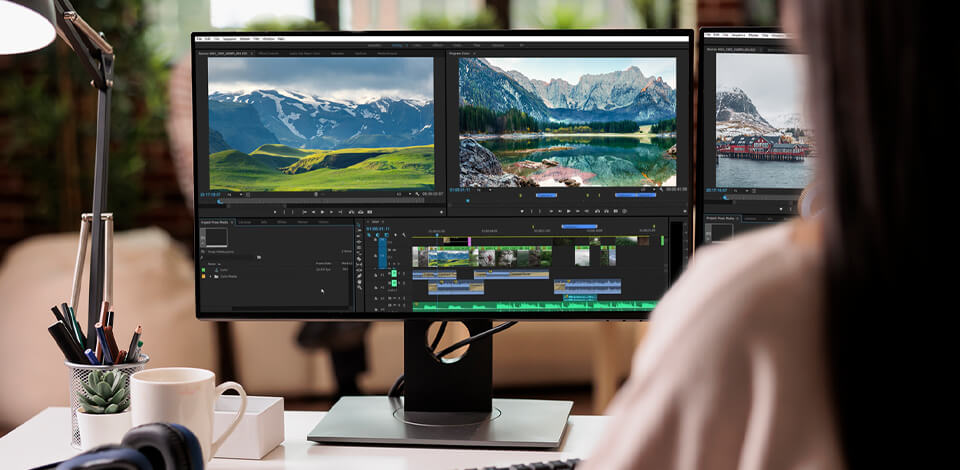
If you’d like to learn how to edit a 4K video on Windows, you’ll have to first find out the relevant hardware requirements for working with such a resolution and what video editing software for Windows to employ.
A 4K video offers a horizontal screen resolution of about 4,000 and a vertical definition of 2000 pixels.
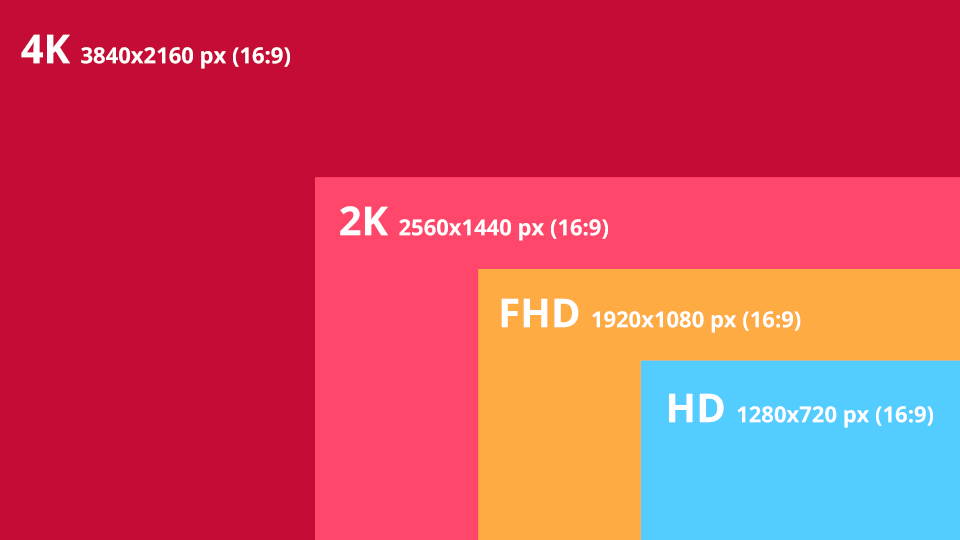
In less technical streams, 4K resolution is capable of containing a stunning amount of detail while producing a sharp, clear image picture that completely outclasses traditional resolutions, which you’ll instantly see if you ever pit 4K vs 1080p.
Additionally, 4K resolution is conveniently versatile, providing a lot more editing freedom while allowing you to enjoy unparalleled image quality. That said, if want to edit such footage or just learn how to play 4K video on PC smoothly, you need to own the necessary hardware that is powerful enough to support post-processing without significantly hindering your system’s performance.
As 4K videos have a significantly bigger file size because of the increased resolution, they demand a drastically more powerful PC for smooth editing compared to 1080p or 720p videos.
CPU (Central Processing Unit). Taking care of the bulk of the processing and execution work performed by the PC, your CPU has a direct effect on the provided video processing speed.
As such, larger core counts typically guarantee quicker video processing, and a modern 4K computer for video editing has to be supplied with a fast and efficient processor.
The minimum processor requirement for 4K post-production is an Intel Core i7 or AMD Ryzen 7 CPU. That said, if you want to ensure your PC’s performance is as smooth as possible, it’s advised to invest in a more advanced processor like the Intel Core i9 or AMD Ryzen 9.
GPU (Graphics Processing Unit). Created for improving graphic rendering, graphical cards were rather underutilized in video editing just a few years ago. However, recent industry trends show a constantly increasing number of 4K video editing software that heavily relies on GPUs to provide high-speed encoding and rendering. Having a powerful graphics card is particularly important when you have to export your 4K edit of a large video.
For decent 4K video editing performance, you need to get an NVIDIA or AMD GPU with 4GB of VRAM or more.
RAM (Random Access Memory). Acting as the primary holding element of your PC, memory is used for clip processing. Install at least 16GB of RAM to enjoy seamless 4K editing.
RAM frequency. Other than requiring a lot of RAM, this component also has to offer a high frequency to deliver optimal I/O performance. The larger the frequency, the smoother the I/O performance will be.
Whenever you see different RAM models that offer the same amount of memory but are priced differently, you can rest assured the reason for that comes usually comes down to frequency. Typically, 4K video editing requires a RAM frequency of 2666MHz or 2933MHz.
Storage. A good amount of storage space is essential when working with large files and this is particularly relevant for lengthy 4K videos. To set up an optimal workflow, it’s recommended to get SSDs (solid-state drives) rather than HDDs since they offer superior storage access speed, allowing you to perform different tasks faster.
Typically, it’s advised to own at least 500GB of storage space to handle an hour-long 4K video project. Such an amount should be enough for storing RAW footage, the edited project, and any extra visual assets used in post-production.
Since a lot of users don’t have the budget for getting an expensive PC that would at least match the minimum requirements for editing 4K videos, professionals offer several tips that will allow you to get the maximum out of your current equipment and receive a decent result.
Avoid installing big professional NLE systems on your C drive. It’s your job to make sure the system drive has enough space to offer smooth performance when using different software.
Lastly, if you’re editing the video for personal needs (not professional or commercial), choose a lightweight video editor for Windows that allows working with this resolution.
Make it your goal to find the best 4K video editing software that will ensure you have access to all the essential tools. More specifically, the optimal software for learning how to edit a 4K video on Windows should come with hardware acceleration functionality, fluid timeline scrubbing, real-time rendering, color grading, and so on.
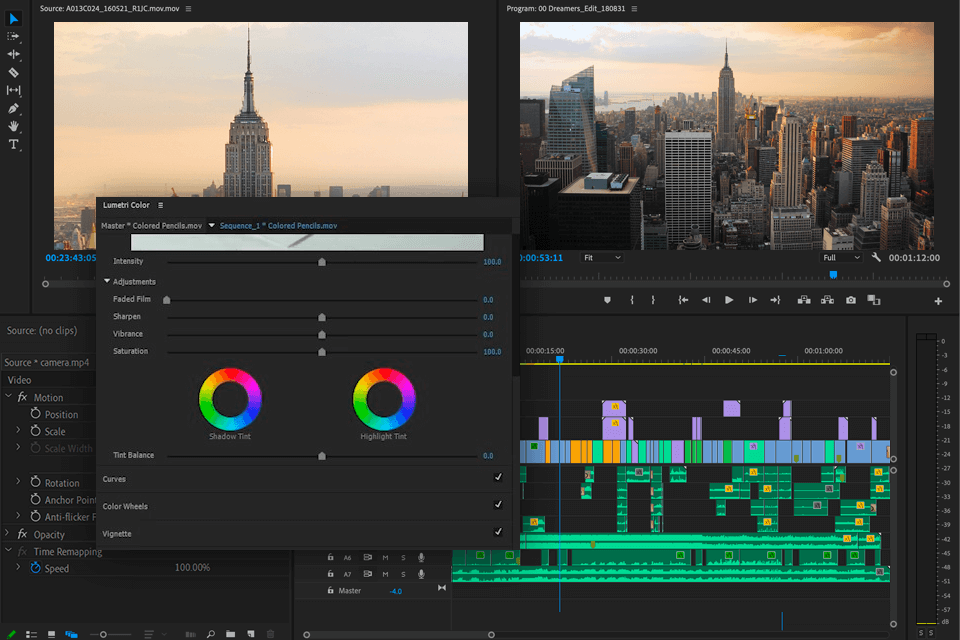
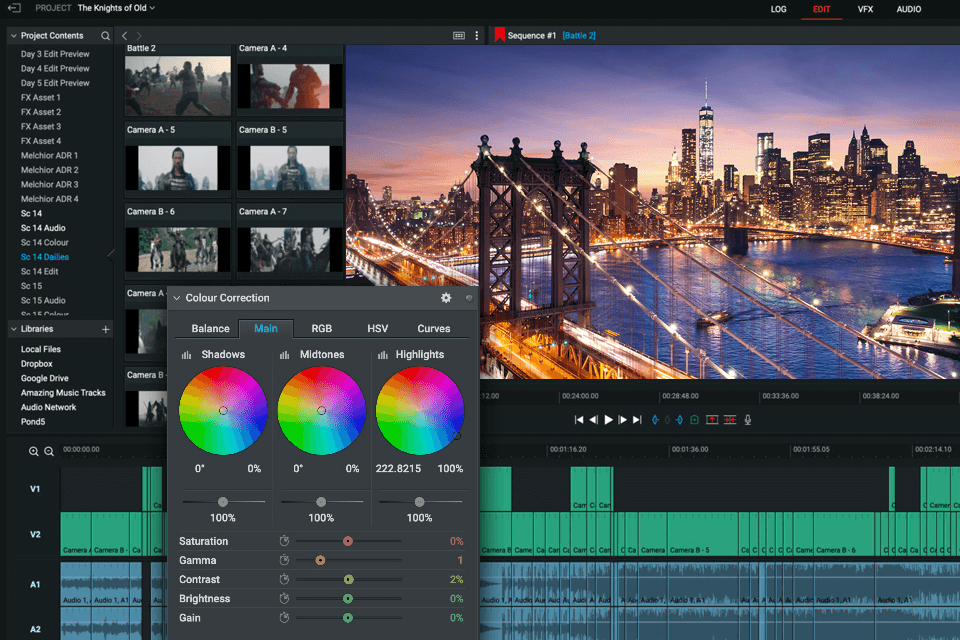
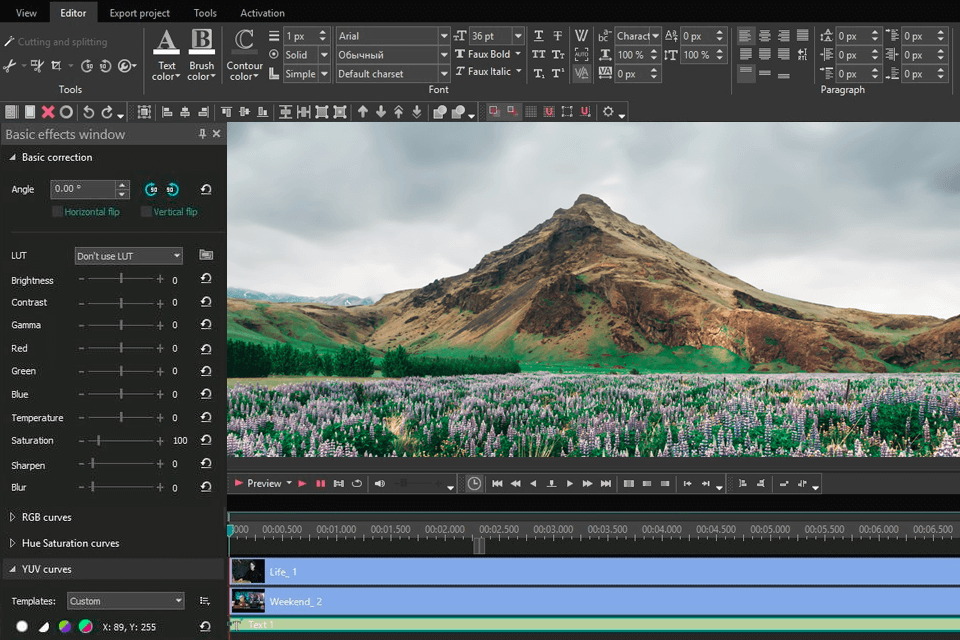
Adobe Premiere Pro is the optimal choice for professional editors, established YouTubers, and aspiring filmmakers who want to edit a 4K video on Windows. It comes with an array of tools designed for precise editing. Moreover, the provided Lumetri panel is the perfect tool for color grading.
If you're an experienced editor who has previously done 3-point and 4-point editing, you'll be glad to hear this solution comes with the rolling edit, ripple edit, slip, and slide edit tools that can be useful in a variety of editing situations. Additionally, Premiere Pro allows you to adjust different parameters, transitions, and effects to your liking to ensure your video looks exactly how you envisioned it.

Movavi lets you enhance your 4K videos using an expanded selection of VFX and sound effects, filters, stickers, presets, and other tools that can be used by beginners and experienced professionals alike.
This software allows you to overlay clips on top of each other to tweak their size and positioning. It can also be used to animate different elements by adding keyframes to set their placement, size, angle, opacity, and other parameters.
Moreover, you can leverage Movavi’s AI functionality to improve your clips by getting rid of background noise, upscaling the resolution, getting rid of distracting objects, and so on.
You can employ Lightworks to take advantage of multi-cam editing, more than 100 presets, a library of transitions and VFX, quick-trimming tools, and keyboard controls. It has proven to be a reliable tool for editing 4K footage on Windows.
Lightworks Pro can be paired with an extensive list of audio plugins like VST3, AU, and LADSPA from renowned plugin developers including iZotope, Waves, Sonnox, and Accusonus. You can utilize these tools to make the audio clearer and juicier with a couple of clicks while employing convenient drag-and-drop controls.
The free edition of VSDC Video Editor comes with a large number of features that you won’t find in alternative free 4K UHD editing software including 4K stabilization, picture-in-picture mode, and many others.
Since hardware acceleration isn’t included in the free edition, this software isn’t a suitable solution for low-end PCs and regular laptops that you might want to use for 4K editing. That said, since the VSDC Video Editor offers the most intuitive UI out of all the software included in this review, it still might be the best option for any beginner.
Shotcut is a free editor that can be used to edit a 4K video on Windows. While its UI looks unremarkable, the software itself comes with an array of diverse features including cutting, splitting, merging, and trimming, as well as VFX, titles, and text.
Additionally, Shotcut offers such advanced features as 3D text, color grading, overlays, etc. It takes some time to get used to these tools but they can provide a lot of benefits in the long run. This software lets you work with a plethora of different formats including H.264, MP4, and the 4K format HEVC, which is used for 4K export.
You can simply follow this brief Adobe Premiere Pro tutorial to learn how to edit a 4K video on Windows with minimum effort.
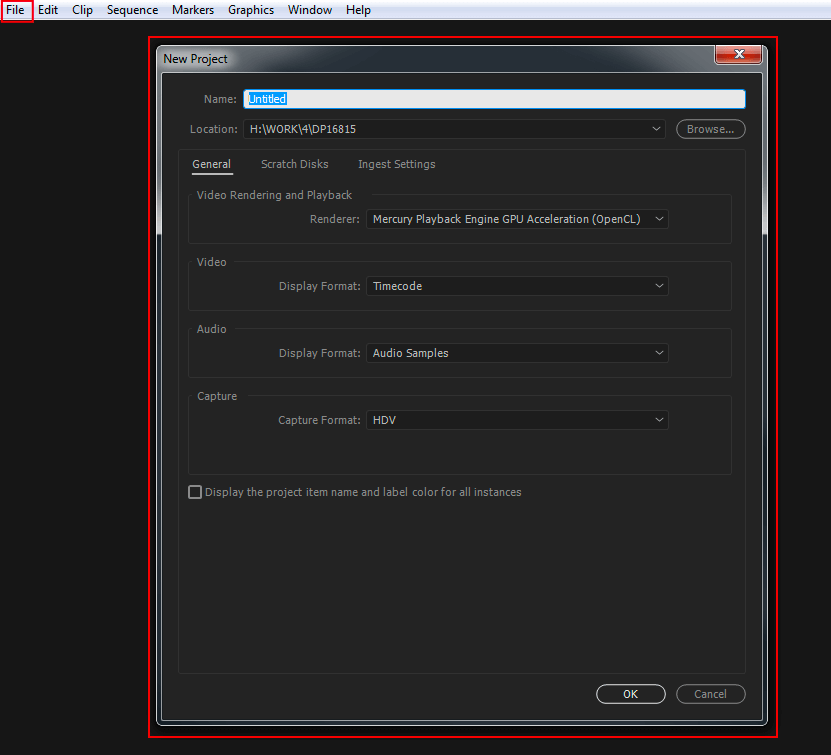
You have to begin by adding a new file. To do so, you have to click the File tab and then pick New Project.
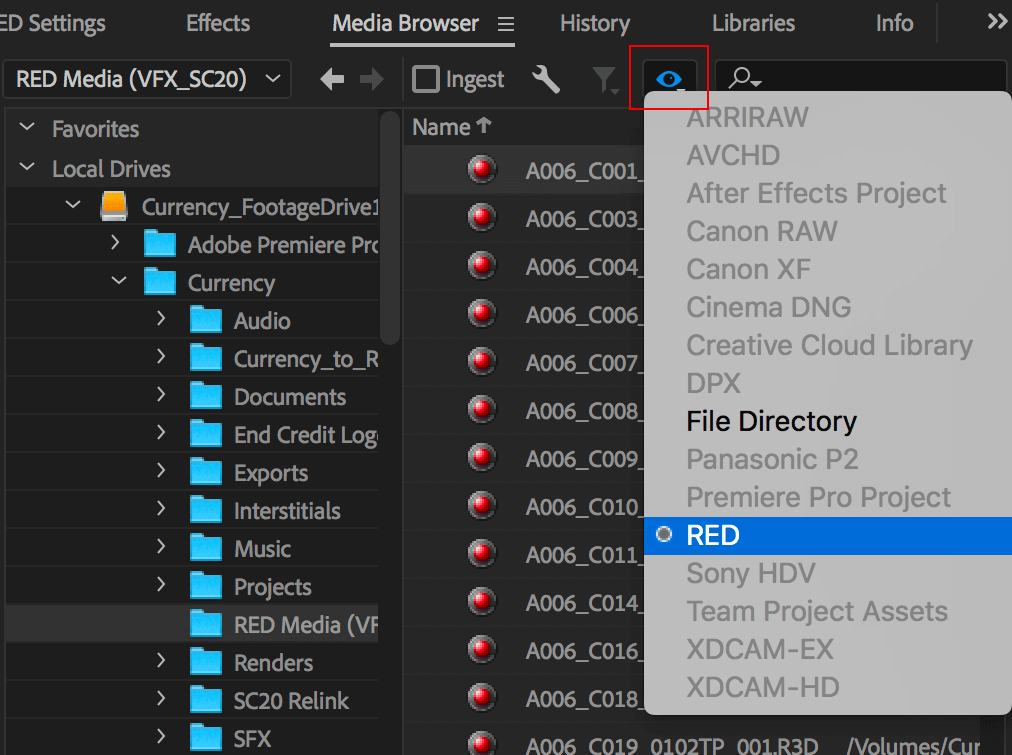
If you click on RED R3D, you’ll be shown an additional set of options. Once you’re done editing your video, you can easily set its version to 4K.
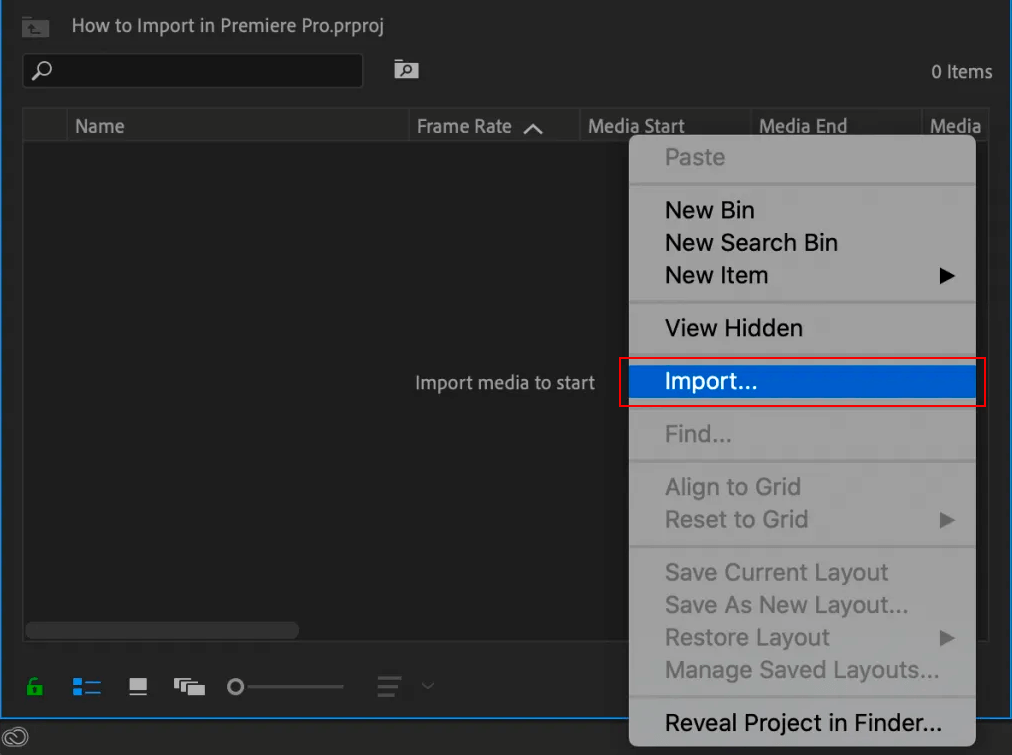
Now you have to import a 4K video to add it to your project. Delete the added clip and then bring it back. This way, your video will be placed on the editing screen.
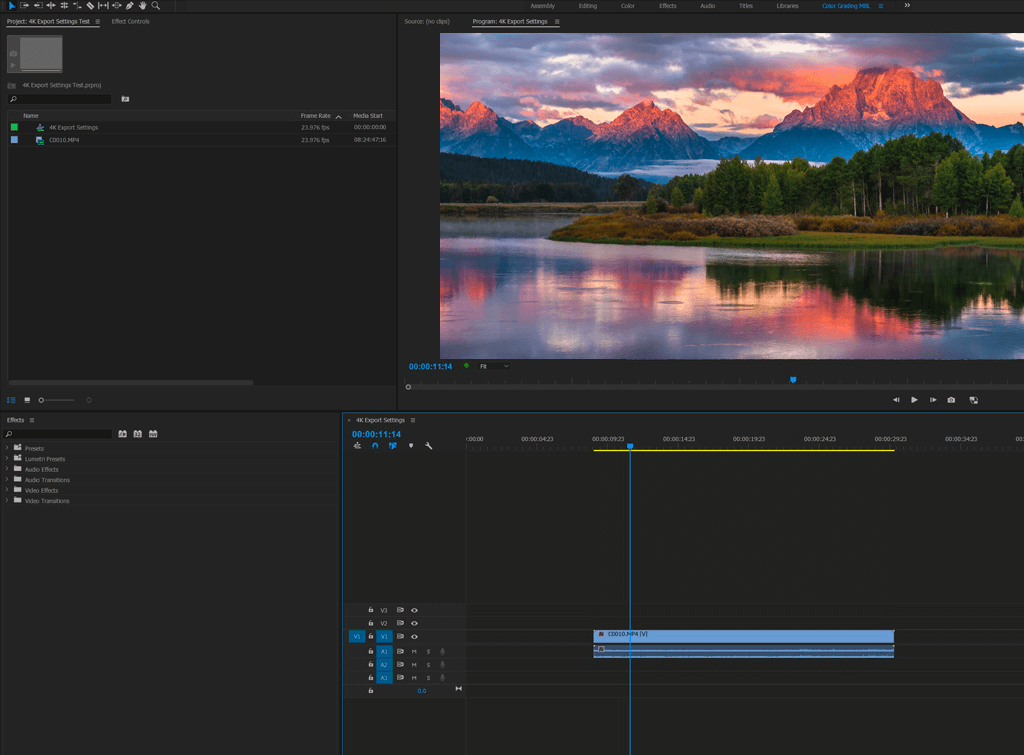
Now your 4K video is ready for editing.
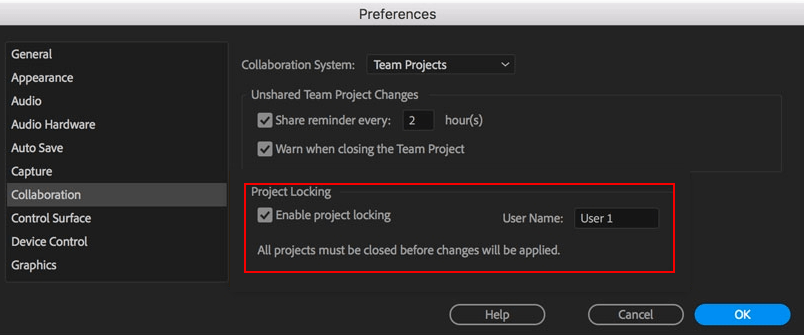
Block further video editing by enabling the Project Locking parameter. Next, you have to make sure the video you plan to export has a high dynamic range.
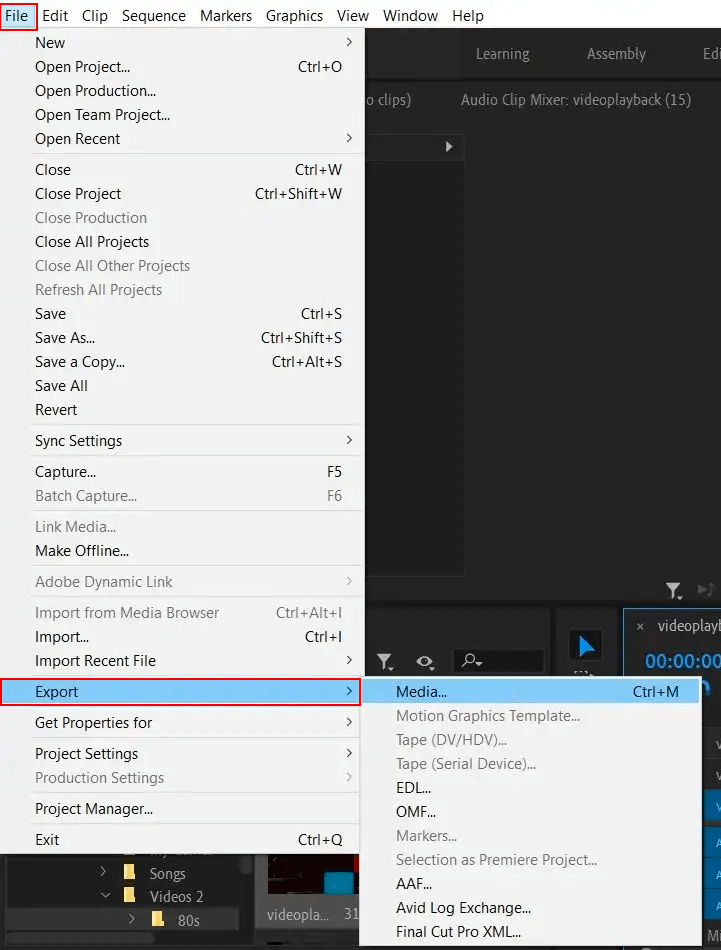
Open the file and choose File > Export > Media after typing in the timeline.
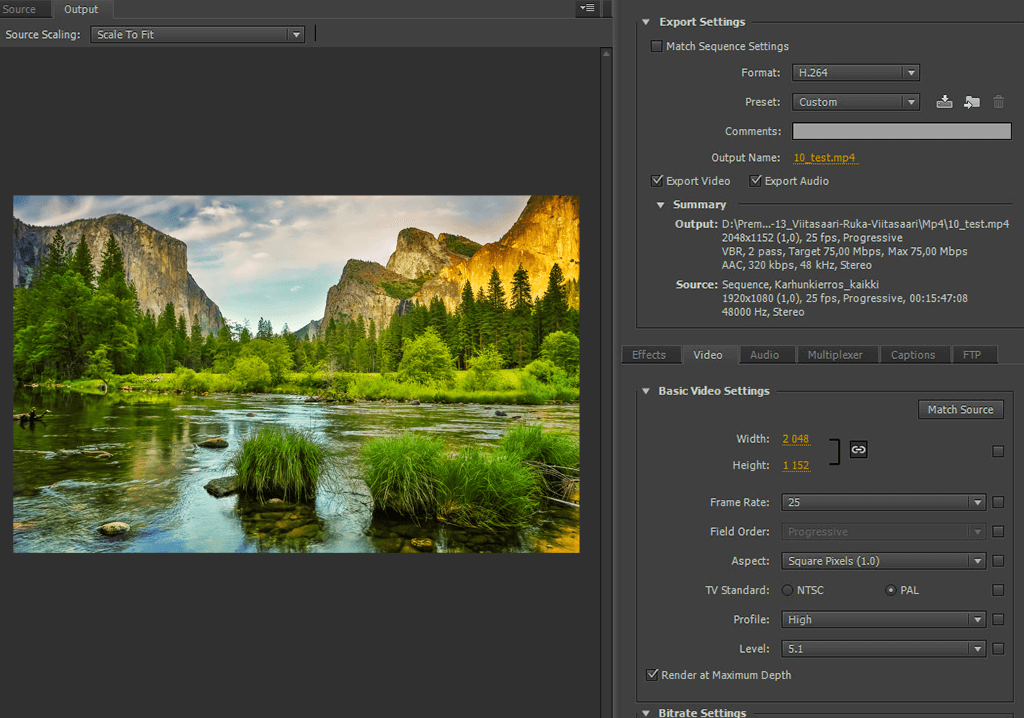
Afterward, it’s recommended to set high dynamic range visualization, maximum depth, Rec.2020 colors, and maximum visualization quality. You can find all of these parameters in the Export Settings section.


