A camera shake effect in Premiere Pro is applied where there is a risk of camera shaking while shooting. It may be a result of hitting, collision, falling, etc. Moreover, it is additionally employed when adding transition.
If you are a beginner in Premiere Pro, you are able to use a 7-day trial version, but in case you are already the program user, I advise to update it to get access to all the necessary instruments.
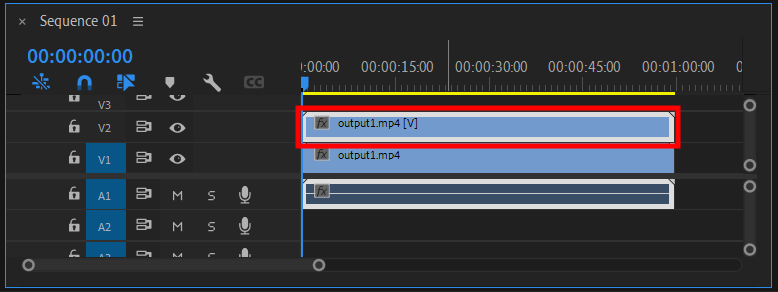
Firstly, you have to make a copy of the clip for shake effect application. Hold down the Alt key and move the clip into a new layer.
Furthermore, you may utilize the Premiere Pro keyboard shortcuts to make it faster. Use Ctrl + C (Windows) or Cmd + C (Mac) for copy and Ctrl + V or Cmd + V for paste.
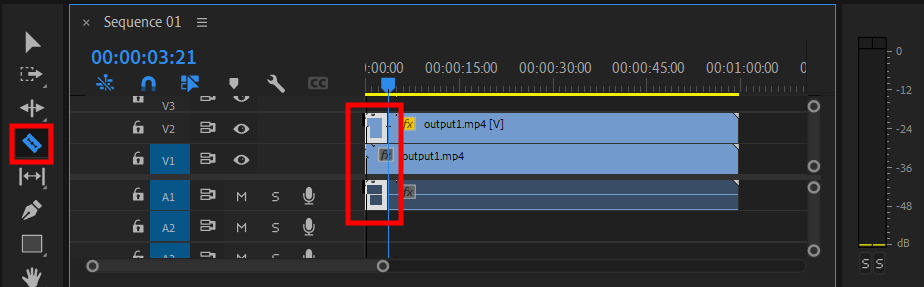
At this stage you have to find a point at where you want to apply shaking effect. Utilize Razor Tool (C), to resize video in Adobe Premiere Pro only for this clip.
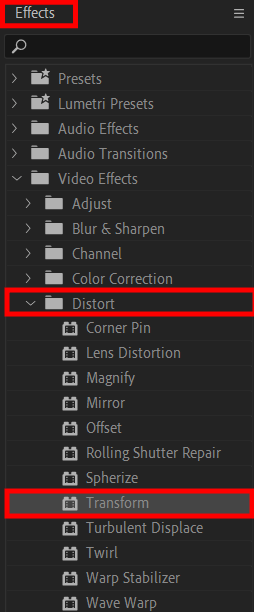
Go to Effects > Distort > Transform and use the effect for the cropped clip on the top layer.
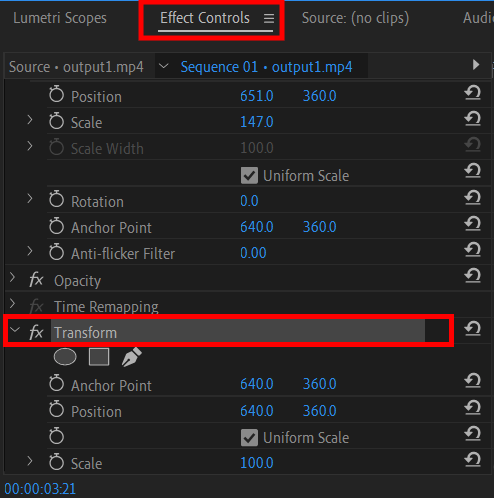
In the Effects Controls board, search for the Transform effect.
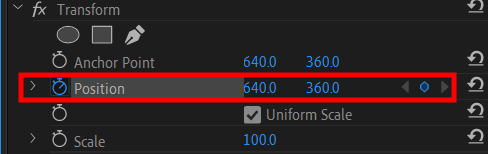
Produce a keyframe applying the Position board instantly before and after the points where you are willing to include the shake effect with this video editing software. Press the stopwatch and start the animation.
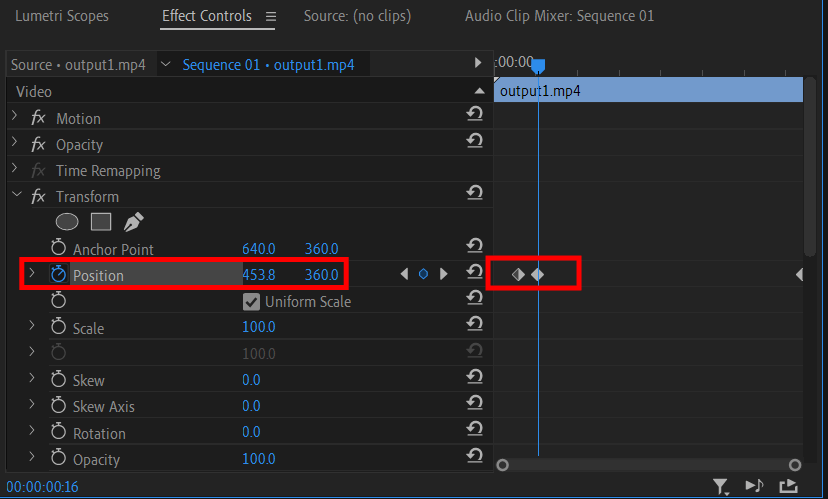
Drag the scene position a little bit between the key images. The more you drag, the stronger the shake effect will be. Furthermore, you can zoom in a little bit, in place of moving the keyframe’s position side to side or up and down.
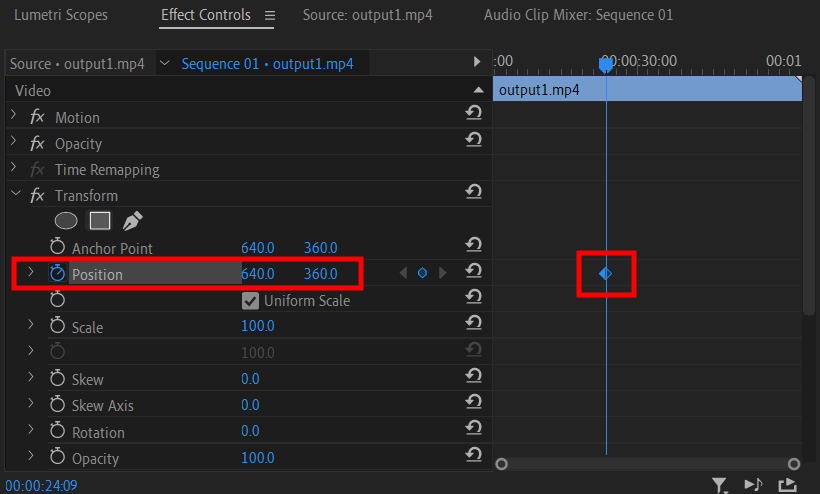
Your further action in this Premiere Pro CC tutorial will be moving several keyframes ahead and resetting the parameters in order to return the shoots to the initial value.
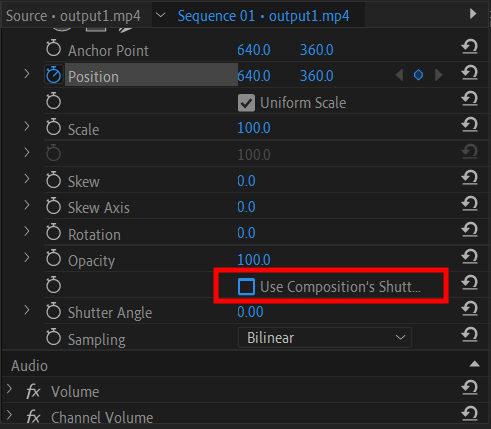
In order to add blur in motion, remove the flag Use Composition’s Shutter Angle option, and drag the shutter corner up.

After that, you are able to export Premiere Pro video to MP4 or any other appropriate format. For this you have to tap on the Export option.
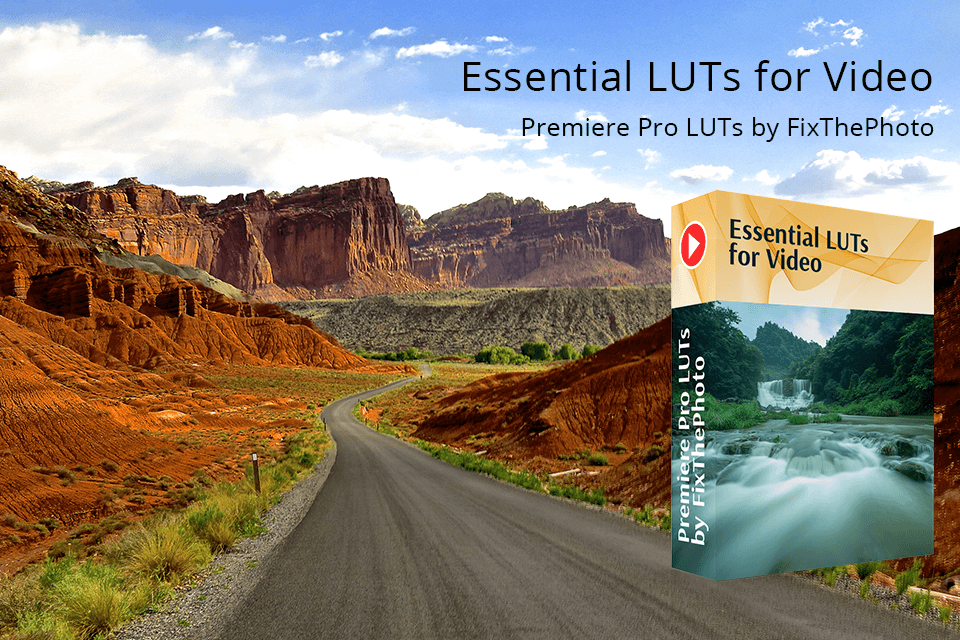
If you are willing to amend your video promptly, you may install LUTs for Premiere Pro. They can correct the shaking effect with their help, having it done more smooth or sharp, and also add other immersive effects which will diversify your clips.


