When editing videos in Premiere, users often need to fade out audio to create transitions between various scenes. By applying such an effect, you can avoid the effect of abruptly finished scenes.
Before you start, download or update your version of the program, and follow the steps described below.
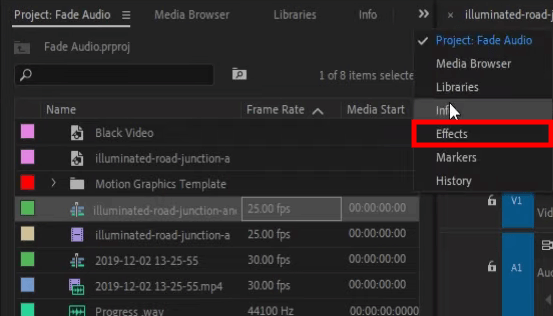
In case the “Effects Tab” is not visible, head to Window → Effects to activate it.
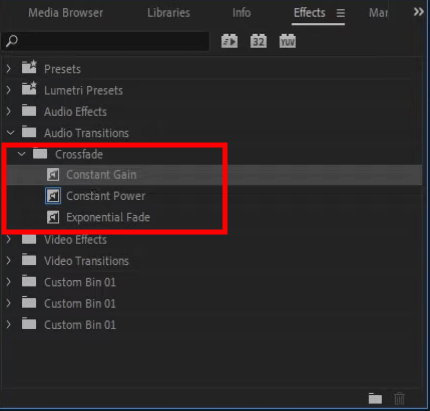
Check a dropdown menu for “Audio Transitions” in the Effects Panel. Pick CrossFade>Constant Gain.
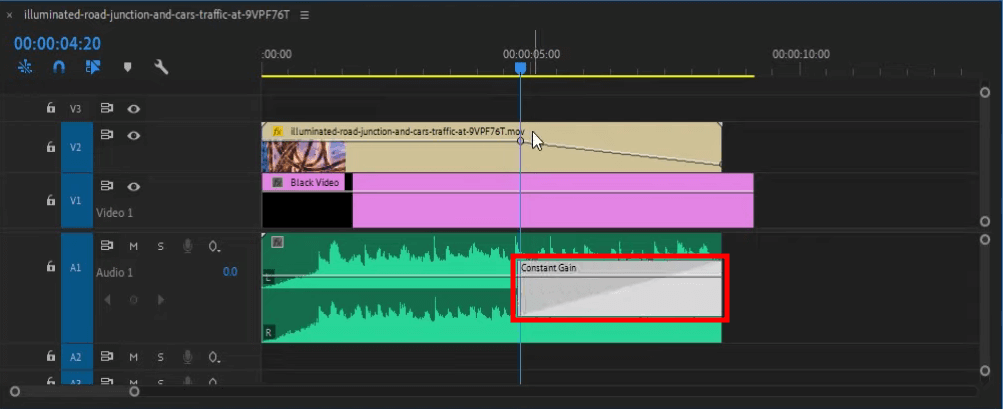
Add the Constant Gain effect to the end of the audio track. In case your project contains two tracks, make certain it is applied to the end of the first audio, and not to the middle of them.

Now, the audio contains the fade-out effect. By clicking on the edge of the box and dragging it backward, it is possible to increase the duration of the fade-out.
Spend some time learning this Adobe Premiere tutorial to work with these transitions manually. As in the previous method, first, import your video or audio files into Premiere Pro.
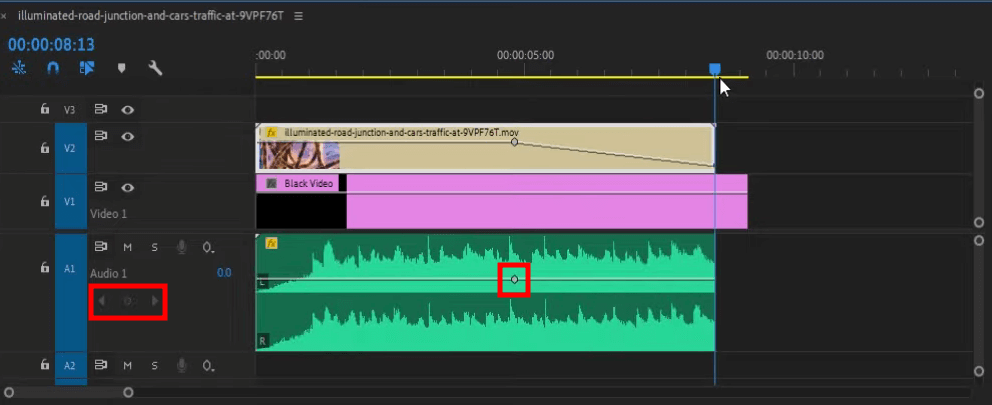
After clicking the audio track, find <- <> -> buttons on the left edge to expand it.
Define the line where you want the Premiere Pro audio fade out effect to start, and then add a keyframe by hitting the <> (add-remove keyframe) button. Alternatively, use ctrl/cmd + click combination.
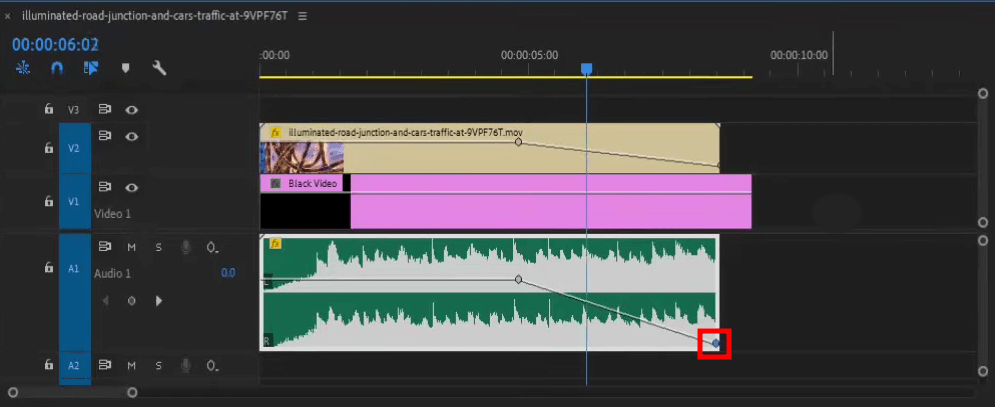
Now you need to add another keyframe, so head to the end of the track.
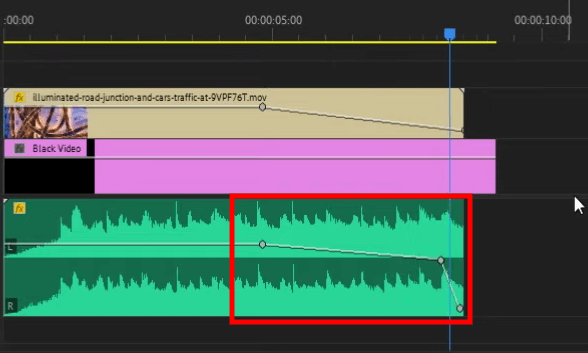
Click on a new keyframe and drag it as far to the bottom as it will go. After finishing your project, export Premiere Pro video to MP4.

These free tools, which are compatible with all Premiere versions are quite versatile. You can add audio effects, change the color scheme of your clip, make tones warmer, increase saturation, add bluish tints and rich shades, and more.
For more advanced audio editing tasks, such as noise reduction or enhancing audio quality, consider using audio restoration software. These tools can provide additional features to ensure your audio is of the highest quality throughout your Premiere project.
Audio fade-out is a gradual decrease in volume at the end of an audio clip. It is crucial for creating smooth transitions and preventing abrupt endings, enhancing the overall audio-visual experience in video projects.
Adobe Premiere audio fade out effects are available in three different types. If you need to decrease your video volume in an equal way, the Constant Gain crossfade is what you need. The Exponential Fade transition is similar to the previous one, but this type of transition reduces the volume in a constant curve.
Users of Mac devices should hit Shift + CMD + D Whereas Windows users should press Shift + CTRL + D With the Premiere Pro keyboard shortcuts, the default transition with the standard length will be added to your audio track.
While merging clips in Premiere, the program allows you to increase (fade in) or diminish (fade out) the volume of added sound. If you apply the fade in transition at the beginning of the clip, the loudness of the sound will increase gradually until reaching its peak. Adding the fading-out transition results in the opposite effect.
Customizing the audio transition is an easy task. Click it twice in a Timeline panel and tweak the parameters of the effect in the Effect Controls panel. By adjusting the video’s audio volume keyframe graph, it is possible to change the rate of an audio fade or crossfade.