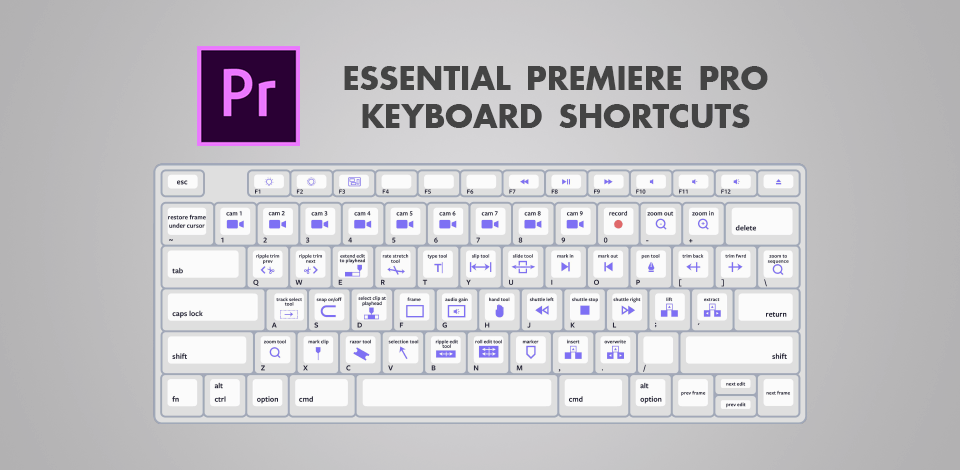
Using Premiere Pro keyboard shortcuts, you can speed up the editing process, which can be really time-consuming process, but you can speed up main operations. I’ll dwell on the default keyboard shortcuts that will make your work in Adobe Premiere more productive and enjoyable.
If you are just starting to learn this software but need professionally edited videos in the shortest time possible, don’t hesitate and address our experts. They will fix all defects and edit footage in accordance with your style and requirements. All our services are reasonably priced.
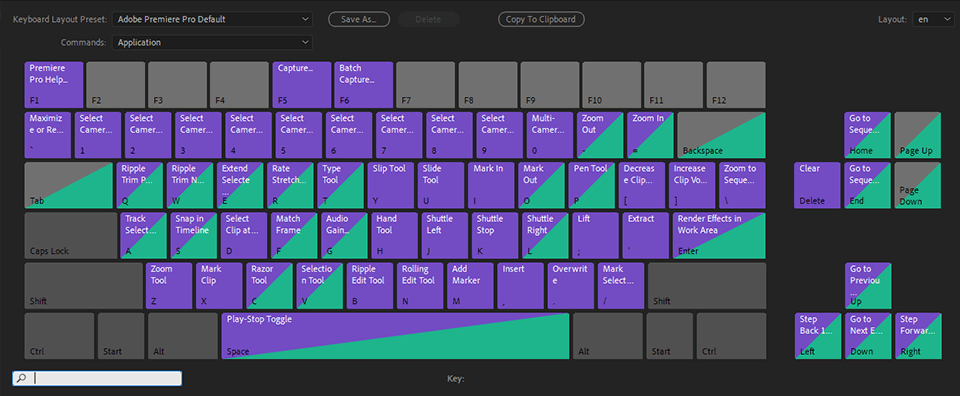
Adobe Premiere Pro allows using 2 types of shortcuts – application shortcuts that allow manipulating the entire program and panel shortcuts that are designed to work on specific panels. By devoting some time to learning and memorizing these shortcuts, you can totally revolutionize your video editing experience. Besides, with this info in mind, cCommandsomprehending various Adobe Premiere Pro CC tutorials will be a breeze.
These are the shortcuts that presuppose using the Command key on Mac computers and the Control key on Windows. With the help of such Premiere Pro shortcuts, you can start, save, and close projects. The easiest way to learn these shortcuts is to think of them as the File menu options.
Navigating the toolset of the software is easier with the help of these shortcuts. Now, you can instantly activate the needed tool and perform actions in no time. For instance, if you frequently edit text in Premiere Pro, it makes sense to memorize how to access the Type Tool in a quick way.
The software comes with a separate set of panel shortcuts. Panels are like separate work environments within a project that contain specific instruments for a task, e.g., coloring tools or those for audio mixing. It happens that you need to work on one panel for a long time and it’s cool that you can use shortcuts designed with this panel in mind.
What’s more, using such shortcuts, you can seamlessly switch from one panel to another without opening, closing, and rearranging the workstation all the time. For example, if you need to create a Ken Burns effect in Premiere Pro, you can just hold down the needed keys and will immediately get to the Effects Control panel. Moreover, it is possible to set a panel shortcut so that a specific key combination is responsible for particular tweaks depending on the panel you’re currently working on.
If you have ever googled Adobe Premiere Pro tips, you have probably come across those related to keyboard shortcuts. I want to highlight that in addition to memorizing pre-configured key combos, you can create your own shortcuts based on the edits you make on a regular basis. For example, if you frequently use a specific tool, it seems to be a wonderful idea to create a shortcut, which will instantly make the instrument active. You can also generate a shortcut for selecting several tools at once.
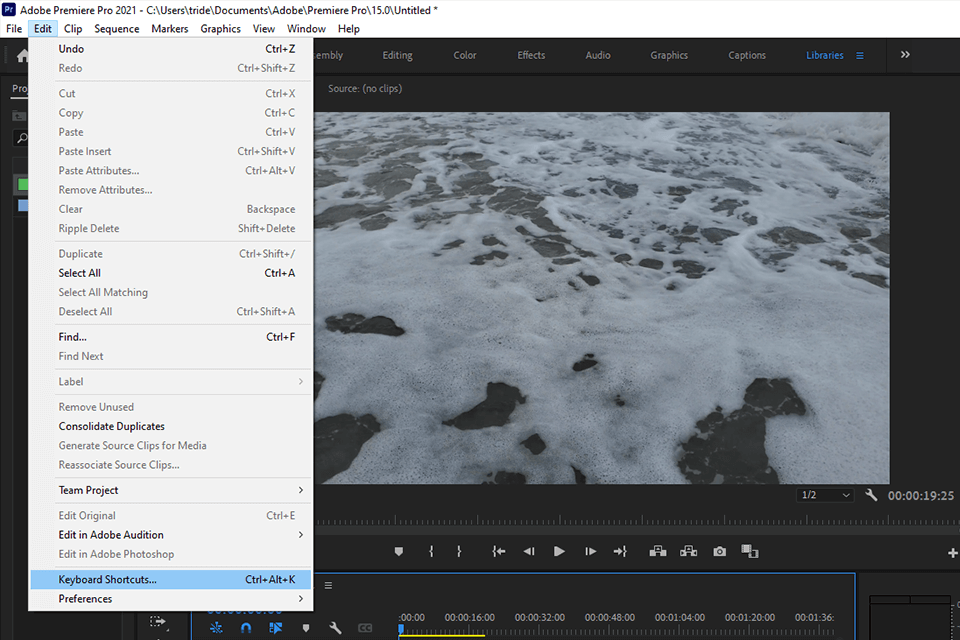
Open Edit > Keyboard Shortcuts or press Cmd+Opt+K/Ctrl+Alt+K. There will appear a window with the list of all existing Adobe Premiere keyboard shortcuts. Here you can also create custom shortcuts.
The interface is absolutely user-friendly and you can add, change, sync, and delete shortcuts in a quick way. Most processes boil down to drag-n-drop operations.
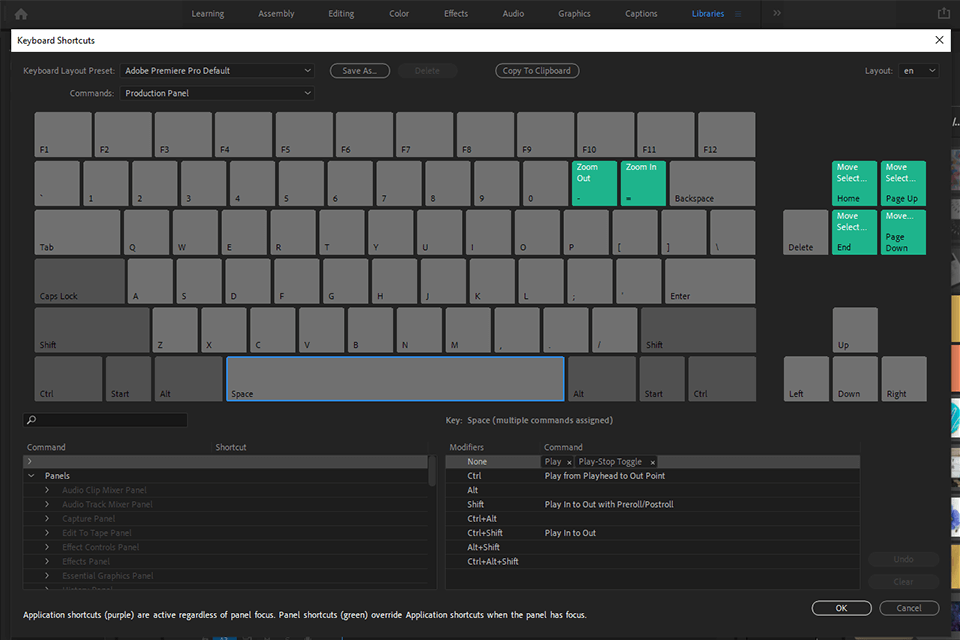
To create a new keyboard shortcut, you first need to look for the command you want to assign it to. In the dialog box that has opened, choose the suitable option from the menu:
Application – contains commands located in the menu bar, organized by category.
Panels – displays commands related to panels and menus.
Tools – shows a list of tool icons.
Head to the search box under the left side of the keyboard and start typing the needed command.
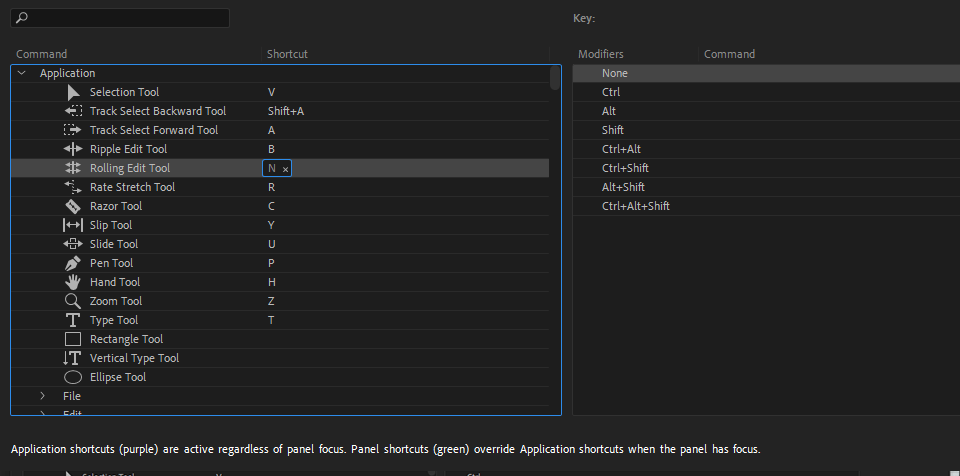
Hit the little “x” to the right side of the currently assigned command. The box should be empty now. Click inside the box and start typing the new command.
While typing, you will see which keys already have shortcuts assigned to them. They will be highlighted on the visual keyboard displayed on the screen. Thus, you will be notified in real-time if the shortcut you want to choose has been already assigned.
After you’ve found the key, hit Enter and assign by clicking OK in the right-hand corner. Repeat these steps to customize as many Premiere Pro keyboard shortcuts as you want. Once you’re done, click Save As, type a name for your Key Set, and click Save.
Pro Tip
If it happens that you have the program installed on one computer and different video editors use it for their needs, the experts may prefer different shortcuts for one operation. Fortunately, in Premiere Pro, it is possible to add multiple hotkeys to one command. Just find the command and double-click on the already assigned shortcut’s right-hand side. You will see a little box, where you can assign another key for the command shortcut.

In addition to using shortcuts, you can also streamline your workflow by importing LUTs. This collection contains professional LUTs that will gently affect colors in footage, add mesmerizing effects, mimic vintage mood, and more. You just need to learn how to install LUTs in Premiere and then move to the creative part.