The Ken Burns effect is a combo of pan and zoom that is typically used for beautifying still images. It is made by moving a lens in a respective direction (panning) and zooming a photo. Thus, you create an illusion of movement in pictures, which looks amazing.
If you want to learn how to create a Ken Burns effect in Adobe Premiere Pro, this guide will definitely come in handy. I have described every step in detail, so launch Adobe Premiere Pro and get down to work.
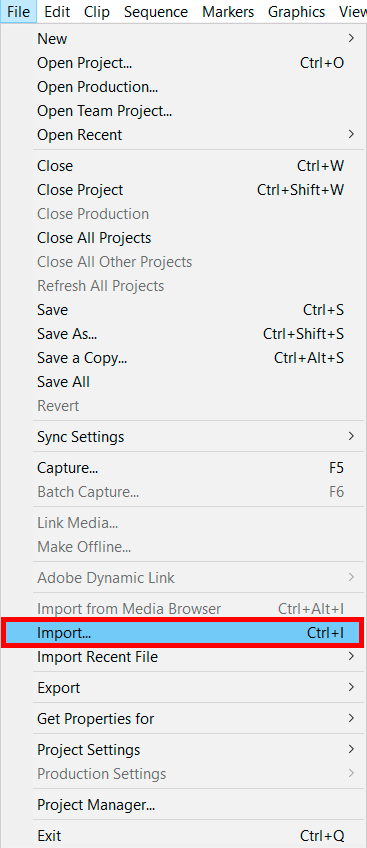
The process is identical no matter whether you use Adobe Premiere Pro on Windows or Mac devices. First of all, start the program and upload a video file. You can do this, using a drag-n-drop approach, or going to File > Import. After a file was uploaded, drag it to the timeline and view the details.
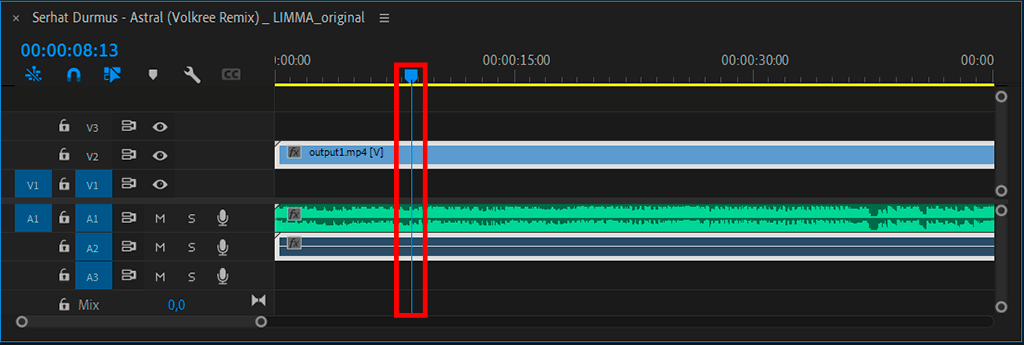
Place the slider on the timeline where you want the effect to start.
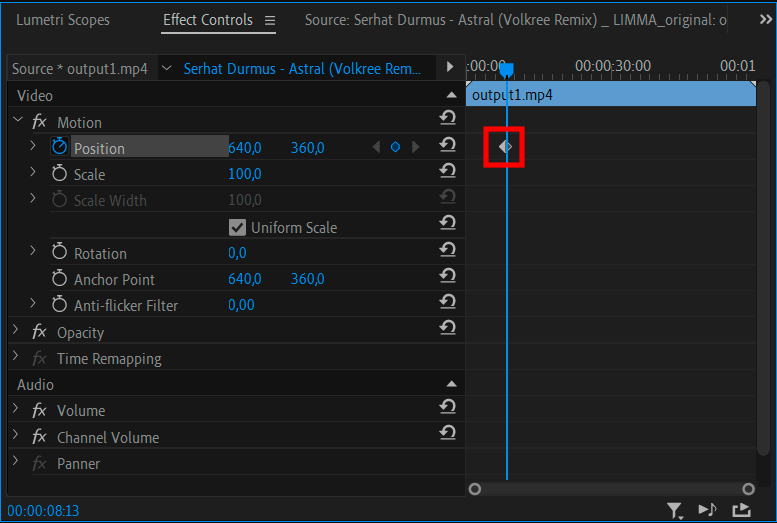
On the Effects Control Panel, add a keyframe for the parameters you want to use. You can choose Scale, Position, and Rotation based on the Ken Burns Effect Premiere Pro you want to get.
If you are pressed for time to perform all these manipulations on your own, address professionals from FixThePhoto and they will bring your ideas to life quickly and for a reasonable cost. They accept all types of footage be it action videos, GoPro clips, touching family moments, etc. Explain to them what result you expect to see and they will work hard to satisfy your needs.
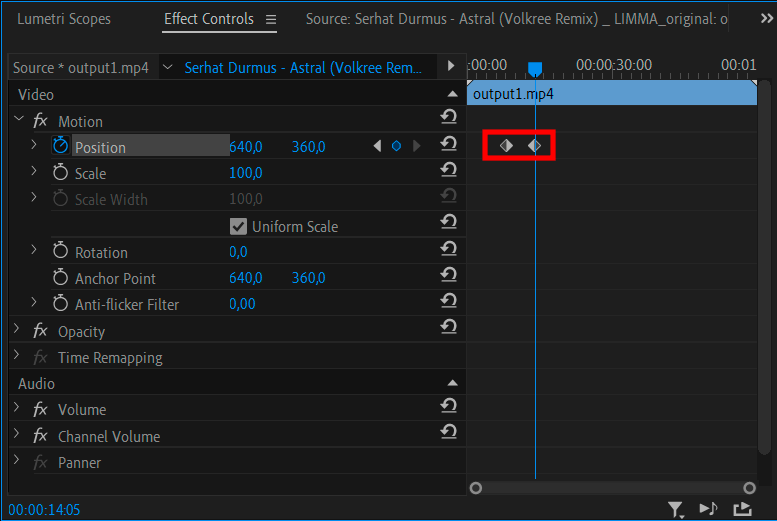
Locate the playhead where you want the effect to finish and add a second keyframe.
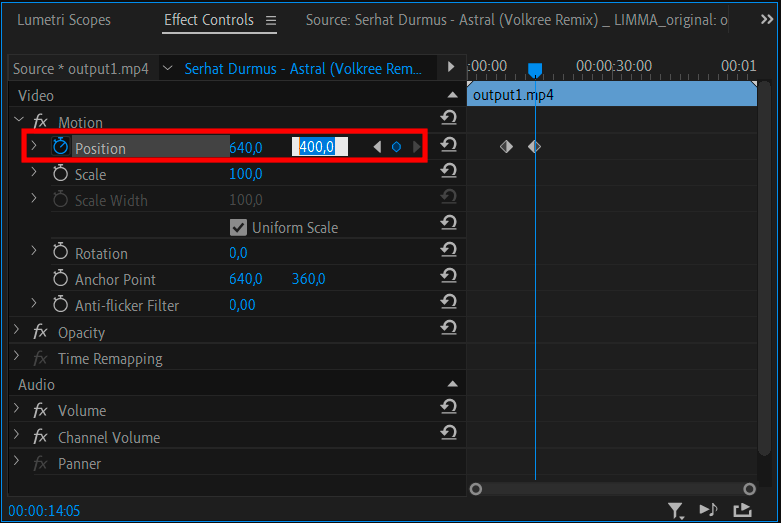
Adjust the size, position, and rotation of the image until you like how it looks.
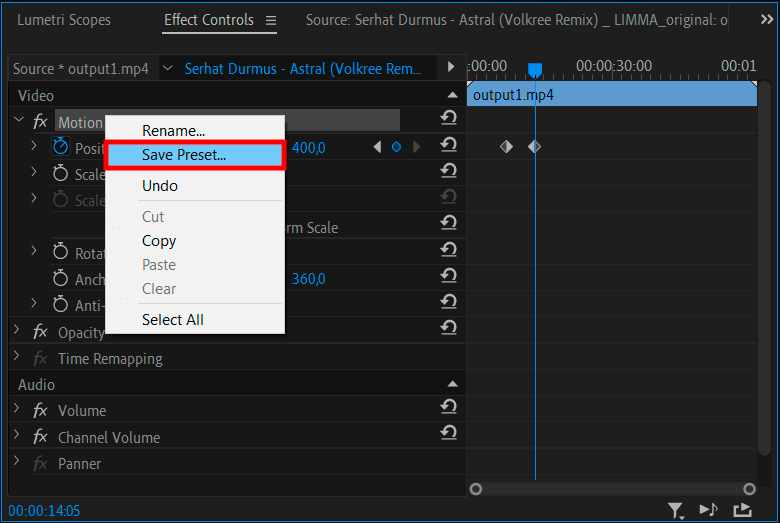
Go to the Effects Control Panel, right-click Motion and select the Save Preset option.
If you want to speed up your video editing workflow, these free tools are worth downloading. You can get a full collection of LUTs and apply top-notch effects to mimic the look of color films. Every LUT is available in a .CUBE format and can be used in all popular video editing software for Windows and macOS.
Now you know how to create a Ken Burns effect in Adobe Premiere Pro. However, you can make it even more awe-inspiring if you take advantage of Adobe Premiere Pro tips provided below. You’ll grasp what to pay attention to and how to make specific adjustments.
Applying this effect is one of the best ways to add action to still images. However, you shouldn’t use an identical effect for a series of photos, as there are different forms of Ken Burns animations to choose from. Be creative and opt for a variety.
Sometimes, videographers apply this effect to several media files. In this case, you need to adjust the speed for every separate video to get a professional result. First of all, you have to select all your files. Then, right-click and go to the Speed/Duration option, and make the needed tweaks.
Images and Videos have a specific resolution, which actually defines how far you can zoom. If you go overboard, the quality of a file will be spoilt drastically. The same is relevant for too much panning, which results in viewers feeling Motion sick.
Those creating promo clips should also use the Ken Burns effect to their advantage. You can pan along a product range or zoom in gradually to direct viewers’ attention to a particular element. Therefore, it is possible to deliver confusing or boring info in an engaging and straightforward manner without going the extra mile.
Since this effect isn’t integrated into Premiere Pro, you should save it as a preset. Go to the Effect Control option > click the Save Preset button. Your settings are saved and you can apply them as a preset the next time you’ll edit videos.


