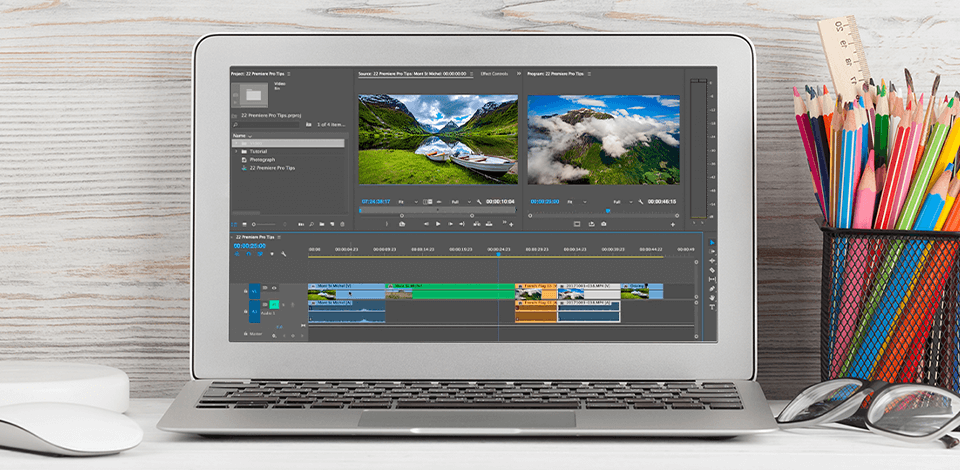
Many users are looking for useful Adobe Premiere Pro tips, as the program is considered to be one of the best editors on the market. It allows processing basic YouTube clips, as well as professional films. However, the program may seem to be quite complicated in usage, especially at the beginning, and you will need some time to master it.
If you want to become a professional editor, these Premiere Pro editing tips will help you solve even the most complicated video-editing tasks. Use them to learn how to enhance videos more quickly. The first thing you need to do is to download Premiere Pro.
Before starting to work on your project, you will need to optimize your workflow. Use this tip to ensure that your project won’t have such problems as offline media and missing links.
Before launching Premiere Pro, you should organize your media files. As soon as you’ve organized your folder properly, drag and drop them to the Premiere Pro, and the program will save the way you’ve arranged the files on your PC.
Organizing files before editing them may seem to be too much, but this will help you avoid problems in the future. It might take a long time to search your hard drives, SD cards, or PC trying to find a video you’ve stored in the wrong place. Relocation of your file will prevent Premiere from finding the pathway to it.
One of the handiest Adobe Premiere Pro tips is to use adjustment layers for applying effects to numerous clips at once. You can add an effect to each video separately, but in this case, you will also need to adjust the settings of every individual clip.
Open the Project panel and select New Item > Adjustment Layer to add a new layer. You will see it in your bin. Place it onto the timeline, above all videos you want to refine and apply the effects to them. This way, you can edit all the clips at once.
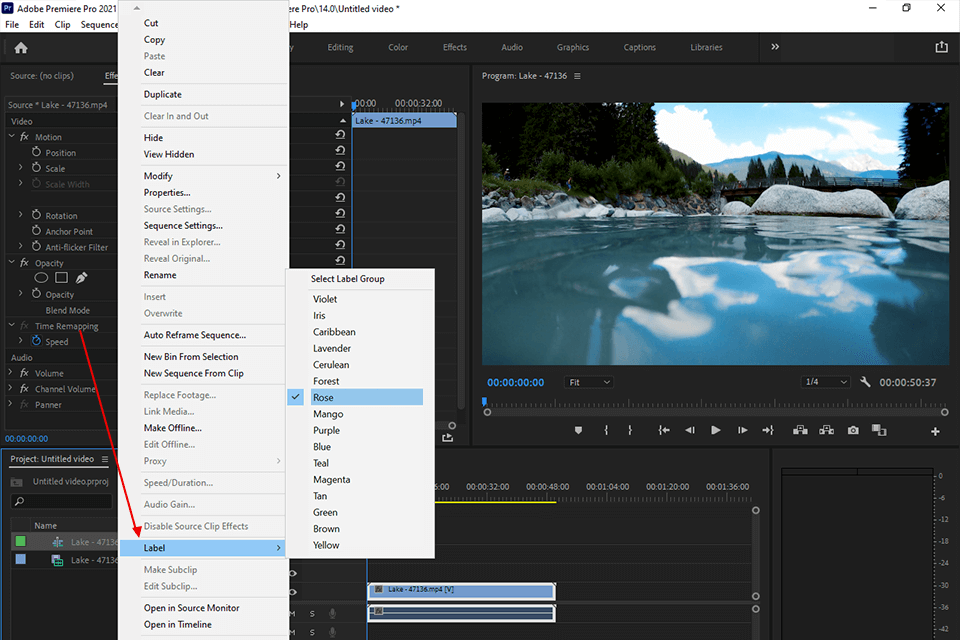
In Premiere Project, videos are grouped into bins that are similar to folders. To organize files more efficiently, try to color your clips. To label a video, click on a clip or a group of clips with the right button, select a label and its color. If you want to process your files faster, you can use LUTs, so it will help you if you learn how to install LUTs in Premiere.
Your videos will be tagged with the selected color in the bins. You will be able to differentiate the clips by this color in your timeline. Besides, you can mark every scene of your project with a separate color or use various colors for labeling different types of images.
Video editors who have ever processed videos without Lumetri Color Panels in Premiere Pro know that color controls can significantly facilitate their workflow. By learning more about various color theories, you can master color grading using Lumetri curves.
Besides, if you do not have time to improve your video-editing skills, you can contact a professional service.
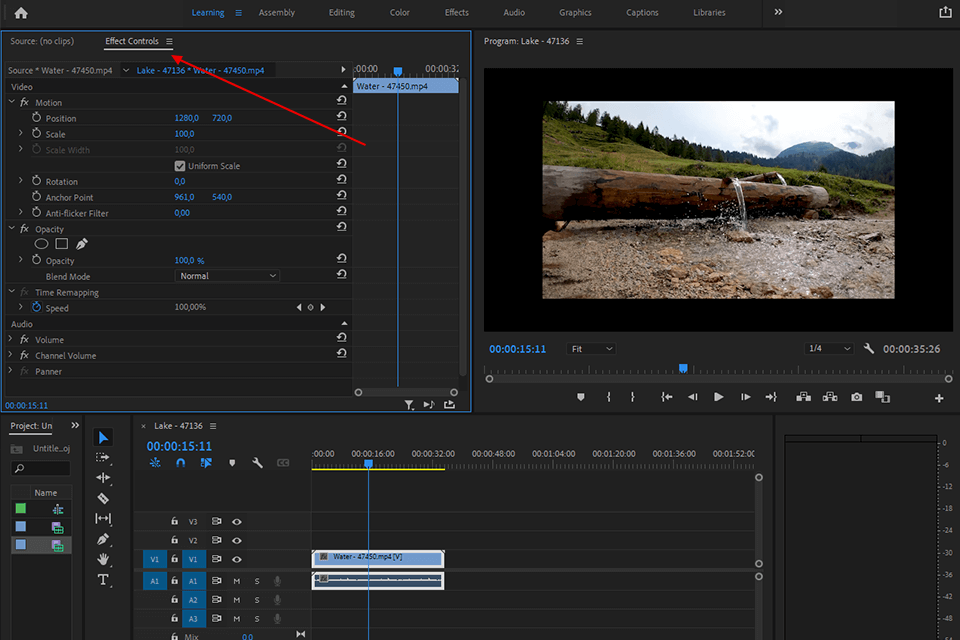
You can keyframe most effects in this 1080p video editor. This feature allows selecting some particular points in a clip, and the program will build a gradual transition between these points.
Go to the Effect Control panel and find the clock symbol next to the effect to change the animation for that effect. By using the controls on the right, you can add keyframes and create the transition between them. By keyframing a color effect, you can make a video alter color gradually during its playback.
You can also animate clips by setting keyframes for Motion properties to scale the video as it is being played. Make sure to read Adobe Premiere Pro CC tutorials for beginners to learn more tricks.
By cropping your videos in Premiere Pro, you can add depth to your clips. You can use various clips, images, text, or visual effects and place them on one another. Follow these steps to crop layer videos and create a split-screen effect.
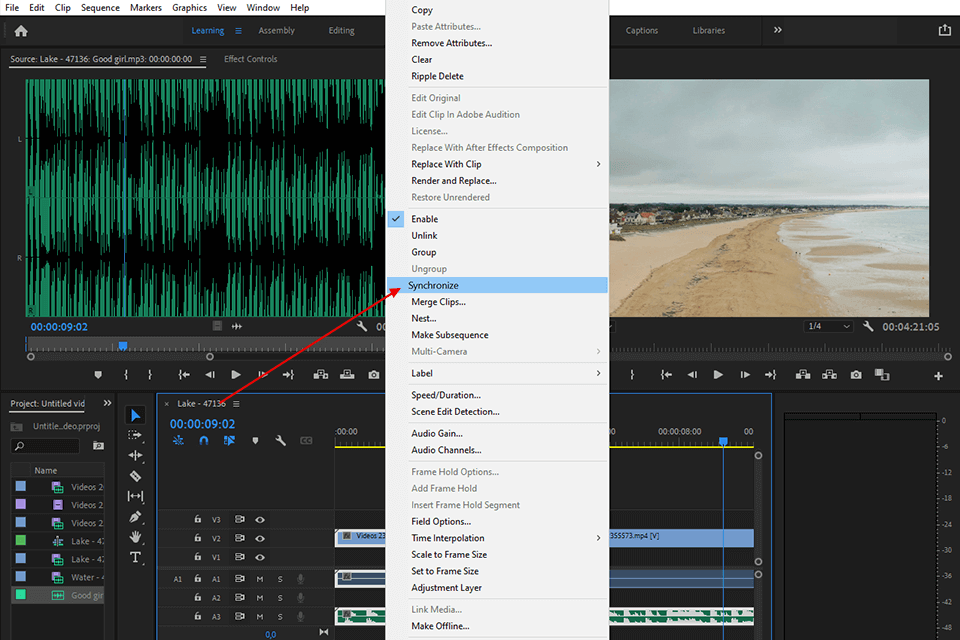
You can use various Adobe Premiere Pro tips to synchronize your audio. If you need to sync two clips (a video with camera audio and a sound recorded using a professional mic), you can manually choose a point of reference for your audio, like a hand clap. However, automated synchronization is faster and more convenient.
Add both clips to the timeline, select them, right-click and select Synchronize. In a new window, select Audio. The program will analyze both audio files and line them up. Once they are aligned, you can delete the audio attached to the video, and synchronize your clip with selected audio. Afterward, place the merged video into the bin for further use.
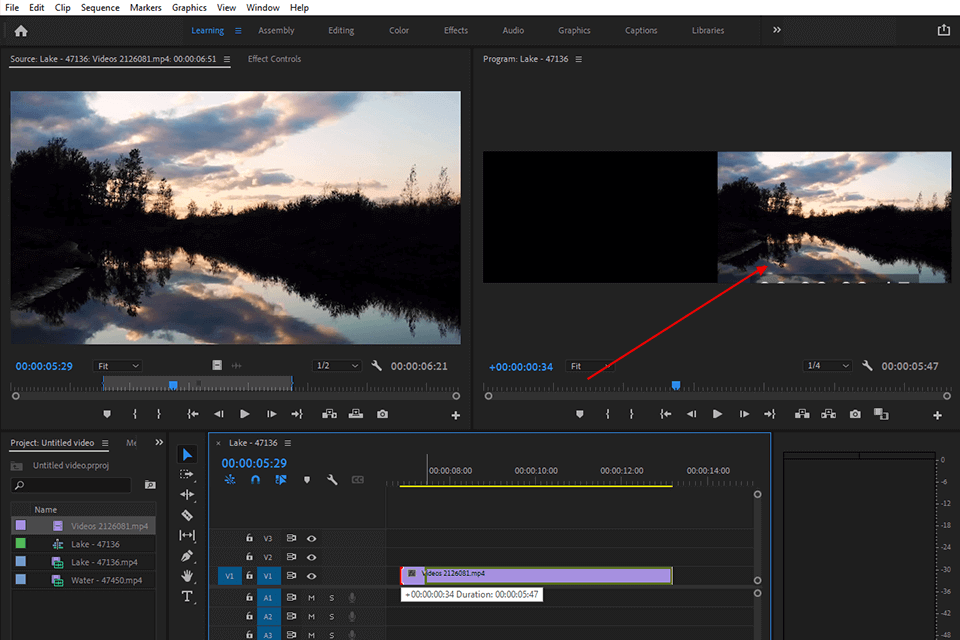
Very often shooters only need some part of a long video, like an interview or a drone flight. It is difficult to keep track of all the necessary segments of a clip. To make this task easier, copy the video from your bin and mark In and Out points on it. By adjusting the position of these points, you can select a segment of a clip. Besides, you can name it as you want.
Open the video and select the in and out points for cropping the portion of a video you are interested in. Use the I key for setting the In point, and the O key for defining the position of the Out point. Put the selected frame into your bin. Then, you will be able to use the trimmed clip with the selected beginning and endpoints. By changing the in/out points on the source video you can trim another section of a video.
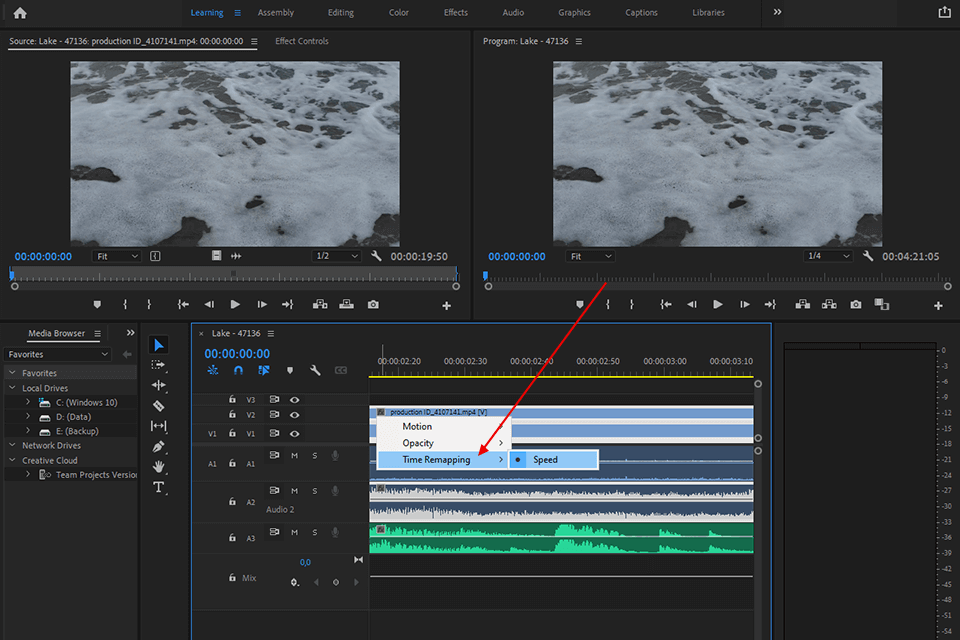
Time-remapping allows you to accelerate or slow down the video playback. Activate the menu with the right button click and use the Speed/Duration tab to adjust the playback speed of the entire clip. You can use the time remapping feature to change the speed of the video during its playback.
Right-click and go to Show Clip Keyframes > Time Remapping > Speed. Use the pen tool for adding keyframes and use the selection tool for adjusting the speed of every portion of a video. By altering the speed of clip segments, you can create impressive time-based effects, such as slow-motion, etc.
One of the most important Premiere Pro tips and tricks allows you to enhance your clips with the help of creative timeline nesting. You can incorporate your sequences into other sequences to make video editing easier. Besides, nesting can help you improve the organization of your projects keeping the timeline clean and segmented.
The keyboard shortcuts allow you to optimize the video editing workflow. You can create custom keyboard shortcuts by providing detailed instructions. You can find Premiere Pro > Keyboard Shortcuts on the top bar.
You will see a list of all shortcuts. To see what shortcuts are assigned to each key, you can use one of the modifier keys, like Shift, Alt, Cmd. To assign shortcuts, drag a command from the function menu on the diagram.
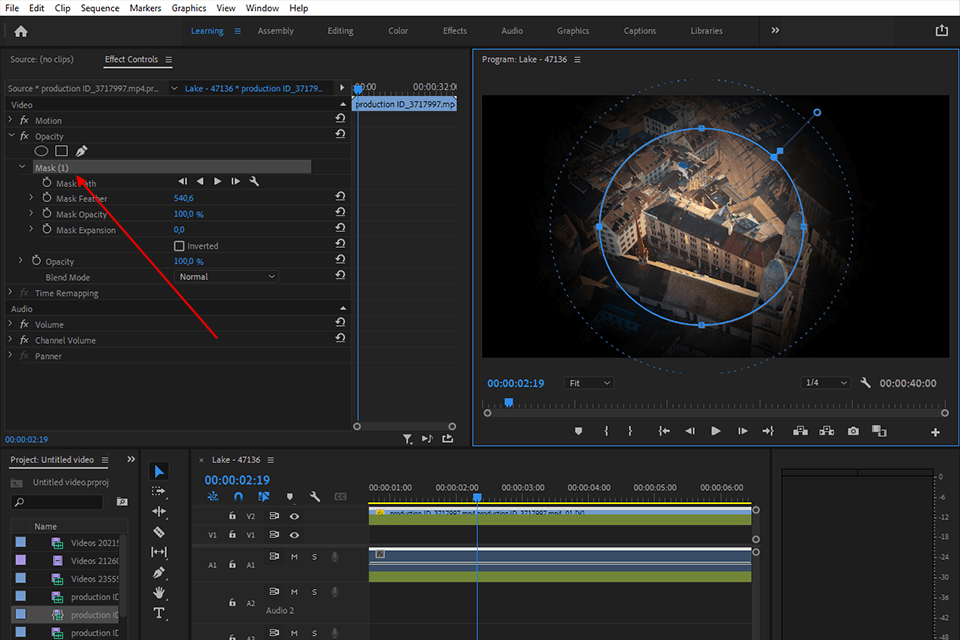
Masking allows refining the specific segment of a clip with the desired effect (like brightening the person’s face). The first step is to create a duplicate of your video and place it onto the top layer. Then, go to the Effect Controls panel for the copied clip, find the pen tool, and use it for outlining the area that you want to mask.
From this point, all the effects applied to the video will only affect the selected area of the video. Besides, Premiere Pro allows masking even the subjects in motion. You will need to click on the play icon next to Mask Path. By modifying Mask Feather, you can achieve a softer edge and smoother picture.
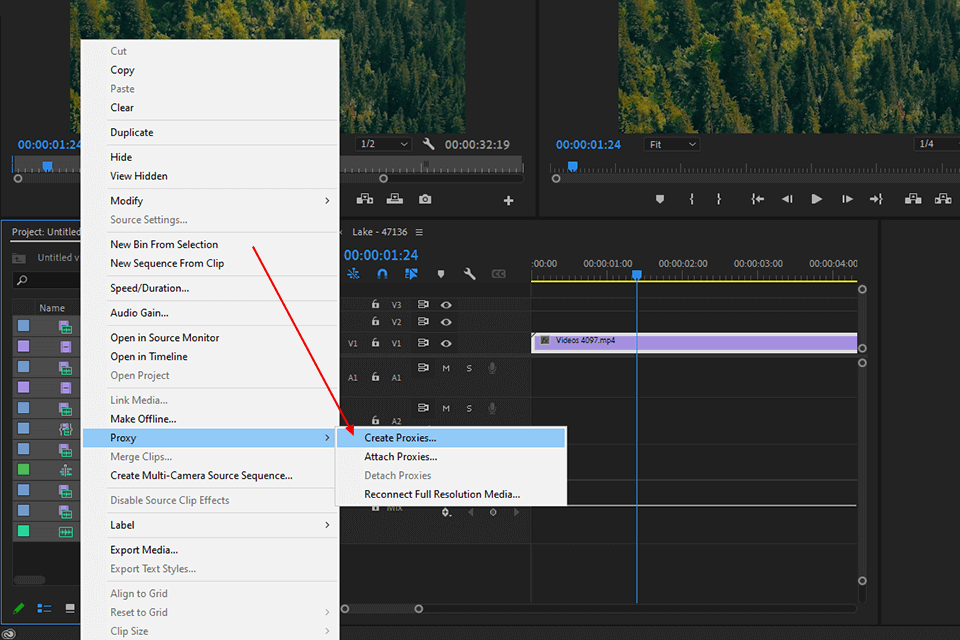
As video editing involves intensive data processing, Premiere Pro might slow down a bit sometimes. To accelerate the performance of this software without purchasing pricey hardware, use one of several effective methods.
The first option is to create proxies, or copies of your clips in lower resolution. Select your videos in the bin, go to Proxy and click on the Create Proxies tab. Process the proxies instead of the original file and then return to the source video by clicking on the Toggle Proxies button, which you can add to the Program Monitor toolbar by clicking on the “+” sign.
Another method is to alter the playback resolution. Find the Playback Resolution drop-down menu on the Program monitor toolbar and decrease the resolution to ½ or ¼. The quality of the preview video will be worse, but the rendering will be much faster.
You can also increase the amount of RAM reserved for Premiere Pro to improve its performance. Go to Premiere Pro > Preferences > Memory in the upper menu and lower the value next to “RAM reserved for other applications.”

Those who want to change the color of the videos can use these LUTs. Use them for making tones warmer or more saturated, adding some blue shades, etc. With these impressive LUTs, you can speed up the process of video editing, thus saving time and money.


