You can use a Premiere Pro Adjustment Layer to avoid editing all layers individually. This feature allows you to change a single layer in Premiere Pro and then copy the created effect to all the other clips. The software also lets you employ several adjustment layers for controlling a larger number of effects.
Before you follow this tutorial, download or update the software to the latest version.
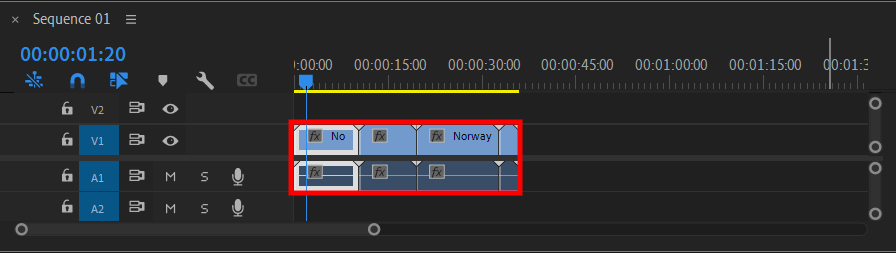
Before we begin this add adjustment layer Adobe Premiere tutorial, you first have to launch the software and import the videos that need to be edited. Drag them onto the timeline section to get ready.
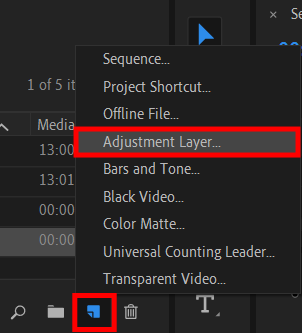
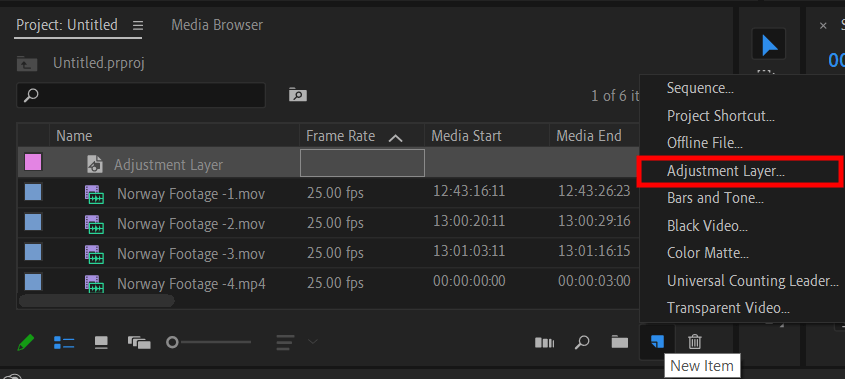
Go to the lower right-side corner of the Project workspace and pick New Item > Adjustment Layer to bring up the relevant timeline settings.
Press OK to accept the default parameters. The newly created Adjustment Layer will be added to the Project window.
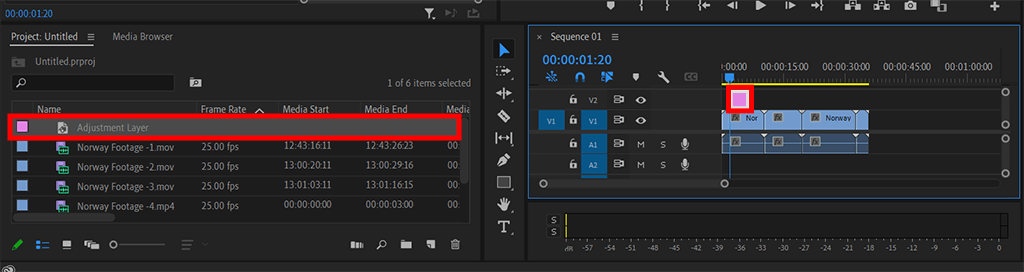
Now, drag the Adjustment Layer to the Timeline and place it right above the clips.
Similarly, all clips placed on top of the Adjustment Layer won’t be edited as well.
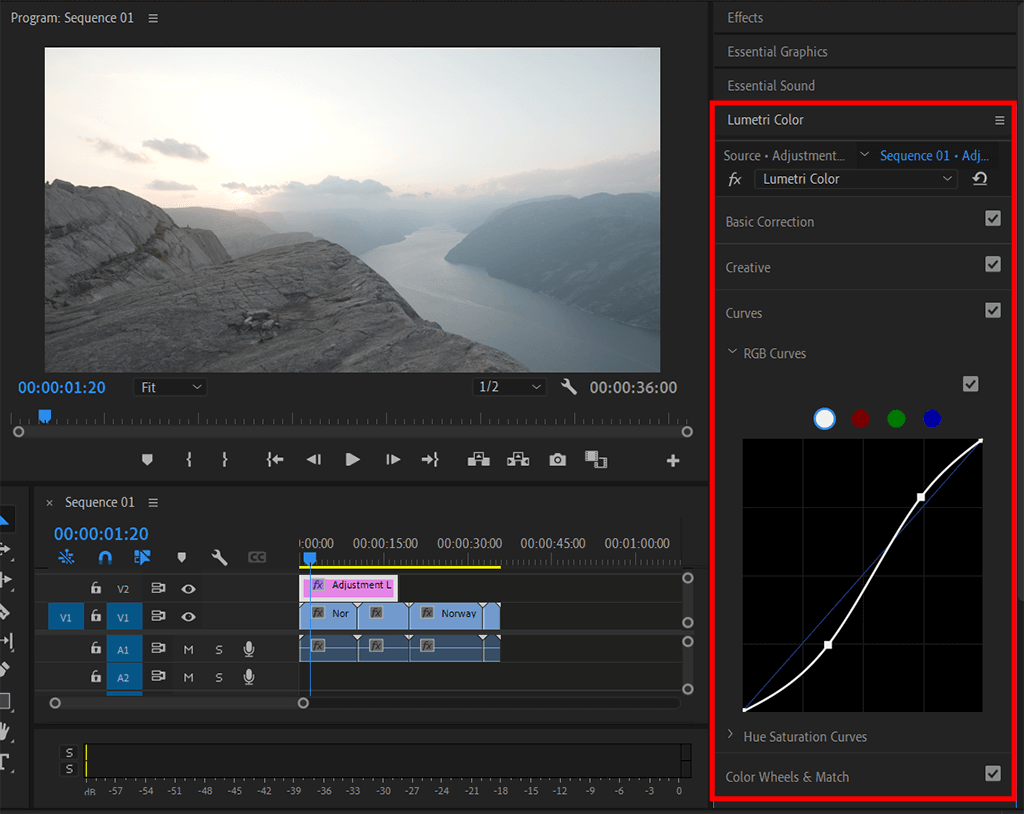
Pick the Adjustment Layer that you added to the Timeline and go to the Color section in the upper part of the workspace. Open the Lumetri Color menu (that you can find on the right) and make all changes you deem necessary while following basic video editing tips.
Now it’s time to add an adjustment layer in Premiere Pro a second time and once again put it into your Timeline while making sure it covers the length of all your clips.
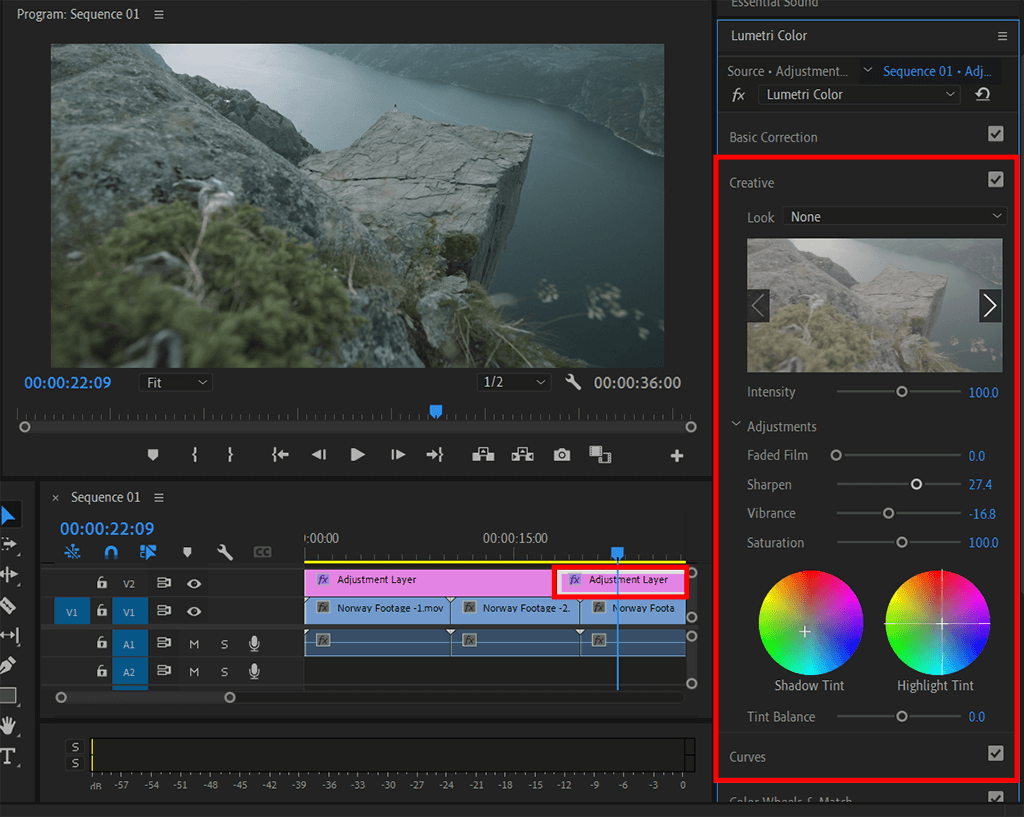
If you want to add a cinematic effect to your footage, adjust the colors in the Creative panel.
You can create all sorts of distinct looks by experimenting with the Effect Controls menu. You can open it by using Premiere Pro keyboard shortcuts and pressing Shift + 5. If you'd like to add a widescreen "cinematic bars" look, you should set the Top and Bottom parameters to "12%".
Learning how to add layers in Premiere Pro isn’t any different than mastering other editing tasks, which is why there’s always a chance something can go wrong or that you’ll receive unpredictable results, hence why we’ve put together a rundown of Adobe Premiere Pro tips that will ensure your adjustment layers are organized and work as intended.
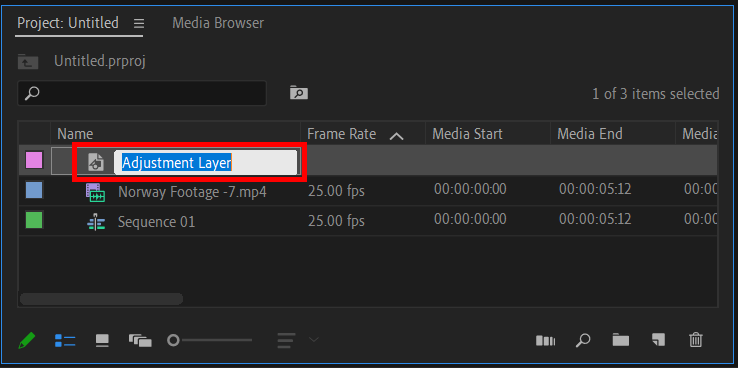
Remember to name each Adjustment Layer. How to do it: go to the Project Browser, right-click your Adjustment Layer, and pick Rename. Type in a relevant name for the layer something relevant and press Enter.
Label each adjustment layer with a distinct color. The software lets you label layers by choosing them in the timeline with a single right-button mouse click.
Next, you have to pick “label” and the needed color. Such an organizational approach will make it easier to locate your adjustment layers and check out what parts of the video they're going to affect.

Perform color correction before moving on to color grading. If you want to do some color grading with the adjustment layer by using color grading software, it’s important to finish making all the color corrections first. Keep in mind that the adjustment layer will impact everything it covers so the graded footage might look different from clip to clip.
Employ keyframed Adjustment Layers to achieve cool effects. Add the Gaussian Blur effect on top of your sequence, and keyframe the Blur Amount parameters. This technique is particularly handy for applying titles over the footage.
Employ the Lumetri Color Saturation parameters to achieve a Wizard of Oz-esque style color shift that fades between B&W and full color.
Add the Leave Color effect to gradually transition the sequence to B&W, making sure only one color remains in the sequence. This technique looks particularly great in music videos and event promos, especially if they feature huge amounts of rich, bright colors.
Save your edits as a preset. You can do this by picking the Adjustment Layer in the Sequence.
Go to the Effects Control menu, pick all effects that need to be included in the preset, right-click, and choose Save Preset. It can now be found in the Effects Control menu.

If you don’t have the time to mess around with different effects to enhance your videos, you can try out these tools for all Premiere versions. They can be used for making the colors in your footage warmer and more saturated, overlaid with blueish hues or vibrant shades, and so on.


