If you want to conveniently enhance your videos across various devices, then you can greatly benefit from learning how to use Adobe Rush. This software allows you to perform fast video adjustments, apply different looks, paste in transitions, and export the edited footage in a variety of formats.
This article will teach you the basics of improving clips in Adobe Rush, acquaint you with its most popular features, and offer a couple of professional tips.
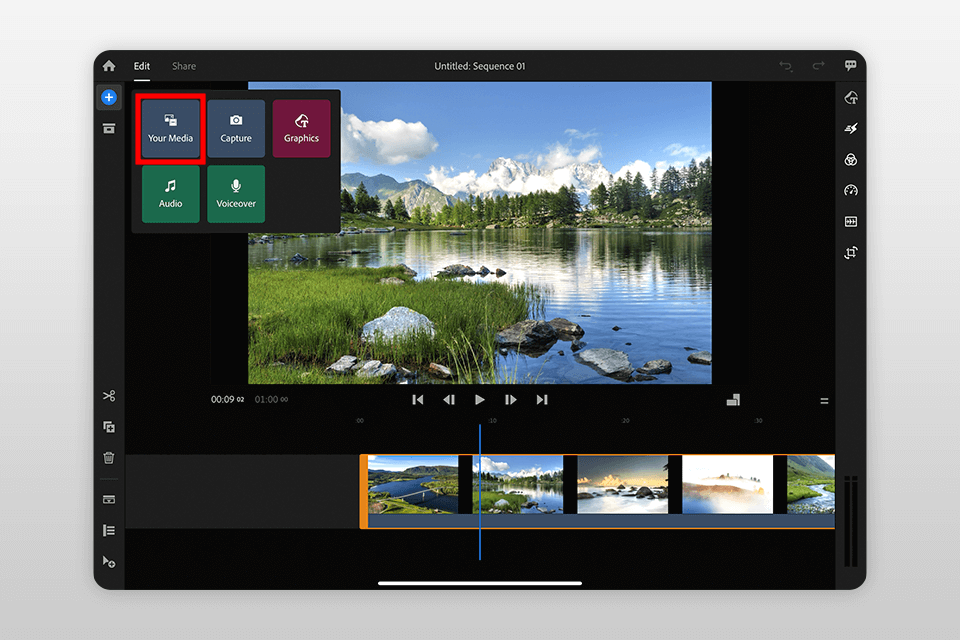
Before you can begin working on your video project, you first have to import the necessary clips, images, or sound files into Adobe Rush. To open a video file from your library, press Your Media. This collection can be expanded at any time you want.
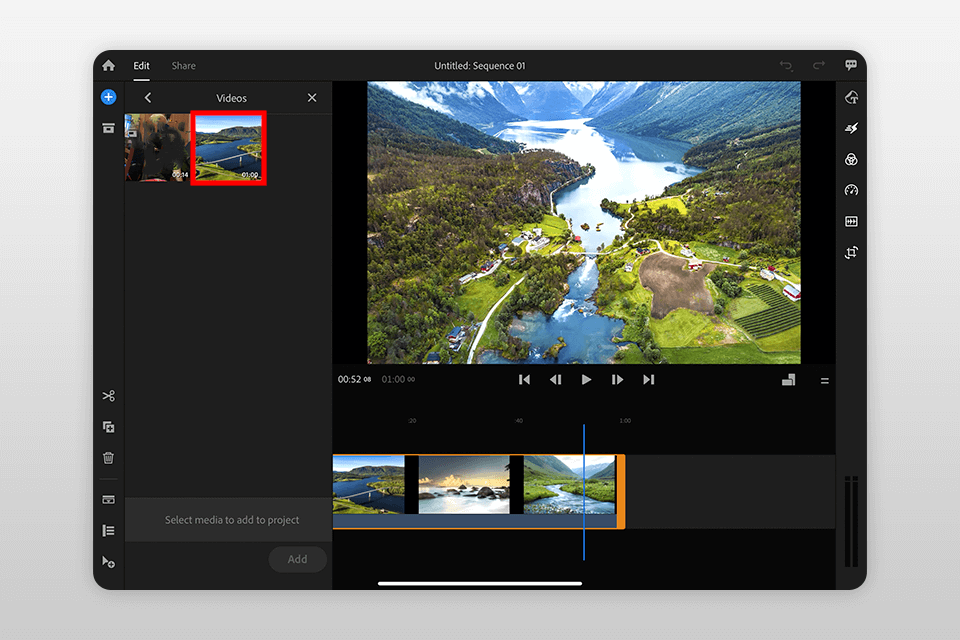
Choose a video file and drag it onto the workspace. The selected clip will be assigned a “track” in the appropriate window.
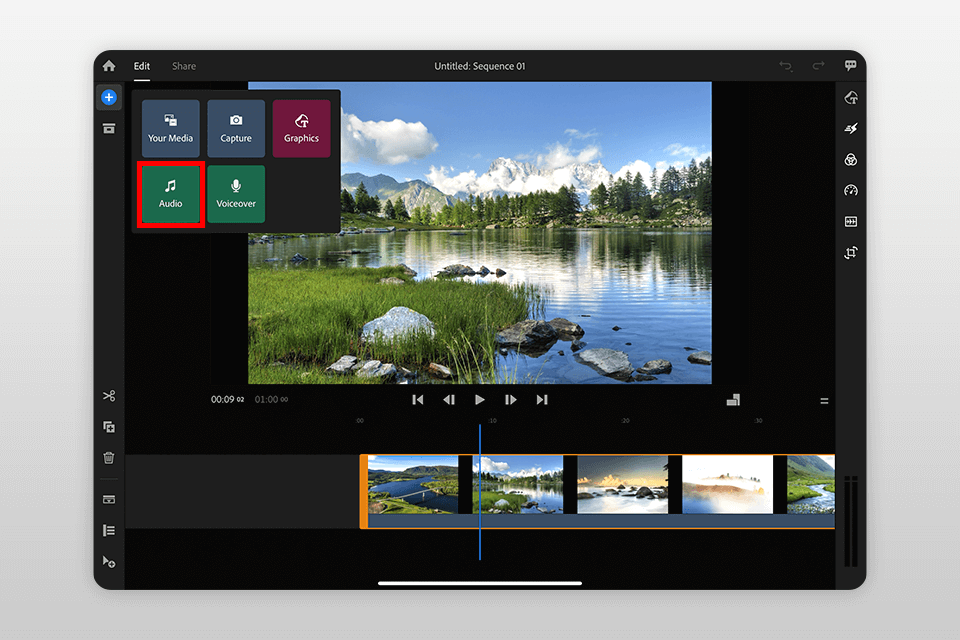
To add an audio file to your video, click the + icon and choose Audio.
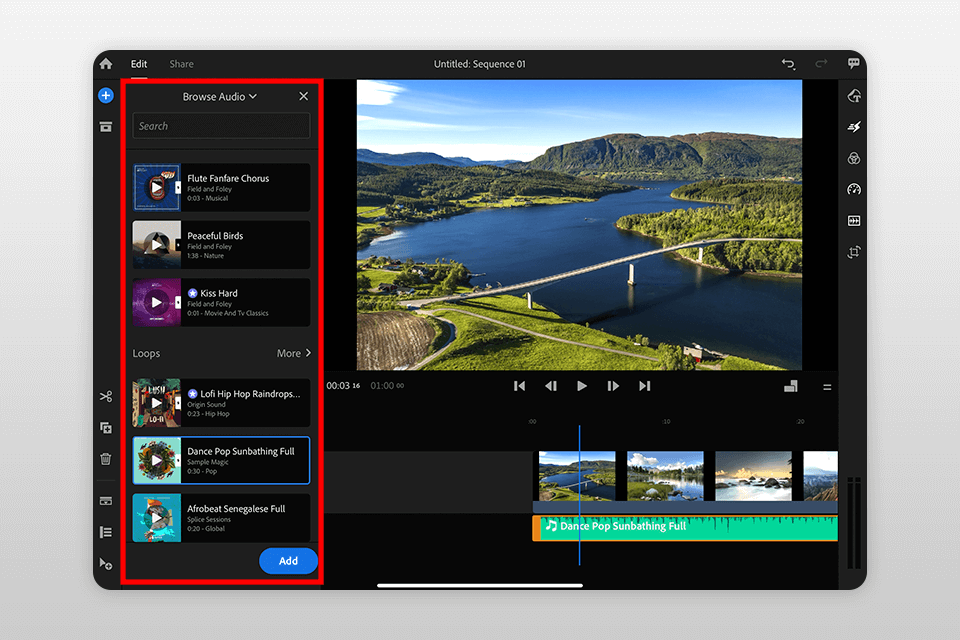
Choose the desired audio file from the popped-up list and press Add.

Akin to voice over software, Adobe Rush has a voiceover option. To add an audio recording to your video clip, press + and choose Voiceover.
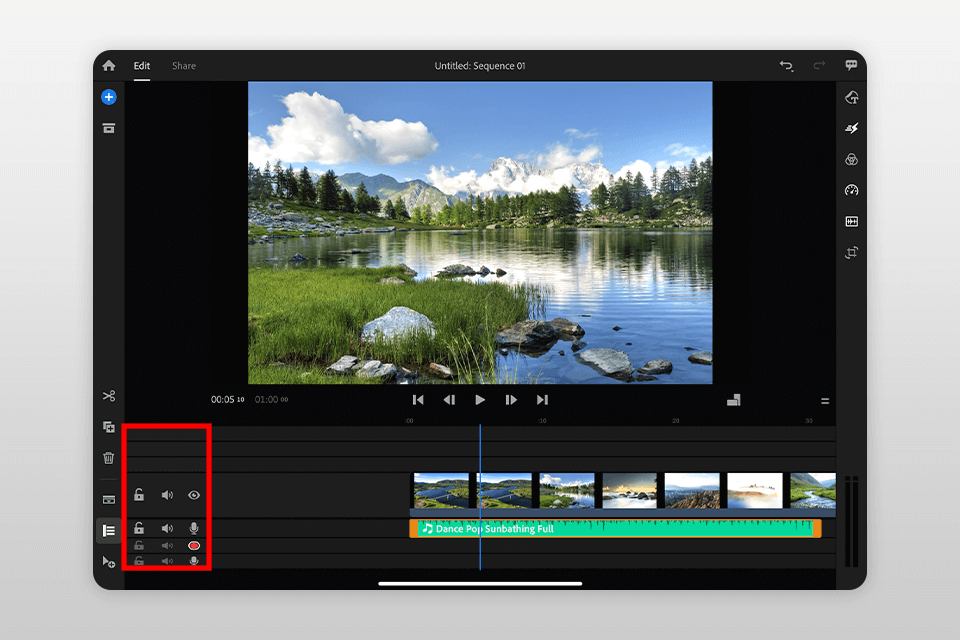
To start recording your voice, pick the appropriate option in the bottom left corner of the screen. The footage will be played while you talk over it, allowing you to keep track of what video parts you’re voicing over in real-time. You can also cut the recorded audio track or change its volume.

Transitions allow you to smoothly switch from one clip to another. To open Transitions, select the Effects tab on the right. You can pick one of the provided transitions and set its length by using the slider above it.
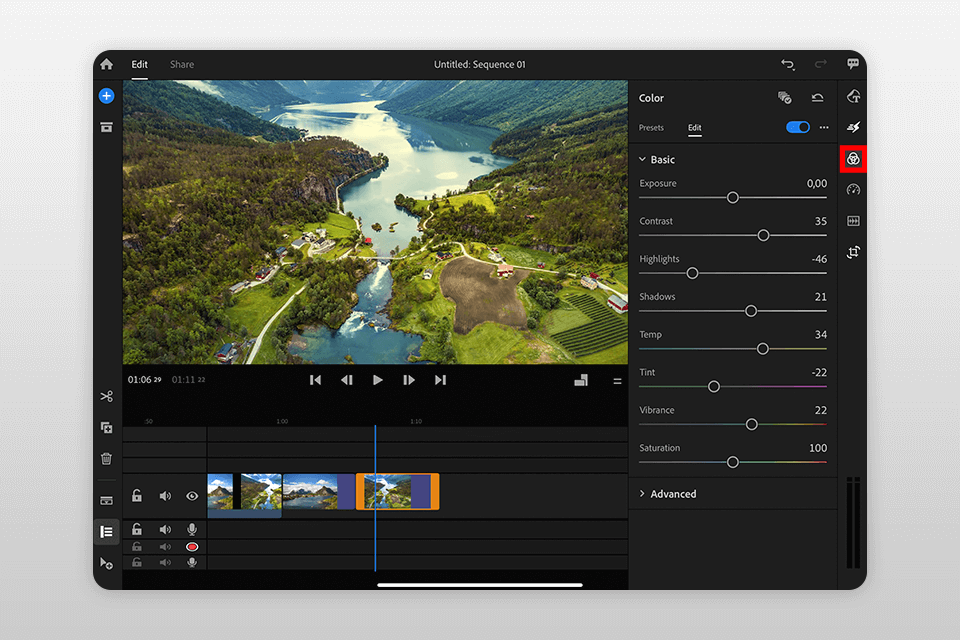
To change the exposure, contrast, shadows, saturation, and other basic color correction parameters, go to the Color tab and make any necessary adjustments.
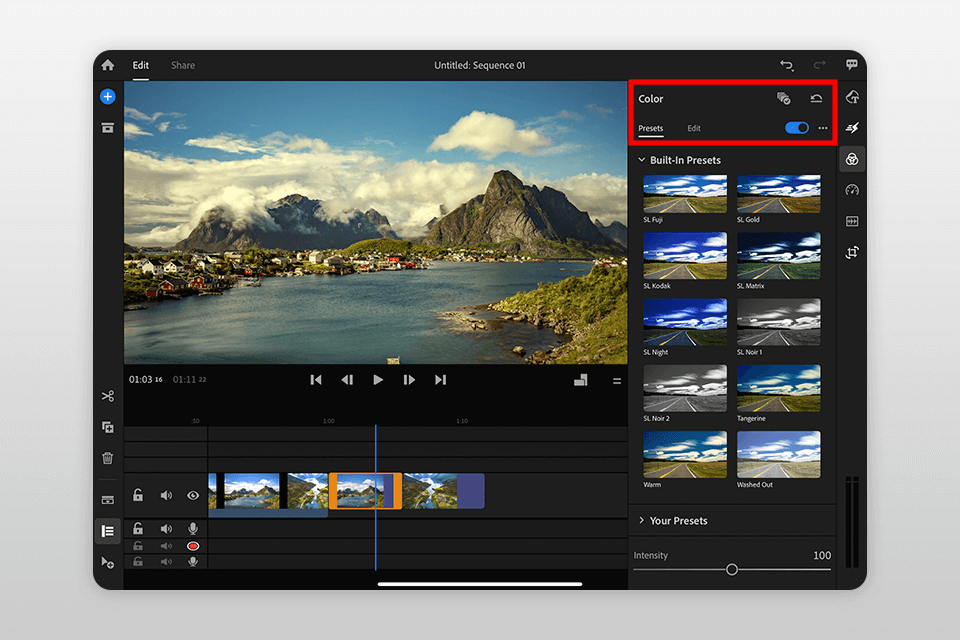
The Color tab also allows you to apply an array of interesting presets that can completely change the look of your video in a single click. Other than providing a library of built-in presets, Rush allows you to add your own.
Each preset can also be customized by going to the Edit tab on the top of the workspace. Additionally, the software comes with several artistic presets such as Faded Film or Vignette.
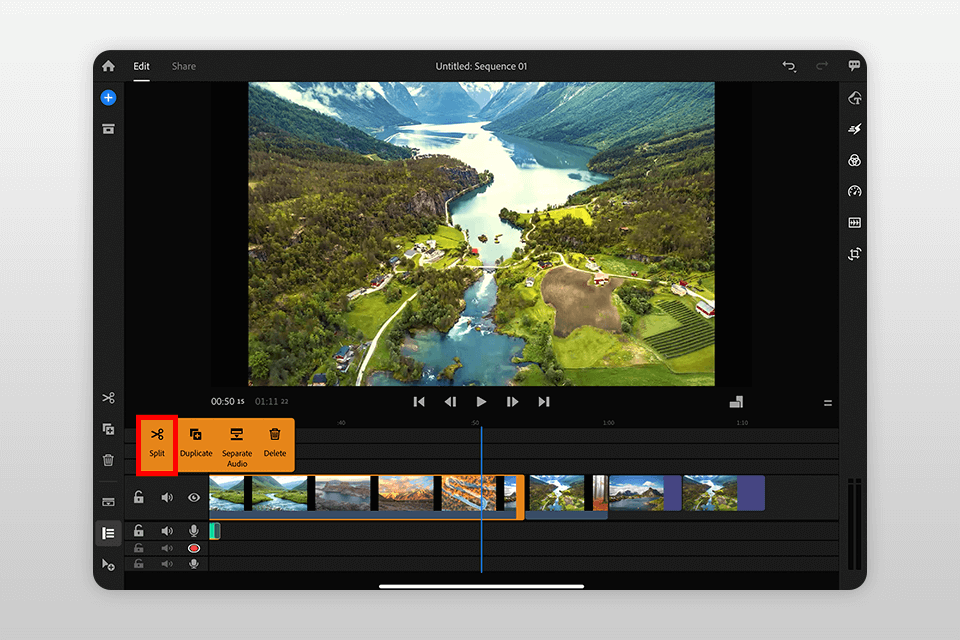
You can split your footage by choosing it and then clicking the scissors icon that is located on the left side of the screen. As a result, the clip will be divided at the user-defined point.

To add text to your video, press + and pick Graphics.
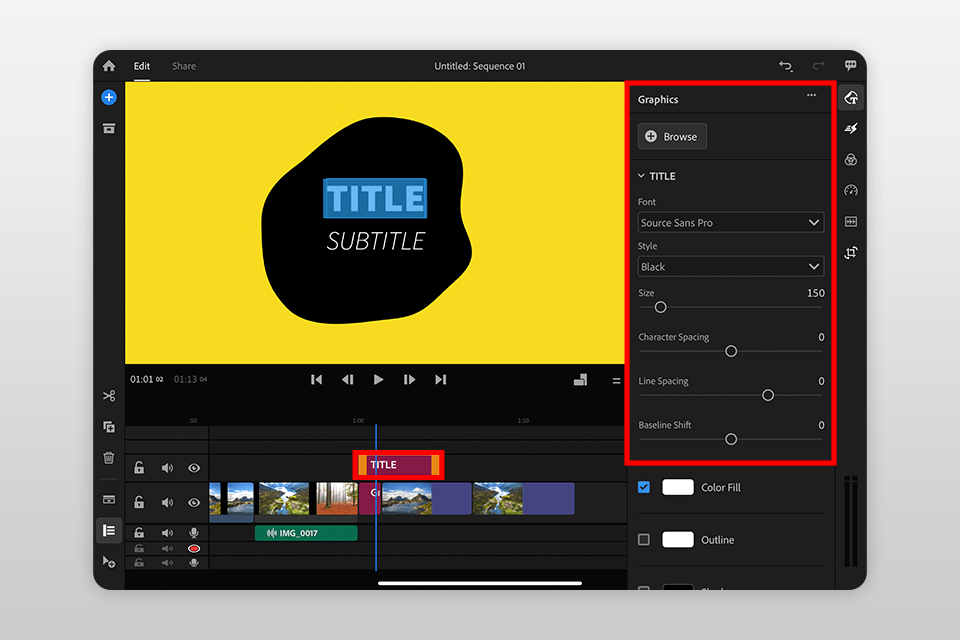
Click the text displayed on the video screen to edit it. You can replace the default text by simply typing in the words you want. Additionally, you can use the Edit panel on the right to change the color, font, size, and other text parameters.
Now, you only need to save the project. Press the Share button located at the top. The file can be saved on the local storage drive or shared via any number of your social media pages. After choosing the destination, press Export to start the process.
If you want to receive a high-quality video without wasting hours of your time editing it, entrust your project to professionals. They will add transitions, music, and VFX to your video while also improving its colors and stabilizing the footage.
Discover the basics of how to use Rush or improve your skills by watching tutorials that will inspire you to get better. I’ve put together a rundown of 10 video tutorials that will teach you how to improve the colors in your footage, animate images, create speed ramps, etc. If you want to reach a new level of clip editing mastery, you’ll greatly benefit from checking out the provided Adobe Premiere CC tutorials.
This guide will teach you how to produce professional videos with the help of Adobe Rush. Mark Wallace goes in-depth to explain the process of adding footage to the timeline, trimming it, editing audio parameters, adding a soundtrack, animating photos and illustrations, making speed ramps, recording voiceovers, and adjusting the colors.
In this guide, Mike Gray will explain all the steps you need to take to perform Color Grading in Adobe Rush. Discover how this renowned travel moviemaker employs his presets to enhance his footage while ensuring it always looks cinematic and professional.
In one minute, you’ll learn the proper way of employing the picture-in-picture feature to overlay your clips and offer a superior storytelling experience to your viewers.
This short Premiere Rush tutorial from Adobe comes with a step-by-step description under the video. It will teach you how to employ speed ramps to achieve creative effects and increase the sense of drama in your videos.
Discover the proper way of improving the colors in your videos by watching this Jeremy Clyde tutorial. Learn how he picks appropriate presets from the software’s library and uses the Edit menu to change the temperature, saturation, exposure, shadows, and other settings to achieve the perfect look. He will also explain how you can make your own presets to ensure all your videos have a similar visual style.
This Premiere Rush tutorial by Jude Allen focuses on explaining how to achieve a cinematic look by employing the provided Speed Control tool.
This video will teach you how to enhance your footage with fully customizable text and titles while ensuring they look professional and eye-catching.
Manny Ortiz is a YouTube content creator and photographer who made this guide to teach you how to use Pro Camera Settings to record quality footage using Adobe Rush.
In this video, Tyler Babin will explain how you can combine various clips in Rush to make an Instagram Story.
Amber Torrealba is a Skimboarder and YouTuber who will explain how you can make smooth clip transitions and employ Adobe Stock to design your own transitions using Rush.
If you're looking to masterpost production with this best video editing app, take these tips from experienced editors to heart. They will also help you avoid common beginner mistakes and produce decent content regardless of your experience level.
Employ the Adobe Rush application for video recording. This software comes with in-depth video recording functionality that includes DSLR-like features, which allow you to change ISO, white balance, shutter speed, framerate, etc.
Pick the appropriate recording mode. If you want to produce a YouTube video, record it in landscape mode. On the other hand, if you plan to post the clip on Facebook or as an Instagram story, then go with portrait mode. To switch the aspect ratio in Rush, press the icon below the Preview monitor and pick between 16:9, 9:16, 4:5, and 1:1.
Don’t use colorful text. Black or white text color will get the job done perfectly in 99% of situations.
Master Transitions. Transition effects can make your video flow seamlessly. Experiment with different transitions. Lengthier transitions make a video seem more professional. Make use of the Edit feature in the transitions menu and increase their duration to about 1-1.5 seconds.
Export Settings. Adobe Rush offers various export settings. Understand the basics of video formats and choose the right one for your intended platform, whether it's YouTube, Instagram, or elsewhere.
Don’t use different filters for the same project. You might be tempted to use multiple filters for different parts of the video since Adobe Rush lets you pick from 12 unique options. However, if you do that, the exported project will look like an incoherent, amateur-produced mess, hence why it’s advised to choose a single filter and stick to it.
Maximize audio tracks. The left side of the workspace has a useful button for maximizing audio tracks, which allows you to adjust the background music for your video and perform other similar tasks.
Check the sound before you start recording. Whenever you want to capture sound with your video, remember to perform a quick test before you begin recording. An audio check lets you see if the camera or microphone is picking up unnecessary noise or echoes. Thankfully, Adobe Rush lets you delete any excessive background noise during editing so that shouldn't be too large of an issue.
Employ keyboard shortcuts. This tip will help speed up the editing process. Some of the most widely used shortcuts include:
New > Project – Mac: ⌘ + N, Windows: Ctrl + N
Share – Mac: ⌘ + E, Windows: Ctrl + E
Undo – Mac: ⌘ + Z, Windows: Ctrl + Z
Split – S
Separate Audio – E
All other keyboard shortcuts can be found on the official Adobe website.
If you want to enhance your videos with a single click, try using free tools like LUTs and overlays. LUTs help you edit the colors in the videos while overlays add creative effects like smoke or glitches. This collection contains over 100 free tools that can be used for all sorts of filmmaking projects.


