If you need to download a video but it’s too big or you want to cut a clip off, this guide on how to resize video in Adobe Premiere Pro is a must-read. With the help of this program, you can flawlessly modify the size of a clip, crop it or rotate it, as well as make other changes.
First off, download Adobe Premiere Pro CC from the official website. The program comes with a full set of tools for video post processing. You may even get Adobe Premiere Pro for free and use its trial version for your basic tasks.
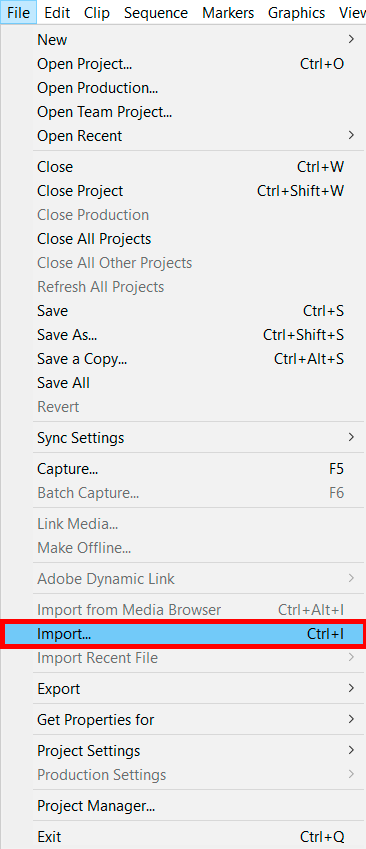
Download a video you need to crop in Adobe Premiere Pro. Go to the File tab and choose the Import option. You can also add a clip to the timeline, using the drag-n-drop method.
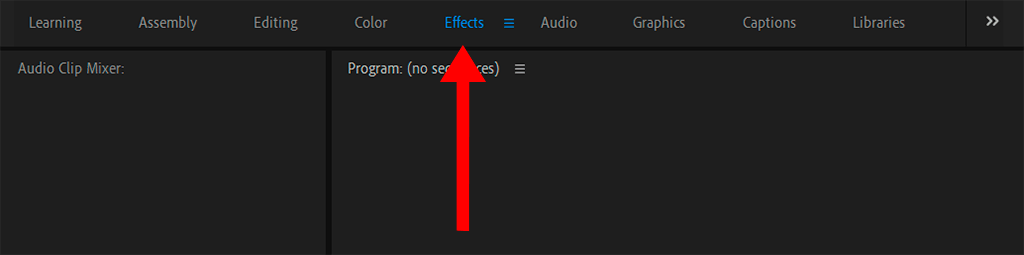
Another step of this Adobe Premiere Pro CC tutorial is to open the Effects panel next.
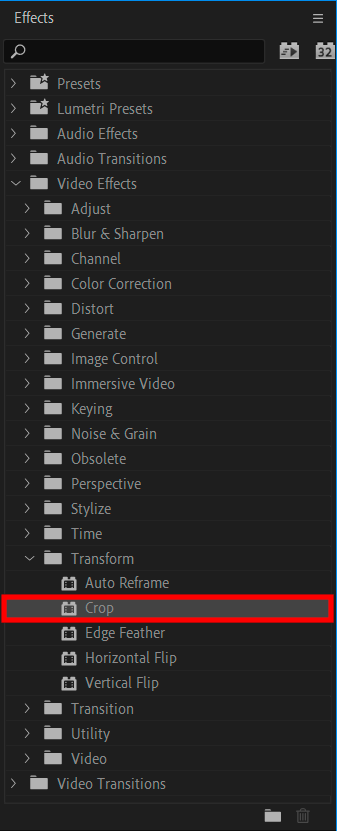
When you are in the Effects tab, find the Crop tool under the Transform folder. Click on it and drag it onto the video.
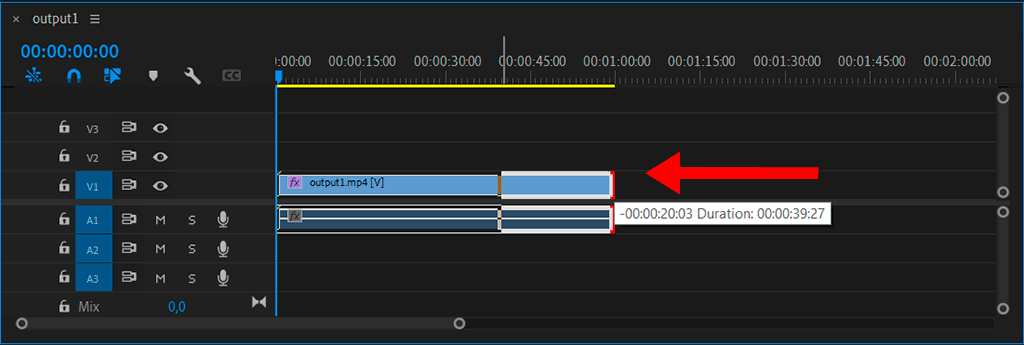
If you need to adjust settings, you can do it on the Effect Controls panel. There, you will find options for Left, Right, Top, and Bottom. You can also alter other values to crop your video.
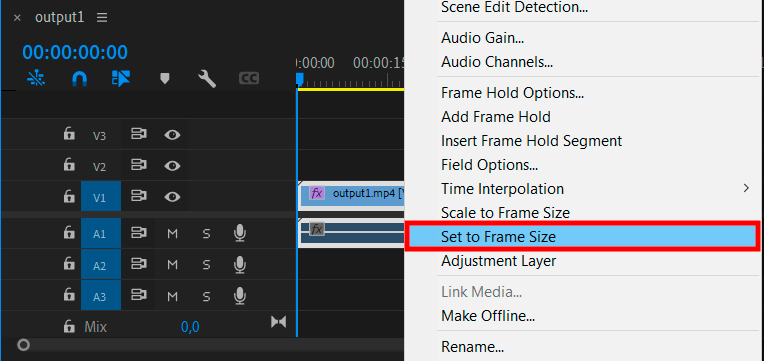
To set the frame size, you need to find the video you want to change on the timeline, by choosing the Set to Frame Size feature in the dropdown menu.

Right-click on the video and choose the Scale to Frame Size option from the list. If you want to manually change the size of the original clip, instead of applying pre-defined settings, you can also do it here.
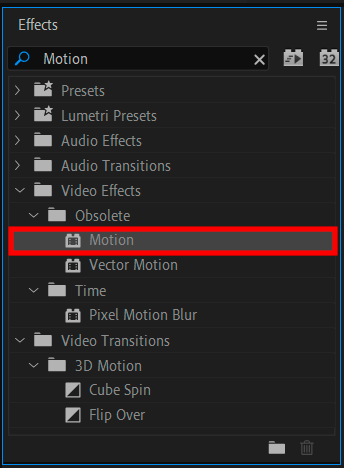
Return to the Effect tab to apply the Motion effect. Find the Effect Control Panel and you’ll see the Motion drop-down list.
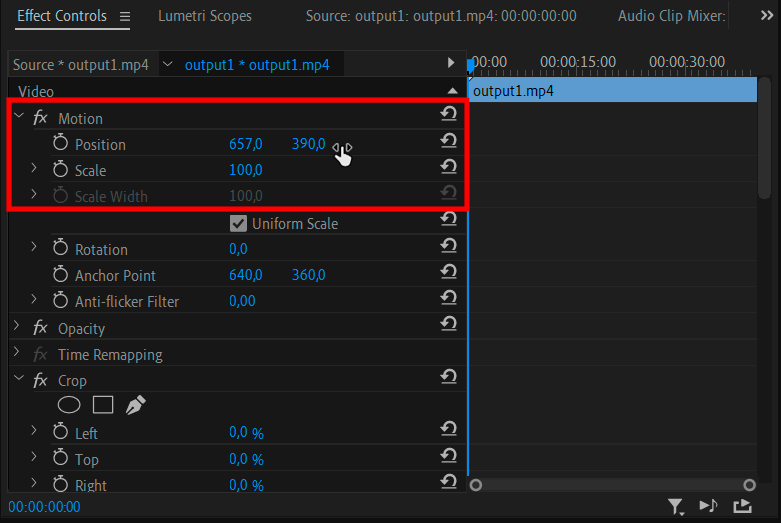
Use a slider to identify the optimal scale.
That’s it. Your video is ready for further use. You can also take advantage of other Adobe Premiere Pro tips to add additional effects, like fading, etc.
If you need professional help with video editing, contact the FixThePhoto team. They will make your footage look stunning in the shortest time possible.

In case you don’t plan to edit videos professionally, but want to make basic tweaks, feel free to use beginner-friendly Adobe Premiere alternatives. Another variant is to apply LUTs developed by FixThePhoto specialists for instant automatic modification. Thus, you can improve a short movie, correct defects, and add interesting effects.


