If you need to add a little movement to a still movie or focus on an object, learn how to zoom in Adobe Premiere Pro. With zooming, you can bring static objects to life, make transitions smoother, or add a cinematic effect to your YouTube videos.
Digital zoom in Adobe Premiere Pro is a visually simple animation with a zoomed-in picture. You can achieve the zoom effect by using scale and position keyframes. One of the most useful Adobe Premiere Pro tips is to remember that your footage will lose some quality after zooming in. This means that a high-definition video is more suitable for better results.
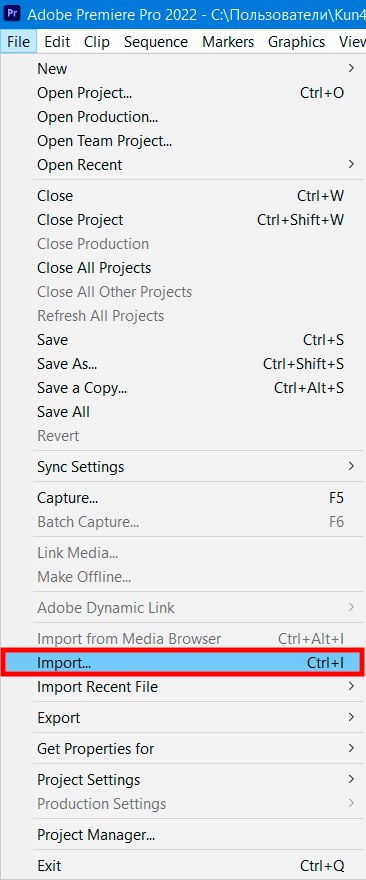
First, import a video into Adobe Premiere Pro via File> Import. You can also drag it directly to the timeline.
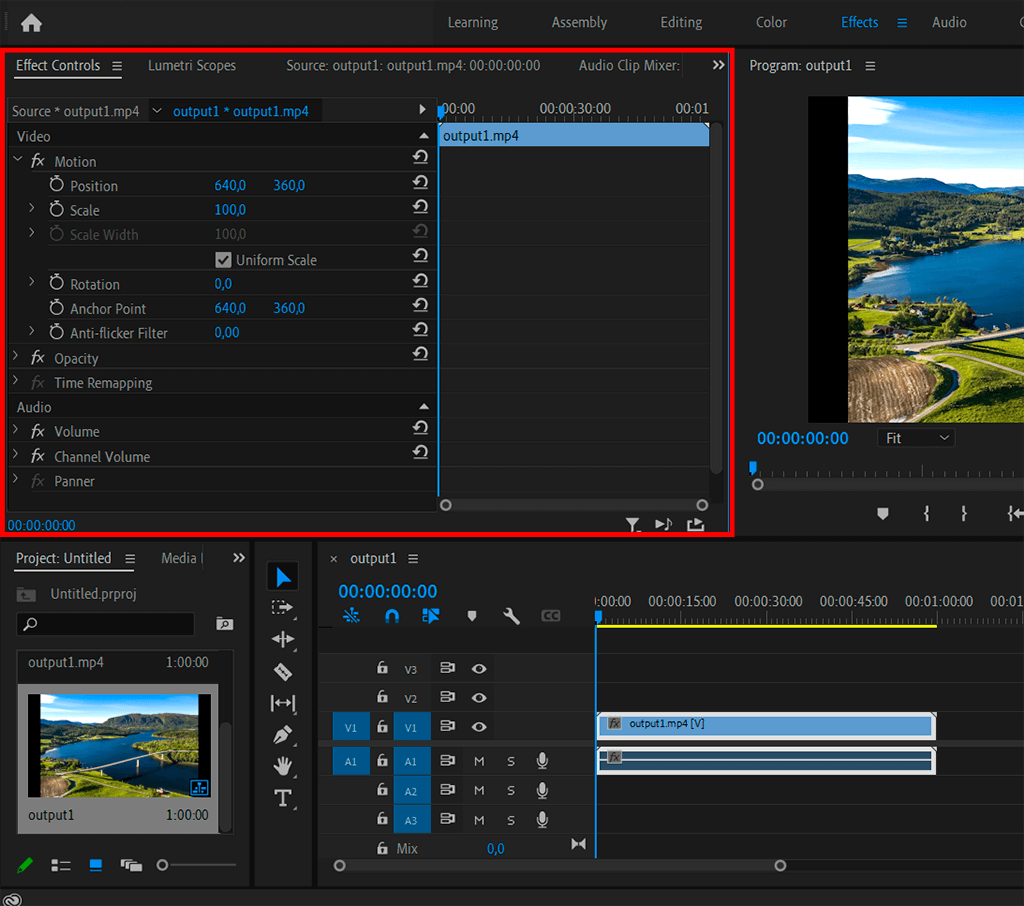
Click on a clip in the timeline to select it. It will be highlighted with a white border, and the Effects Control Panel should appear on the left.
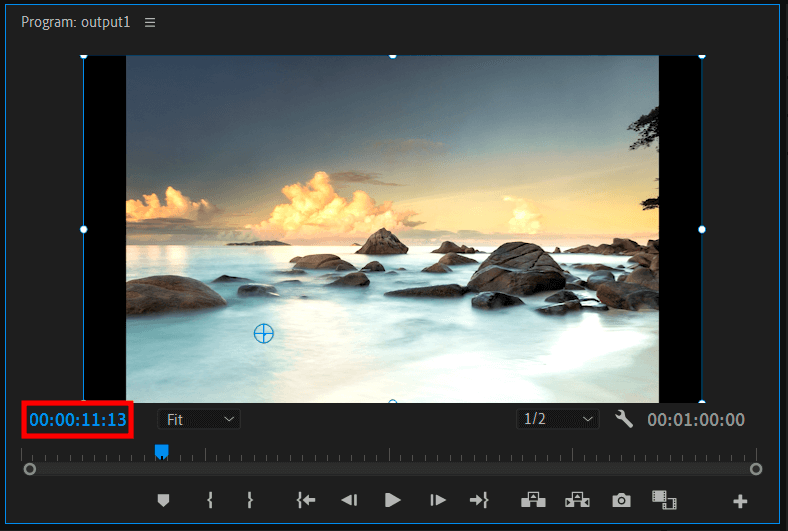
Mark the beginning of zooms by moving the playhead to the necessary place in the timeline. You can indicate the time manually.
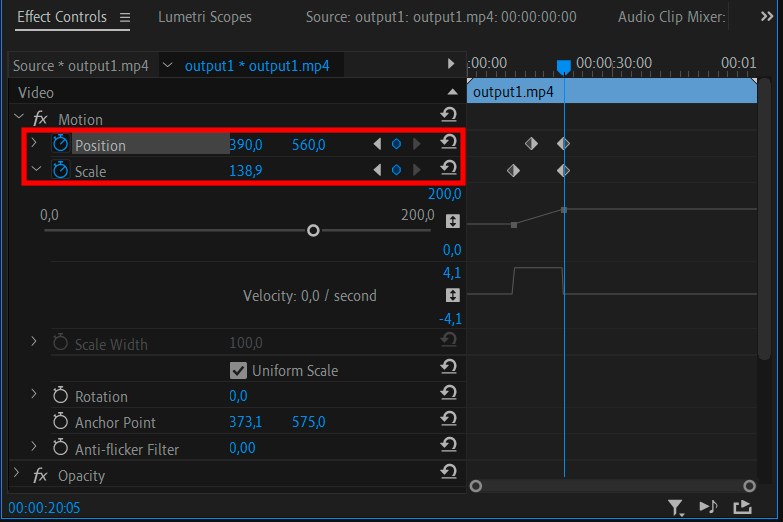
Find the Scale and Position properties in the Effect Controls panel. Click on the stopwatch icon to enable keyframes and set the first one for scale and position.
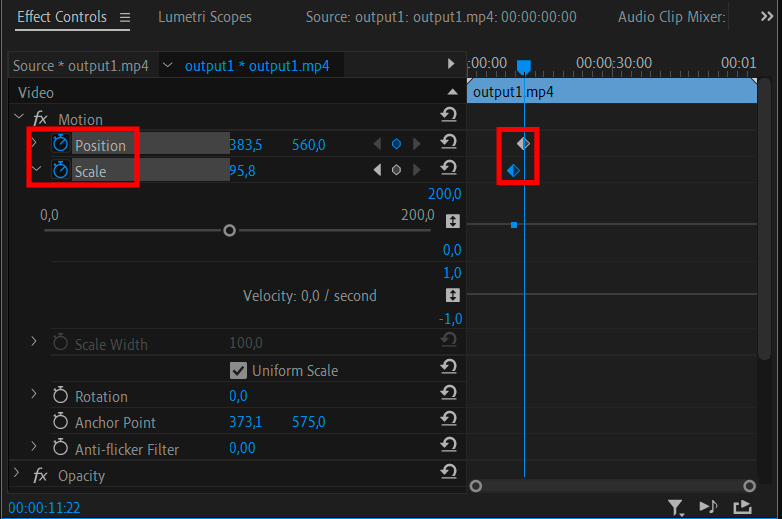
Place the playhead to where you want to end the zoom Premiere Pro. Click the diamond icons and create the last keyframes with new parameters for Scale (how many times the image will enlarge) and Position (if the centered position isn’t suitable for you).
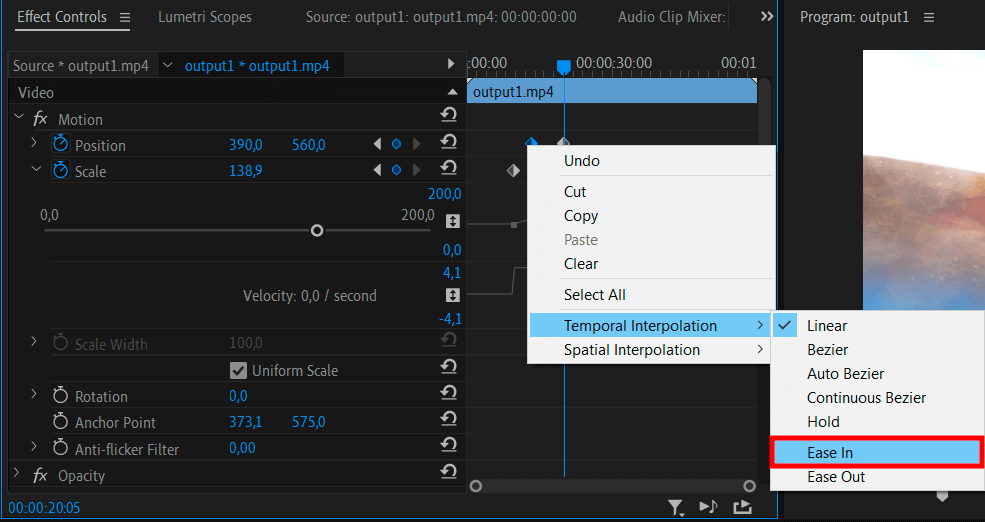
You should playback video in real-time and check if the speed at the beginning and at the end of zooming is the same. If you need to get non-linear motion, you should choose the interpolation method Ease In by right-clicking on the first keyframes. Select Ease Out for the last keyframes.
If you have followed these instructions on how to zoom in Adobe Premiere Pro, you've performed a basic scaling. Keyframes are automatically set to linear timeline interpolation and auto spatial Bezier curve interpolation. For deeper control over scaling, you need to explore the kinds and properties of interpolation and transitions. You can also add cool transitions by contacting a specialized service.
A professional service will give you more precise control over the animation. It will help you apply some cool cinematic zoom effects, like Shutter Zoom or Dolly Zoom. Your video will look as if not only the picture is moving, but also the lens, the camera itself and the objects in it.

If you want to enhance your footage or make rough cuts smoother with transitions, use these free tools. After learning how to overlay videos in Premiere Pro, you can apply these stunning effects and get results that exceed your expectations. They are useful for adding creative effects, such as smoke or a digital glitch to videos. If you want to achieve a cinematic look, a Film Grain Overlay is the ideal choice.
Yes, the anchor point looks like a circle with a crosshair. It is in the center of the frame by default. Before introducing keyframes, you can select an anchor point in the clip and drag it to the focal point to start zooming from. This means that the Position setting is not necessary.
It is the process of filling data between two frames. You can choose between timeline and spatial interpolation. The interpolation between keyframes allows you to animate motion, effects, color changes, sound volume, transparency, and other visual and audio elements.
Yes. You can make a nice zoom transition by adding a transforming effect to both clips. Set a keyframe at the end of the first clip and about 3-4 frames before its end. Scale up the Transform effect and the shutter angle to 360 at the end of the keyframe. Don't forget to uncheck the Use Composition's Shutter Angle checkbox. Repeat all the manipulations in the reverse order in the second clip. You need to add the same zooming to the beginning and apply regular settings a few keyframes later.


