If you want to know how to use Adobe Premiere to upload YouTube videos, check out this step-by-step tutorial. You will learn how to upload videos directly from Premiere Pro to YouTube instead of saving files to your computer. Besides, we’ll tell you what settings to use when exporting, and how you can get free tools to improve clips with ease.
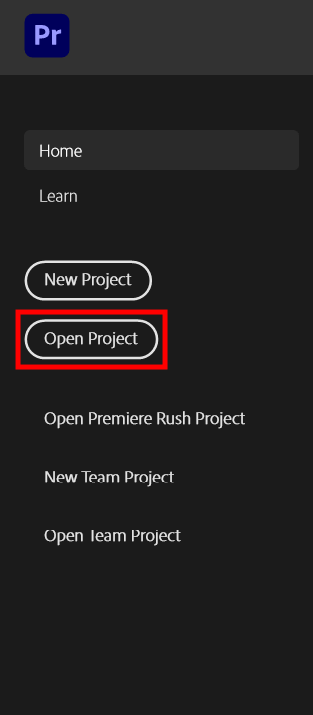
If you want to upload YouTube videos with Adobe Premiere, you need to open the project first of all. Find the app icon in the Start menu or Applications folder, and click File > Open. Alternatively, you can right-click on the project file in your file manager and choose Open with > Premiere Pro.
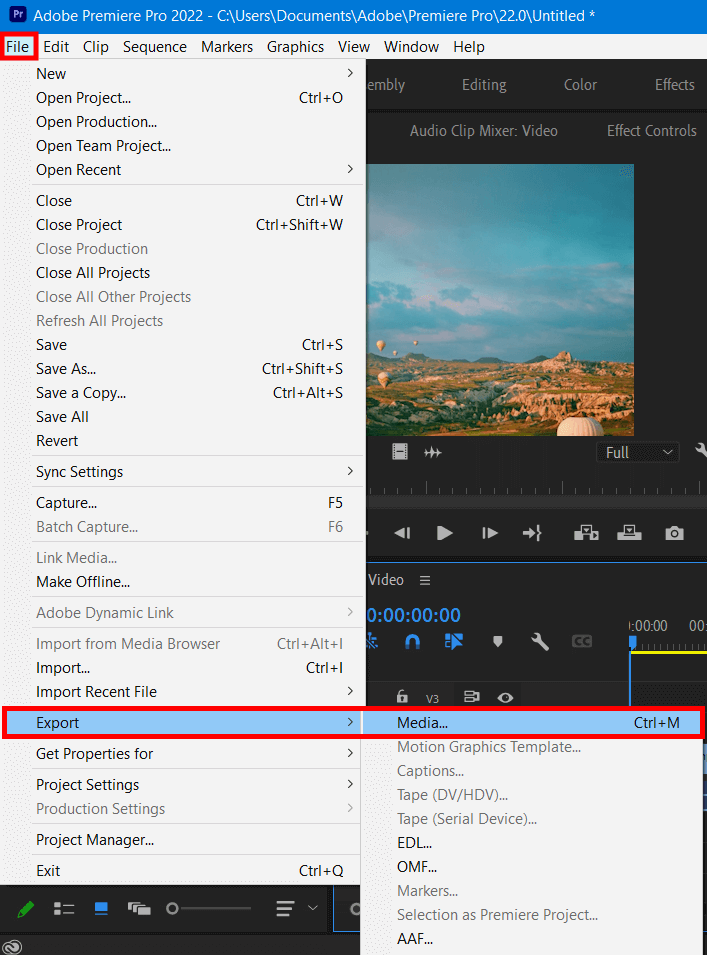
Click File located in the toolbar in the top left corner of Adobe Premiere Pro. Hover the mouse over Export and click Media. Once you move the mouse to Export, you’ll see a drop-down list to the right. Alternatively, you can use hotkeys Ctrl + M (Windows) or Cmd + M (Mac) to open the media export window.
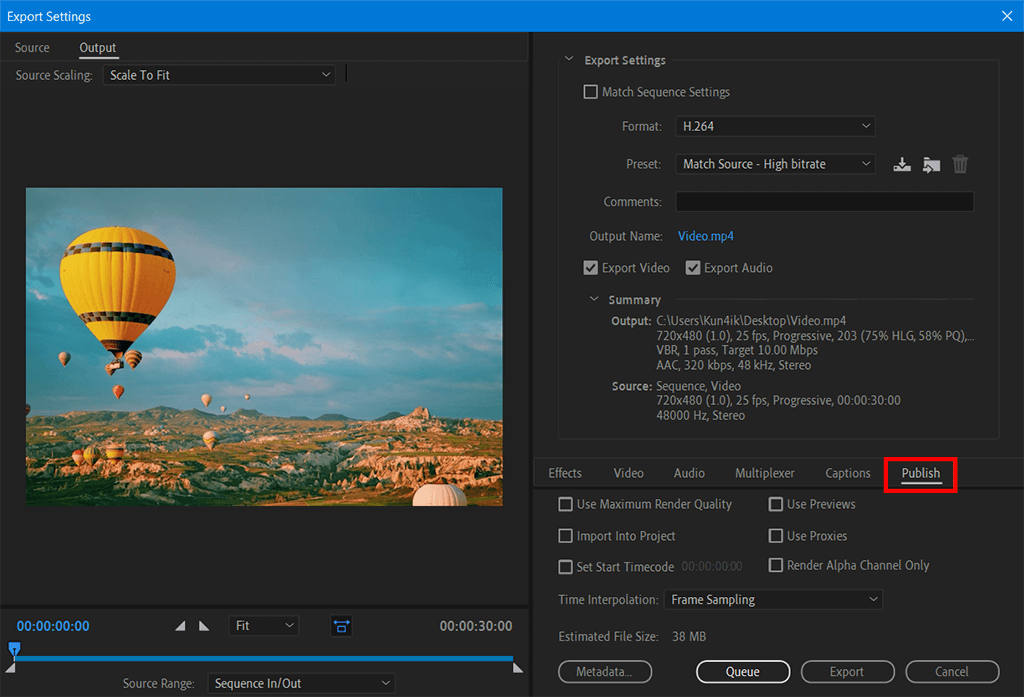
You will find this tab to the right of "Effects" on the left side of the "Export Settings" window.
You need to go to the bottom of the list to find the "YouTube" option and click the arrow next to it.
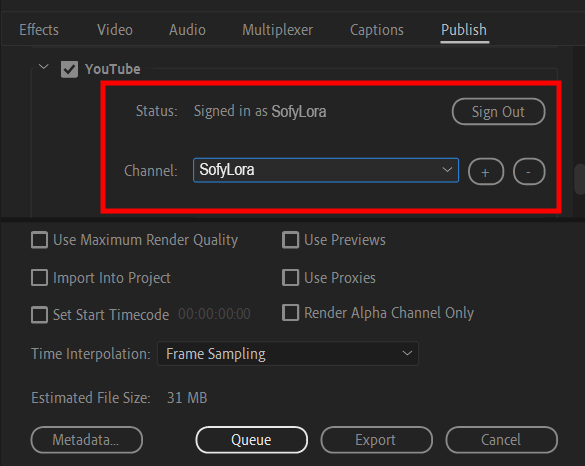
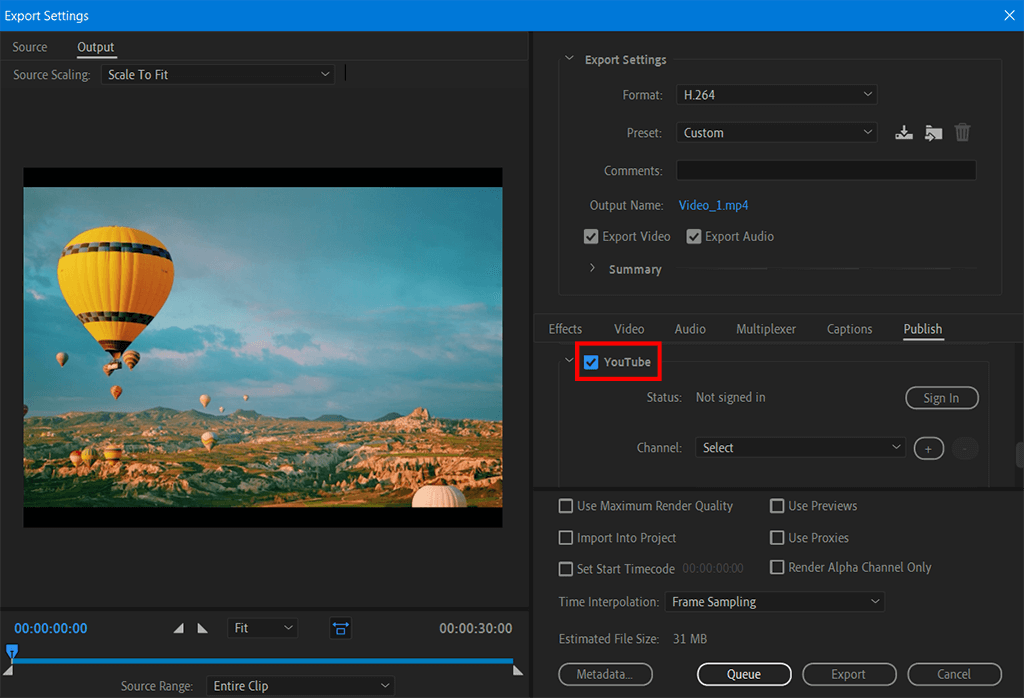
To post a video, you must be logged in to your YouTube account. Once done, you’ll see the YouTube profile where you’ll publish the video.
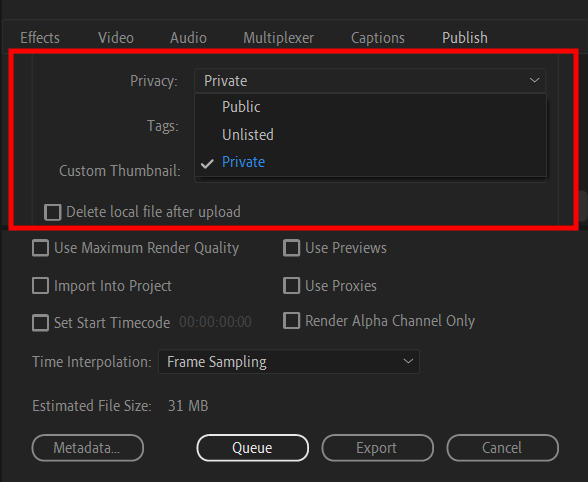
The software sets the video privacy as "Unlisted" by default. You can change settings to private or public. Based on your YouTube account, you may have an option to select the playlist/channel to add a video to.
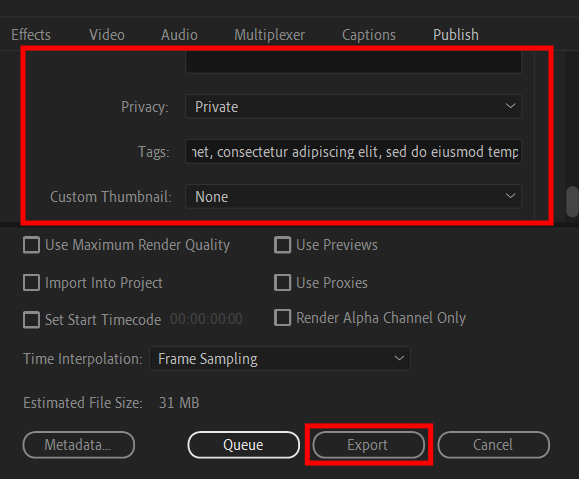
The title you’ll add to your video is the output title of your project. If you want to change it, press Output Name next to the "Export Settings" pop-up window.
Once you click export at the very bottom of your screen, the software starts uploading videos to YouTube.
Even though you know how to upload Premiere Pro video to YouTube, you still should make sure the uploaded video looks professional to get more views. To edit clip fast and easily, you can contact professionals. They will add transitions, and create a picture-in-picture effect in Adobe Premiere Pro, correct colors and audio, while maintaining the desired style of the video.
When uploading videos on YouTube, you should choose MP4 format. It stands out with high quality and efficiency along with fast uploading with no losses. When it comes to codecs, the choice is a bit more challenging. The developers describe the way Premiere Pro can compress and decompress a video file. The more efficient the codec, the higher the video quality after export (except for large files). The H.264 is the best codec for YouTube. It compresses and encodes video into the MP4 video file faster.
The frame rate you use to record a video affects the frame rate of the exported one. As a rule, a camera used for recording allows you to set the frame rate. Check out the most common values:
Bitrate shows how much information every second of video transfers. It’s measured in bytes or kilobytes. The higher the bitrate, the more information is transferred, resulting in better quality. As a rule, a good bitrate value known as “Target Bitrate” in Premiere Pro ranges from 8 to 45 Mbps. It guarantees a high-quality video. Thus, if you record 720P and 1080P videos, you should consider an 8-12 bitrate while for 4K with a high frame rate – 35-45 works better. When it comes to bitrate encoding, CBR (constant bitrate) is the best variant since it delivers high-quality video with less effort for Premiere Pro during exporting.
Picture resolution means the number of pixels used to display a video. Thus, if you try to get a clear and sharp picture when using Adobe Premiere to upload YouTube videos, you should choose the higher number of pixels. 720P: It works great for smartphones. However, if you’re targeting laptops and TVs, it’s worth considering higher value. If you’re sure, your audience uses mobiles mostly, you can cut file sizes and upload times by shooting and exporting in 720P. 1080P: It’s a standard for most video broadcasting, including YouTube, TV, and streaming apps. 4K: Known as “UHD” or “Ultra-HD”. If you specialize in design and visuals, this resolution works great for your needs. However, in case your audience uses mobiles only, it may be a bit overwhelming for them since no mobile supports 4K screens.
It’s a rare case for YouTube to not accept a video. It may happen if you indicate wrong export settings, including incompatible values of file type or codec. Check out several scenarios you may face when using the wrong export settings:

You can check out the Adobe Premiere CC tutorials for a basic understanding of the program. Alternatively, you can use ready-made LUTs to speed up video enhancing without prior training.
If you want to correct colors in your video, try these free tools to add warmth, increase saturation, add bluish tints, and rich shades. You can get 150 high-quality LUTs suitable for various video styles, including vintage, cinematic, wedding, travel, landscape, etc. They come in .CUBE format. The LUTs are compatible with Premiere Pro, After Effects CC, FCPX, and DaVinci Resolve.


