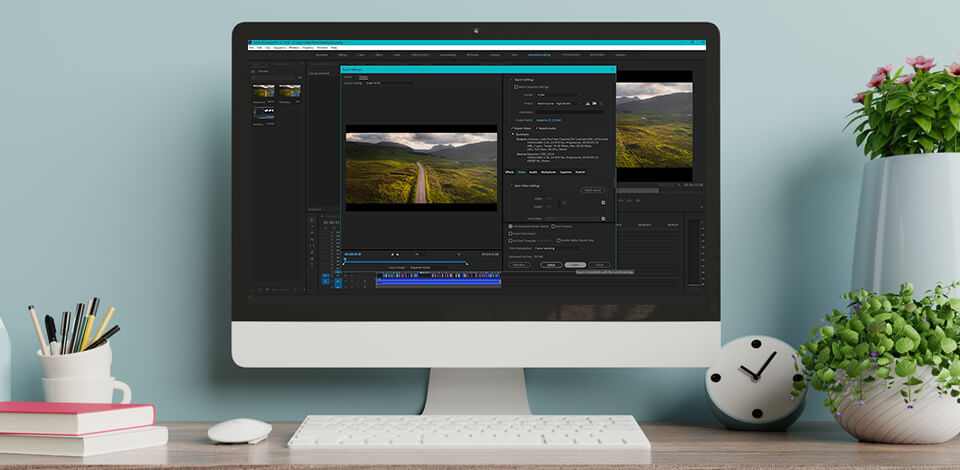
Making a choice of appropriate settings for YouTube Premiere Pro export after importing the content can ensure the best content quality when you finish editing your video.
Despite the fact that in the best video editing software for YouTube the ready-made presets are already embedded for the export, YouTube rules are frequently under amendments, that’s why the option to apply the export setting manually will always be in high demand.
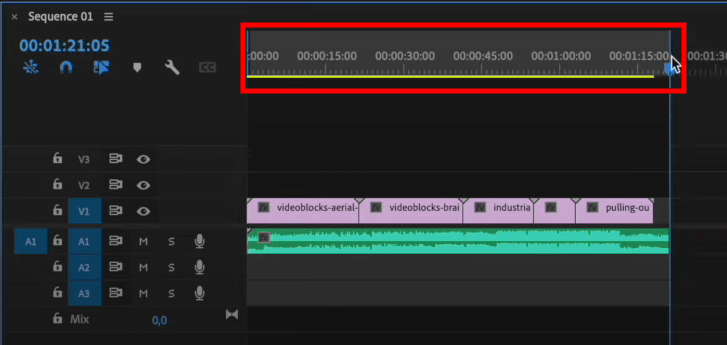
After you finish editing your video in Premiere Pro set the incoming and outcoming points for your video.
Firstly, move the “Play” indicator to the place you want to start to render your video, and click on “I” on your keyboard.
Then go to the moment you want your video rendering to be finished, and tap “O” on your keypad.
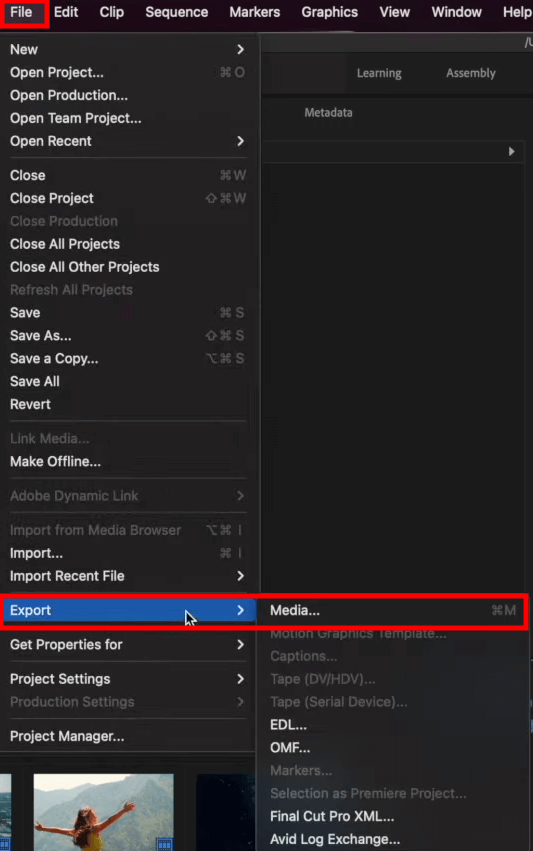
Then select “File”> “Export” > “Mediafile” in the menu — after that you will see the pop-up message.
You are able to select the pre-built export and format settings with the help of the ready preset.
To do so, you will have to choose YouTube 1080p Full HD on the appearing board. If you do not see it in the “Pre-setting” list, go to “Additional pre-settings”, open a dialogue window “Pre-settings manager” and finish the pre-setting search.
Nevertheless, for the best result, I advise you to set your own export parameters.
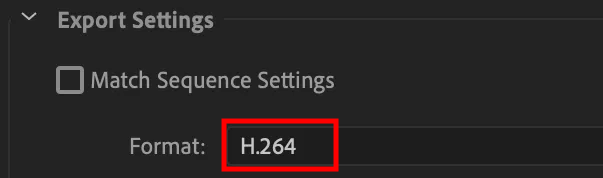
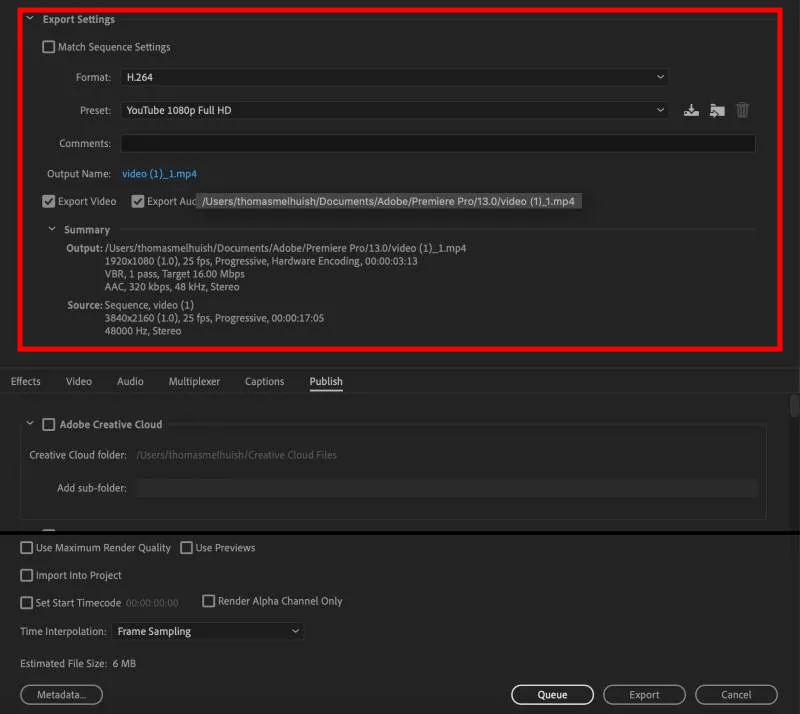
The first step is selecting the format. The best one for Premier Pro export is H.264.
In comparison to other compression formats, like MPEG-2, H.264 ensures a much better video quality at one and the same compressed bit rate, uses a smaller bandwidth and is compatible with online platforms.
Among other widespread codecs that ensure the best video quality while publishing, I would also like to point out HEVC H. 265.

After that, right below, select pre-installing – I recommend to use preset “YouTube 1080p Full HD”. Then, just below the format, set audio and video flags.
Although you are able to use render in 4K, you have to remember that it overloads the system, and according to the annual YouTube reports, the majority of users use the application on their smartphone, and the most popular quality which they select is 1080p. Thus, you will be likely to waste your time.
It is also fundamental to choose the correct framerate. Here, I always recommend to set 60 f/sec – it will allow to play the video without interruptions.
Nonetheless, if you got fascinated with the stop motion animation ideas, and created your simple linear clip, for instance, with the animated pictures for kids, or just voice something – you can leave a minimal rate – 24 frames. It will enable you to perform a faster video rendering.
Please, also do not forget to put the indicators in Encoding Setting section, set a video profile to a higher (or higher), and a level - to 4.2 (according to statistics, it is the most popular, while you export video for YouTube).
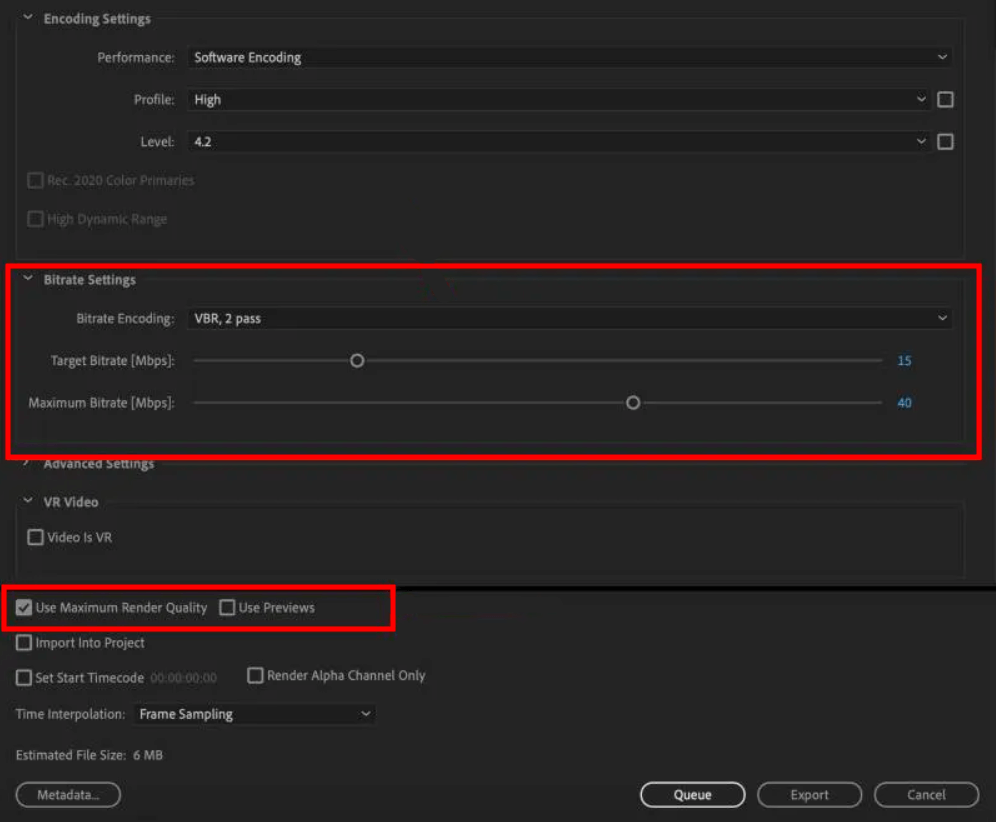
To set an optimal bitrate parameter, go behind the title “Bitrate” and set a bitrate coding to VBR, 2 Pass, then set the desired bitrate to 15 and a maximum beat rate to 40.
Do not forget to set the flag “Use the best possible rendering quality”.
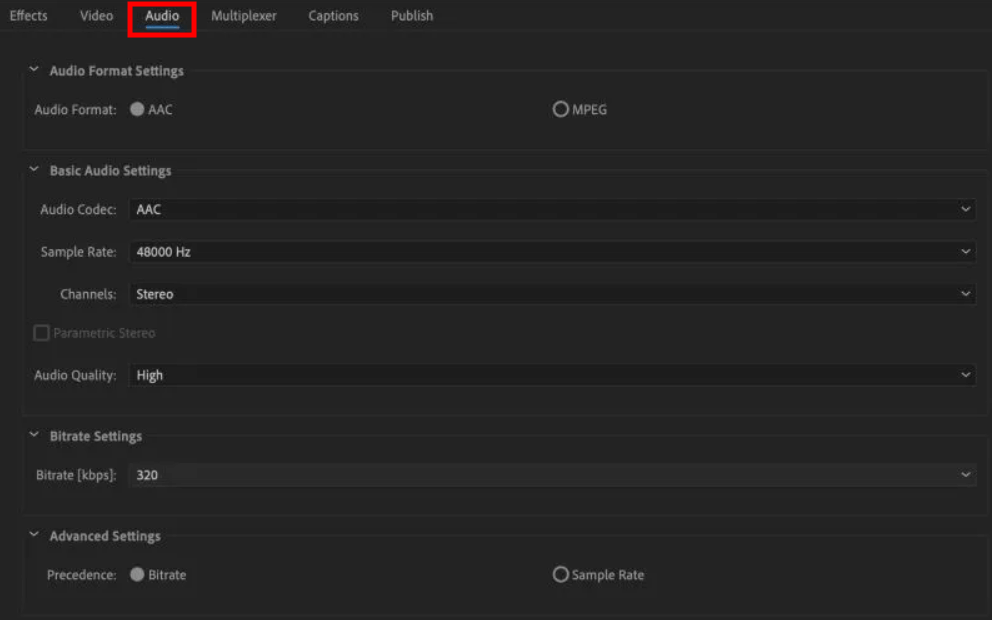
To set the audio export just opt for “Export settings” tab and set the following parameters:
My advice will also be to press “Additional settings” and set “Priority” to “Bitrate”.
The last alteration on 10th March, YouTube added the following rules for video publishing. The minimum resolution: 256×144 (144p). Maximum resolution: 3840 x 2160 (2160p).
The main settings which we included in this guide are usually involved in other Windows video editing software, yet Premiere Pro, puts itself as a most stable video-editor. Additionally, if any questions have arisen, you can revise a large database of Premiere Pro tutorials, or ask tech support for assistance.
The choice of frames frequency for video depends upon your video genre, thus, if it contains any action scenes, motion or effects, it is advisable to apply the render settings in 60 fps at video export from Premiere Pro. However, if you have produced a simple animated video, shall we say a short cartoon, 30 frames per second will be pretty enough (which will let significantly increase your video rendering process).
Most probably, 1080p will be better, as the majority of people use YouTube on smartphones or tablets, and 2160p videos take a lot more place on the disc (and it takes longer to render them), than 1080p video. Therefore, if you do not have a hard drive with the capacity of 3TB or more, it will be wise to perform the rendering and downloading in Full HD format rather than Ultra HD.
If you use a standard frame rate (30 frames per second), aim at the low range point, from 3500 to 5000 Kbit/sec. If your frame rate is high (60 frames per second), aim at beat rate from 4500 to 6000 kbit/sec. A perfect bitrate for video broadcastings in 1080p would be from 3500 to 4000 kbit/sec.


