Lightworks
Verdict: Lightworks has everything a clip editor may need for enhancing footage. It has a streamlined UI with a range of features for tweaking colors and editing audio. While this software doesn’t have such advanced tools as DaVinci Resolve and VSDC, it’s a great option to consider if you don’t have extensive experience in this field. In this Lightworks review, I will tell you about the key advantages and weakest points of this software.
You may need to spend a lot of time to master all the tools available in this program, however, you will quickly learn how to use its basic toolset. It doesn’t support a variety of export formats, but if you need to create a video for social networks and optimize its size, you will like the fact that this program allows exporting videos to Vimeo and YouTube.
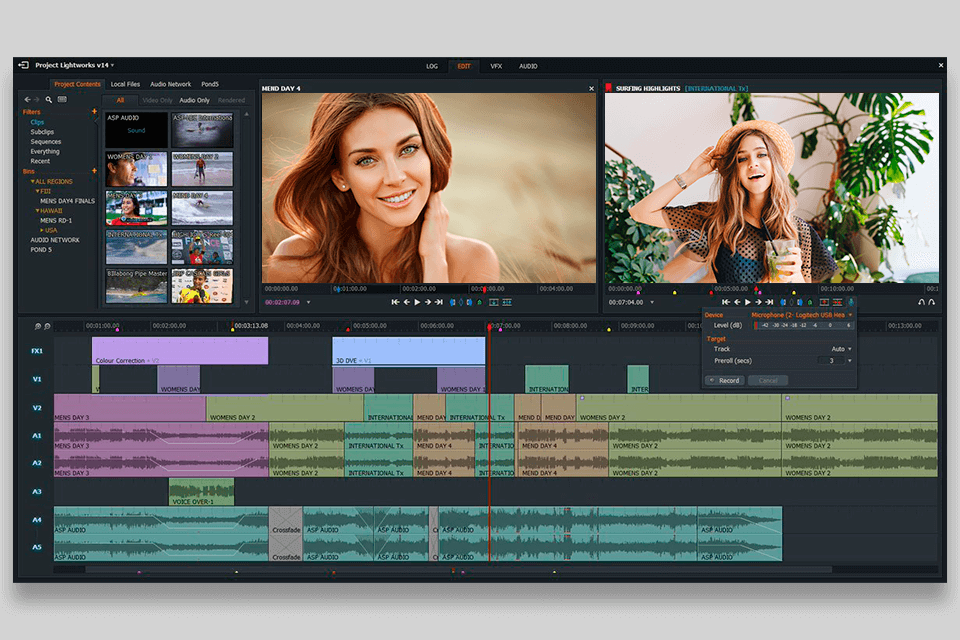
This color grading software is popular among YouTube bloggers, Instagram vloggers and social network users who need to improve their videos quickly and publish them online for gaining many likes and followers. The free version of Lightworks meets all these requirements very well. However, novice editors need some practice to get used to this program.

Lightworks is professional video editing software for Mac, Windows, and Linux that is popular among videographers and filmmakers. With the help of this software, you can quickly edit your footage for YouTube, merge clips, and publish videos on the web in several clicks.
You can set up and use this software without any prior skills. To get access to its tools, you need to sign up. Installation is quick and easy, although you need to register to activate Lightworks. It’s a non-intrusive process that only requires a name and a password.
You will easily figure out how to use this video editing software as it has an intuitive interface with a convenient tile grid that allows you to either create a new file or continue enhancing a video that you saved before. To create a new project, enter a name for it in the Name field. Then, specify the frame rate of the movie you are going to edit in the Framerate line. If all the clips that you will use have the same frame rate per second, apply default (Auto) parameters for them.
To access the Log, Edit, VFX, and Audio tools, you just need to click on the corresponding tab in the top part of the screen. Under each tab, you will find a variety of tools for enhancing your content.
The Log tab includes features for adding file metadata, configuring the timeline, and adding cue markers. The Edit tab contains all the tools that you may need to edit your clips, while the VFX tab makes it easy to access a collection of effects and presets. When using the latter, you can also tweak colors, add text, and perform a variety of other tasks for giving your footage a unique feel.
If you go to the Audio workspace, you can tweak the sound in your clips. All the tools are quite intuitive and can be used without any prior experience. You can also use handy tips to master their functionality in no time.
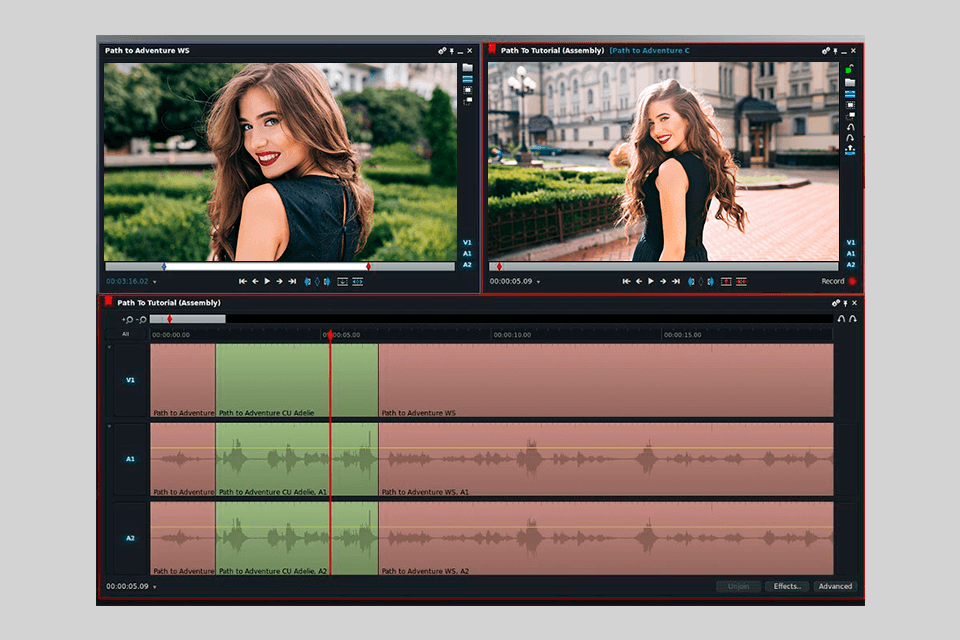
If you have ever used other professional video editing software for Windows, you won’t face any difficulties when trying to figure out how to use Lightworks. At the bottom of the page, you will see a timeline. There is also a project library in the top left corner as well as source and program monitors.
To preview the edited clip, use the source monitor. You don’t need to indicate input and output points manually as the program will automatically choose the last part that you watched. While the interface may seem a bit convoluted, once you have mastered it, you will be able to solve a variety of video enhancing tasks more efficiently. To merge different segments, you can click on them to select them.
The program allows you to create one video and two audio files. To add a new track, just open the menu and select the corresponding option. There is no need to drag a file on the timeline.
You can move a clip to one of the tracks in Lightworks by dragging the necessary sketch imported into the project from the Clips window. Place the clip on the track and hover the cursor over it. Note that the pointer will change its shape depending on its location.
Open and closed clip brackets mean that the pointer has moved to the clip trimming mode.
Additional double arrow is an open bracket added to the cursor from the left edge of the clip or the arrow of the cursor complemented by a closed bracket in the right part of the clip. When the cursor is in the middle, you can move the video to the timeline or transfer it to another free track.
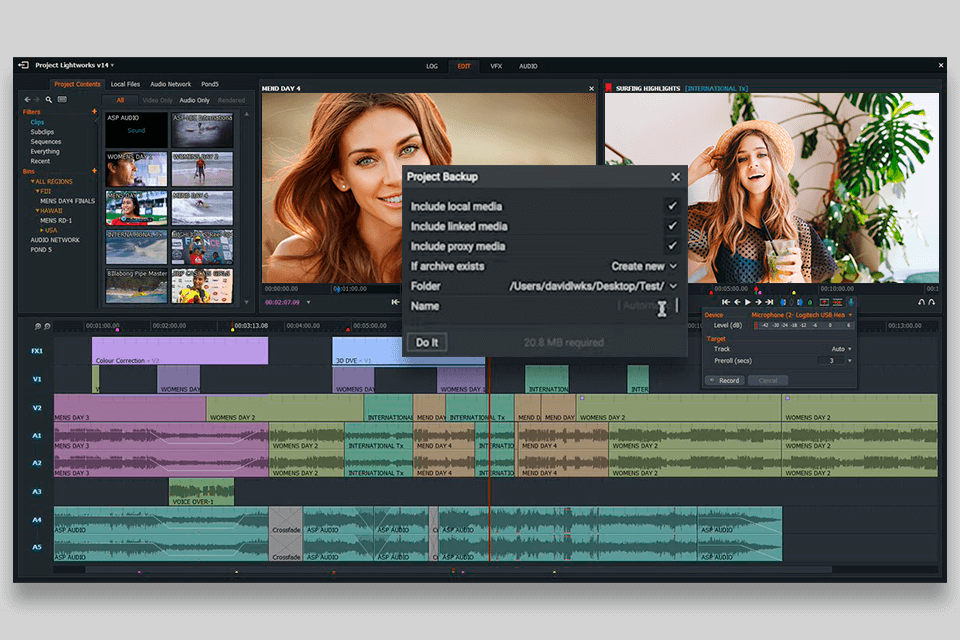
Lightworks software has an incredibly convenient option to create a backup copy. It lets users save all the files from their projects to one folder and continue working with them using another computer for video editing.
To create a data archive, right-click on the window with media files used in the project and select the Bin Commands section in the context menu. Then open the Export and Backup sections, and select the archive option here.
When I started using Lightworks, I didn’t expect much and thought that I would find only basic tools. However, it defied my expectations. The only disadvantage of the free version is that you can save your videos only in 720p in H.264/MP4. However, a premium subscription allows you to save your clips in 4K. In both versions, you can select from different playback options and view your videos in UHD 4K.
Another advantage of this software is that it fully integrates with YouTube and Vimeo, which makes it easy to export files to these platforms with any frame rate you want to. You can save your clips with different resolutions, such as 240p, 360p, 380p, 480p, and 720p.

When working with the tools from the VFX tab, you can apply a range of effects, add transitions, make colors pop, or add titles. After selecting an effect, you just need to drag it onto your video and then customize it as you see fit.
The Color video effects group of Lightwork includes filters for image color correction. You can change the color tone, adjust the balance of shades, convert a color video to monochrome, as well as correct the brightness and contrast of the frame with their help.
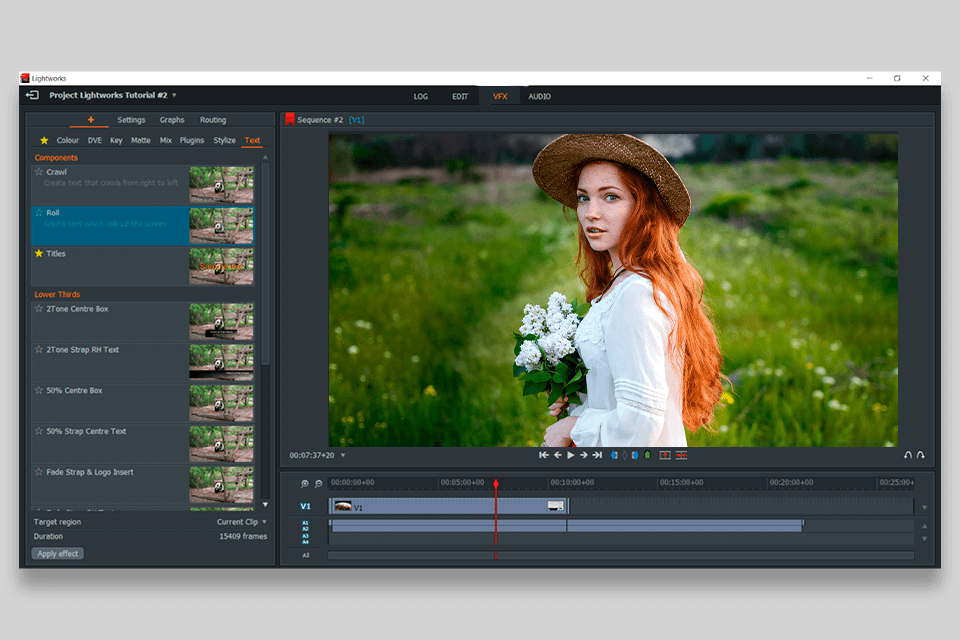
The next useful feature is the Stylize group of effects. It comes in handy when you need to use basic post-processing filters. Here, you can find tools for sharpening (Sharpen and Sharpen Edges), blur filters (Blur and Radial Blur), Glow to add a glow effect, as well as a tool for tracing the color palette (Pasteurize).

The Vignette & Crop categories include the tools that are necessary for creating a color vignette video. The vignetting effect available in Lightworks Pro can be used to crop an image with a black color field.
The Keying category contains tools for customizing transparency effects. It includes two main filters for adjusting the transparency using blue (Bluescreen) and green (Greenscreen) colors, as well as a keying tool for brightness (Lumakey). In addition, this Lightworks category has a tool for image importing with a transparency channel (Image Key).
Here, you will also find the 3D DVE feature that is similar to the motion control tools available in Premiere Pro. Using it, you can rotate, scale, or crop your clips. In addition, you can work with keyframes, which will come in handy for users with a background in animation.
To speed up your workflow, you can add LUTs to your videos, which will help you edit their LOG parameters. The program will analyze the available metadata and select a list of LUTs that are the most suitable for enhancing footage taken with your camera. It’s also possible to select other LUTs from the library.
This software has a collection of LUTs for videos taken with ARRI, Canon, GoPro, Panasonic, RED and Sony cameras. It also supports third-party LUTs.
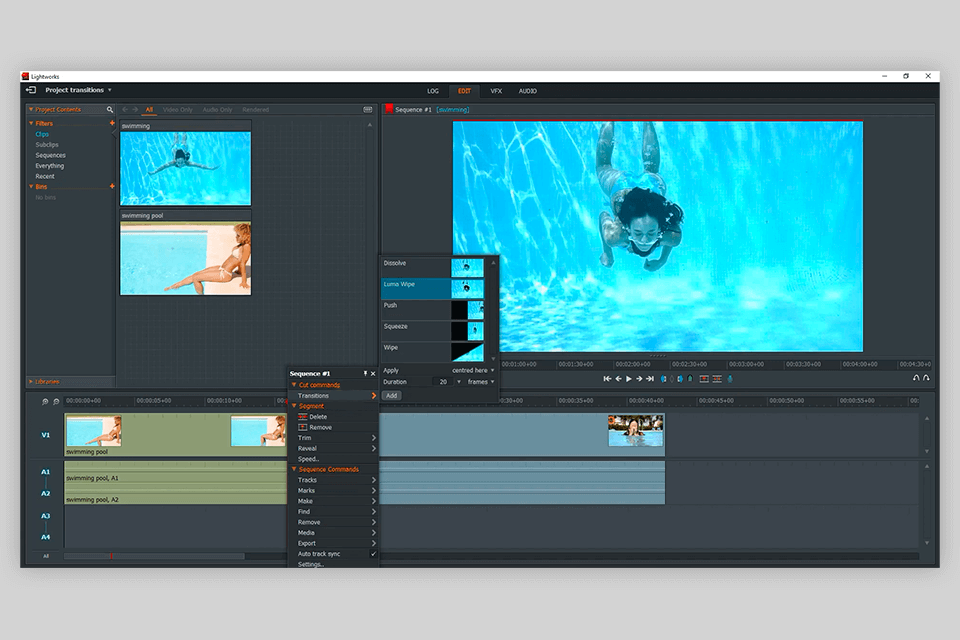
If you have never used such effects before, it might be challenging to figure out how to add them. Keep in mind that it’s necessary to add the transition to the video that is placed above another one.
By default, the transition will be applied to the whole video. To change its length, you need to go to the Graph menu and add keyframes. It might seem a bit convoluted at first, but it lets you customize the transition effects to your liking.
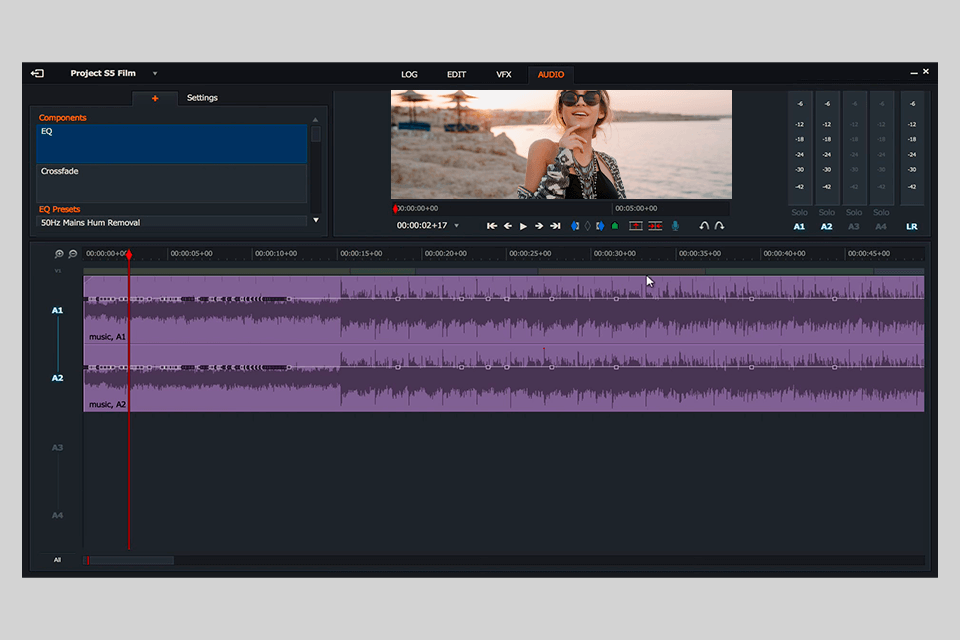
You can apply a variety of effects to your audio, including crossfades, sibilance reduction, and hum deletion. Besides, you can configure the EQ settings. All the tools are easy to use even for beginners.
Using keyframes, you can edit the volume with better precision. The only disadvantage is that you can’t access these settings from the main edit tab or Audio workspace. Besides, you can’t add keyframes to effects. All in all, Lightworks is suitable for editing your audio tracks, however, if you need to use more advanced features, it’s better to use DaVinci Resolve or other professional software instead.
You can download a free version of Lightworks without paying a dime. There are versions for Windows 10, Windows 7/8, macOS and Linux. The free version will be perfect for beginners who need to edit and merge their clips to create engaging video content for social media.
If you have some experience and need to access more advanced tools, you can pay $9.99 per month for the Lightwork Create version. It’s suitable for gamers, YouTube vloggers, and other creative professionals. This version lets you add titles and automatically save your videos in the formats supported by popular social media platforms. You can save your clips in 1080p.
Lighworks Pro will cost you $23.99 per month. This subscription plan is more suitable for professionals who are interested in filmmaking. It includes all the options available for the other two plans as well as pro-grade filters and TotalFX and DAW support. You can export your videos in 4K.