
Professional images gather 60% more page clicks than other property listings in the same price range. Good lighting is essential for establishing a cozy and inviting mood in your real estate photography.
You can get the best lighting on a sunny day. That said, white clouds can also be useful for diffusing rough daylight by creating a soft, evenly spread light across the interior and exterior.
On the other hand, completely overcast and rainy days cause bad real estate photos. As for camera settings, aim for a shutter speed between 0.5-1/60 seconds, an aperture in the f/8 f/11 range to increase detail sharpness, and an ISO of 400 or lower.

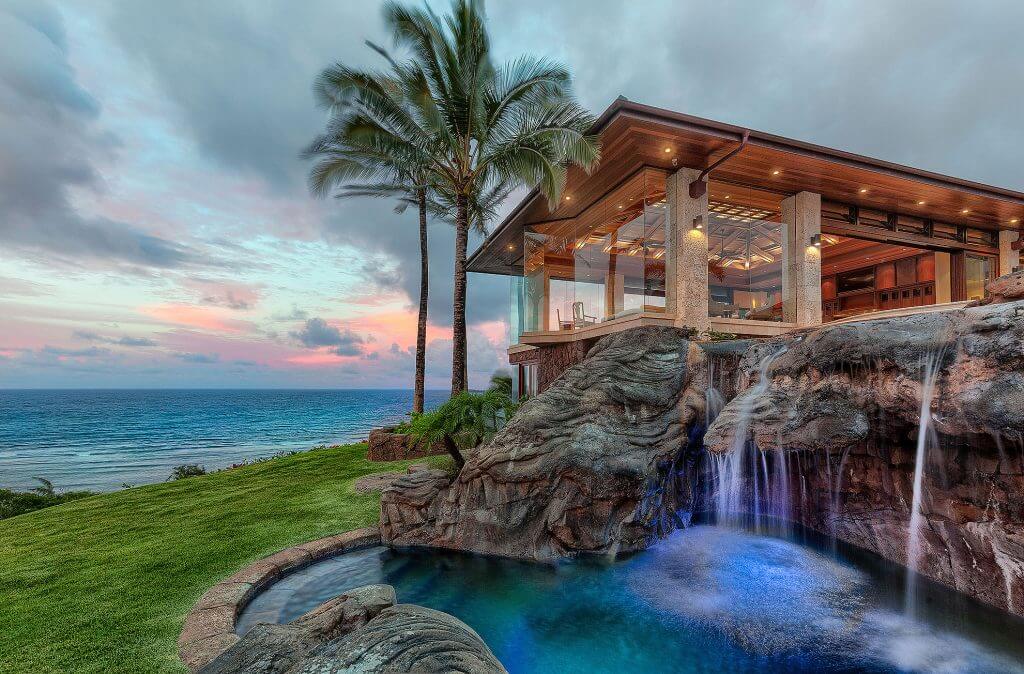
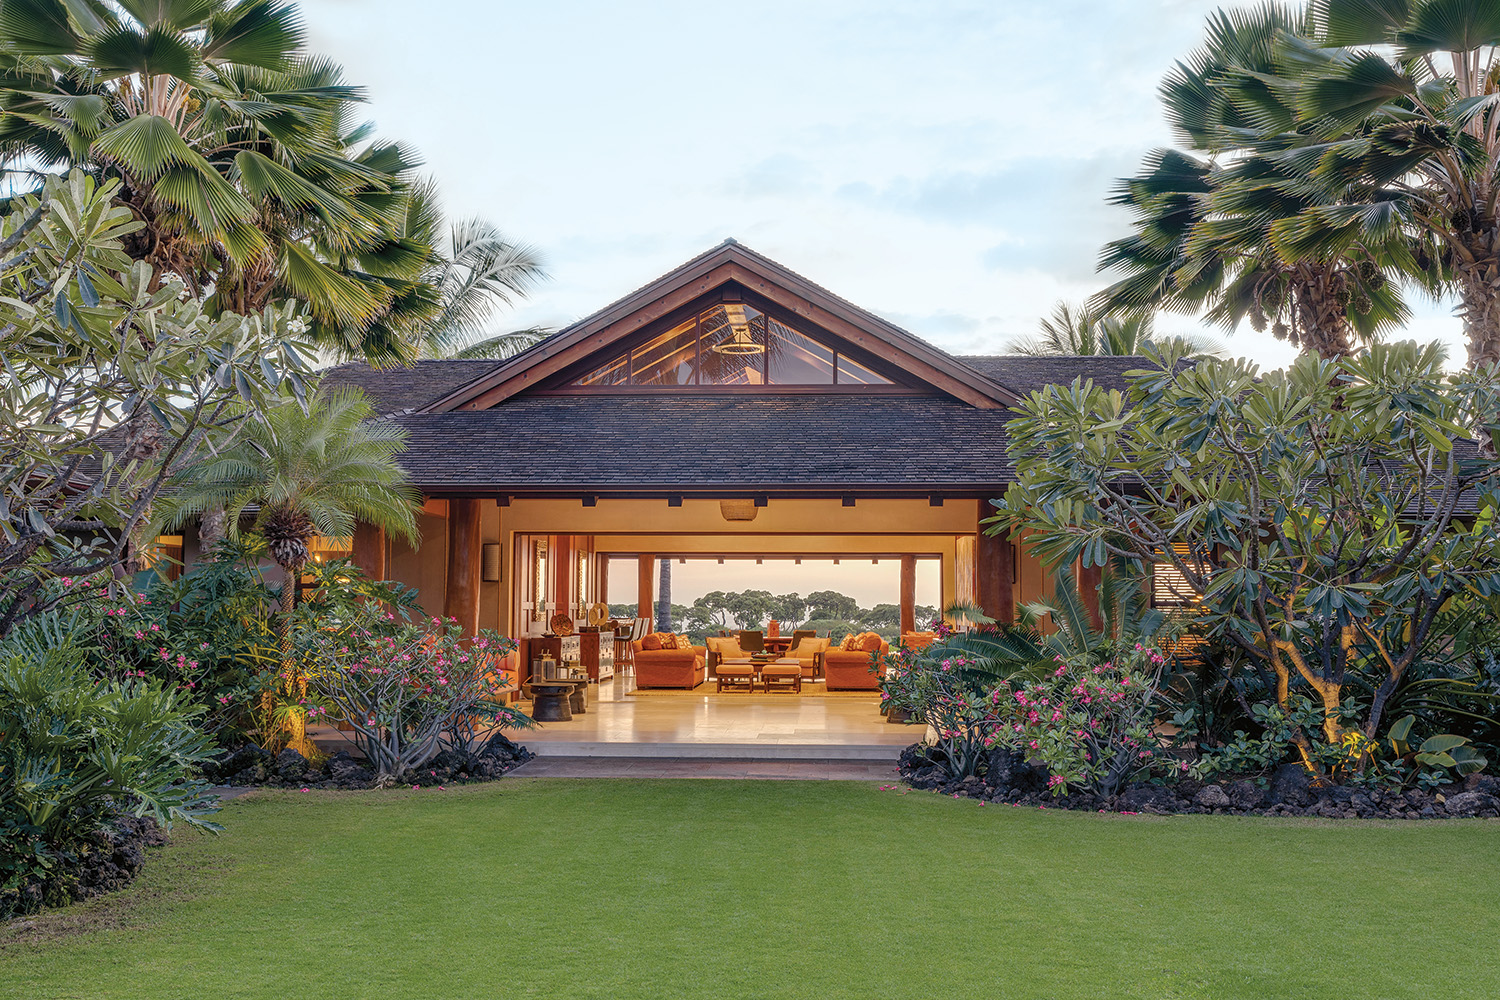
There’s nothing more suitable for interior photography than natural lighting, particularly if the venue has big windows. Account for the location of the windows when planning your shots since a window on the side won’t create the same blinding light you would get from a window in front of the camera.
Open the curtains or blinds to let in as much light as possible. However, if the created contrast between the interior and exterior is too strong, feel free to cover the windows a bit.
The best light for real estate photography is usually around noon but that may not be the case depending on the property’s location and orientation. If you’re working with a north-facing venue, consider scheduling the photoshoot between 10:00 AM and 2:00 PM.
If you’re taking photos of a south-facing property, schedule the photoshoot for either early morning or near the evening. Meanwhile, the afternoon is perfect for west-oriented houses and east-facing buildings can benefit the most from the morning light.
Always keep the position of the property in mind. If the sun is going to rise behind the building, it will look dark, forcing you to overexpose the background since otherwise, you'll take bad photos.

Whenever a person enters a room, their eyes instantly adapt to its lighting, helping them distinguish all the highlights and shadows.
However, when it comes to technology, even the most expensive camera can’t convey their entire range in just one photo. This is where bracketing photography enters the stage, as it allows you to take photos with several exposures at various shutter speeds, enabling you to blend the pictures using real estate photography software.
The biggest advantage of this approach is that it lets you capture more detailed shots, particularly the shadows and highlights. The optimal way to do HDR real estate photography if your goal is to receive natural results is to employ local adjustments to restore highlights and shadows only when required while the properly exposed photo areas remain unchanged.
There are many techniques and tricks you can try out to improve the lighting for real estate photography but once you pick an approach for one room, be sure to uphold it for all the other rooms you’ll be shooting in during the photoshoot.
If the first space will have natural lighting, then you’ll use flash for the next room, and then have light fixtures turned on in the third one, your photos will look incoherent and unprofessional. Simply having all rooms filled with natural light will leave a far more favorable impression on the viewer and increase your chances of selling the property.
It’s recommended to walk around the venue before the photoshoot so that you can choose the optimal lighting approach for the situation. The same tip is relevant for short commercial real estate photography series that involve a group of houses that an agency will advertise on its website.

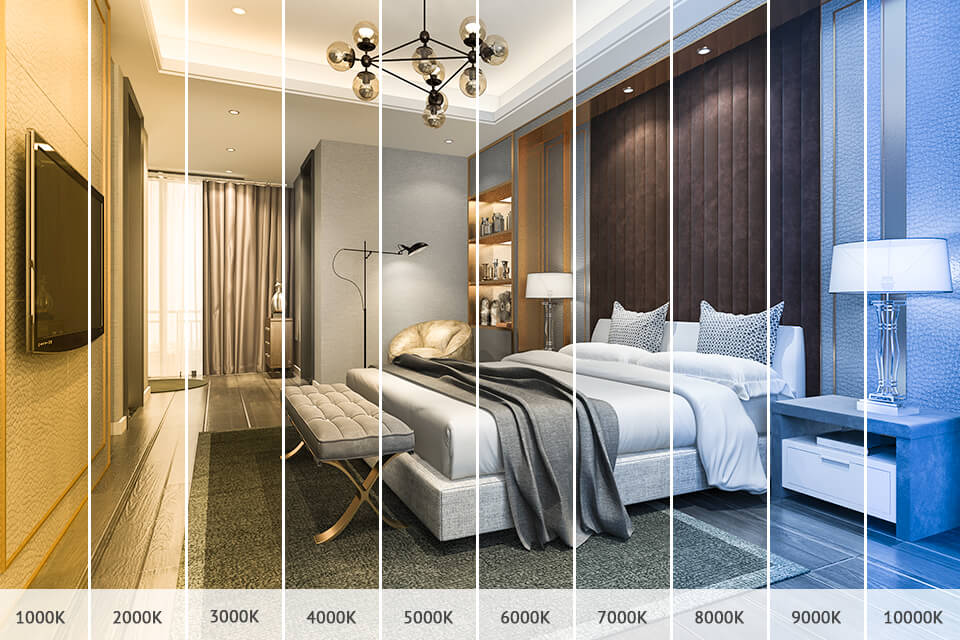
Ideal real estate photography lighting should have a uniform, neutral tone, which isn’t always feasible since different photography light bulbs and light sources have different color temperatures.
The color of the sunlight falling through a window is different based on the time of day and the direction the property is facing. The light fixtures can also be cold or warm, and the light produced by the flash usually mimics daylight.
If the lighting sources in your photo don’t match, it can end up having a red and blue cast, which has to be fixed during the image retouching stage.
Probably the easiest method of dealing with color casts is to turn off all the lights so that the scene is only lit by natural lighting or your own. Alternatively, consider employing gel filters in case your camera’s flash doesn’t have the same color as the sunlight or the existing light fixtures.

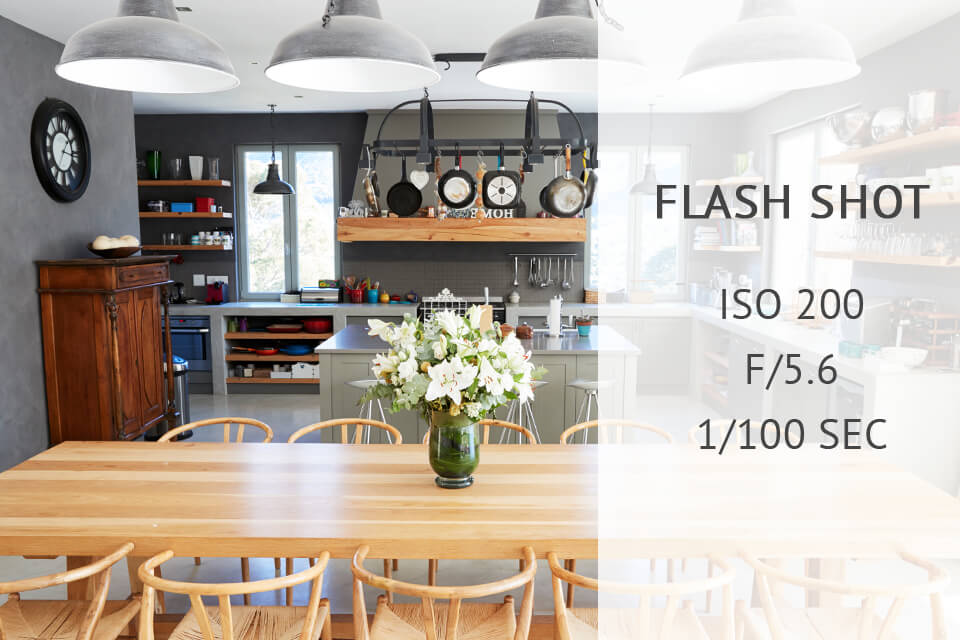
A light meter is a useful solution for evaluating the light levels in a shot and making sure you set the correct exposure, hence why it’s a crucial component of any real estate photography equipment set. Some cameras come with integrated light meters but usually, you'll have to purchase one separately.
Employing this tool will do wonders for allowing you to receive consistent and precise exposures, which are one of the cornerstones of professional real estate photography.
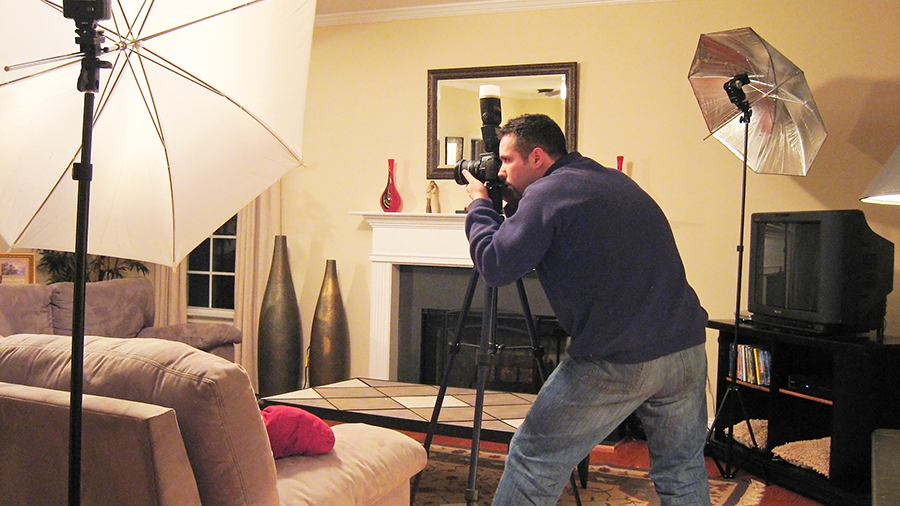
While using natural lighting is generally beneficial, such an approach also has several drawbacks, the most notable of which are the strong casted shadows that later need to be handled in image editing software. The best way to emulate natural lighting when taking interior photos is to use a single flash with your camera.
You have the option of either employing a basic light stand or you can hand-hold the flash wirelessly. Godox V860II-N is one of the best products on the market and the Yongnuo YN560 IV is a fantastic alternative if you’re looking for a flash that is suitable for real estate.
The key to emulating natural lighting is making sure the scene is lit from a specific direction. If the property has windows that don’t shed enough light, aim the flash at the same wall to receive a soft, diffused light coming from the same direction. Whatever you do, it’s important to make sure your photos don’t have the dreaded “flash look”.
Remember that in high end real estate photography it's essential to avoid aiming the flash forward since otherwise, you'll create harsh shadows.
Another aspect to take care of is setting the optimal exposure. The third thing you can do is tweak the flash output so that it only affects the shadows.
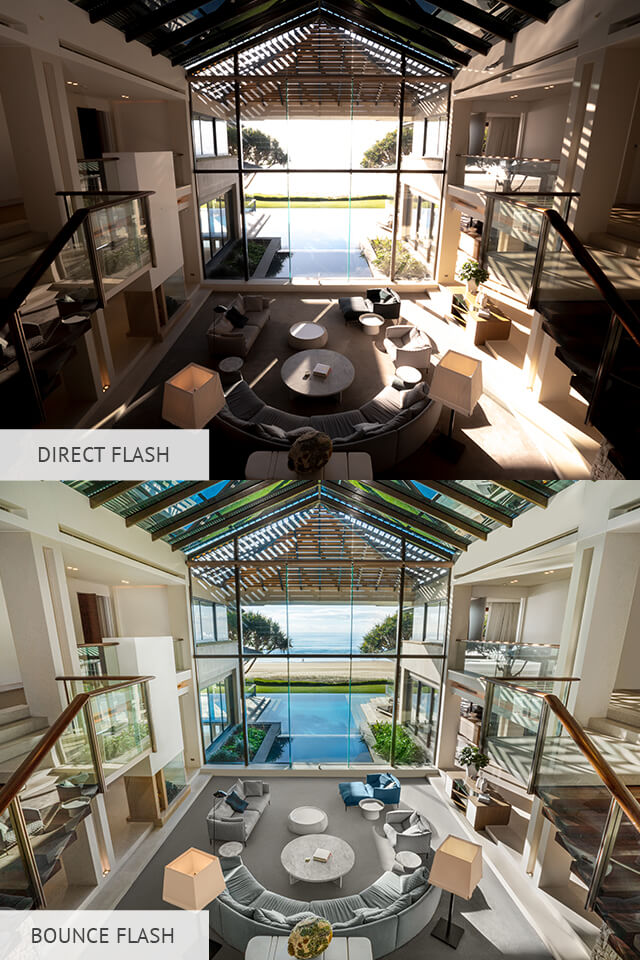
The ceiling and walls are the largest reflectors you can take advantage of. Experiment with various angles and placements to bounce the camera flash. Adjust the flash unit so that it’s aimed at the wall behind you, the ceiling, or a side wall. Such an approach will ensure the light is diffused and evenly spread across the room.
If you’re taking exterior photos on an overcast day, you will probably have to aim the flash at the dark clouds in the sky to dissipate a bit of light and distribute it onto the scene. It’s also a good idea to avoid aiming the flash at glass surfaces and windows since they can cause flash hotspots that will make your photos look amateurish.

Continuous lighting refers to artificial light sources that have to be constantly turned on throughout the entire photoshoot. Regardless of whether you’re using light fixtures or strobe lights for photography, the key here is to have the light be turned out continuously for as long as you’re taking photos.
Continuous interior photography lighting usually creates an even light stream that illuminates the space and lets you examine the lighting conditions in real time. As such, you'll be able to always see if you have to add some additional light sources or use more powerful lights.

Prevent the appearance of harsh shadows by employing modifiers like umbrellas and softboxes to diffuse the lighting. Remember to make sure the lights you're using have the desired color temperature. Consider setting it to daylight or about 5,600k to produce natural ambient light. Keep any unwanted light sources turned off so that the environment is only lit by your continuous lights.
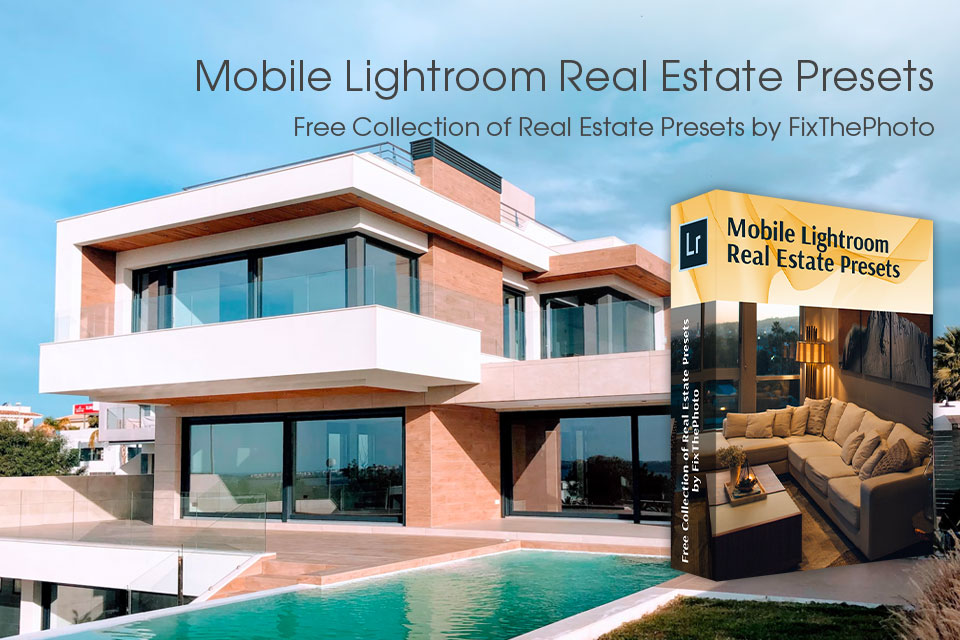
If you want to significantly reduce the amount of time you spend editing images, then take advantage of these tools from FixThePhoto reatouchers. They will help you easily enhance the look of the property in your photos while instantly making it more appealing to potential buyers.
The included tools are suitable for a broad range of lighting conditions and can be used for both interior and exterior pictures.


