Histogram is a graph that shows the tones of a picture: the highlights, the shadows, and the things connected to them and is one of the most used tools by both beginner and professional photographers, related to exposure triangle in photography. Read more how to use histogram on camera and set exposure correctly to avoid any flaws.
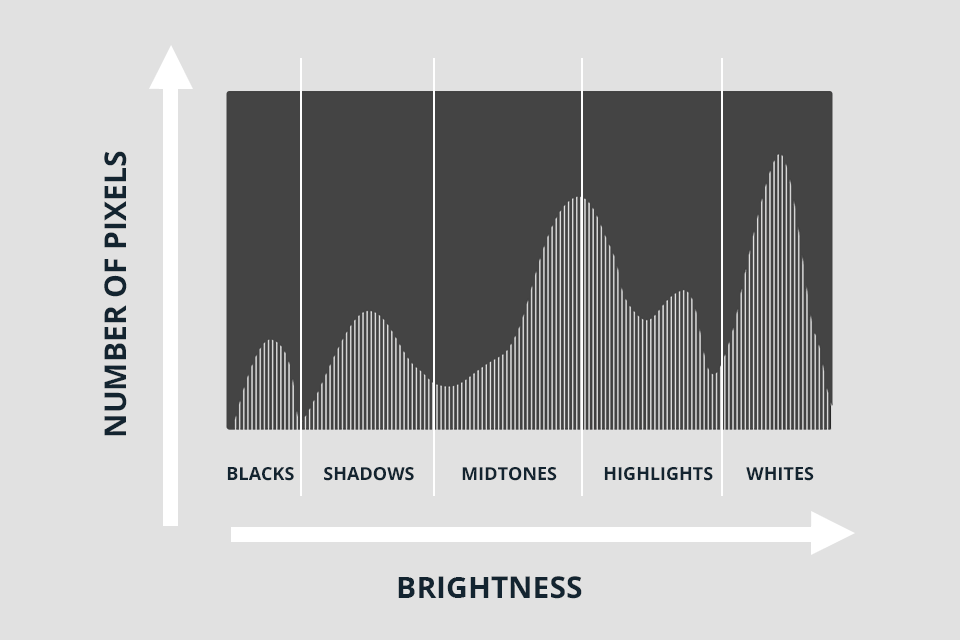
Histograms contain a lot of data but it’s practically illustrating the brightness of a picture. The horizontal axis of the graph outlines the exposure or tonal metrics of a single photo.
The vertical axis reflects the pixels volume and their location across the horizontal axis. It is also possible to consider the vertical axis as the tool showing the strength of the histogram exposure.
On the left side of the histogram, you’ll see pure black, and on the right-hand side – pure white. Between them, you’ll encounter your midtones, shadows, and highlights.
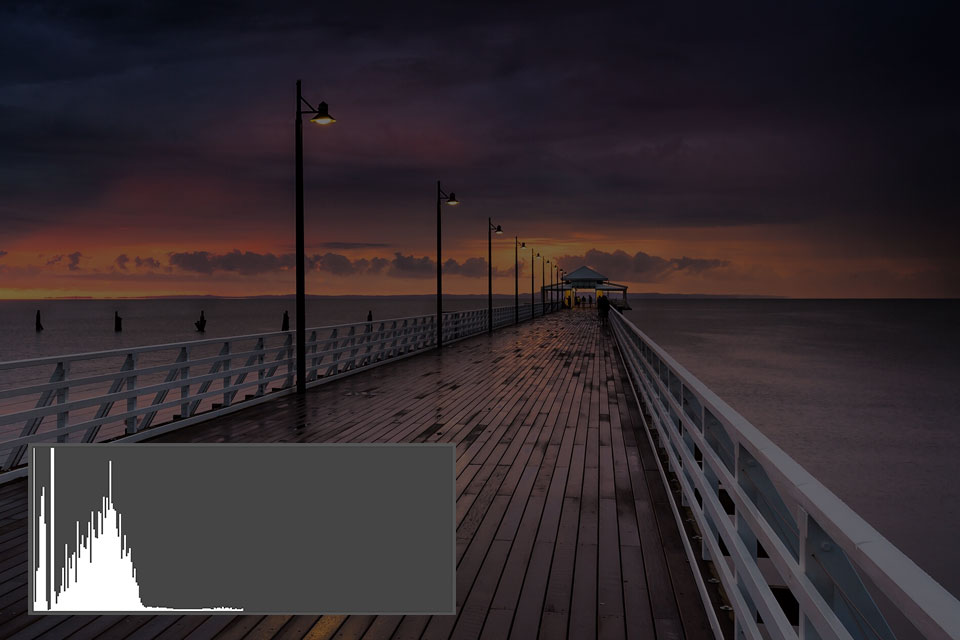
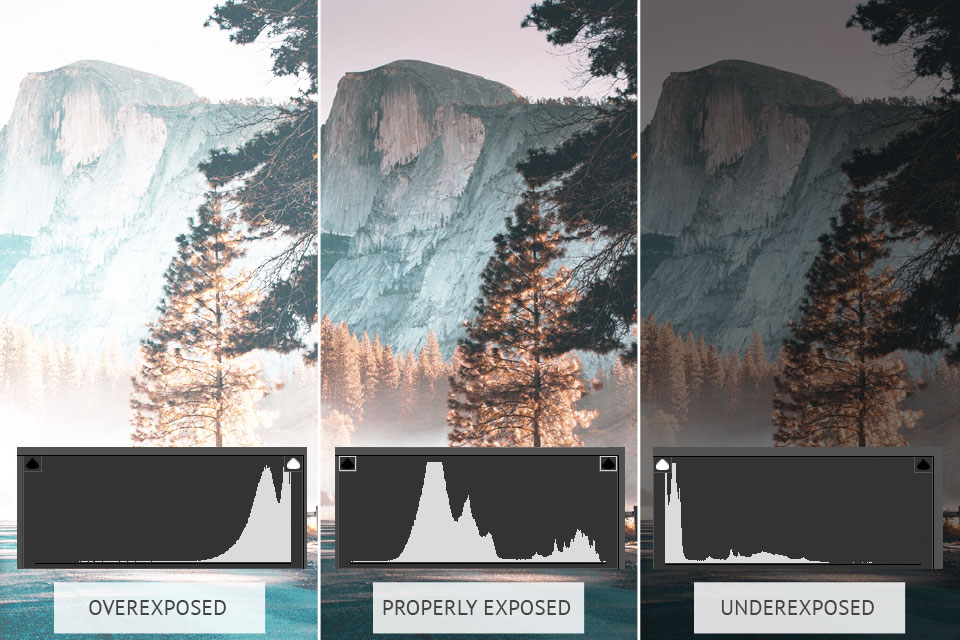
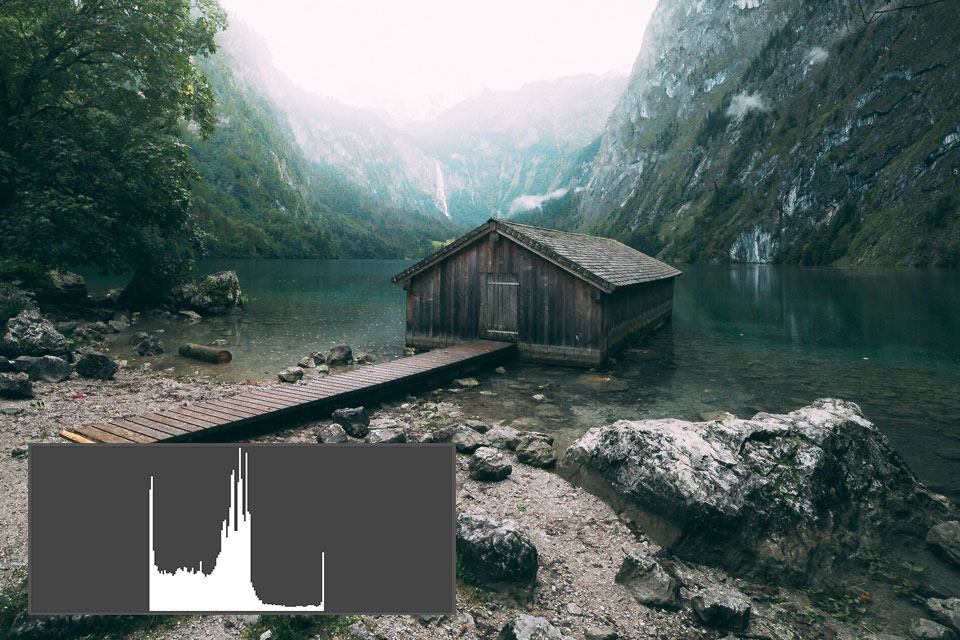
In case you find high-frequency tones or peaks appearing on the left side of your histogram, it means your blacks are being cropped, and your camera is not including all of the shadow detail. This is called low key photography and may look very unusual and may be exactly what you need, but if it is not, you can try to change your portrait camera settings, and add more lighting by decreasing the shutter speed, widening the aperture, or increasing the ISO (light sensitivity) of your camera.
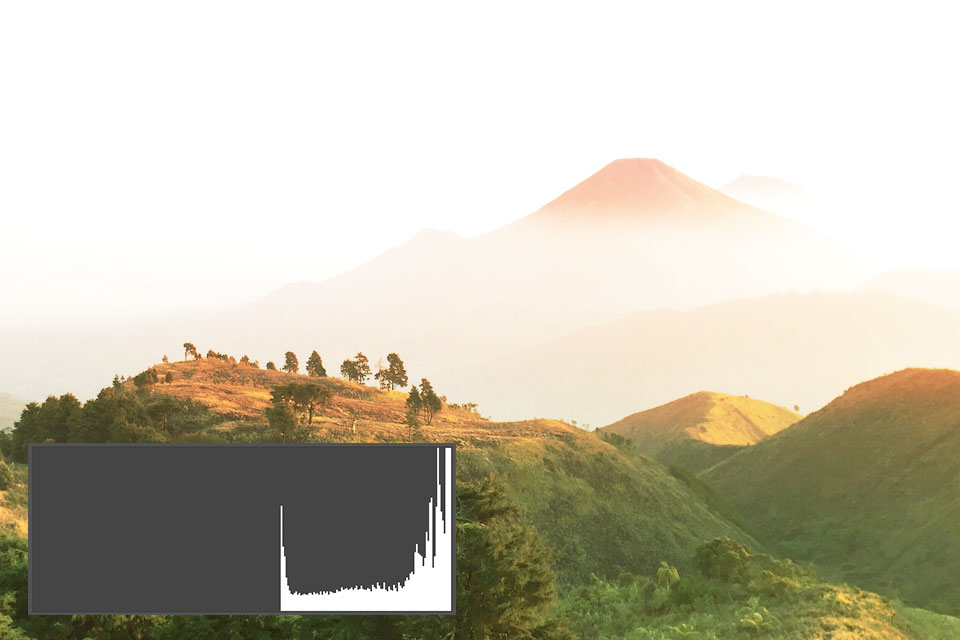
If you deal with high key photography, you may be used to seeing peaks on the right side of the histogram camera. But if they are clipped on the right side, the picture may be overexposed, meaning the highlight component is blurred.
In this case, consider shortening your exposure, narrowing your aperture, or decreasing the ISO to lower the light captured by your gear.
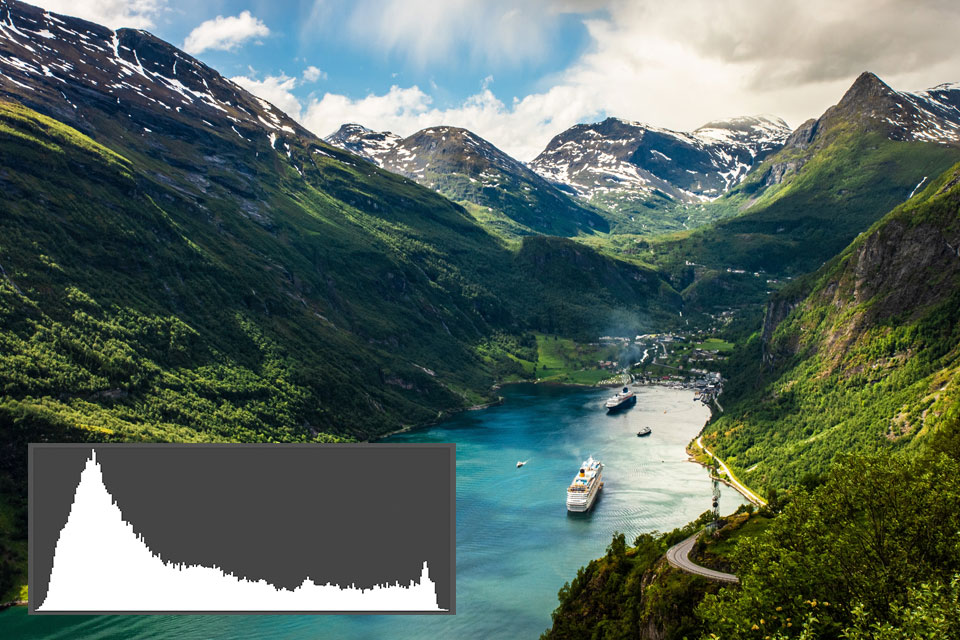
The “perfect histogram” is frequently the aim of all photographers. It depends on the picture you are willing to take, but perfect histogram’s pixels are spread throughout the axes with plenty of mid tones.
In terms of contrast in photography, if all your tones are put into one area of your histogram, and each side contains a lot of space, the contrast may result low.
A picture of a higher contrast will spread them more extensively. If you’re taking pictures in an adjustable environment, you can add light to strengthen highlights and deepen shadows. If you cannot control the environment, try restructuring your image to involve contrasting components or plan to set contrast in post-production.
Traditionally, photographers try to spread tones across the histogram to get a well-exposed shot. We see tapering off at the edges and peaking in the middle with this technique. By applying the “exposing to the right” method, you will get the peak of the histogram as far right as possible. As a result, the picture will be overexposed without clipping any highlights.
During editing, you will correct the exposure and get a file of higher quality. It contains less noise in the shadow areas and more tonal information.
Be careful not to overdo the ISO level. Too high a value will result in unnecessary graininess and your “exposing to the right” will be futile. I recommend experimenting with shutter speed, aperture and depth of field.
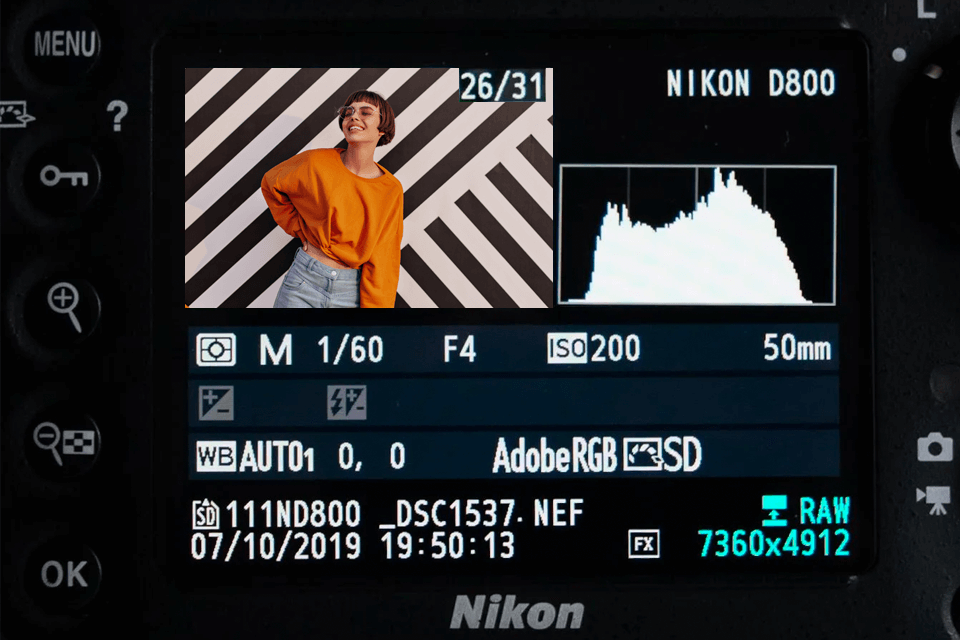
After taking a photo, you will find the corresponding file on your memory card. Typically, all pictures are saved in JPEG and RAW formats. RAW file contains all the info captured by the sensor and is considered the highest quality image format. It allows you to save all the data received by the camera during shooting.

When you edit a photo, you can remove unnecessary information. On the other hand, the JPEG format only includes limited data since some of it was lost during compression. This file is smaller but its quality is lower.
Already knowing how to read a histogram photography, you can analyze these two formats. The JPEG histogram may have some white clipping and banding while the RAW file’s histogram looks smooth. For this reason, professional photographers recommend choosing RAW format if your camera supports it.
The Histogram on camera usually relies on a JPEG image even if you are photographing in RAW format. This means you won't always be aware of clipping. Keep in mind that you can probably get lost data in the JPEG format since the RAW file stores it. Experts argue that the histogram is not the only way out. You can try exposure bracketing to deal with this problem.
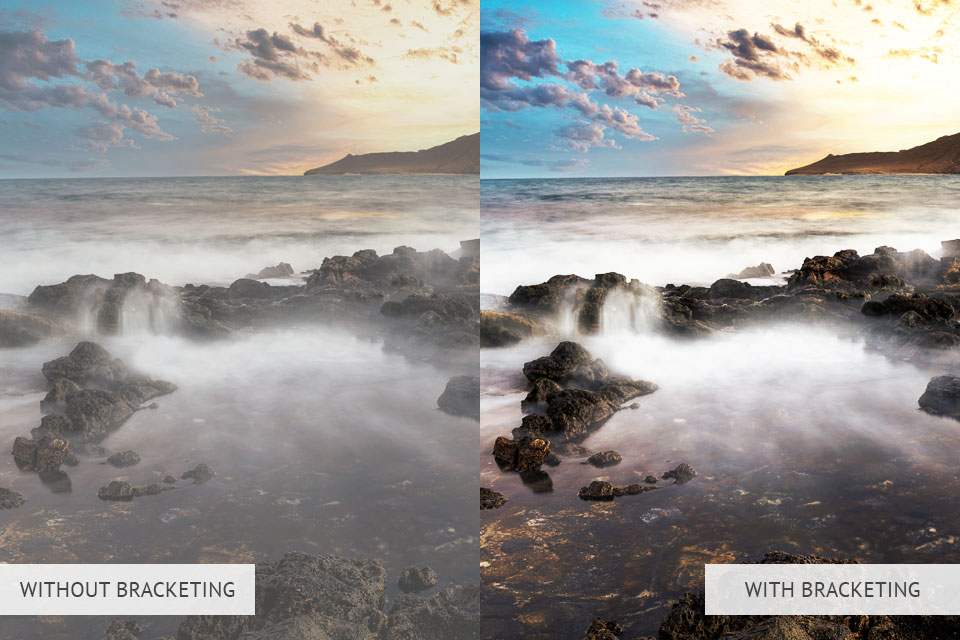
A shooting technique that involves taking multiple shots of the same scene with different exposures is called bracketing photography. This means you have to take a brighter/overexposed shot, a darker/underexposed version, and a standard picture. This approach gives you confidence that you still took a well-exposed picture even if the histogram does not provide the necessary information.
Manual mode is the highest priority among all camera modes. It allows you to control ISO, Aperture, and Shutter speed well. By changing these parameters, you can properly choose histogram camera settings before taking a photo.
Generally, you can achieve a balanced histogram in Shutter Priority and Aperture Priority through exposure compensation.
Keep in mind that some camera models require the activation and deactivation of Live View in order to make the necessary changes. This can be a little inconvenient. Therefore, I recommend doing everything in Manual mode.
The histogram can be quite useful when editing photos in Lightroom. Image correction and fixing overexposed photos in Lightroom are possible by changing the histogram itself. Even if this approach is not part of your workflow, you can get more information about each area of the histogram by dragging it one way or another.
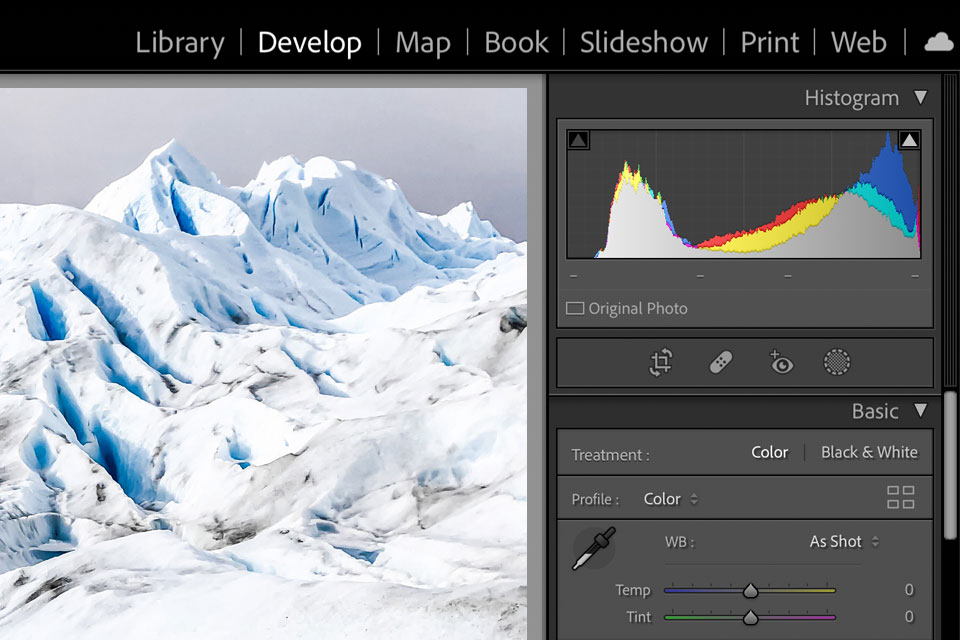
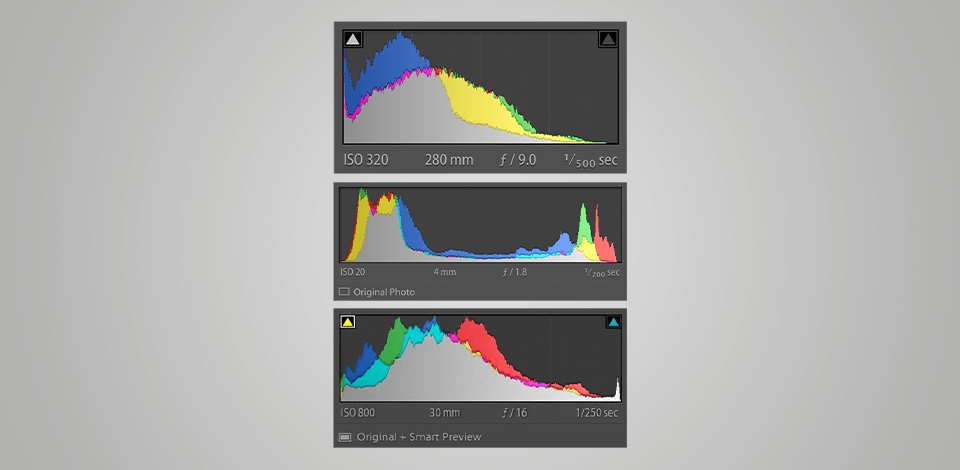
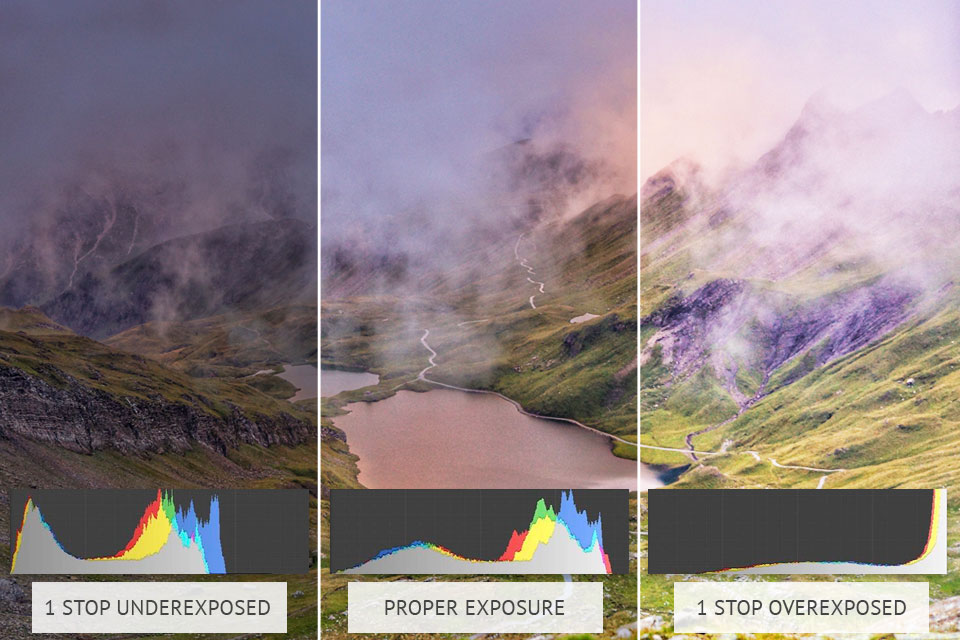
Another handy feature of Lightroom's histogram is the ability to detect clipping of the highlights and shadows on the photo itself using colors. Find the option to enable highlight and shadow clipping in the upper corners of the histogram. This will show blue over clipped shadows and red over clipped highlights. With this method, you can easily identify areas that require changes.
You must have had the cases when you took a seemingly fantastic photo, but it looked too dark or too bright when you viewed it on your computer. The reason may be the sun hitting the camera screen or the lack of screen brightness during shooting. These factors could affect how you see the picture. To avoid such problems you should know how to use histogram and select camera settings based on it.
If you're using one of the DSLR cameras, then you can probably view the histogram live. This option can be useful when adjusting the exposure. However, be aware that it reduces battery life. To see the histogram, you need to go to the Histogram display and enable Live View. Then choose the “Info” option.
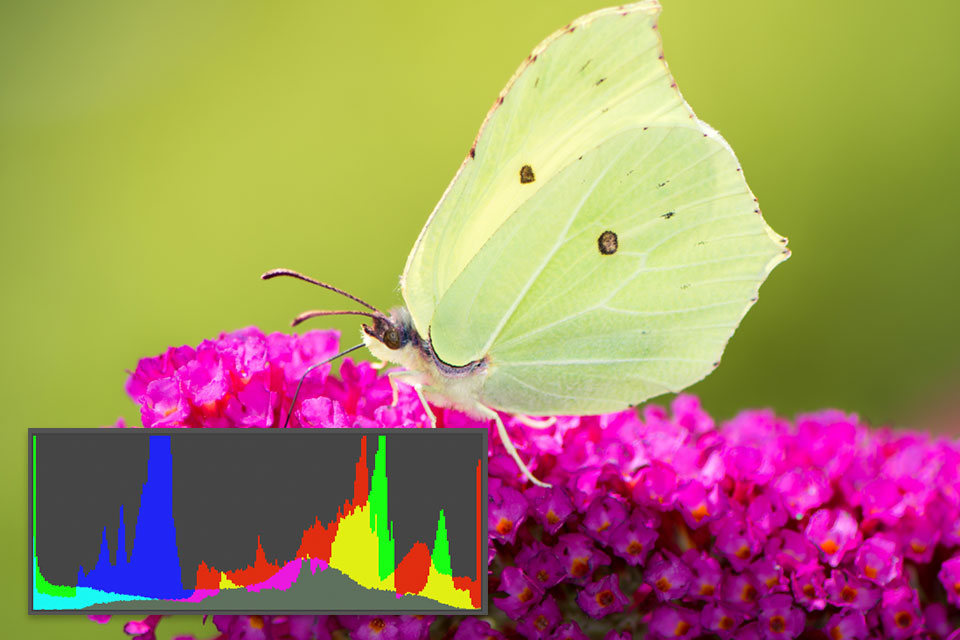
You can see color histograms with many cameras and photo editing software for PC. Typically, they consist of separate graphs for blues, greens, and reds. These histograms let you know if a color is perfect or too bright. In the second case, your details don't look sharp enough.
Similar things happen if the colors are too saturated. You might experience a lack of detail in highlights and shadows when they look too light or too dark. You can use the histogram on camera to make sure the color levels are correct. This is especially critical if you have one color in your scenario since it affects the detail of the entire photo.