You don’t need a lot of materials or some special skills to make DIY photo coasters. Like DIY picture frames, these photo coasters can be a lovely gift for your dearest people. Moreover, you don’t have to spend much.

Typically, a set of 8-10 DIY picture coasters costs less than $10. There are plenty of things you can use: some cute photos, your children’s drawings, or other memorabilia, like ticket stubs or anything else. You need:
1. Take a foam brush and cover the back of the picture with an even layer of Mod Podge. Don't skip the edges.
2. While making such a DIY photography gift, you should put the photo in the middle of the tile and adhere to it.
Make sure you press firmly from the center to the edge. Otherwise, air bubbles will remain between the two materials. If necessary, you can lift the picture while the Mod Podge is wet.
3. When everything is dry, cover the photo with a thick layer of Mod Podge using a foam brush. At first, it will look white, but then it will turn transparent.
Wait about an hour to let it dry. To get a thick, clear finish over a picture, you need to repeat these steps 1 or 2 more times.
4. When it is dry, use a clear protectant spray. Leave it to dry during the day.
5. Prepare a felt of the appropriate size and stick it on the tile with hot glue

You can use these coasters to implement one of these DIY photo album ideas — join your photo coasters with a bit of twine.
This tutorial is basic and one of the easiest. However, you can supplement or modify it. You can use some other materials that you have at hand. For example, use resin instead of clear protectant spray or replace tiles with cork when you create your DIY coasters with pictures.
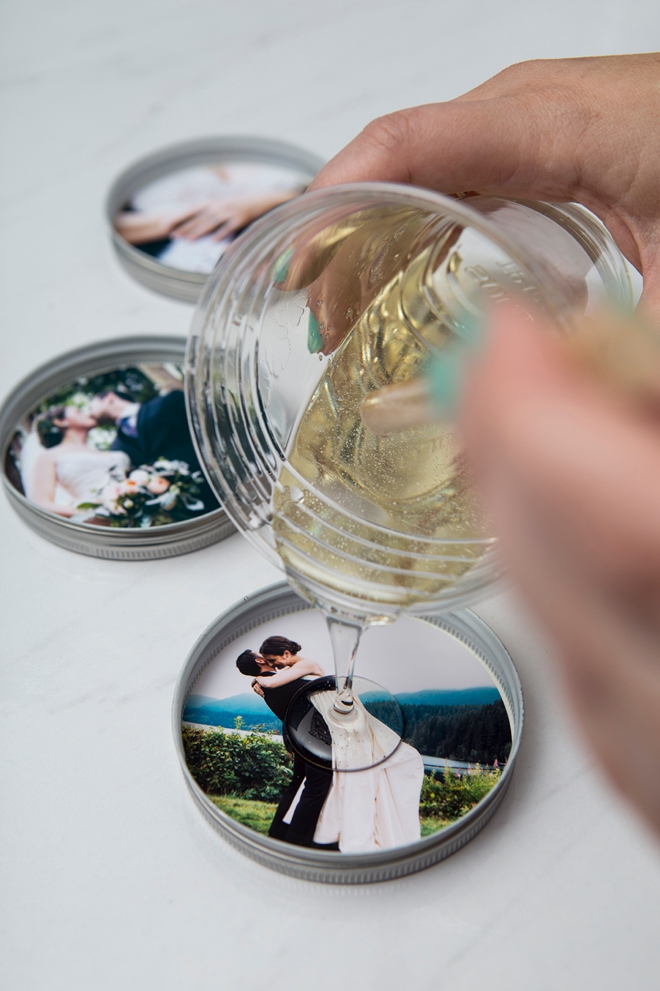
With the resin, your coasters look as if they are made of glass. They seem pretty durable and very shiny. To buy this material you should go to the glue section of the local craft store.
First, you must prepare resin according to the guidelines. Then take a teaspoon of resin and put it in the center of the tile. The second teaspoon must be placed on top of the first. After that, you spread the resin to the edges using the spoon. The coat must be evenly distributed from edge to edge. Leave a very small distance from the edge of the tile.
Having covered all tiles in the same way, wait until the material dries out (up to 72 hours). You can also experiment with a variety of photo collage ideas. For example, you can make up a heart or a Christmas tree from them. The disadvantage of the material is its toxicity. Therefore, you should work with it in well-ventilated spaces.

Try bringing your ideas to life with black, white, gray, aqua, or even navy tiles. If you can't find the right color in your local stores, search online or on the photo tiles platforms.
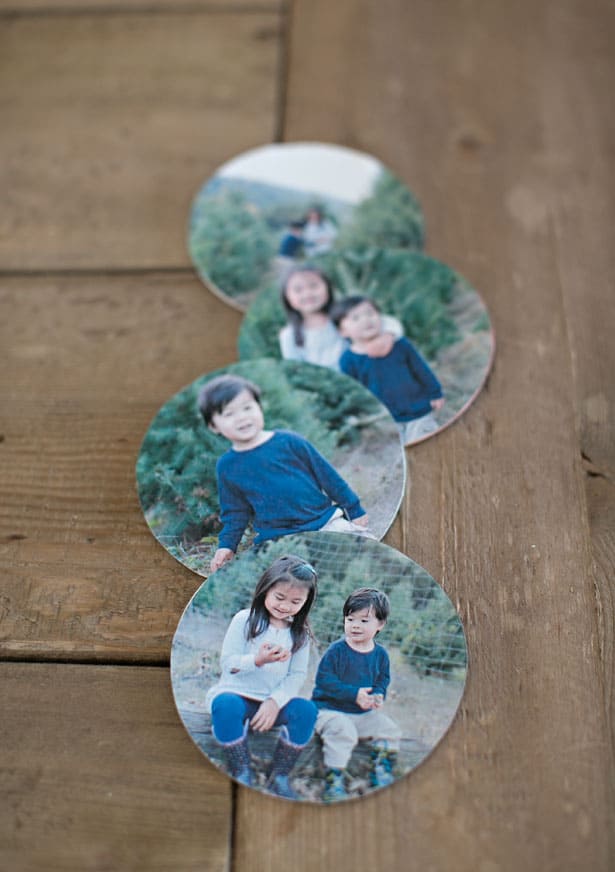
What's more, don't limit yourself to square tiles. Use hexagon-shaped tiles to make your DIY coasters with pictures look more modern. By the way, cutting out photos of an unusual shape will be easier if you download a template from the Internet.

Take a cork board and divide it into squares to fit your photos. You can do this with scissors or an Exacto knife and a ruler. Similar to the instructions given in our “How to make picture coasters” tutorial, you should use Mod Podge/glue to a square of cork. Then stick the picture to the cork.
When working with wood slices, you can not only paste a photo, but also transfer it. You will need tattoo paper for this. Print your picture onto the white glossy sheet as it is given on the tattoo paper instructions. Wait until the ink dries. Remove the adhesive sheet and put it over the glossy photo.

To make sure the transfer is even, you need to remove the air bubbles. Use your credit card or the wood wedge for this. Cut out the photo according to the size and shape of your wood slice.
Before putting the picture on the wood slice, remove the adhesive sheet off it. To transfer the image, press down with a wet towel. After a minute, you can remove it and see how the picture looks on the wood.
Get rid of any unfinished edges with the wet towel. One of the interesting DIY photo display ideas is to put several of these wood slices together and attach them to a wall or coasters.

As a basis, cut out a letter from cardboard or foam rubber. Cover it with newspaper clippings or colored paper, and place a few pictures on top. This kind of do it yourself picture coasters makes a great gift for a birthday or wedding anniversary.
Take special pictures for the photo coaster. For example, to make dad or grandpa happy, you can photograph children with cardboard letters prepared in advance. You can cut them out of the box and then cover them with decorative paper, or you can make letters out of fabric.

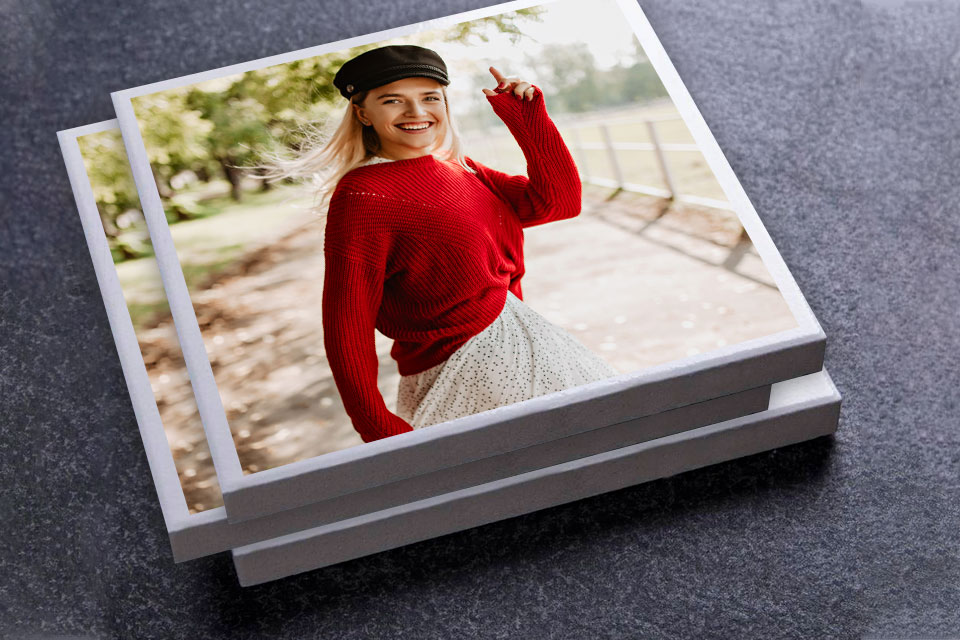
Opt for pictures with simple backgrounds. You don’t have to look for creative DIY photo backdrop ideas. If you want to draw attention to the person in the photo, avoid cluttered backgrounds.
Create the look of a Polaroid print. Cut out the photo in the shape of a rectangle. Then attach it to the tile as mentioned above in the tutorial. It will have a thick white edge across the bottom and resemble a Polaroid print. I recommend using images in landscape orientation for such DIY photo coasters.

Use laserjet copies of your photos. When working with Mod Podge, it is better not to use the original images so that they remain preserved. Inkjet copies are also not the best idea. Mod Podge will make them bleed out.
Use photo enhancement programs. Good photo editing software allows you to experiment with your pictures. Insert text, give a vintage look, add some visual effects, or even blend it with other images using these programs.


