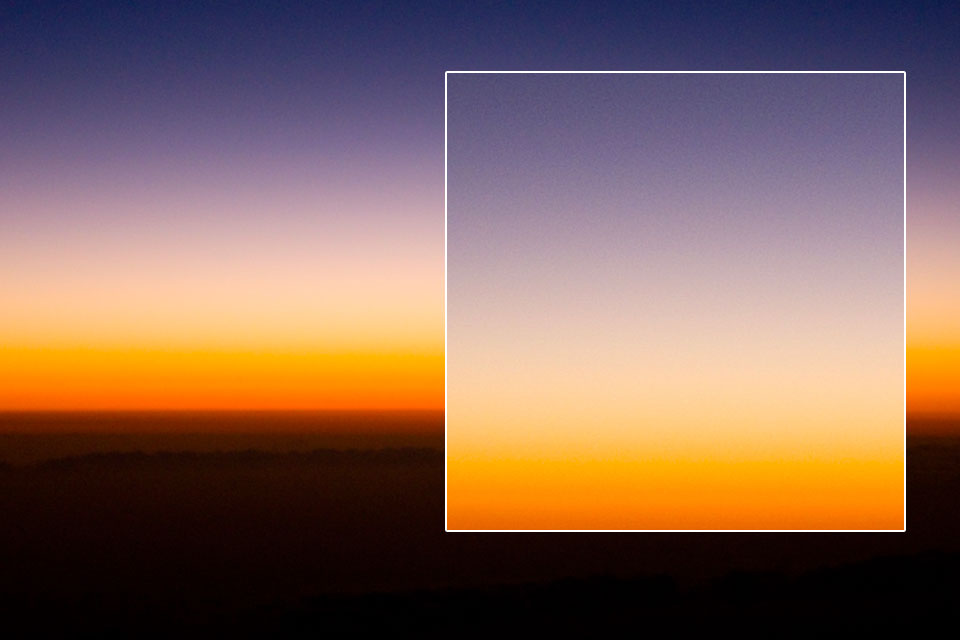
Banding in photography is an annoying phenomenon in photography, which is usually inherent in pictures that capture large solid objects, such as the sky. They look like very sharp and unattractive transitions between different shades of color that are impossible to miss, and they really spoil the overall look of the photo, making it poor quality.
If everything is all right with the photo, then you will not be able to notice such transitions, because they will be smooth. This problem is caused by a lack of tonal range so that transitional colors between the darkest and lightest hue cannot be displayed.
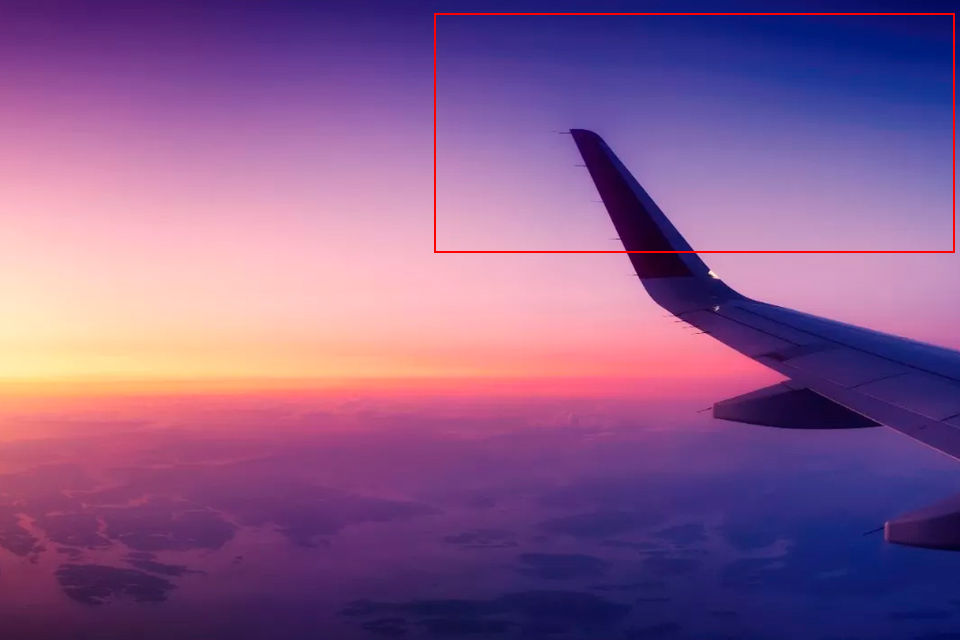
As a result, we see a sharp jump from light to dark, which looks like a band or border between them. Most often we see this phenomenon when shooting sunsets and skies, as well as in the studio on a solid color background, and least often in photos with many objects, faces, leaves, patterns, etc.
Read this article until the end to learn about the difference between 8 bit vs 16 bit color depth, how they affect this phenomenon, and how to fix color banding.

Some of them relate to preparation for shooting, the other part is about improving photos and eliminating bands that have already appeared in your photo.
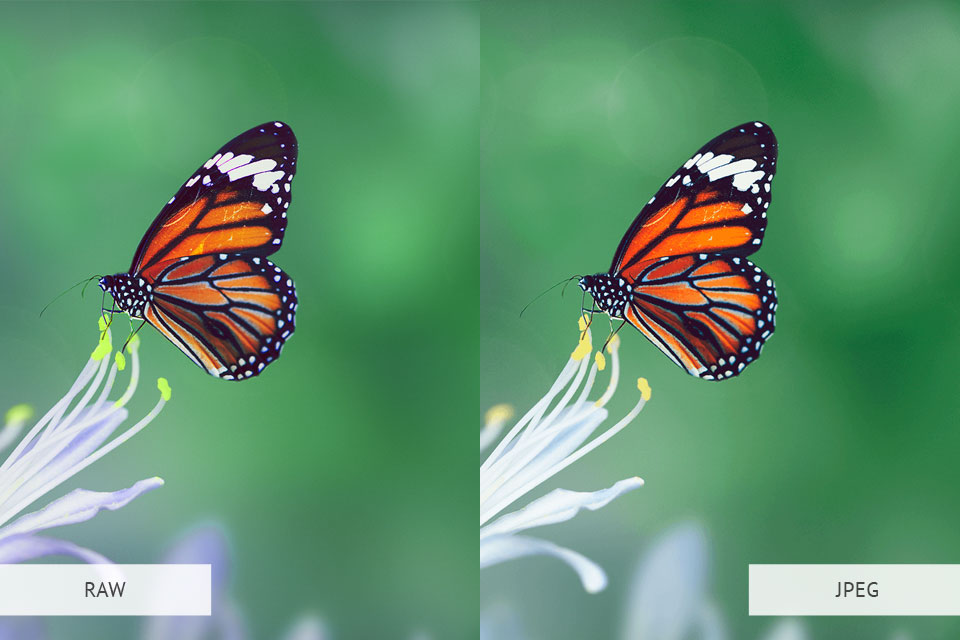
The main difference of uncompressed RAW from other formats is carrying the largest amount of data, including color ones. Thanks to this, the transitions in the photo look smooth.
Banding is a common occurrence in compressed photo formats such as JPEG. This format is used for 8-bit files where the available colors are limited. If your camera only shoots in this format and doesn’t offer RAW, that means you’ll have to deal with a color limit, so you’re more likely to see nasty banding in your shots.
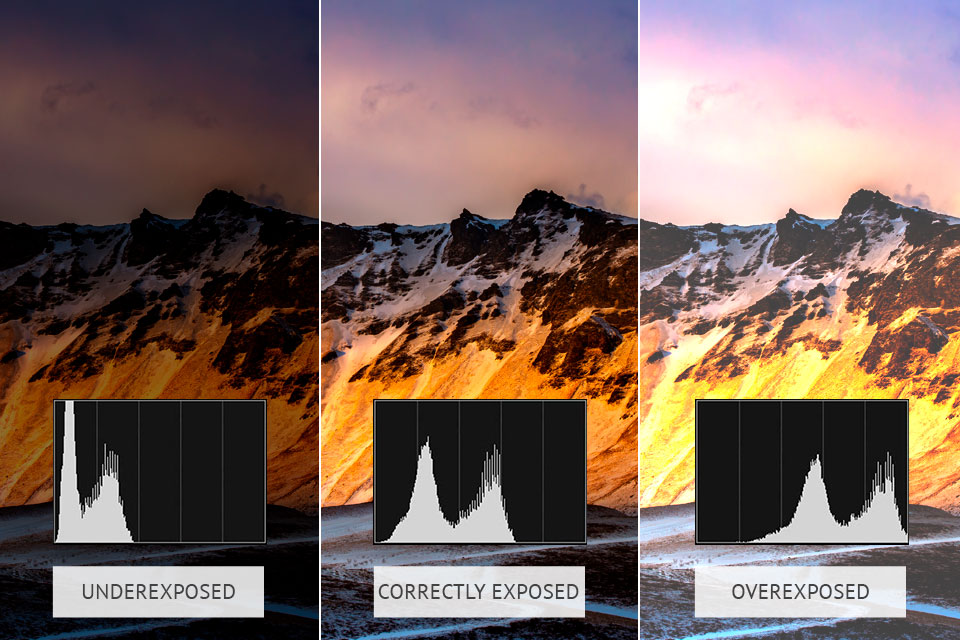
Incorrect exposure is another reason for the appearance of a banding image. To get a correctly exposed photo, you should study the exposure triangle in photography, or, in other words, the correct combination of aperture, shutter speed, and ISO settings. Even if you change just one of these values, at least one more must also be readjusted to get a properly exposed photo.
Also, try using the histogram to see if your shot is under or overexposed. A histogram is something like a graph that displays the position and amount of light in an image. The majority of the peaks should be located in the center or slightly to the right.
If you find your peaks at the extreme left or right, or even outside the top of the histogram, then the exposure should be readjusted. It’s also a good idea to create bracketing photography – a combination of several photos with different exposure settings.
Of course, adding data that was not originally in the image is not possible, but you can maximize it. To do this, you’ll need Photoshop to help you improve your shots and perform color banding fix.
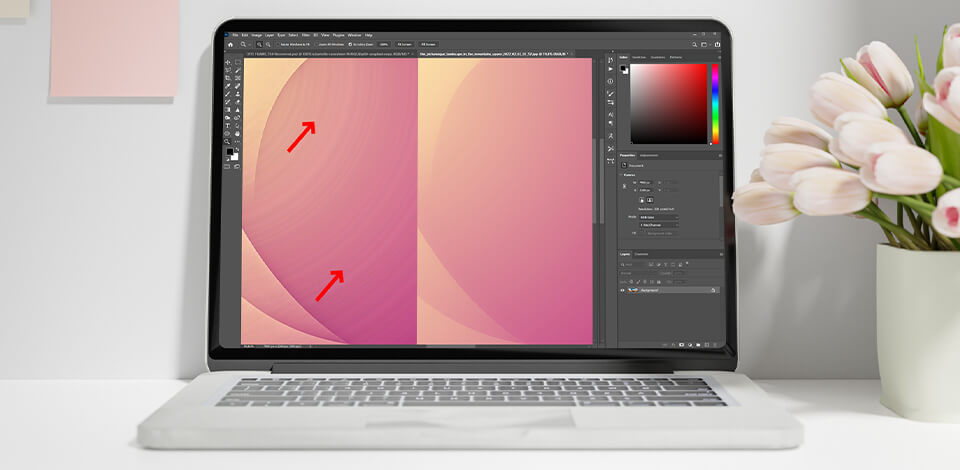
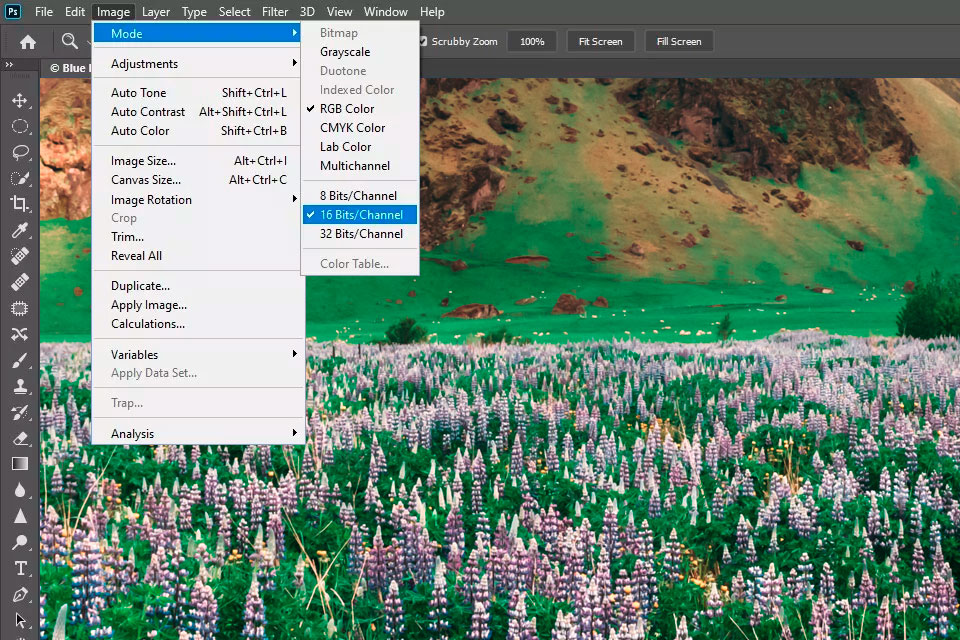
First of all, find out what bit mode and Photoshop color mode your photo has. You can do this by going to the “Image” drop-down menu, then choosing “Image” > “Mode”.
If you find that your format is 8 bits/channel, this should be changed to 16 bits.
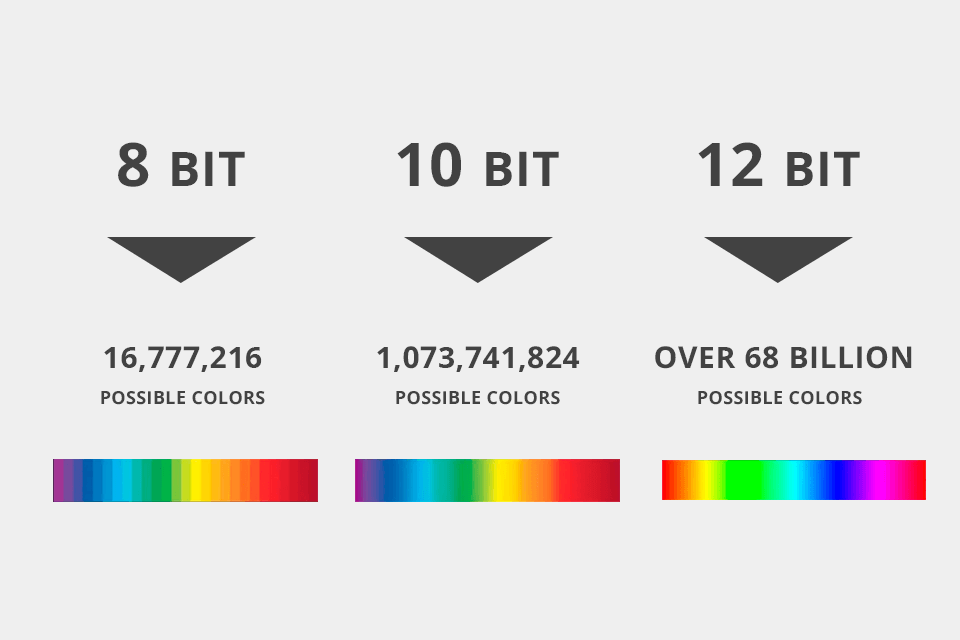
The 8-bit format is inferior to 16-bit in terms of the number of colors, being smaller. It allows 256 colors per color channel in total. Such images will look good on computer screens with a limited range of colors.
In turn, 16-bit already offers over 65,000 color options. By switching from one format to another, your original colors will not change, but the photo will receive more data that you can experiment with. This will help in post-processing and color separation.

After taking a photo and viewing it from the camera, we see banding as normal, without any stripes. However, having started improving it with the photo editing software for PC, we can overdo it, and this trouble appears.
For example, if you want to improve exposure and make the color of the sky brighter, you can overdo it with saturation, brightness, and blur, thereby pushing the boundaries of colors beyond their mathematical limits, and this will lead to these ugly banding in the sky.
By tweaking specific colors using the HSL panel in Lightroom, you can also trigger this phenomenon. That is why you should carefully and wisely edit your pictures.
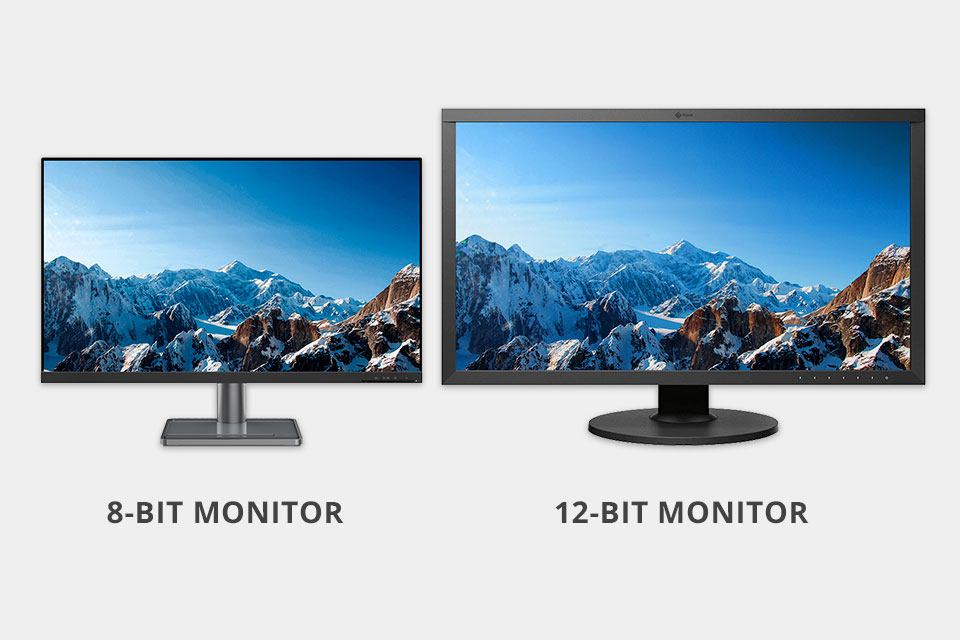
Before fixing banding photography, it is important to check if banding is actually there, or if this defect only appears on a specific monitor. Most monitors only display 8 or 10 bits simultaneously.
As you discard some bits, you will most likely notice that everything is OK with the photo, as the missing data in the transitions between colors will become visible. The thing is that such a monitor simply cannot display these bits of data. Therefore, even if there is this data in the shot, you may not see it due to incorrect displaying.
Accordingly, it makes sense to edit your pictures not on ordinary consumer monitors, but on professional monitors for photo editing. With the ability to display deeper colors, you won’t see banding in photos that aren’t actually there.
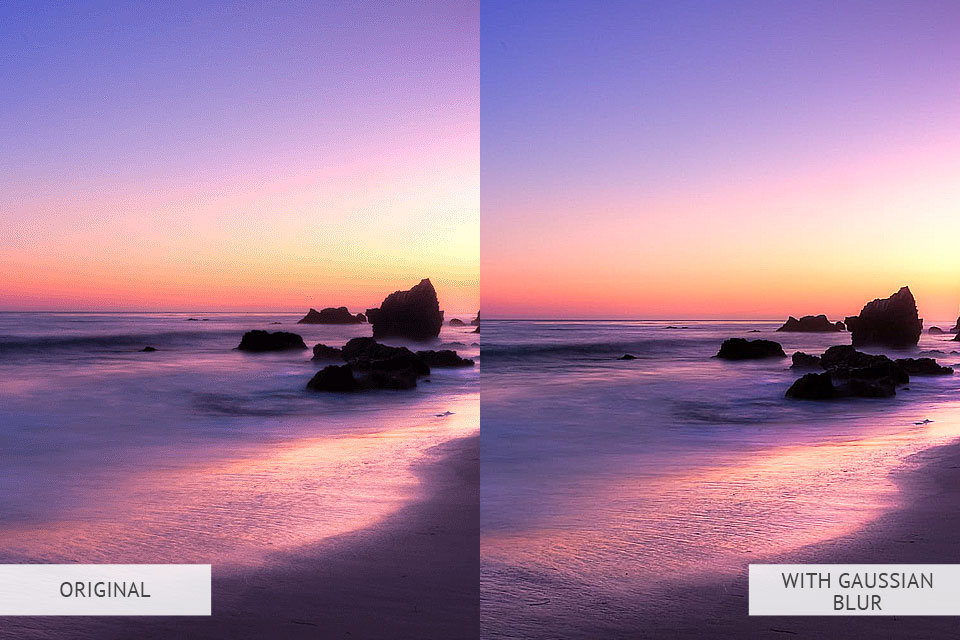
Blur the damaged area. However, keep in mind that this is not suitable for every photo. Blurring will only worsen your photo if you have sharp and crisp clouds in the picture.
On the contrary, if your photo captures a pure blue sky, then blurring it will come in handy. Find the Texture and Clarity sliders and lower their value, to blur background in Lightroom.
If you’re editing photos in Photoshop, then blur your selected layer. Find the Filter drop-down menu, then go to Filter > Blur > Gaussian Blur or Surface blur. As you move the slider, look at the preview window to find the perfect value.
When you have reached the optimal look and have achieved the disappearance of the banding, stop. As an alternative apply a mask in Photoshop and blur only the area where the banding is visible.
Open your favorite noise reduction software and add some noise to the areas with banding. If you prefer Lightroom, then you just need to lower the Noise slider.
To add grain in Photoshop, go to Layer > New > Layer. Once in the dialog box, select the “Overlay” blend mode.
After checking the “Fill with neutral Overlay-neutral color (50% gray)” checkbox, rename it to “Noise Layer”. Then find the Filter drop-down menu where you need to click Filter > Noise > Add Noise to then select Uniform and check Monochrome.
Don’t go overboard with the Amount slider as you don’t want a noticeable amount of noise. Less than 5% should be enough to cover the banding in the photo.
To fix the banding image you can also add texture in Photoshop. You can download any you like, both paid and free Photoshop textures, and even create your own.
Once you’ve opened Photoshop, choose Place by going to the File menu. In the window that opens, select the desired file with the same size. After that, you will notice that you have added a texture as a new Smart Object layer. To give it the proper look, change the blend modes until you get the effect you want.