In my work, I often design personalized stickers for clients in many fields, including packaging and brand materials. I usually use advanced graphic programs that let me adjust text style, arrangement, colors, and print settings with great accuracy. These programs are very capable, but they take practice and time to learn well. Lately, some of our readers have been asking if there are simpler options that let people make good-looking labels without needing special training or difficult programs.
This made me interested in the topic, so I chose to try several AI label generators to see if they could help beginners create designs that are actually useful. Instead of working on it alone, I asked a few coworkers from the FixThePhoto team to join the testing, so we could review the tools from different points of view. We paid attention to how simple they were to use, how good the designs looked, how much you could adjust them, and whether the final results would be suitable for real packaging or branding tasks.
While testing these tools, we noticed that many modern label-making platforms could do much more than I first thought. The options on my list were able to create label layouts on their own, suggest matching text styles and color choices, adjust designs for different types of products, and prepare files ready for printing or online use. Some of them also included ready-made layouts and helpful editing features, which made the whole process easier for people with little or no design experience.
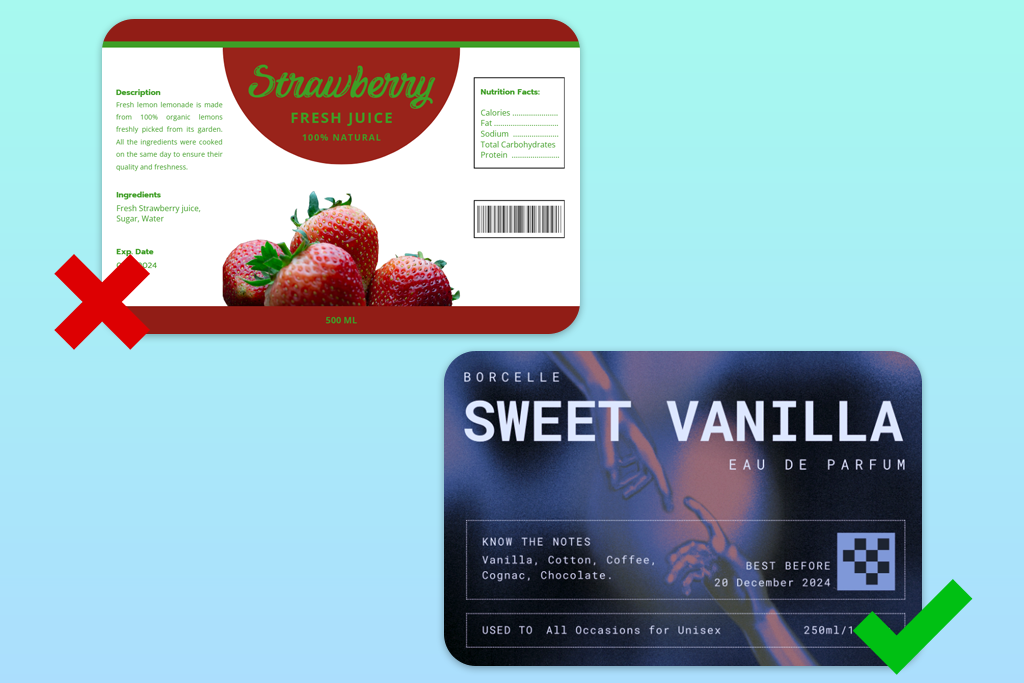
Good results mostly depend on how clearly you explain your idea. Many beginners think the tool will make a perfect design right away, but it works better when you give specific details. Using a very general request, generic like “create a label,” usually gives weaker results. It helps to mention what product you are designing for, the visual style you prefer, who will use it, and the feeling you want to show. For example, asking for a clean herbal tea design with natural shades and classic typography will give a much better outcome than giving a short and unclear request.
Another useful tip is to see the first result as a draft rather than the finished version. During testing, the tools often produced good-looking layouts, but small details still needed fixing. At times, the distance between elements didn’t look quite right, or the order of information wasn’t suitable for product packaging. I usually create several versions at the start, then improve the strongest one by changing text styles, colors, and positioning. This extra step can greatly improve how the final label looks.
It’s usually better to begin with one simple idea rather than listing too many visual details at once. Very long and complicated instructions can lead to unclear results instead of improving them. In my testing, I noticed some designs that mixed styles that didn’t work well together, such as classic lettering combined with very modern color effects. Building the design step by step and making small changes each time often leads to a cleaner and more balanced result.
One detail that people often overlook is the practical side of making labels. These tools can produce nice-looking designs, but they don’t always account for real packaging limits like exact dimensions, safe print borders, or space for barcodes. During testing, I always made sure the layout would actually fit the package it was meant for. If the label is going to be printed, it’s important to double-check image quality, trim edges, and whether the text is easy to read before finishing the design.
In the final stage, it’s important to review suggested designs carefully instead of accepting them right away. Many AI image generators offer modern color choices or decorative details that may look attractive on screen but don’t always suit the brand or type of product. When checking finished layouts, I always think about whether the design sends the right message to customers. These AI label design generators can speed up the creative process, but careful human review is still necessary to turn an initial idea into a polished, professional label.
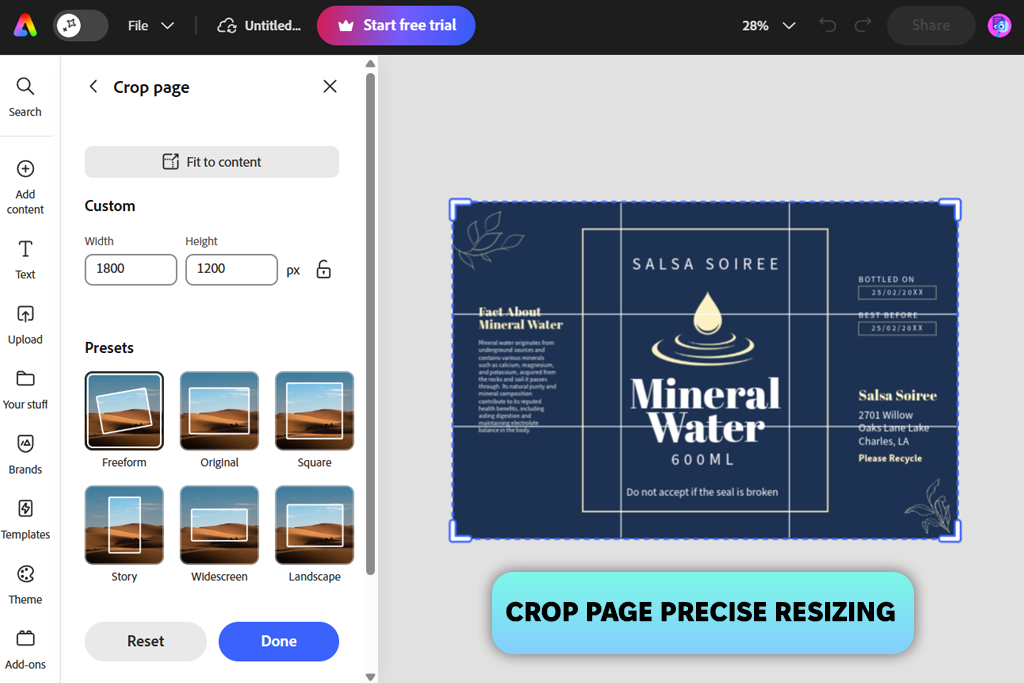
I have used Adobe Express many times when I need to create quick visual ideas without launching more complex programs. In my daily tasks, it works well for making fast graphics or basic layouts.
After seeing that Adobe updated some of its page tools, I wanted to check if it could also be useful for making product labels. To begin, I went to the Templates section and typed “label” into the search. Right away, I saw many prepared designs for jars, packaging, and promotional stickers.
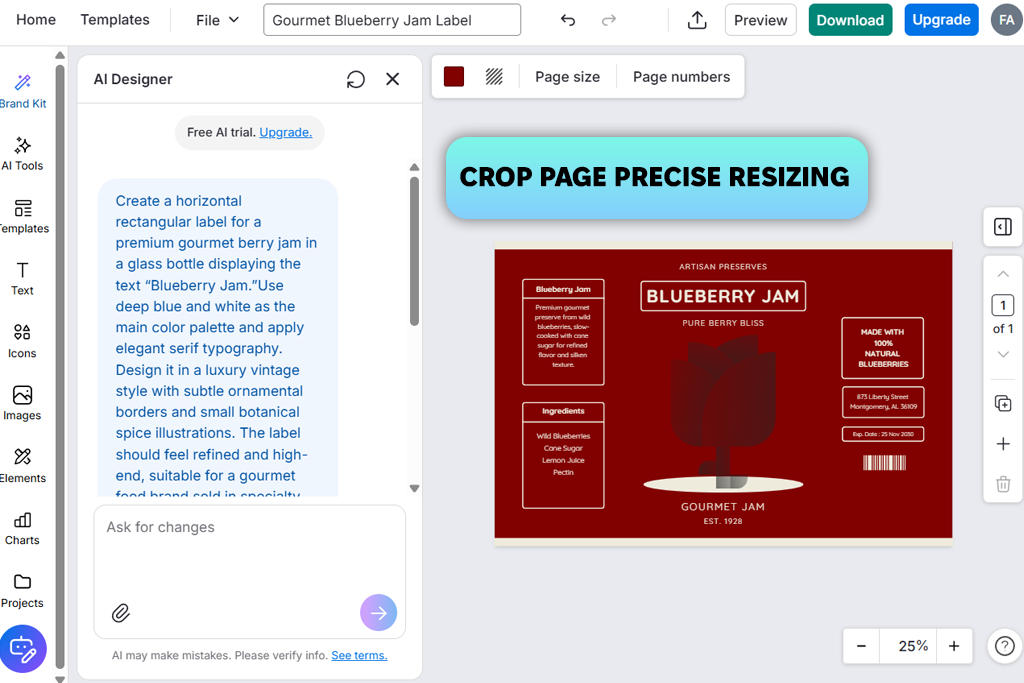
“I usually use Adobe Express when I need to make simple designs quickly. The ready-made label layouts are helpful when you want something neat and easy to read. I also like that I can change the canvas size and adjust the design to fit different package sizes. It can’t fully replace advanced design programs, but it works well for quick drafts.”
To start, I selected a simple honey jar design and began editing it in the workspace. I replaced the default wording, uploaded a small logo, and tried different text styles using the side controls. A feature I found very helpful was the Crop page option inside the Resize tool. It allowed me to reduce the page area neatly instead of shrinking every element. This helped me fit the design to a smaller jar while keeping the text clear and the spacing balanced.
I also tested how to get the design ready for printing. Using the size controls, I expanded the page slightly to create extra space around the edges, similar to adding a bleed margin. The process isn’t automatic, but it works well if you understand the basics.
After finishing the design, I opened the menu near the save options and turned the label into a reusable layout. This is very helpful when making several versions for different products. The only minor drawback I noticed was that some advanced branding tools are available only in the paid version.
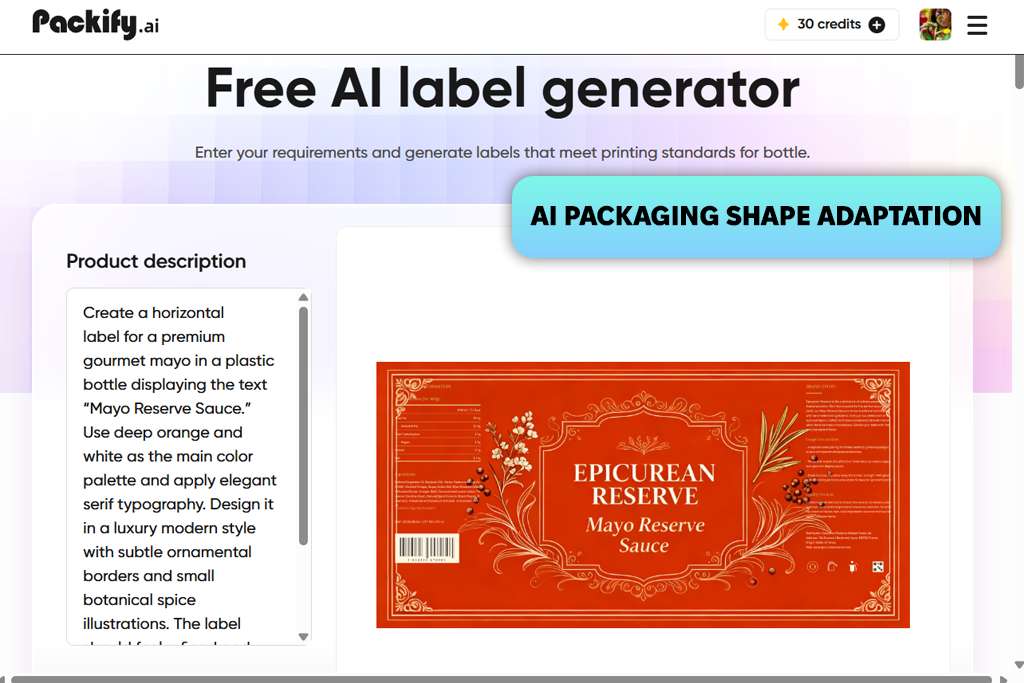
My colleague Tata told me about Packify after using it to design a label for her homemade cosmetics. She said the result turned out better than expected, which made me want to try it myself.
So, I opened the packaging design software to see how well it could work without much manual editing. The interface was easy to understand, and the first screen asked me to describe my idea and choose the product type.
“While working on labels for my small skincare items, I decided to try Packify. The steps were very easy to follow - I just described my idea, and the tool quickly showed a few design options. What I liked most was that the layouts already looked neat and well-arranged, so I didn’t have to fix many details myself.”

Rather than using a basic request, I entered a more detailed description into the input box: “minimal organic olive oil label with natural colors and clean typography.” Then I pressed the Generate button to check how the tool would handle it. After only a few seconds, this online AI label maker displayed a flat design suitable for packaging use. The first thing that stood out was how neat the spacing and positioning looked. The layout didn’t seem random - everything was arranged in a way that already looked close to ready for printing.
During testing, I created several versions for different uses - one for a bottle and another for a food sticker. The tool adjusted the size and shape automatically based on the type of packaging. One drawback I noticed was that there weren’t many options to change details after the design was created, so for more precise changes to text or layout, I had to use another program. After finishing, I downloaded the design as a high-quality PDF using the Export feature. This was helpful, since many beginner tools only allow saving files as PNG images.
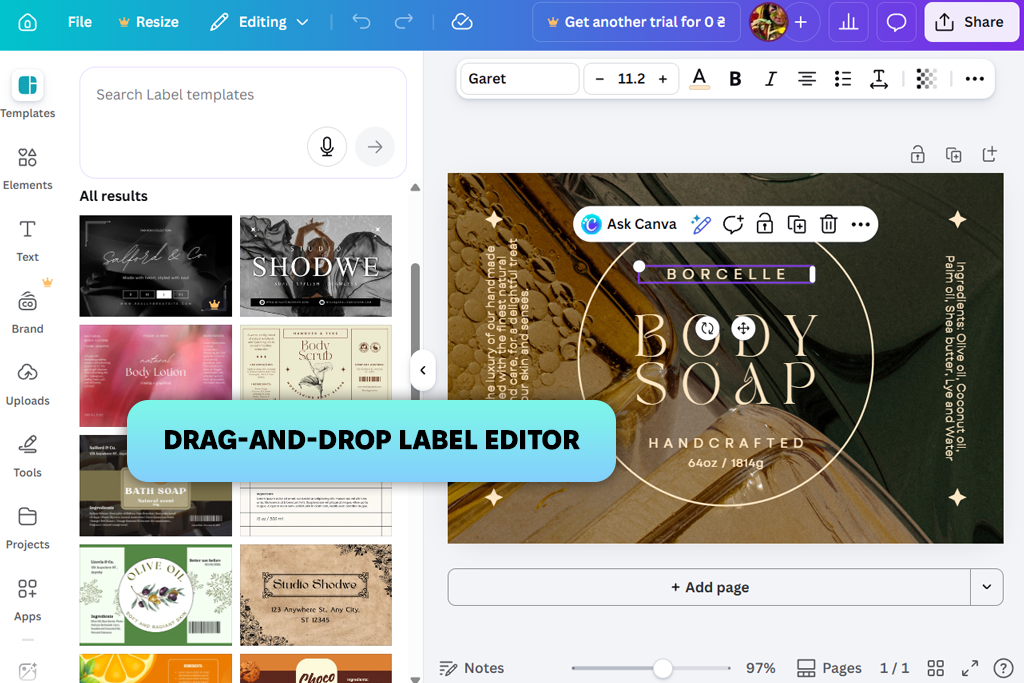
Our team often uses Canva, because it offers helpful design tools and makes group work much easier. When several people need to work on visuals at the same time, it’s very useful to leave comments, make edits, and review changes in one shared project. That’s why I usually start with Canva when testing label ideas or sending early versions to coworkers before switching to more advanced programs.
I started by opening the Templates section in Canva and searching for labels. Right away, I saw many design options, including ones for wine bottles, product stickers, and small address tags. To test how easy the editor was to use, I picked a cosmetic-style template. Then, using the drag-and-drop canvas, I added a few elements from the side panel, such as icons, decorative shapes, and a small plant image. Everything lined up automatically, which made trying different layout ideas feel quick and easy.
Working with text in this AI label maker felt easy and comfortable. I changed the sample wording to a made-up skincare product name and tested several text style pairs from Canva’s collection. Next, I added a simple logo using the Uploads section and changed the colors to match the brand theme. It’s also possible to start with a blank page by choosing your own size before beginning the design.
Overall, the editor is easy to understand, but detailed text adjustments are still more limited than in specialized label printing software.
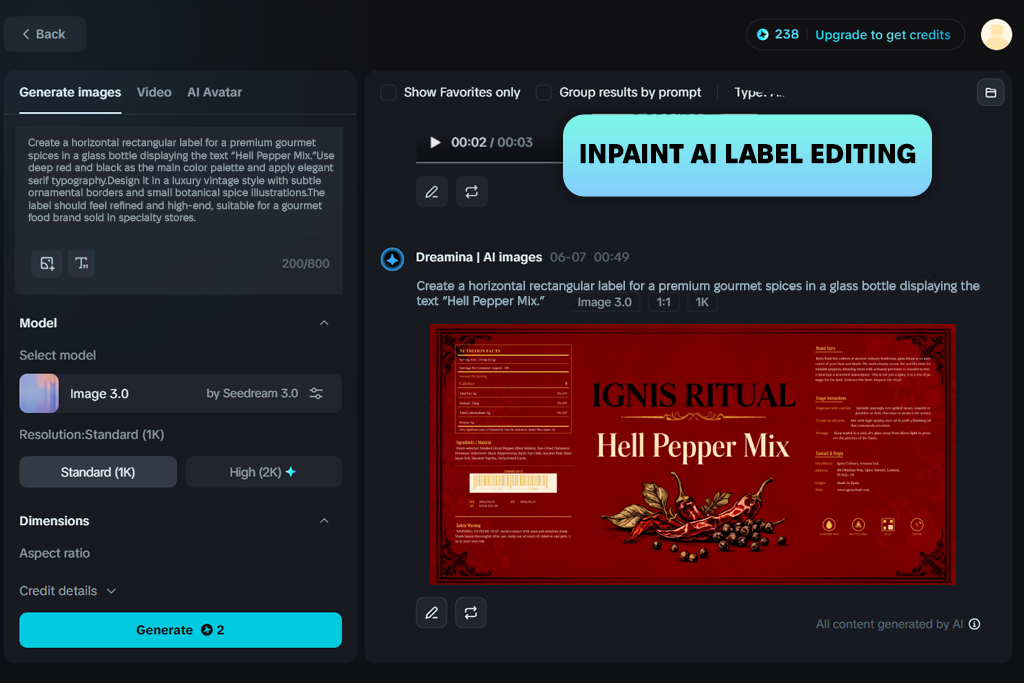
I became interested in Dreamina because it’s made by CapCut, a video editing app I’ve used for many years. Since I already trust CapCut’s products, I wanted to find out how this design feature would handle something different, like creating labels. The layout felt familiar as soon as I opened it. After launching Dreamina, I selected the “Text/Image to Image” option to open the panel where you can describe the type of label you want to create.
I experimented with a more detailed approach rather than using a short prompt to see how effectively the system could interpret complex instructions. Dreamina provides options below the prompt box to select the generation model, image size, and aspect ratio, so I chose the recommended 4:3 ratio for labels and set the quality to the highest level before generating the image. In the prompt itself, I described a wine label featuring a vineyard background, rich dark berry tones, and classic serif typography. The generated results resembled artistic illustrations more than a simple label.
After the design appeared, I tried several editing options available in this AI label generator. I used Upscale to increase image clarity, Retouch to smooth uneven parts, and Inpaint to slightly change small areas of the background. These features are helpful when the result looks close to what you want but still needs minor fixes.
When everything looked right, I downloaded the file using the save icon. One thing to remember is that the result behaves more like a picture than a structured layout, so placing text in exact positions may take some extra adjustments.
I’ve used Fotor for many years, even before it added newer automated design features. At first, I mainly relied on it for quick photo edits and small fixes.
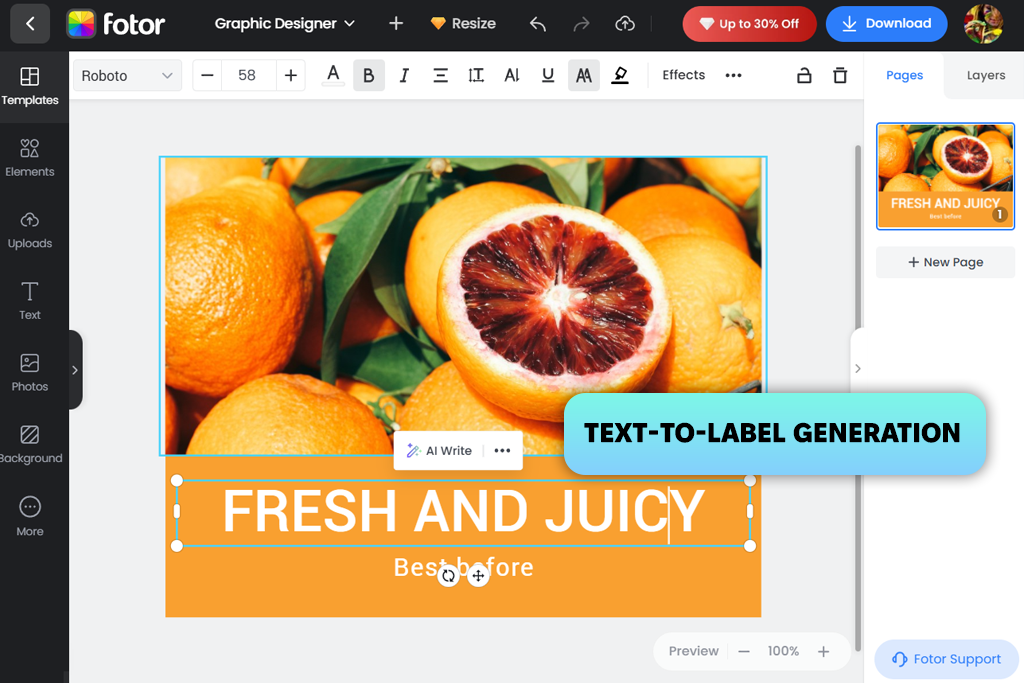
Over time, the platform grew into a more complete design tool, which made me curious to try its label-making feature. I wanted to see how it would work in a real project. The system follows a Text to Label concept - you enter a short description, and the tool creates a label based on what you write.
“I’ve known Fotor for a long time as a basic photo editing tool, so I wanted to see how its label-making feature would work. I was surprised by how the layout formed on its own from just a short written description. I also tried the Gemini editor to adjust a few parts by typing simple instructions.”
To begin, I typed a short description into the text box for a handmade candle label using soft pastel shades and a simple layout. After submitting the text, the tool quickly created a full design on its own. This feature, called Auto Layout, automatically arranged the wording, colors, and lettering styles. The result was produced within seconds, and the design looked neat and well-balanced, even though the instructions were brief.
Another feature I found useful was the built-in AI image editor, which allowed me to improve the design in a quick and simple way. Instead of changing settings step by step, I entered short instructions, such as changing the background color or adjusting the text style, and the tool updated the design automatically.
The process felt smooth and easy, almost like giving directions rather than editing each detail by hand. When everything looked right, I saved the label in high quality, so it was ready for printing without extra resizing. One drawback I noticed about this AI packaging label generator was that the automatic arrangement sometimes made it harder to adjust individual details exactly the way I wanted.
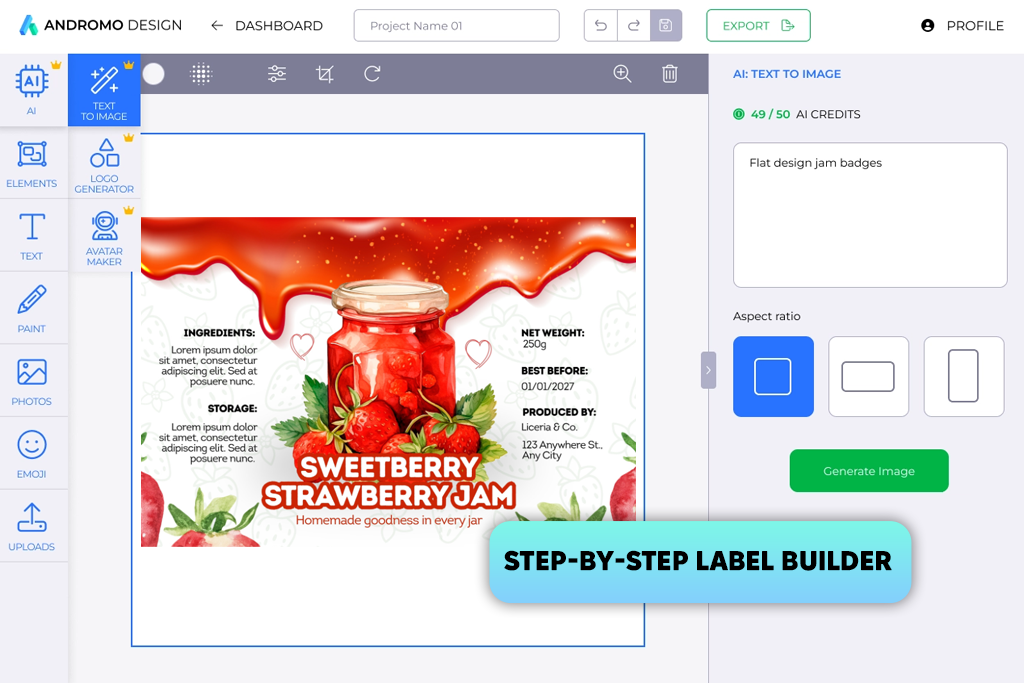
I learned about Andromo from my colleague Ann during one of our team discussions about AI tools for designers. She mentioned that it worked well for making simple product labels, which made me curious to try it on my own. When I opened the platform, it guided me to begin by entering the main label details. So, I started by adding the product name, a short description, and a small tagline into the fields provided.
“What I found helpful was how clearly the process was guided from one step to the next. First, I entered the product details, then chose a layout, and after that adjusted the colors and text styles inside the editor. It didn’t take much time to create a label that looked neat and easy to read. The design of the interface looks quite basic, but it’s very easy to use, even for someone who has never made a label before.”

Next, the process moved to choosing a layout. I looked through several groups of designs until I found a simple one that suited a small coffee bag. After opening it in the editor, I began making changes to the visuals - I adjusted the background shade, tried different text styles, and added a basic logo using the image upload feature. The editing tools were easy to use, with sliders and drop-down lists that made it simple to change layout details, lettering styles, and color themes without searching through complicated menus.
One feature I found helpful was that the design could still be changed easily after the initial layout appeared. I adjusted the size of a few elements, moved the spacing between text sections, and tested different color mixes before saving the label. The final review and download steps were quick and simple, and the file was ready to use for printing or online sharing. Overall, this custom AI label generator worked reliably, although its appearance felt more basic than some newer design tools.
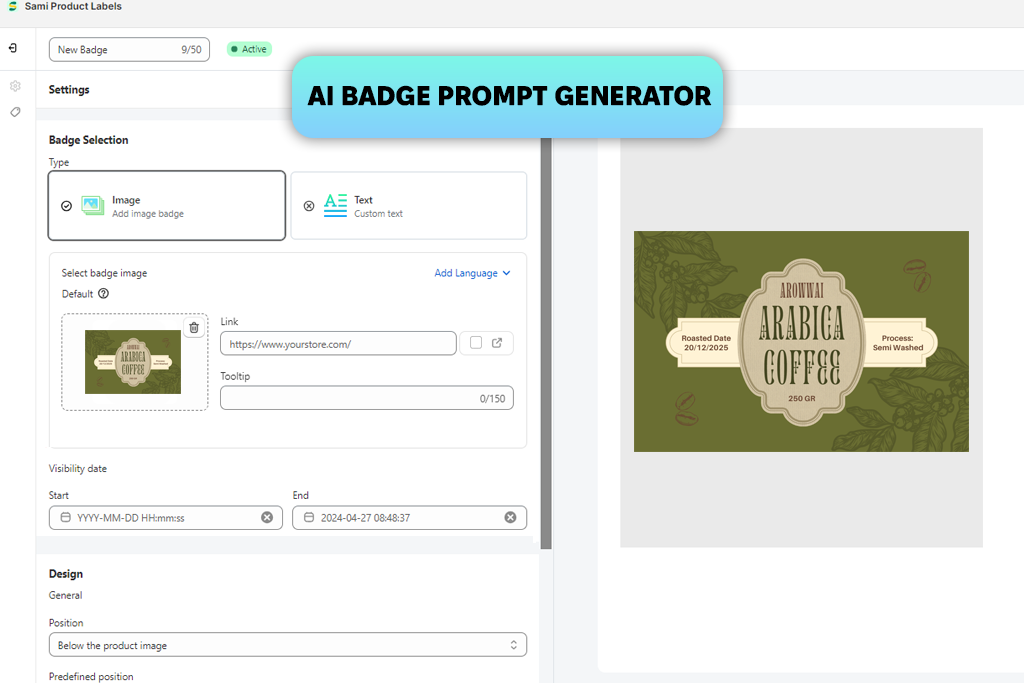
I found Samita while looking online for AI label generators for product packaging. It showed up on the first page of search results, which made me curious to test it. After opening the platform, I explored the main dashboard and located the label feature inside the “Badges and Labels” section. From there, I selected “Create a new label,” which opened a small setup window where I could begin making a design.
This tool mainly works through written descriptions. I first chose the Image type option, then moved the cursor over the sample picture and clicked Change to open the image creation section. In the text box, I entered a description similar to their sample: “premium badge with the text ‘BEST SELLER’, gold accents, crown icons, modern style.” After sending the request, the tool showed several badge-style design options. When the previews appeared, I picked the one I liked best and set it as the final image.
One thing I noticed right away was how strongly the final design depended on the level of detail in the description. The tool suggests adding information about the shape, colors, lettering style, and decorative symbols, and clearer details usually lead to better-looking results. I tested several styles, including flat, shiny, and vintage looks. It handled badge-style designs very well, but it wasn’t as suitable for more detailed packaging that requires many sections of information.
I’ve known Venngage for a long time as an infographic maker. Many people use it for reports, presentations, and visual explanations.
When I saw that it now included a label-making feature, I wanted to check how well a platform designed for infographics could handle packaging-style designs. The process starts by typing a short description of the label you want to create.
“What stood out to me was how neatly the information was arranged, which made the label easy to read. I started by entering a short description to create a design, then adjusted the text styles and colors in the editor. The tool worked especially well for organized layouts, especially when the label contained several sections of text.”
To get started, I opened the tool and entered a short idea for a craft coffee label, describing warm tones, bold headline text, and a small coffee bean drawing. After confirming, the platform showed several design choices. What I liked most was how tidy everything looked - the content followed a clear order, the sections were easy to read, and the spacing felt balanced, similar to small infographic-style visuals. After choosing the version I liked best, I continued improving it using the editing tools.
To test how flexible the design was, I tried mixing different font combinations, color adjustments, and layout tweaks. This AI product label generator made it simple to reuse the same visual style for other items, which is helpful when a brand offers several versions of one product. I can see this working well for small product ranges or limited-time packaging changes. Overall, the editing process felt smooth, although some results still looked more like presentation visuals than designs made specifically for packaging.
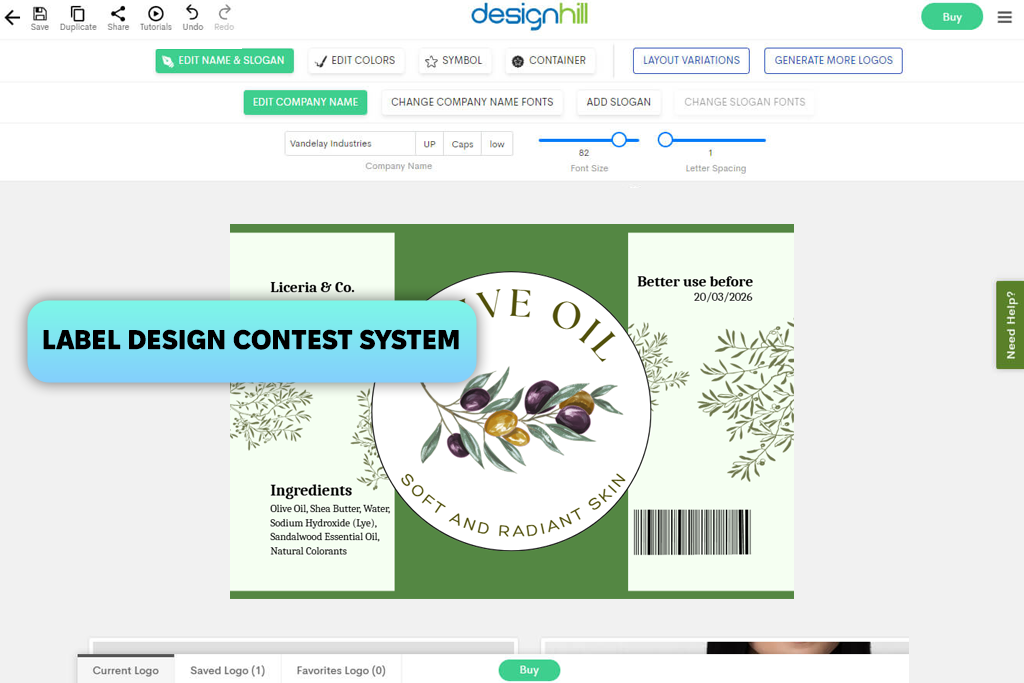
Designhill stood out to me right away because it works differently from most tools I tested. It felt less like an automatic design tool and more like a creative platform where businesses can work directly with designers. I had seen it mentioned before in conversations about logo contests, which made me curious to try it for label design as well. After opening the product label section, I noticed there were two main ways to begin the process.
To explore how it works, I first looked at the two available methods. One way is to start a contest, where you explain what kind of label you need, and several designers send their ideas. The other way is to work directly with one chosen designer on a private project. To better understand the process, I followed the steps for setting up a contest. I added product information, described the preferred look, uploaded sample images when needed, and set the budget. Once everything was ready, designers began sharing their ideas through the dashboard.
I also explored the platform’s AI logo generator and some of the ready-to-use design tools inside the editor. These options help create a quick idea before working with professional designers.
One thing that makes Designhill stand out is the teamwork aspect - you can leave feedback on submitted designs, ask for changes, and review several ideas in one place. The only downside is that the cost can increase quickly, especially if you decide to run full design contests.
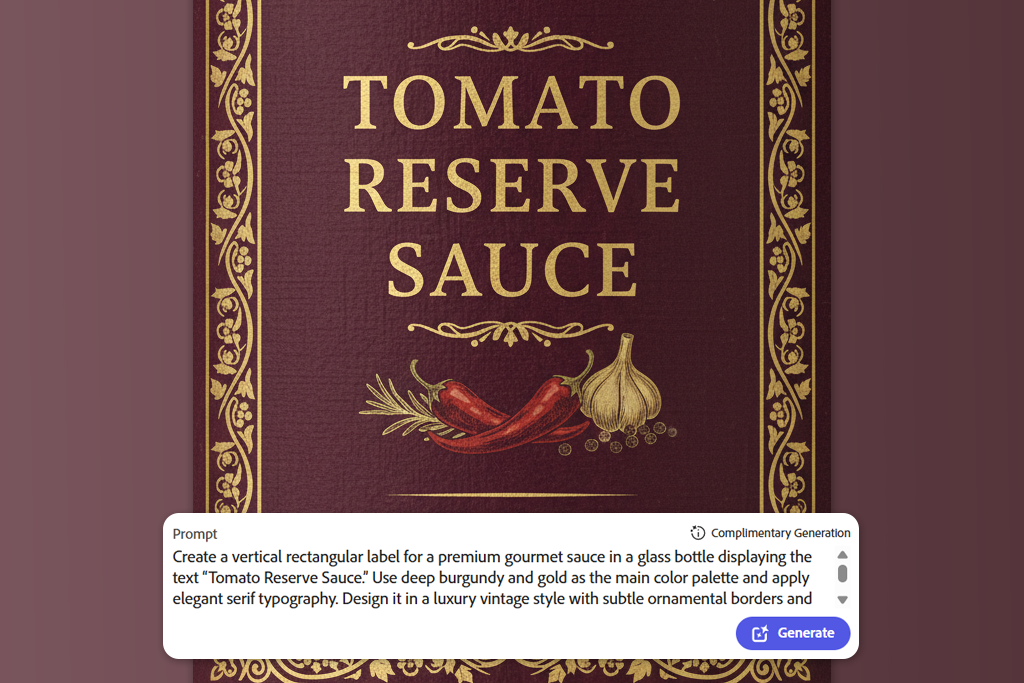
During testing, I realized that the final result depends more on how clearly the request is written than on the AI label generator itself. When the description is detailed and well-organized, the design usually looks cleaner and more balanced. To make the process easier, I prepared a few sample text formats for popular product types. You can use them as a base and just change the parts in brackets to match your own product details.
Food Products
Cosmetics & Skincare
Beverages (Wine, Coffee, Juice)
Retail & Promotional Labels
While reviewing different AI label generators for product packaging, we paid close attention to how well they handled the full creation process, not just how the final design looked. Product labels have special requirements - they need to show information clearly, match real package sizes, and stay easy to read after printing. Because of this, we approached the testing each option in a practical way, using it as if we were working on an actual packaging project.
The first area I focused on was prompt interpretation and design generation, meaning how well the tools understood written descriptions and turned them into visual layouts. Many platforms promise quick results, but the key point is how closely the final design matches the original request. I tested different types of descriptions - starting with short ones and then adding more details like color choices, lettering styles, and decorative features. This helped me check whether the tool could keep the design consistent with the original idea.
Another key area we reviewed was layout structure and information hierarchy. A product label is not only about decoration - it also needs to present details in a clear and logical order. During testing, Tata examined how the tools arranged important parts like the product title, brand name, extra information, and visual highlights. She also looked closely at spacing and positioning to see if everything felt balanced and suitable for real packaging use.
Ann also focused on editing flexibility after generation, checking how easy it was to make changes once the first layout appeared. In real projects, the initial version is rarely the final one. She tested how simply text, colors, icons, and other parts could be updated after the design was created. AI label makers that allowed quick edits and step-by-step improvements proved to be much more practical than those where most elements were hard to adjust.
The last thing I checked was export quality and print readiness. Product labels usually need to be printed in high quality and match exact package sizes. Because of this, I made sure the saved files kept clear edges, correct colors, and enough detail for printing. Even when a tool was designed for beginners, I still looked at whether the final files could actually be used in a simple packaging process.


![9 Best Wan AI Alternatives [{{%year}} FixThePhoto Choice]](http://fixthephoto.com/blog/images/gallery/news_main__preview_28961.jpg)

![7 Best YouTube to MKV Converters [{{%year}} FixThePhoto Choice]](http://fixthephoto.com/blog/images/gallery/news_main__preview_28907.jpg)
![Top 7 Bookmark Makers [Printable & Custom]](http://fixthephoto.com/blog/images/gallery/news_main__preview_28951.jpg)


![7 Best HeyGen Alternatives [{{%year}} FixThePhoto Choice]](http://fixthephoto.com/blog/images/gallery/news_main__preview_28944.jpg)