It might be challenging to fully showcase a real estate property through photos. Since technologies are in constant development, it’s important to use the newest methods of real estate video marketing to promote real estate listings. High-quality videos allow buyers to imagine how houses and apartments look in real life.
Most real estate videos cost between $1,000 to $10,000 per minute. But since there is a lot of competition in the field, you have to be a skilled videographer to become successful, and charge on the higher end.
In this guide, I’ll let you in on all the industry secrets and break down everything you need to know about shooting real estate videos. You’ll learn what it takes to create an impressive video that will attract potential buyers.

If you don’t know anything about video production, you can take videography courses or enroll in a workshop. You can find plenty of online and classroom-based real estate photography classes that will help you improve your skills. Udemy and SkillShare have many useful online resources that will help you learn more about videography gear, composition, and video-enhancement techniques.
You can also watch YouTube channels created by renowned filmmakers, such as Parker Walbeck and Brandon Li. Make sure to watch the most successful examples of real estate videos to find your signature style. This way, you can learn the ropes of videography and find out how to implement various creative ideas to make your videos more appealing.
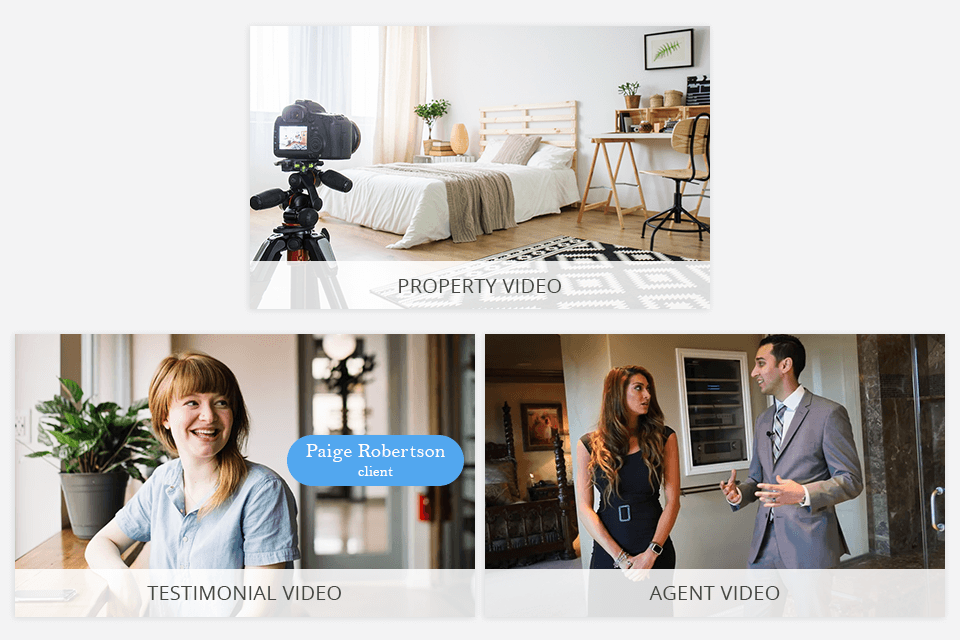
You can analyze a variety of real estate video ideas and select the one that suits your needs best.
Property films are quite popular among videographers who want to show all the details of a listed house or apartment. You can create a walk-through tour to help your potential buyers see all the rooms. Nowadays, VR tours are in high demand since they allow clients to get a panoramic view of every room. Besides, they are more interactive so everyone can decide which rooms they need to explore.
Agent or company film. These videos will help you establish long-term relationships with property sellers. You might need to read a special real estate videography guide to learn how to add a voice-over or an interview with an agent who listed the property. Some companies make such videos more informative by adding interviews with the members of their teams. Sometimes, agencies also shoot funny real estate videos to attract the attention of a larger audience.
Testimonial videos. These videos help agents gain the trust of potential customers. They can ask their clients to share their positive experiences and encourage future buyers to contact the agency. Some real estate agents also use hybrid videos containing elements that can be found in different genres.
When an agent places an order and arranges the date of the shooting, make sure to contact the seller to ensure that you will be able to access the property. You can also ask the seller to send you some photos of the house. It’s important to know in advance whether a house is big or small to plan your time accordingly. You need to know the exact location, day, time, and duration of the scheduled shooting.
After arriving in the house or apartment, ask the agent whether there are any things that they need you to focus your attention on. You can take notes to ensure that you won’t forget anything during the shoot. This way, you won’t miss anything important and there won’t be any need to arrange another shooting.
If you have never edited videos before, you can read the real estate videography guide and try using basic software. However, if you believe that your skills aren’t up to the task, you can contact a professional service that will do all the work for you. FixThePhoto has an experienced team that will edit your real-estate videos at an affordable price.
They will perform color correction and emphasize the key selling points. Besides, they can trim your videos and remove poor-quality parts of the footage. The experts can remove any sign of camera blur and send you a high-resolution video of a real estate property. Besides, they will follow your editing style and take into account all your requirements.

If you need to create a professional real estate video, pay attention to lighting. You can use natural lighting, lighting fixtures, and lighting kits to create a warm and welcoming atmosphere in your photos. It might be difficult to take good photos in the middle of the day is there are many big windows in a house and the weather is sunny.
You need to select the right time of day for shooting and pay attention to color temperature. The golden hour is a great time for real estate photography since it allows you to show the property in the best light. Besides, clients will be able to see the windows clearly.
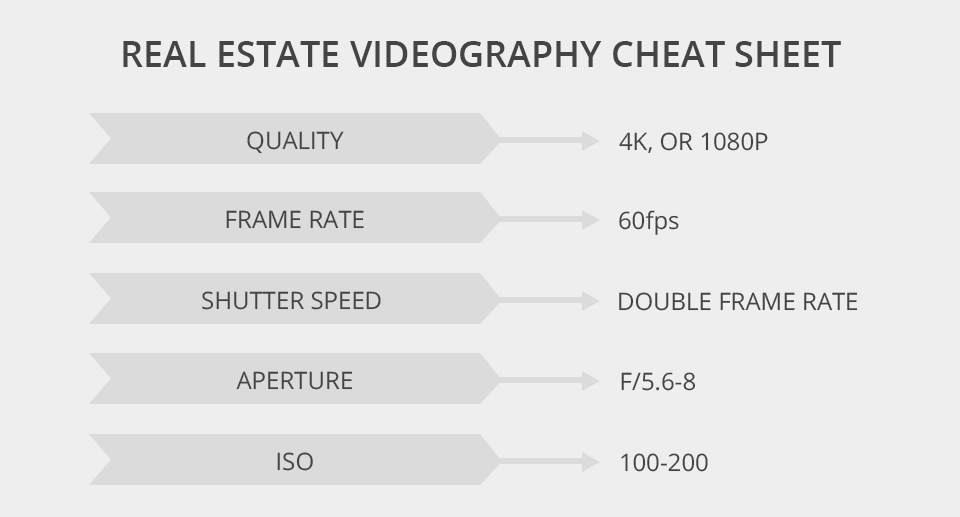
To make it easier for you to edit videos, you need to shoot them in 4K. This way, you will be able to zoom in, trim them, or stabilize them if they are blurry. It’s better to shoot videos at 60 fps to slow down your footage when it’s necessary.
Make sure to shoot videos with the shutter speed twice higher than the frame rate. If you take footage at 24fps, your shutter speed should be at least 1/48. As for f-stop, it’s better to shoot videos at f/5.6-8 to focus on details and get a clear video.
It’s recommended to keep ISO low. However, if you shoot videos on a sunny day, keep ISO around 100-200 without exceeding 800.
The duration of your video should depend on its type. You can make your video shorter or longer depending on the size of the property. If you take a look at the videos posted by companies that specialize in real estate videos, such as LifeStyle Production and Luxury Presence, you will see that they are quite short.
To keep the attention of potential buyers, you need to create an up to 3-minute long video. Many people prefer to quickly look through listings so it’s better to create eye-catching content that will make them want to read the description.
However, if you need to advertise a luxury mansion, you can shoot a longer video. Its duration shouldn’t exceed 8 minutes. Videos that are longer than 10 minutes are unlikely to be watched till the end, which makes them poor value for money.

If you don’t have a video camera or want to upgrade your photography gear with a new model, make sure to buy a camera that allows shooting in 4K even in poor light, has a frame rate of at least 60 fps and a log profile. If you usually shoot videos without gimbals or tripods, you need to buy a model with in-built image stabilization features. It’s better to use DSLRs for video since they can be used with various lenses.
With them, you can take photos as well. A full-frame camera will come in handy when you need to shoot videos in poor light. They support better image quality than cropped-sensor cameras, which makes them more expensive. The Nikon D850 and Canon 5D Mark IV are great cameras for shooting real estate videos.
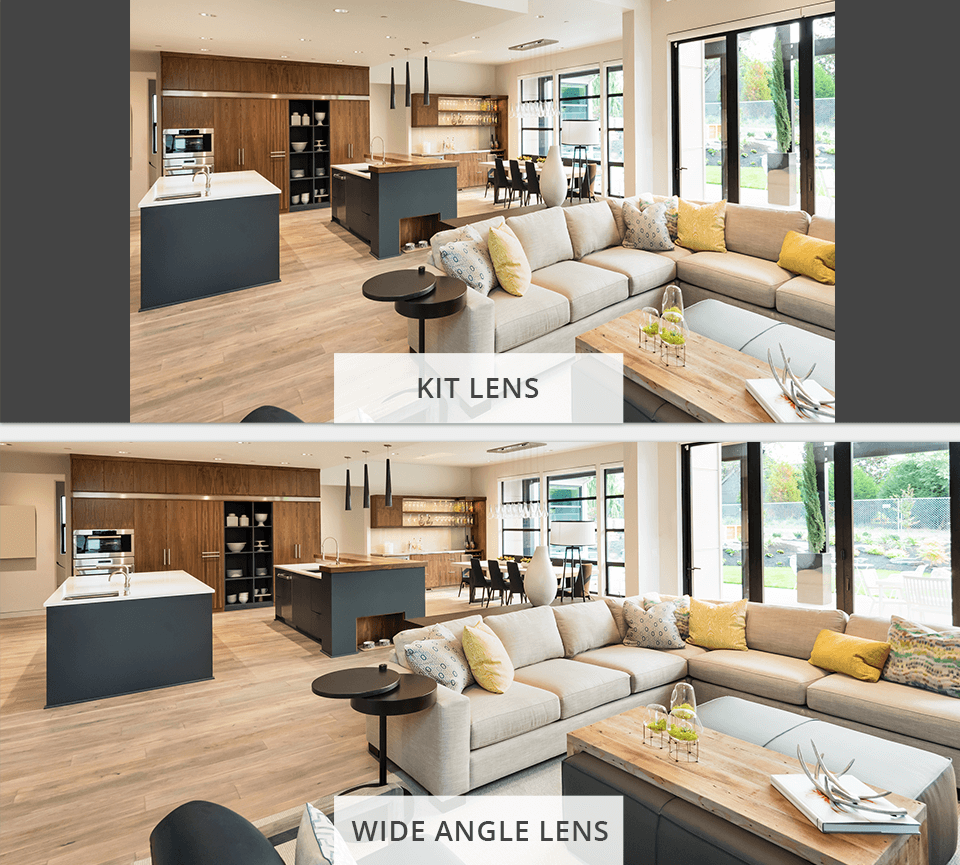
To show all the important details of a room, it’s better to use wide angle lenses, such as Sigma 20mm f/1.8 EX DG RF. However, they might cause distortion.
It’s better to use a 20mm lens and pay attention to your camera’s crop factor. You can select a camera with a sensor that suits your needs best:
Full Frame Sensors. The field of view will be indicated on the barrel of the lens.
APS-C Sensors have a crop factor of x1.5. 20mm lens has a 30mm field of view.
Micro Four Thirds Sensors have a crop factor of 2x. If you have a 20mm lens (20 x 2), it will have a 40mm field of view.
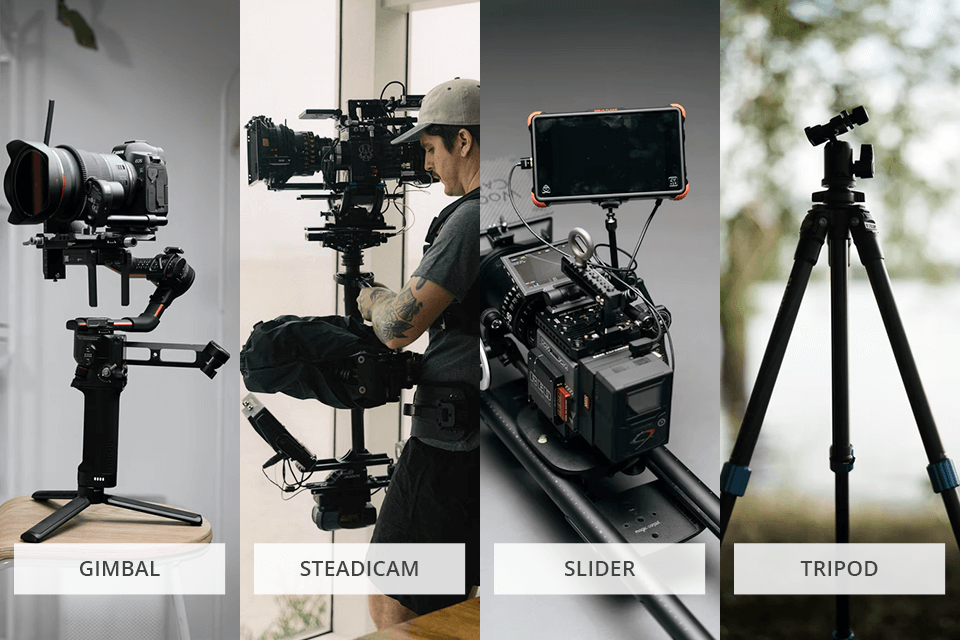
To get a high-quality video, professional videographers, such as Grant Johnston and Taylor Brown, stabilize their cameras to avoid blur. To get clear footage, you can use various pieces of equipment:
Gimbal – A DSLR Gimbal will help you stabilize your camera when shooting a video. Thanks to a special motor, there won’t be any blur caused by hand movements. The DJI RSC 2 allows you to make professional videos with a high level of detail.
Steadicam – Such devices are better at stabilization than gimbals, however, it might be difficult to set them up. The FLYCAM Redking will help you take clear footage.
Slider – A camera slider allows you to slide the camera side to side or front to back, depending on your needs. If you have some cash laying around, you can purchase the Neewer Carbon Fiber slider.
Tripod – Reliable video tripods will help you stabilize your camera when walking around the property. The Manfrotto MT055CXPRO3 is a great option to consider.
Real estate aerial photography and videography skills will come in handy when you need to drive buyers to purchase. You can also use drones for filming to show a property from above. At the moment, the Phantom 4 Pro and Mavic Pro are the most popular options on the market.
Many videographers use push-in shots to create an engaging intro. Pull-out shots are perfect for the outro. You can also take parallax shots to show the entire house. Rise-up shots taken with a tilted-down camera look stylish and give your footage a professional look.
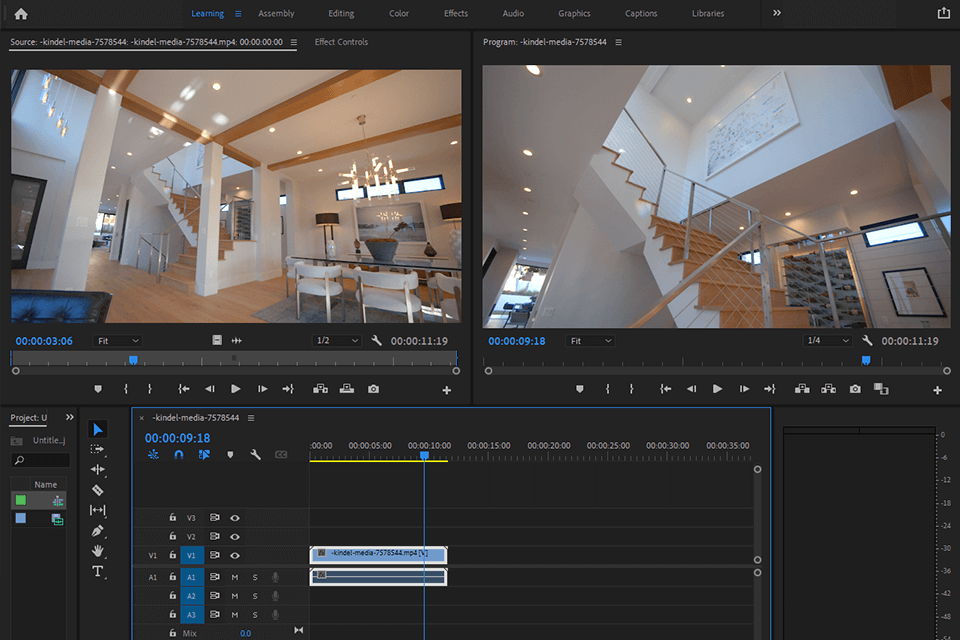
If you have never edited real estate videos before, there is no need to buy expensive pro-level programs to create a clip. You can try using free video editing software, such as iMovie and Windows Movie Maker. These programs have basic video editing tools.
With them, you can trim your videos, cut and paste scenes, add audio, including voice-overs, apply effects, and add transitions. While they can be used even by beginners, their toolsets are quite limited. With them, it might be difficult to perform professional color correction, add an advanced transition or enhance audio.
Experienced agents prefer working with videographers that use software with an extensive set of video editing options. If you have some money, it is better to purchase Adobe Premiere Pro since it is excellent video editing software for Windows and Mac. This software is popular among many seasoned videographers, including Brandon Washington, which is why it’s recommended in virtually every real estate videography guide.
To create a well-structured video, you can use one of the most important video editing tips and create a realistic walking tour. If your viewers see all the rooms in the right order, it will be easier for them to imagine the layout of the property without seeing it with their own eyes.
Avoid repetition and experiment with different angles, slides and glides to create an engaging video. If a potential buyer is interested in a certain part of a video, they can re-watch it afterward.
After creating a video, make sure to preview it to see whether the transitions between different parts look natural. Think about your impression of the property after watching a clip. If the video doesn’t seem to be engaging, you might need to re-edit it. The final cut should create a favorable impression of a listing.
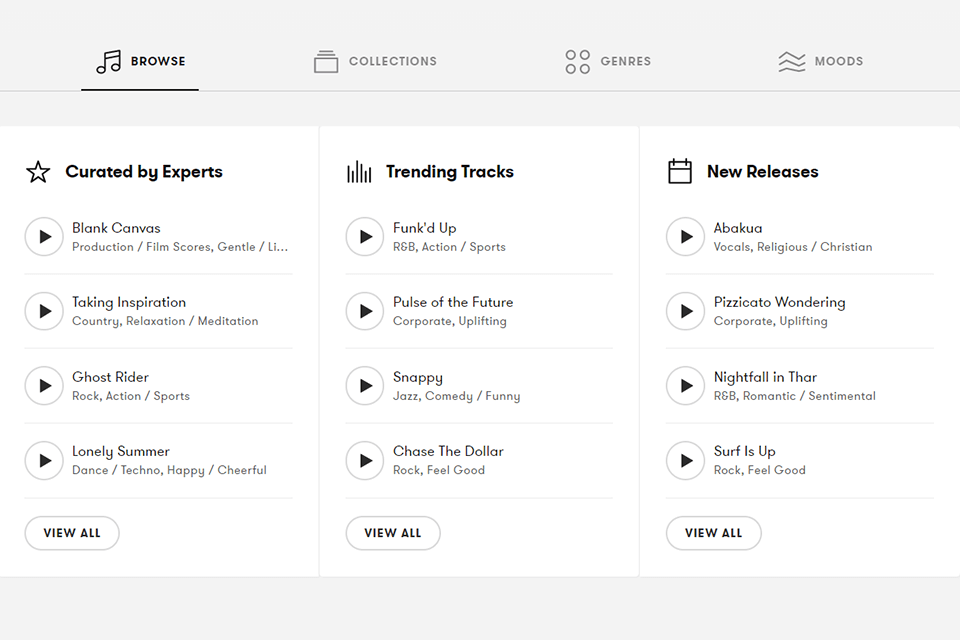
A good audio track will help you attract the buyers’ attention to the content of your video. Make sure to use easy-to-remember music that creates a relaxing atmosphere. You can also select audio that matches the style of the property, isn’t too distracting, and can engage your target audience.
If you need to create a video of a country property, then relaxing music is the best choice. For apartments, it’s better to use urban music, while videos of vacation houses will be more engaging if you add cheerful tunes. Since many songs are protected by copyright, it will be impossible to use them unless you get permission from copyright holders.
To avoid wasting money or to prevent your video from being blocked by YouTube for breaching the copyright laws, you can download audio tracks from royalty-free music sites, such as PremiumBeat, Epidemic Sound, and Audio Jungle.
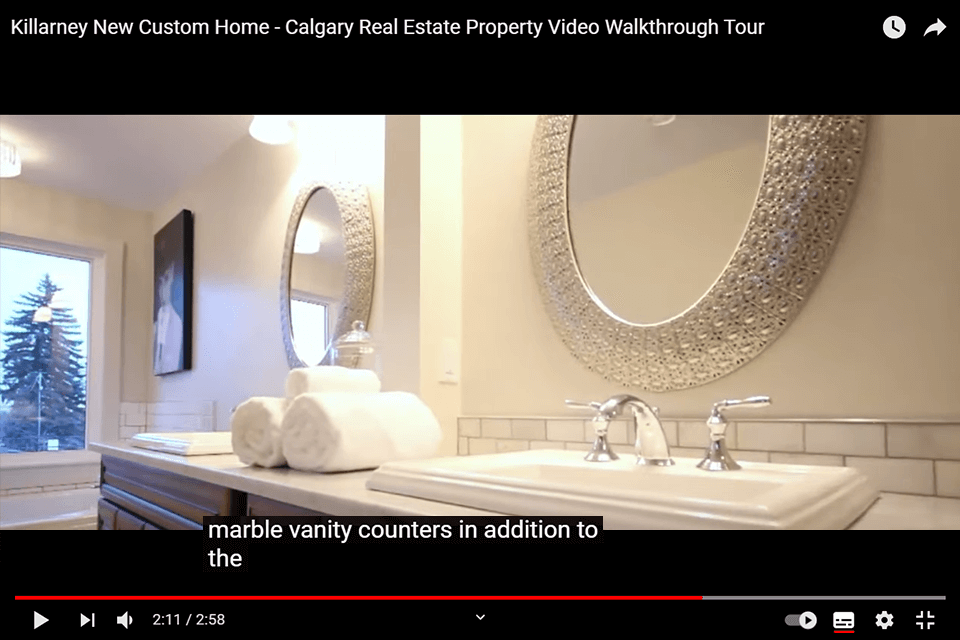
The optimal duration of a video is no longer than 3 minutes. Use this time to tell clients about the advantages of the property. To make your videos even more informative, you can add voice-overs to describe the key selling points in detail. For instance, you can tell clients about energy-efficient windows and doors or other amenities that are impossible to notice during a walking tour.
If your video has a good voice-over, it will help your clients to remember it better. Google states that over 60% of YouTube users aren’t native English speakers or are hearing-impaired. This is why it’s better to use automated subtitles to ensure that your video will appeal to a larger audience.
Nowadays, many people are browsing the web and looking for houses and apartments on their smartphones. You can add subtitles with the help of closed captioning software to help potential buyers watch your videos on the go. This way, they can get all the information without turning the sound on and disturbing other people.
If you don’t want to spend much time on improving colors, take a look at this collection of real estate LUTs created by professional designers. Each of them can be applied to various videos. With them, you can enhance videos of luxury properties or residential buildings to make them stand out. They are suitable for embellishing videos taken indoors or outdoors.