A reliable photo blur remover can rescue pictures I would normally move to the trash folder. That is what made me start testing these tools. I work as a retoucher at FixThePhoto, so Photoshop and Lightroom are part of my daily routine. Most of my client work involves detailed edits where I have to zoom in, check skin texture, correct tiny flaws, and make sure the final image looks polished.
But my personal photos are a different story. When I take pictures during weekend walks, family trips, or casual meetups with friends, I don’t always want to open professional software just to fix one slightly blurry frame. Still, these simple photos often matter the most.
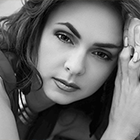
It is always the same annoying situation. You catch a real moment, the light is beautiful, the background looks great, the emotion is there, but the focus is just a little off. I had a photo of my sister smiling in the park, with her hair moving in the wind and sunlight coming through the trees. The image had everything I wanted, except it was not quite sharp enough.
That is when I decided to look for an AI blur remover that could improve these “almost good” shots without making the process complicated.
I asked my FixThePhoto team to help with the testing. Our retouchers looked closely at image quality, skin texture, edges, hair, and artifacts. Team members who do not retouch photos every day checked how simple each tool felt for a regular user. In total, we tested 30+ photo blur removers that I found through Reddit discussions, YouTube reviews, and photography communities.
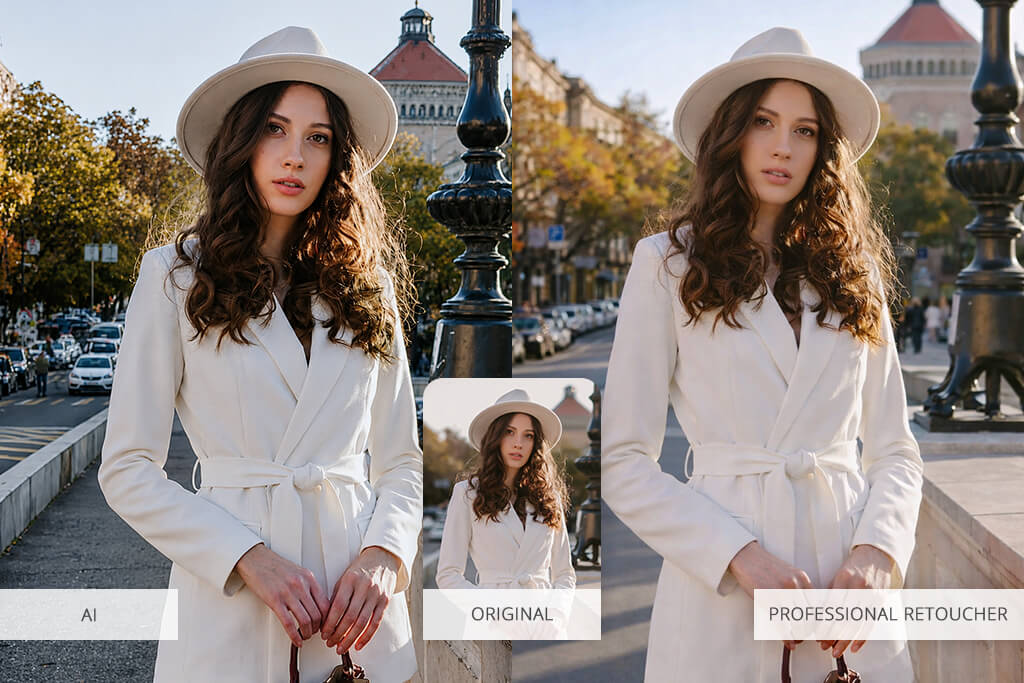
To make the comparison fair, I used the same test image in every online photo blur remover. It was a portrait of my sister in a park, and it had several details that made it useful for testing:
This made it much easier to see which tools could remove motion blur from a photo in a believable way, and which ones simply added harsh sharpening over the entire image.
I was not looking for a tool that only promises to remove blur from an image with AI. I wanted something that could actually turn a blurry photo into a clearer one while keeping the person in the image looking real. Some tools made the skin too smooth, created strange edges, or added that crunchy artificial sharpness that instantly gives away bad AI processing.
Before getting into the full results, these are the things I paid the most attention to when choosing a good image blur remover:
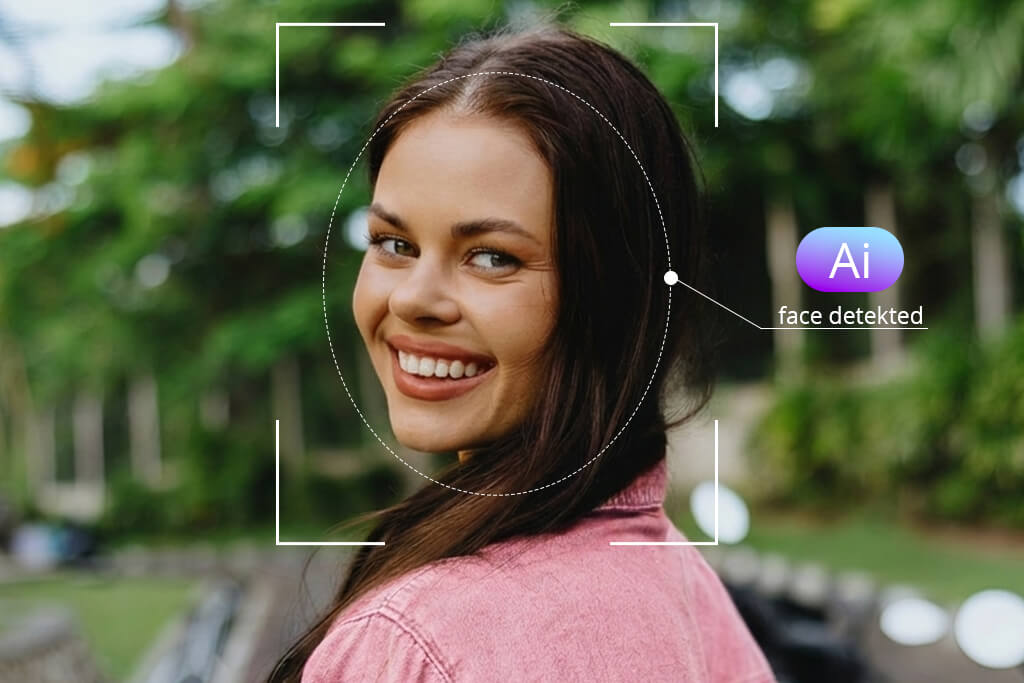
After testing every tool on the same photo, I noticed one thing. Many users think a blur remover brings back the exact detail that was lost. In reality, it usually does something different. AI looks at the image, compares it with patterns it has learned from photo edit datasets for AI training, and then creates a version of the detail that probably should be there.
That is why some edited photos look very sharp when you see them small. Then you zoom in, and something starts looking a little strange. The eyes may be too crisp, the hair may look drawn, or the skin may lose its natural texture.
When you upload a picture to an AI blur remover, the process usually goes something like this:
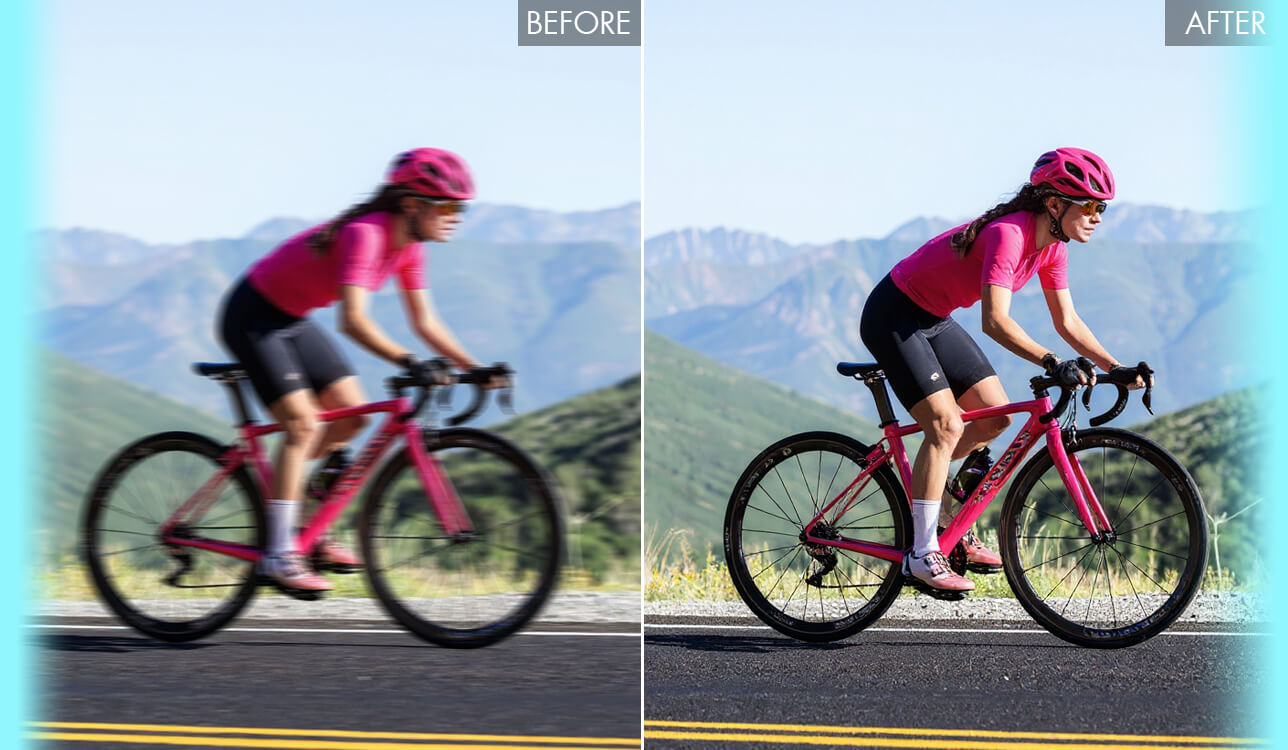
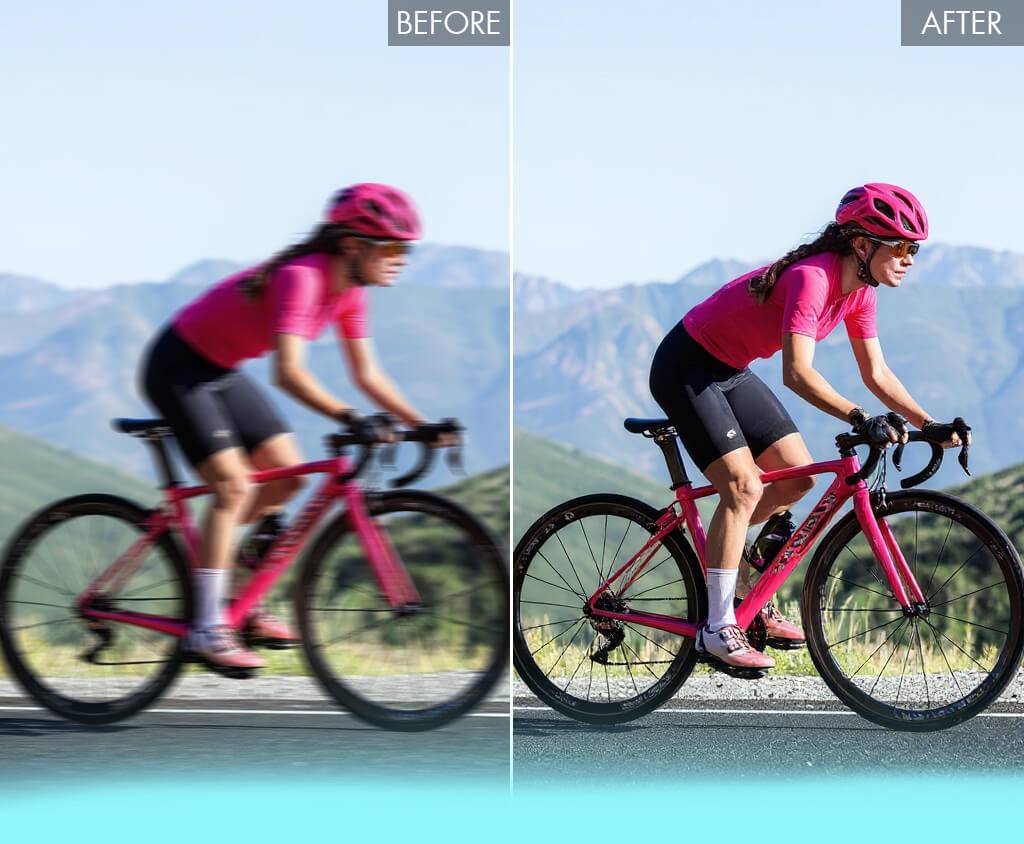
Removing motion blur is the harder part. A slightly soft portrait is much easier to fix than a shot where the subject moved during exposure. Better tools try to guess the direction and strength of that movement, then rebuild the image around it.
From my tests, Topaz Labs Unblur handled this deeper correction better than many simple online tools. Some browser-based platforms are faster and easier, but they usually don’t analyze the image as carefully.
There is also one thing I rarely see mentioned in basic reviews. When it comes to AI vs professional retoucher battle, AI still does not fully win. Not with blur correction. But in some everyday cases, it is already very close. AI gave me the best results with:
One recent example surprised me. I had a candid photo of my mom turning her head. Her hair was slightly blurred, and I expected the result to look messy. One AI tool managed to rebuild several strands in a way that looked believable. Was it perfectly accurate? No. But the photo looked good enough that I didn’t feel like opening Photoshop.
Still, AI has clear limits. It struggles with:
I also tested a backlit portrait where sunlight was glowing through the hair. Several free AI blur removers made the same mistake. They tried to sharpen the glow instead of leaving it soft. As a result, the light turned rough and crunchy. This is exactly where a retoucher’s eye still matters. You need to understand what should be sharp and what should stay soft.
So I would not say AI can fully replace a skilled retoucher for serious blur correction. It still guesses too much, especially in complicated images. But for casual portraits, phone shots, travel photos, family moments, and those pictures that are almost good, modern blur removers can make a real difference in seconds. And sometimes that is enough.
Best for: Social media creators, beginners
Platform compatibility: Web, iOS, Android
I already used Adobe Express a lot before this test. Mostly for small everyday tasks: resizing photos, making Instagram posts, adding text, preparing short videos, and exporting something quickly without opening heavier software. The auto-caption update made it even more useful for my video work. But I had never really used it to unblur an image in Adobe Express, so I was curious to see what it could do.
What I liked right away is how simple everything is. You upload the picture, use the enhance option, and Adobe Express tries to clean it up on its own. There are no confusing settings, no long menu, no sliders that make you wonder if you are ruining the image. It is the kind of tool you open when you just want to fix the photo and move on.
Still, I would not use it for heavy motion blur. When I checked the harder areas, like hair mixed with moving leaves in the background, Express could not bring back all those tiny details. It made the photo better, yes, but it did not fully rebuild the missing sharpness.
“So for a lightly blurred portrait, it works well. For a badly blurred shot, I would still pair it with Photoshop. But for casual photos – it’s perfect.”
For me, Adobe Express makes the most sense for casual photos. A quick portrait, a travel picture, a family shot, something for Instagram or stories. In those cases, I don’t need perfect pixel-level control. I just need the image to look cleaner and more usable.
The biggest advantage is that the blur remover is already inside a full editing workspace. After fixing the photo, I can crop it, resize it, add text, make a post, and export everything from the same place. I don’t have to jump from one app to another just to prepare one image.
One small trick helped me get better results: If the first edit still looked a bit soft, I exported the photo and ran it through the blur remover one more time, but lightly. This worked better than trying to get a dramatic change in one pass. The photo stayed natural, and I avoided that harsh over-sharpened look.
Pricing: Free (limited exports, features), from $9.99/mo, from $99.99/year
Best for: Important photos, realistic restoration
Platform compatibility: iOS, Android


Fix The Photo Body Editor&Tune was a little different for me to test because I work with the team behind the app. So I had to be extra fair here. I didn’t use one of my own photos, and I didn’t treat it like an internal tool. I uploaded the same portrait of my sister and checked the result the same way I checked every other app to fix blurry photos.
“The main difference is pretty simple: this is not a fully automatic photo blur remover. AI starts the correction, but the final version is checked and improved by a real retoucher. That changes the result a lot.”

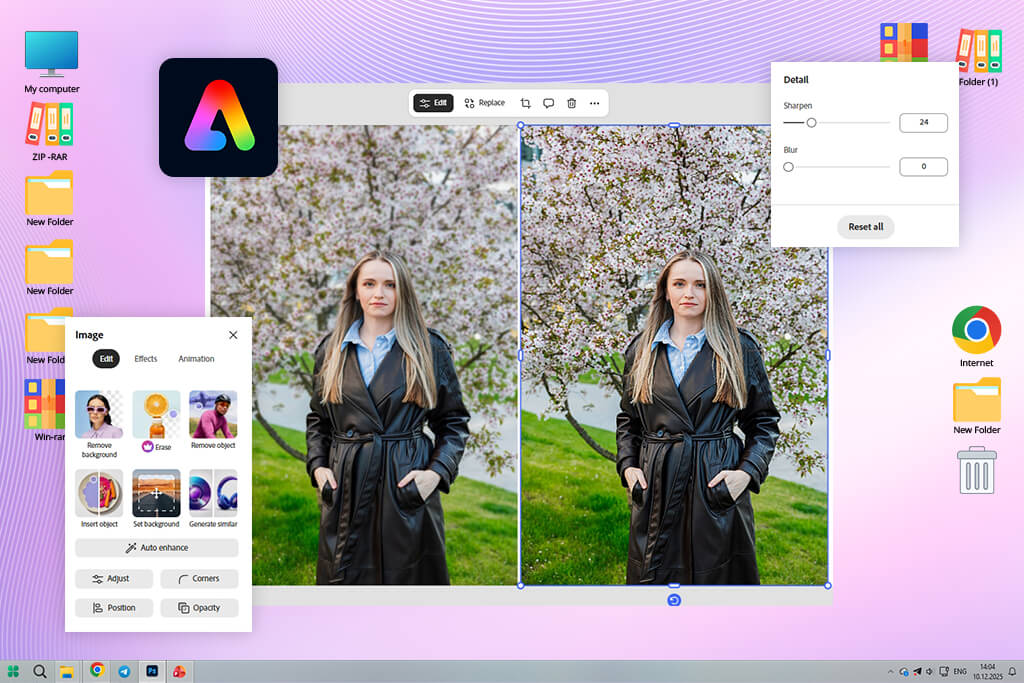
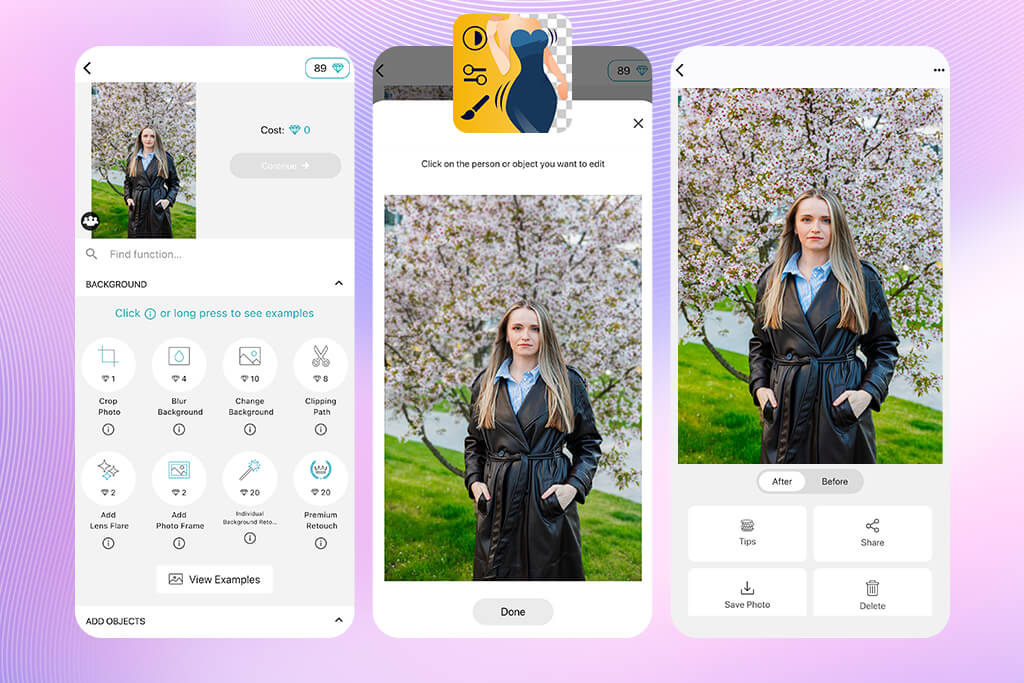
The unblur option is in the Color section, under Photo Restoration. You send the image, the app first runs AI blur correction, and then a retoucher cleans up the weak spots. They can fix rough edges, remove strange artifacts, and bring back detail where automatic tools usually start guessing too much.
The hair area was the part I watched most carefully. In my photo, the hair was moving, and there were leaves behind it, so this was a tricky spot. A lot of AI tools fail here. They either make the hair too sharp and fake, or they blur everything together. Here, the transition looked much more natural. I didn’t see weird halos around the strands, and the app didn’t invent dramatic new details.
That is the biggest benefit of mixing AI with human retouching. You still get the speed of an AI blur remover, but the final image has a more careful finish. A person can notice things that automatic tools often miss, especially with faces, hair, skin, and soft backgrounds.
After testing, I still use this app for photos that matter to me. For a random quick post, I may open a simple online blur remover and finish the edit in a minute. But when the photo is important, even if it is just a personal picture I really like, I would rather send it through this app and wait a bit.
The turnaround is usually around 10 minutes, which is not instant, but still very fast compared with proper manual retouching. And for this type of result, I think the wait makes sense. The first photo is free, so it is easy to test without risk. After that, the price starts at $0.99 per image, depending on how difficult the edit is. Considering that a real retoucher is involved, the price feels fair to me.
Pricing: First photo free, from $0.99/photo
Best for: Photographers, detailed restoration
Platform compatibility: Windows, macOS
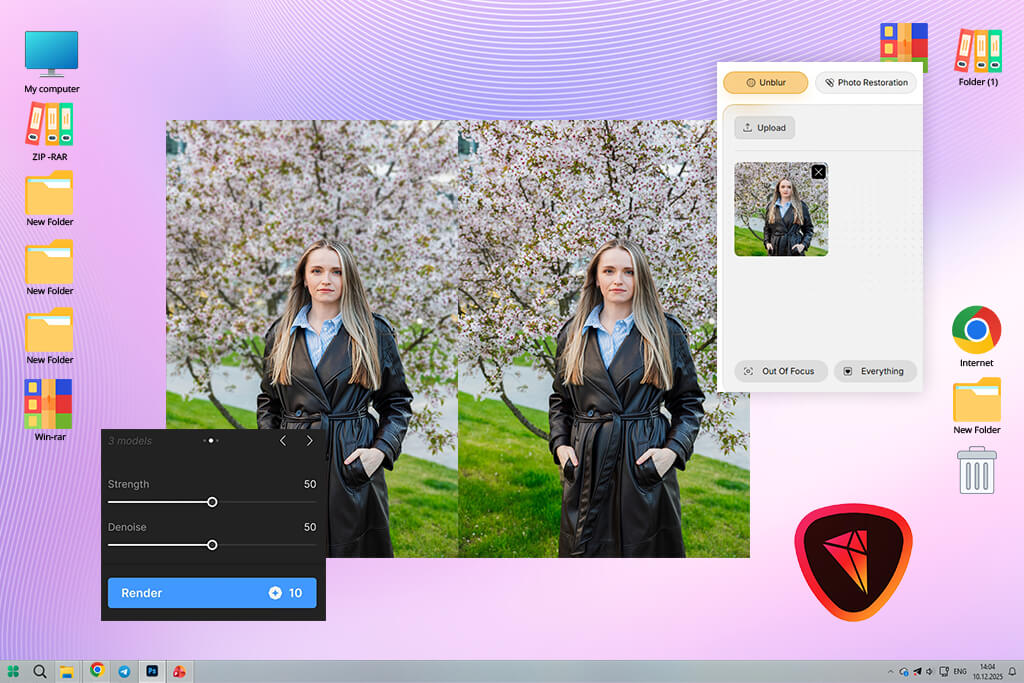
I noticed Topaz Labs in Reddit discussions. Photographers were debating whether AI photo editor can really fix motion blur, not just add fake sharpness. Topaz was mentioned again and again, usually as the tool that comes closest to doing it properly. So I expected a lot before I even installed it.
It is very different from the simple online blur removers I tested. You don’t open it for a two-second fix. Topaz gives you a much more serious workspace, and you can tell right away that it was made for deeper photo repair. It doesn’t just throw sharpness over the whole image. It studies the photo and tries to understand what kind of movement caused the blur.
The hair result was not perfect, but it was interesting. Some strands looked surprisingly good, almost like they were brought back carefully. Other parts looked a little guessed. I don’t see this as a huge problem because every AI blur remover does some guessing. The question is how believable that guessing looks. With Topaz, it usually looked better than with cheaper one-click tools.
“For an important photo, Topaz makes sense. If I have a portrait, event shot, or travel image that I really want to save, this is one of the tools I would trust first.”

The strongest part is control. I could choose different AI models, change the strength of correction, and adjust the result instead of accepting whatever the app gave me. That makes a big difference if you know what you are doing. It reminded me more of working with a serious Photoshop plugin than using a casual browser tool.
The main problem is that it is not the easiest option for beginners. If you have never worked with sharpening, noise, or AI photo models before, the settings may feel a bit confusing at first. Also, there is no real free version, only a trial, so it is not the best pick if you just need one fast free edit.
One thing I learned quickly: don’t push Topaz too hard. Strong settings can create strange textures, especially on skin. My best results came from lighter correction. I let the tool improve the structure, then I checked the face, hair, and background manually. For me, that is the safest way to get a cleaner image without making it look artificial.
Pricing: Free trial, from $79 one-time

Best for: Casual users, social media
Platform compatibility: Web, iOS, Android
I first heard about Picsart from my sister. She uses it for quick edits all the time and told me, “Just try it, it fixes blur in one tap.” I didn’t expect anything serious, but I wanted to see how a casual photo blur remover app would compare with stronger options.
“Picsart is clearly made for fast content editing, not careful photo repair. You upload a picture, tap AI Enhance, and the app sharpens it, cleans it up, and tries to improve the resolution at the same time.”

I don’t use Picsart for professional work, but I understand why people like it. For a quick Instagram photo, a story, or a casual picture that just needs to look a bit better, it’s convenient. You can fix the blur, add effects, adjust colors, and make the post in the same app.
The free option is there, but some exports and tools are limited. The paid plan of this Instagram photo editor only makes sense if you already use Picsart often.
My small tip: don’t leave the photo too sharp after AI Enhance. I usually lower the sharpness a little afterward, so the image looks less fake.
Pricing: Free (limited exports), from $5/mo, from $55/year
Best for: Beginners, design workflows
Platform compatibility: Web, iOS, Android

I used Canva a lot before I switched more of my quick work to Adobe Express. I made collages there, simple Instagram posts, covers, and small layouts. So when I saw that Canva could also improve blurry photos, I was curious. I never opened it thinking, “Okay, this is my photo blur remover.”
Everything works in the usual Canva way. You upload a photo, open the photo settings, and use Enhance or sharpness. That’s it. You don’t need to learn anything new. But it’s also not a serious unblur tool. It won’t rebuild hair, eyes, or small details. It just makes a soft photo look a little cleaner.
I would use it only when I’m already working in Canva. For example, if I’m making a story, a post, or a simple banner, I can quickly sharpen the photo there and continue with the design. That’s convenient. But I wouldn’t open Canva just to fix blur in an important image.
“For me, this image blur remover is a small bonus. Nice to have, but not the main reason to use Canva.”

The free plan lets you try it, though some tools are still Pro-only. Canva Pro makes sense if you use the platform for design. I wouldn’t pay for it only for unblur.
My tip: add a little contrast together with sharpness. The photo will look clearer, but still natural.
Pricing: Free (limited features), from $12.99/mo, from $119.99/year
Best for: Everyday editing, quick clean results
Platform compatibility: Web, iOS, Android
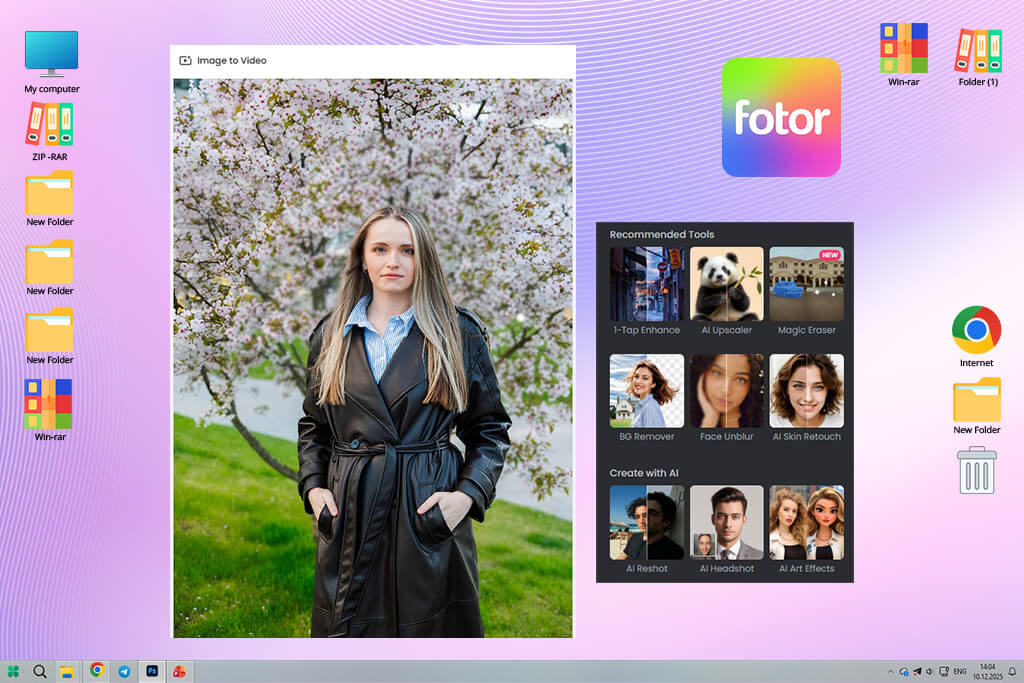
I found Fotor while I was testing photo blur removers and asked my Instagram followers what they usually use. I expected to see the same big names again and again, but Fotor was mentioned a lot. So I added it to my list.
The blur remover is part of Fotor’s AI Image Upscaler. The process is simple: upload the photo, run the enhancement, and download the result. It tries to sharpen the image, clean up blur, and improve resolution at the same time.
What I liked most is that Fotor doesn’t go too hard with sharpening. Some tools make the photo look sharp, but also rough and fake. Fotor was softer with the result. It cleaned up some noise, made the edges clearer, and kept the portrait looking natural.
“Fotor is better than many quick one-tap apps, but still much easier than pro software. I use it sometimes when I want a clean result without opening anything complicated.”

The free plan lets you try the AI blur remover, but exports and some features are limited. I’d only pay for it if I used Fotor often, not just for fixing blur once in a while.
My tip: after using the blur remover, add a little contrast or clarity inside Fotor. It usually makes the final photo look sharper, but still natural.
Pricing: Free (limited exports), from $8.99/mo, from $39.99/year
Best for: Selfies, portraits, social content
Platform compatibility: Web, iOS, Android
I found AirBrush thanks to a colleague. She mentioned it as a good app for quick portrait fixes, so I added it to my test list. I didn’t expect much at first because many apps promise perfect unblur results and then give you something very average. But AirBrush was better than I thought.
“This app is clearly made for portraits. It doesn’t try to fix every tiny part of the photo. It mostly focuses on the face, skin, and the main subject. For social media, that often matters most.”

The process is simple. You upload a photo, apply the enhancement, and AirBrush tries to make the image cleaner. You don’t need to play with difficult settings or understand sharpening tools.
So I wouldn’t call AirBrush a real motion blur remover. It’s more of a portrait enhancer that can also reduce light blur. For a quick selfie, profile photo, or Instagram post, it works well. For a serious photo restoration, I’d choose something stronger.
The free version lets you try it, but some exports and tools are limited. The paid plan makes sense if you edit portraits often, not just because of the blur remover.
My tip: don’t use the strongest effect right away. Lower it a little if you can. This helps keep the skin from looking too smooth or fake.
Pricing: Free (limited exports), from $9.99/mo, from $59.99/year
Testing photo blur removers took more time than I expected. I didn’t just open a few apps, upload one image, and choose the prettiest result. I tested them together with my FixThePhoto team because we work with real photos every day: portraits, event shots, real estate images, family photos, and client pictures that are never “perfect demo” material.
I wanted to see which tools could actually help with normal blurry photos, not just show a nice sample on their website. First, I made a big list of more than 50 tools. I found them on Reddit, YouTube, photography forums, and even in comments under photo editing posts. Then my team and I cut that list down to around 30 tools that looked worth testing properly.
For a fair test, I used the same image in every blur remover. It was a portrait of my sister taken outside. The photo had a few tricky parts: hair moving in the wind, leaves in the background, soft depth, and a little motion blur. It was not a “hopeless” photo, but it was also not easy to fix. Exactly the kind of image people usually want to save.
Some well-known tools didn’t make it to the final list. We tested Remini, Let’s Enhance, VanceAI, BeFunky, Snapseed, and a few others. They were not terrible, but they had problems. Some made the image look too processed. Some sharpened the wrong areas. Some couldn’t handle motion blur in a natural way. A few free versions were so limited that it was hard to judge the tool properly.
My team was quite strict. If a tool made the photo sharper but added ugly edges, strange skin texture, or extra artifacts, we removed it from the list. I didn’t want tools that create more cleanup work afterward. We tested every photo blur remover by the same basic rules.
First, I looked at how easy it was to use. Could I upload a photo quickly? Was the blur removal tool easy to find? Did I need to go through too many steps? If the interface felt messy or slow, it lost points right away.
Then we checked the result. This was the most important part. I wanted to see if the photo really looked better, or if the tool simply added harsh sharpness. We looked closely at the face, skin, hair, edges, and background. If the image started looking fake, crunchy, or noisy, it was not a good result.
We also tested consistency. I ran the same photo through some tools more than once to see if the result stayed the same. A few tools gave different results each time, which I wouldn’t trust for real work.
Speed mattered too. A blur remover can be good, but if it takes too long or slows down the whole editing process, I won’t use it often. We paid attention to tools that actually saved time, not tools that forced us to fix new problems after the AI edit.
And of course, I checked the price. I don’t mind paying for a tool if it gives a better result. But if the free version is useless and the paid plan still doesn’t improve the photo much, it’s not worth it.
In the end, I only kept the tools I would honestly use myself or recommend to someone from my team. They had to work on a real photo, give a natural result, and save time instead of creating another editing problem.