For a long time, separating subjects in video editing was one of the tasks that took me the most time. That’s why discovering auto object masking in Premiere Pro felt like the update I had been anticipating.
Before Adobe added AI-based masking, I had to draw masks by hand on every frame and keep fixing them whenever the subject moved. It was tiring work, especially when dealing with long videos or scenes with a lot of movement.
That’s why I’m making this tutorial. I want to show you how the new masking tools work and how they’ve made my editing much easier. I’ll guide you through every step and add a few Adobe Premiere Pro tips I’ve picked up over time.
Basically, object masking in the Adobe Premiere Pro free version works by combining AI-based subject recognition, motion tracking, and smart masks that automatically follow objects as they move from frame to frame.
Rather than drawing and animating masks by hand, Premiere studies the clip, detects objects such as people, faces, clothing, or other clear elements, and keeps the mask locked to them as they move.
In older versions, masking was mostly linked to opacity settings and effects like Gaussian Blur or Lumetri Color, and it depended a lot on manual keyframes. Now, with Premiere Pro auto mask workflows, the software handles most of the hard work for you - especially when editing short-form videos or fast-paced content. I mainly use auto masking for:
The important thing to remember is that this tool isn’t built for complex, film-level visual effects work. However, for the majority of everyday marketing and web videos, it works quickly, delivers solid results, and cuts editing time dramatically.
Here’s the process I personally follow to isolate a subject in a shot with motion.
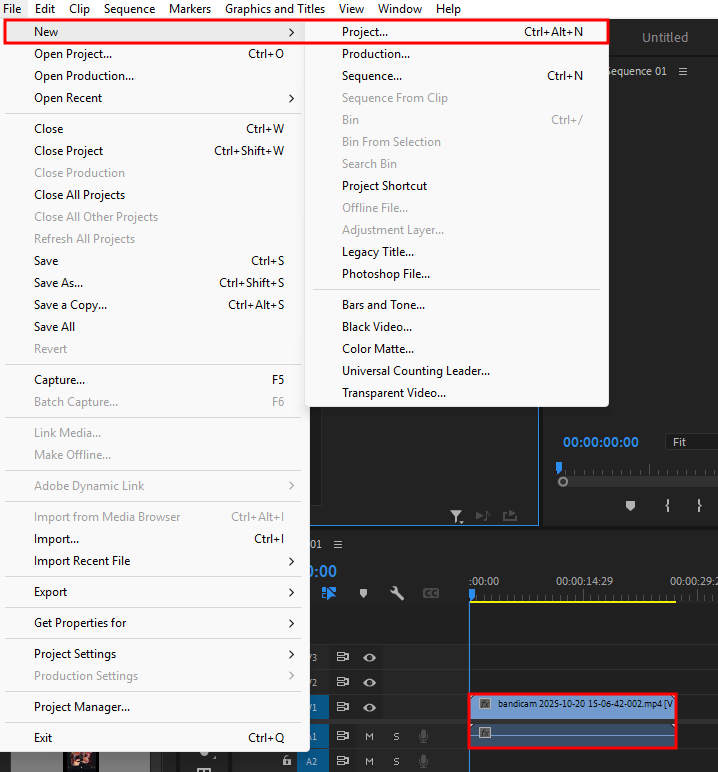
I start by launching Premiere Pro, setting up a new project, and then checking the scratch disk options right away to be sure everything is set up for smooth performance.
When a project includes several clips, I often put together a quick rough cut first. However, for masking work, I switch to working with just one selected shot and place that clip directly on the timeline.
For example, when I was working on a dancer in a studio, the clear 4K video helped the AI find the dancer almost perfectly. But when I tried to do the same for a person in a dark, grainy video, the AI couldn’t tell where their jacket ended.
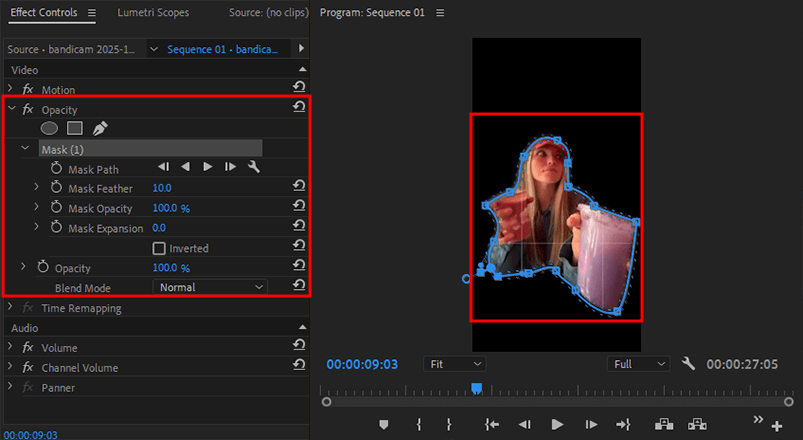
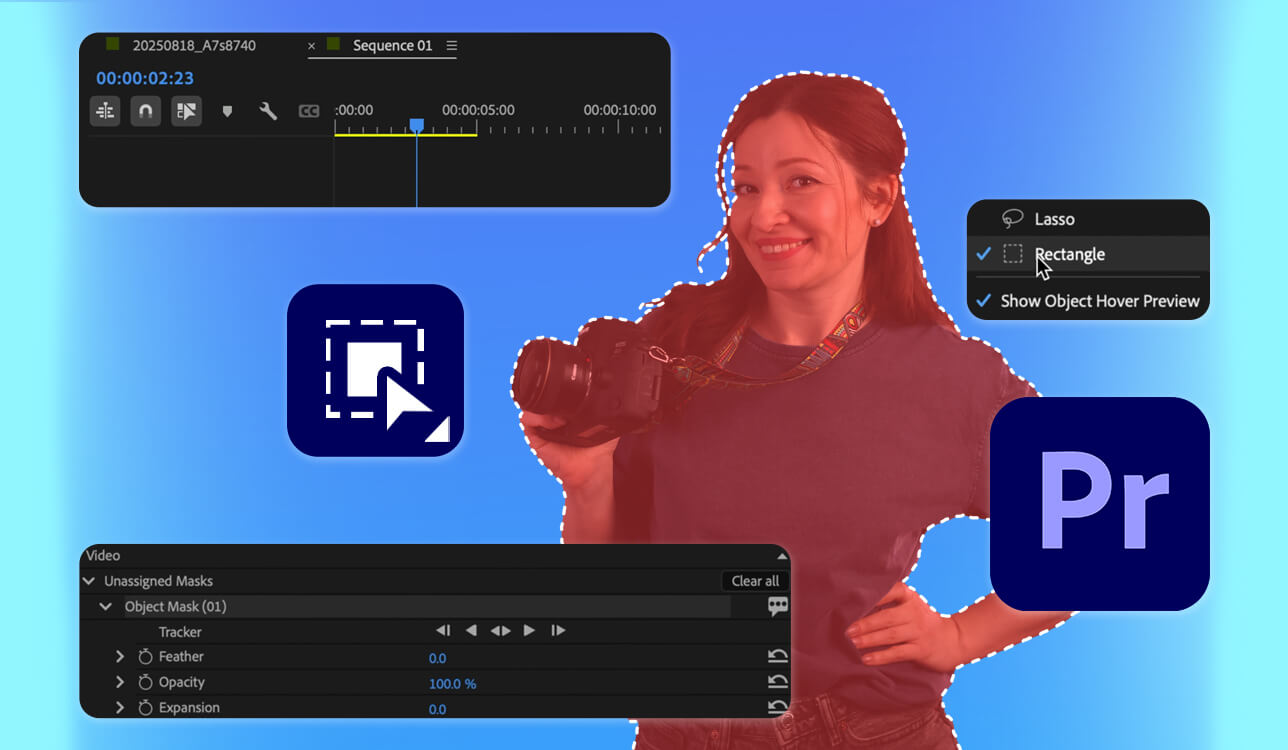
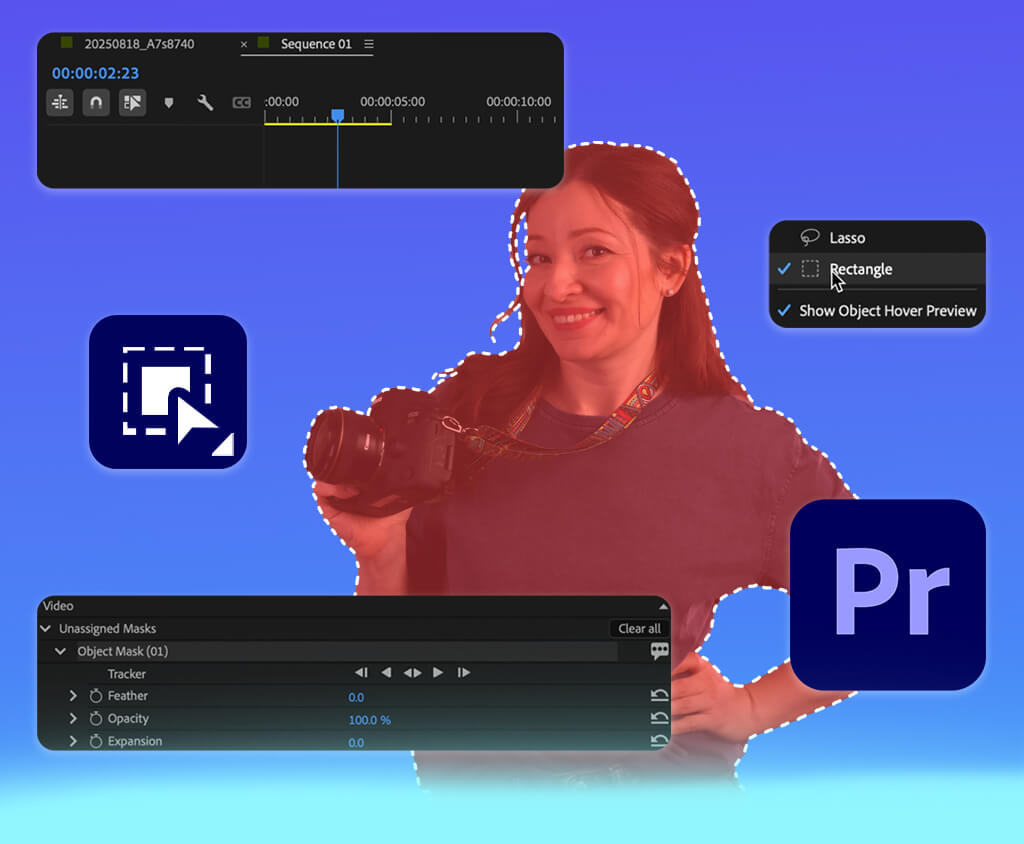
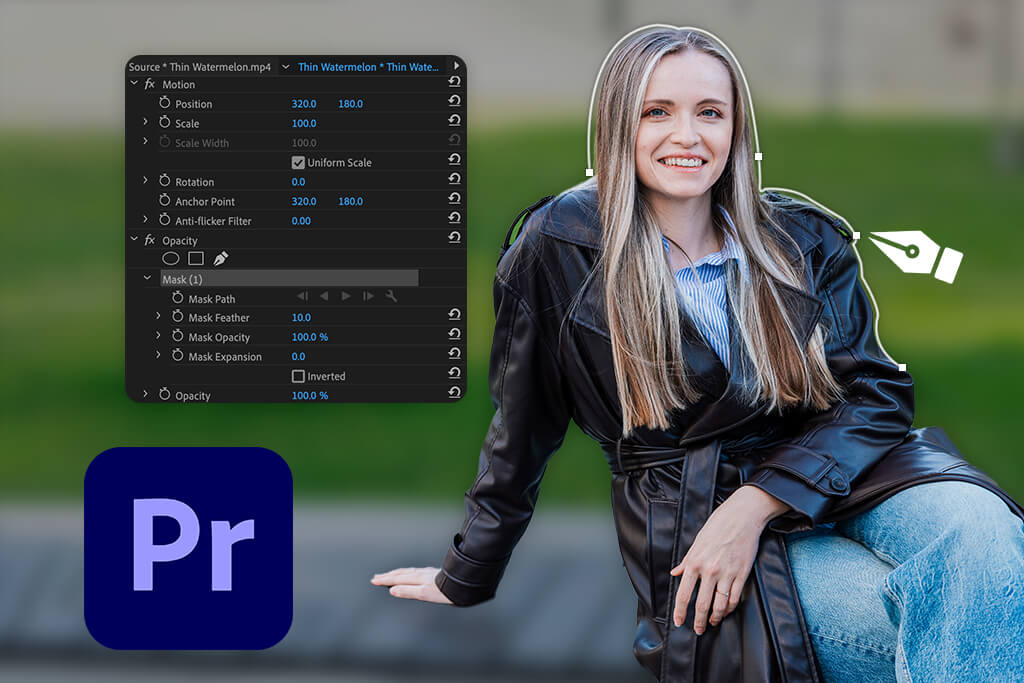
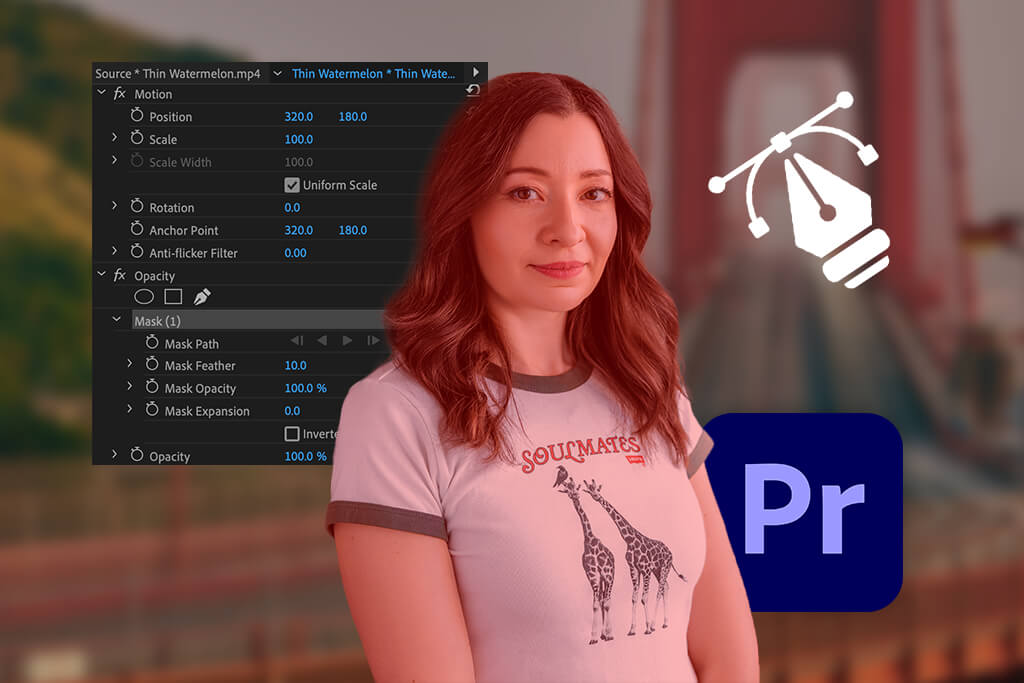
After you add the clip to your timeline, select it and open the Effects Controls panel. There, under Opacity, you’ll find the masking tools: Free Draw Bezier, Ellipse, and Rectangle.
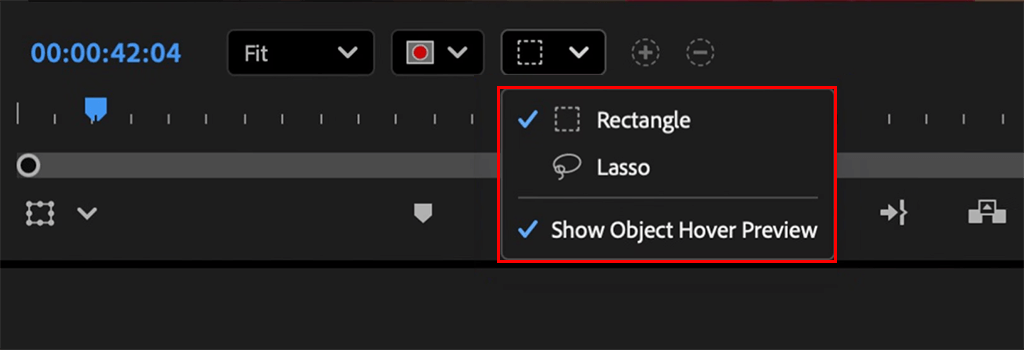
I usually begin with the Free Draw Bezier option since it lets me shape the mask freely. When I’m working with a person, I can quickly trace their silhouette. For round or box-shaped objects, such as a basketball or a laptop display, the Ellipse or Rectangle tools are a quicker and easier choice.
Before AI existed, I had to adjust Bezier points on every single frame, which took hours. Now, with the masking video editor, I just draw a simple outline, and the software does the rest. It’s so much easier, it feels like a cheat.
Here’s the best part. I right-click on the mask and select Auto Detect Object. Premiere then looks at the video and automatically creates a mask around the person or thing I selected.
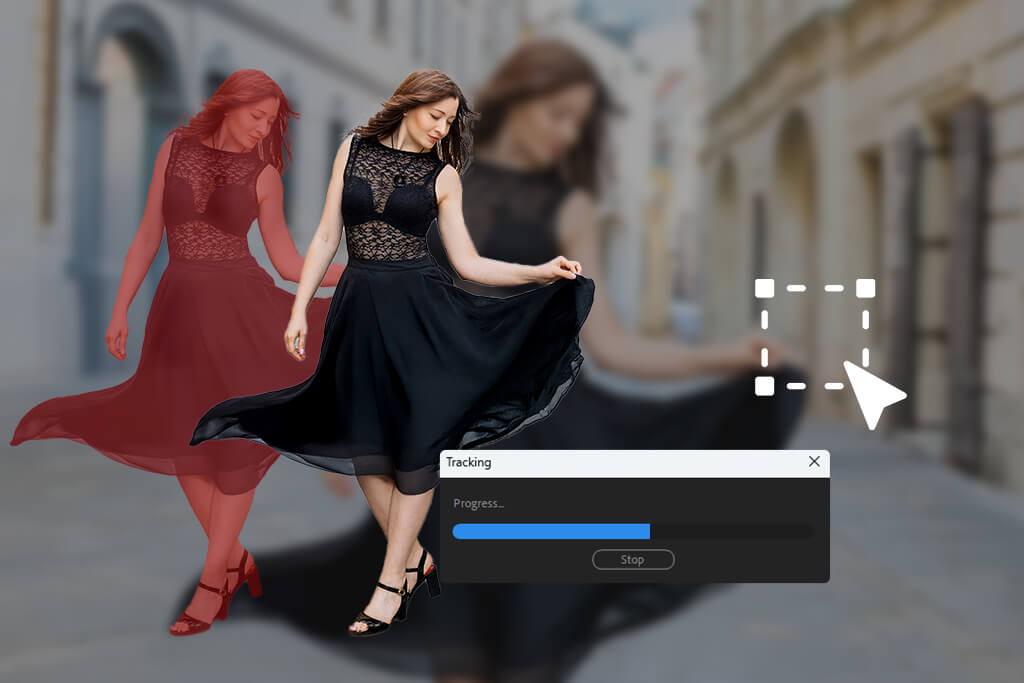
It’s still amazing to watch the AI track a moving person so easily. I remember a wedding video where the bride walked through her guests. Following her manually would take forever. With the Premiere Pro auto selection, I just clicked once, and the software did it all.
While working on this Premiere Pro CC tutorial, I realized that Premiere’s AI handles people more confidently than animals. When I tested it on a dog running outdoors, the mask sometimes drifted, especially around the tail. With human subjects, though (particularly in well-lit scenes), the masking stays much more stable and accurate.

Now I fine-tune the result. I tweak the Mask Feather to smooth out the edges. For people, a setting around 10-20 pixels usually looks natural, while objects with clean, hard edges, such as a phone or a car, need a much smaller feather.
After that, I adjust the Mask Expansion. This helps when the automatic detection hugs the subject too tightly. Increasing it by about 5-10 pixels makes sure no important parts of the subject get cut off.
I edited a sports promo where an athlete ran across the shot. After turning on Mask Path Tracking, Premiere tracked him very accurately. I only had to adjust a few frames by hand when his arm moved beyond the mask.
Feathering helps make things look real. A mask with a hard edge looks fake, like a paper cutout. Feathering softly blends the edges, making the person look like they truly belong in the scene.
Once the subject is separated, that’s when things get interesting. I can add color tweaks, blur, sharpening, or creative effects.
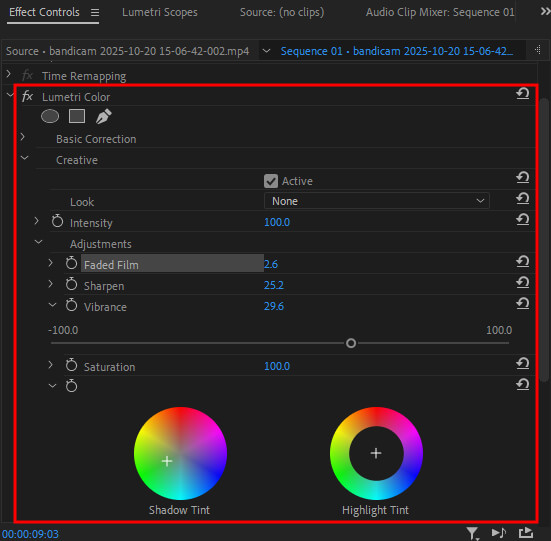
I usually rely on Lumetri Color. For instance, I’ll make the subject a bit brighter while reducing color in the background. This creates a soft spotlight look that naturally pulls attention to the subject.
In one corporate project, I isolated the speaker and added a Gaussian Blur to the background. The final look felt like it was filmed with high-end cinema lenses, even though the footage came from a simple DSLR.
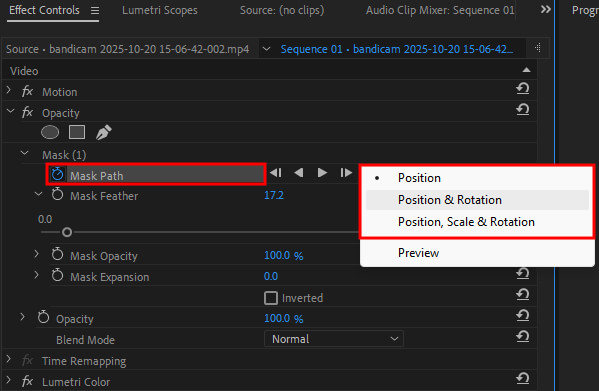
At the end, I scrub through the timeline to check that the mask stays locked on the subject. If it drifts, I fix it using Mask Path Keyframes.
I also avoid reviewing only at normal speed. Playing the clip at half speed helps catch small masking issues. A mask can look fine in real time, but show problems when slowed down.
I now constantly switch the mask view on and off as I edit. It’s the quickest way to see if the subject is properly isolated or if the mask is leaking into the background.

1. Mask slipping off the subject. One issue I often face is the mask slowly moving away from the subject, especially when the subject and background look similar. This is common in low-contrast shots, such as a person in a gray hoodie standing in front of a concrete wall. In these cases, Premiere’s AI can struggle, and the edges start to blend together.
How I fix it:
2. Hair and fine details. Hair is very tricky for any auto-masking tool to get right, including Premiere and multiple Premiere Pro alternatives. This is because the thin strands move a lot and are see-through. The software often makes mistakes, either cutting off some of the hair or leaving bits of the background in the mask.
How I fix it:
I’ve seen that Premiere’s AI gives more consistent results with smooth, straight hair. When the hair is curly or messy, the outline can move back and forth because the edges aren’t clear, which means I often have to step in and fix it by hand.
3. Fast motion blur. When a subject moves fast, motion blur can confuse the AI, causing it to mistake the blurred parts of the subject for the background.
How I fix it:
4. Objects passing in front of the subject. When another person or object crosses the frame, the mask can get confused and briefly lock onto the wrong subject.
How I fix it:
5. Clothing with patterns. Detailed patterns, such as plaid shirts, can sometimes confuse the AI.
How I fix it:
Lighting matters. Good lighting is the most important thing for masking. The AI auto mask tool works best with bright, even light. If your subject is standing in a shadow, the software might think the dark area isn’t part of the person.
This happened to me before. I was filming a product in a dark room, and the mask wouldn’t stick to the box properly. But when I added a simple light to brighten the product, the mask snapped right into place.
Contrast helps. Clear contrast really helps. When the subject blends into the background, like a white shirt on a white wall, the software struggles. If the subject wears darker clothing, the mask works much better.
Multiple masks. Don’t be afraid to use multiple masks when the subject interacts with objects. For example, if someone is holding a coffee cup, the auto mask may miss it. In that case, I make a second mask for the cup and track it on its own.
Creative use. Masking isn’t only for fixing problems - it’s also a creative space to experiment. Try mixing masks with adding transitions in Premiere Pro. For instance, separate the subject and gradually fade the background to black to create a strong, dramatic reveal.
In a music video I worked on, I isolated the singer and slowly blurred the background until it turned completely black. Viewers called it “cinematic,” even though it was just a basic mask combined with blur.
These kinds of creative details are what clients remember. Anyone can edit a video, but using masks to direct the viewer’s focus is what makes your work feel more professional and memorable.
Since I spend a lot of time watching TikTok and Instagram Reels (it’s work, I swear), I’ve noticed that many current trends focus on separating the subject in creative ways. That’s exactly where auto object masking in Premiere Pro becomes so useful.
Teleport effect (TikTok/Instagram). Teleport-style effects are a popular, attention-grabbing trend on TikTok and Instagram, and with Premiere Pro’s auto object masking, they’re much easier to create than ever.
The concept is easy: it looks like you vanish from one place and show up somewhere else right away - like a jump cut, but smoother and more cinematic. Here’s how I do it step by step:
Step 1. Record two shots - one in spot A and another in spot B. Make sure the camera position and framing stay the same for the best effect.
Step 2. Bring both clips into Premiere Pro and place them one after the other on the timeline.
Step 3. Use auto object masking to separate yourself in both clips. Premiere’s AI will outline you automatically.
Step 4. Add a short transition - I usually animate the mask size or use a soft fade so it looks like I disappear and reappear.
Step 5. Add extra effects - a light glow or blur during the transition helps sell the teleport effect.
Step 6. Match the moment to sound - line it up with a beat drop or sound effect to give it that viral feel.
I tried this effect in a short TikTok where I “jumped” from my studio to a city street. The mask made the cut look smooth, and people kept asking how I did it. Honestly, without auto masking, I would’ve spent hours cutting frame by frame. With the AI tools in this Adobe video editor, the whole thing took me under 10 minutes.
Clone effect (multiple versions of yourself). This trend is all over TikTok - creators show up several times in the same shot, interacting with their own “clones.” It’s fun, a bit surreal, and a great way to show personality. Here’s how I create it using auto object masking in Premiere Pro:
Step 1. Record several takes of yourself in different spots within the same scene, like sitting on a couch, standing near a window, or lying on the floor. Keep the camera fixed on a tripod.
Step 2. Import all the clips into Premiere and place each one on its own layer in the timeline.
Step 3. Use auto object masking to isolate yourself in every clip. Premiere’s AI will separate you cleanly.
Step 4. Line up the clips so all versions of you appear on screen at the same time.
Step 5. Slightly soften the mask edges to blend everything smoothly and avoid hard lines.
Step 6. Add music or a trending sound to bring the whole effect together.
Freeze frame transition in Premiere Pro is a popular Instagram Reel effect where it looks like you step out of a paused photo into motion. It feels cinematic and works especially well for fashion, travel, and story-driven videos. Here’s how I create it in Premiere Pro:
Step 1. Pick a frame where your pose looks strong and interesting, then export it as a still image.
Step 2. Bring that image back into Premiere and place it right before the moving video clip.
Step 3. Use auto object masking to isolate yourself in the still image.
Step 4. Animate the mask so it expands and fades away, revealing the moving clip underneath.
Step 5. Add a sound effect, like a camera click or beat drop, to make the transition hit harder.
I used this trick in a travel vlog by freezing a shot of myself in front of a landmark and then stepping into motion. It felt like a movie poster coming to life, and the Reel performed much better than my usual edits.

At FixThePhoto, we’ve put together a set of free LUTs for Premiere. They’re simple to use, flexible, and great for improving the look of clips where you’ve used masking.
Install these LUTs in Premiere by importing them into the Lumetri Color panel, applying them to your clip, and adjusting the strength. It’s an easy way to give your videos a cinematic look without spending hours on color grading.
Right‑click your mask in the Effects Controls panel and select Auto Detect Object.
Yes. With object tracking masks, the AI follows the subject as it moves through the clip.
Yes, Premiere on iPhone includes auto masking along with other advanced tools.
Manual masking means adjusting the mask frame by frame, while AI masking lets the software do most of the work automatically.
It works best when there’s a clear contrast, but you can fine-tune the mask by hand if needed.
Yes, you can use multiple masks and run auto detection on each one.
It can be GPU‑intensive, but with modern hardware, it runs smoothly.
Auto object masking is part of the newest releases, so be sure you’re using the latest update.


