This tutorial about enlarging a picture for printing can interest both average users, who want to create an original present for their relatives, as well as people, who make money by selling high-quality images.
If you enlarge a photo in the wrong way, you’ll end up with a pixelated image. I will show you how to cope with the task step by step, using 3 most popular methods. We will work in Photoshop, Lightroom, and Preview. Regardless of the method you choose, you will make a picture bigger without degrading its original quality.
Photoshop is a go-to program for many photographers and designers. In addition to its editing features, it also contains tools for enlarging pictures. Thus, you can start working in Ps, resize your images, and then switch to photo printing software.
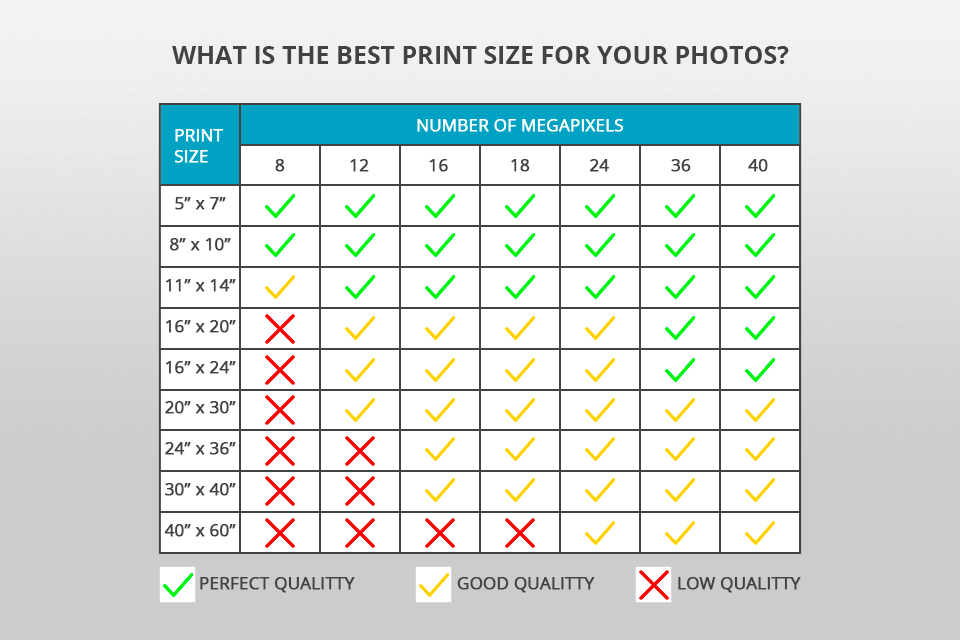
Before getting down to resizing, you need to choose a proper image format for printing and standard photo sizes for printing. An important thing to keep in mind at this point is the number of dots per inch (DPI). Simply put, the more dots, the clearer the photo. If there are very few dots printed in every inch of an image, you will receive a grainy, low-quality result.
For the clearest photo prints, I recommend sticking to 300 DPI. A good rule of thumb is to learn the max photo size at full quality and double the value when blowing up a picture. If you choose 150 DPI and lower, the quality of your image will be terrible. To avoid mistakes, use the tablet above for reference.

Launch Photoshop, go to the Home Screen and click the Open button to open your file. You will see the File Explorer if you use a Windows computer or the Finder if you own Mac (this is my case). Navigate to the folder with images and double-click on the needed file.

To change PPI in Photoshop, start the Image Size dialog by clicking Image – Image Size in the top menu bar.
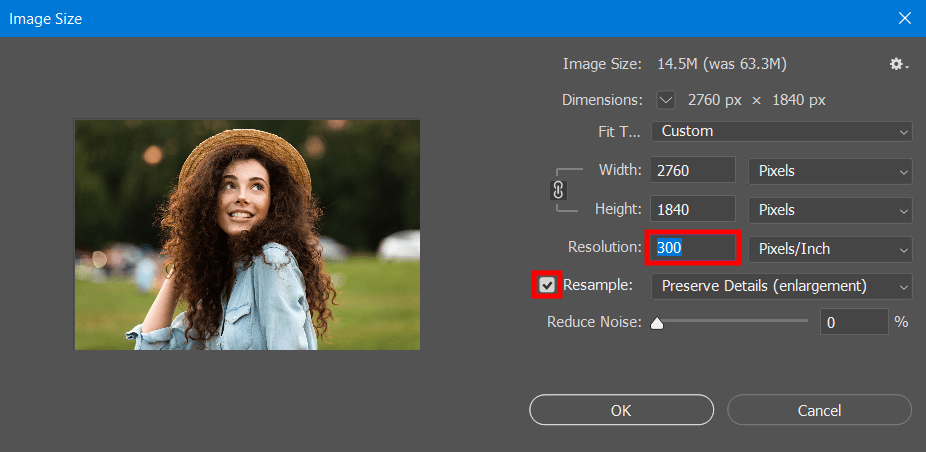
Now, you can increase resolution in Photoshop. Check resample, and select “Preserve Details” in the corresponding dropdown menu. Resolution should be set to 300Pixels/Inch.
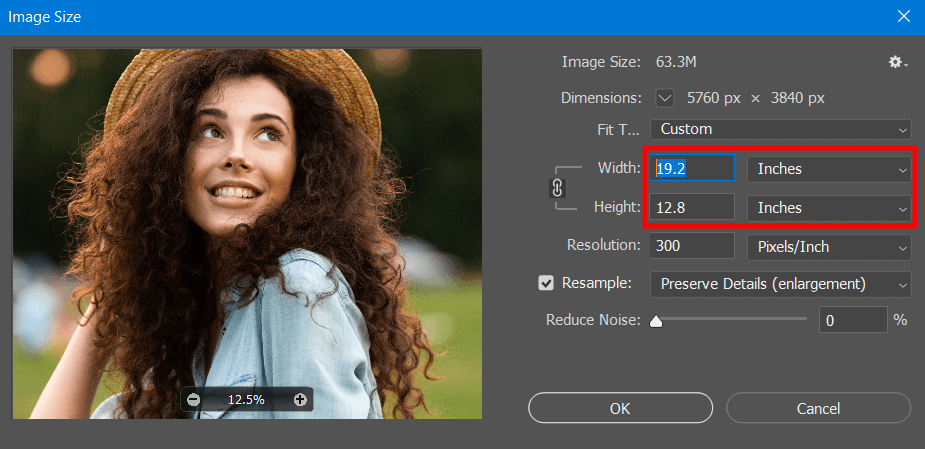
Set Width and Height to inches and enter proper values to make your picture bigger. At this stage, inexperienced users who learn how to blow up a picture for print can make a common mistake. They forget about the recommendation to double the size of the source photo and choose too high values, which negatively affects the resulting image.
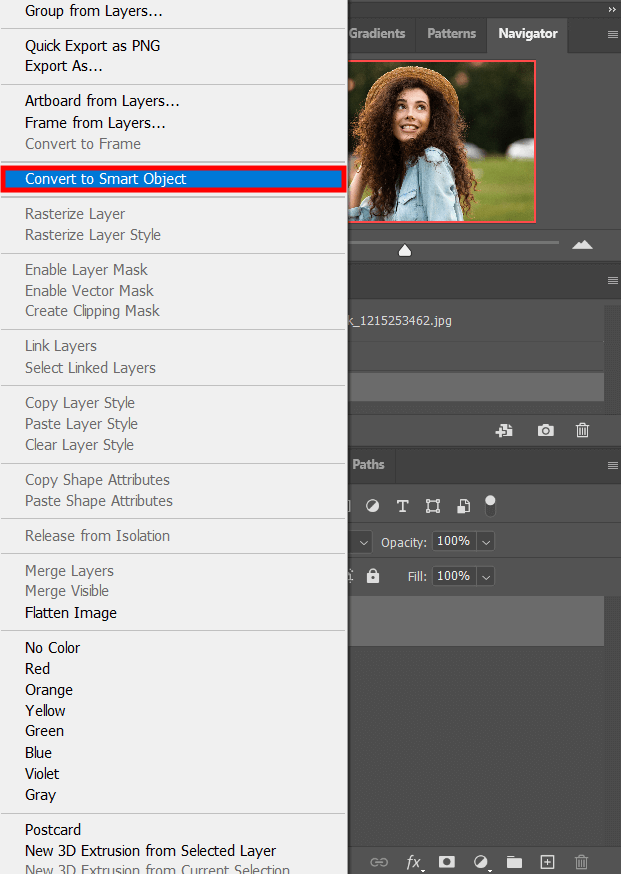
After you enlarge the photo, save it as a smart object. You need to right-click/Ctrl-click directly on the layer in the Layers panel. Then choose Convert to Smart Object from the menu. There will appear a smart object icon in the layer’s preview thumbnail, so you can be sure the layer has been converted into a smart object.
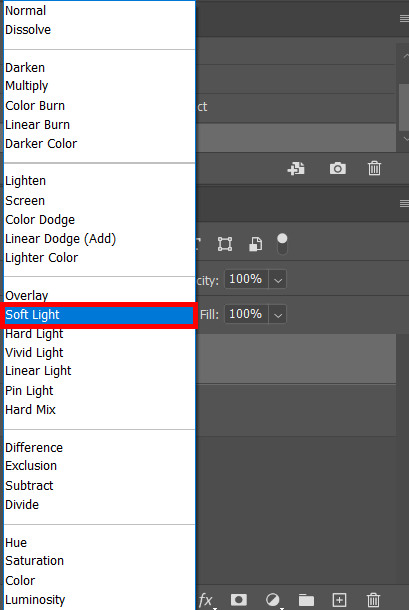
Use the Ctrl+J/Cmd+J Photoshop keyboard shortcuts to duplicate the layer. Head to the Layers panel, and click on the Blending Modes menu there. In the window that opens, choose the “Soft Light” for the new layer’s blend mode.
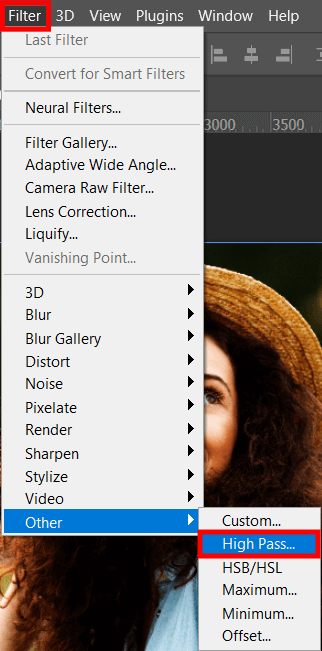
Go to the menu bar and choose Filter>Other>High Pass. The photo will be transformed into a grey overlay and you will see the High Pass window.
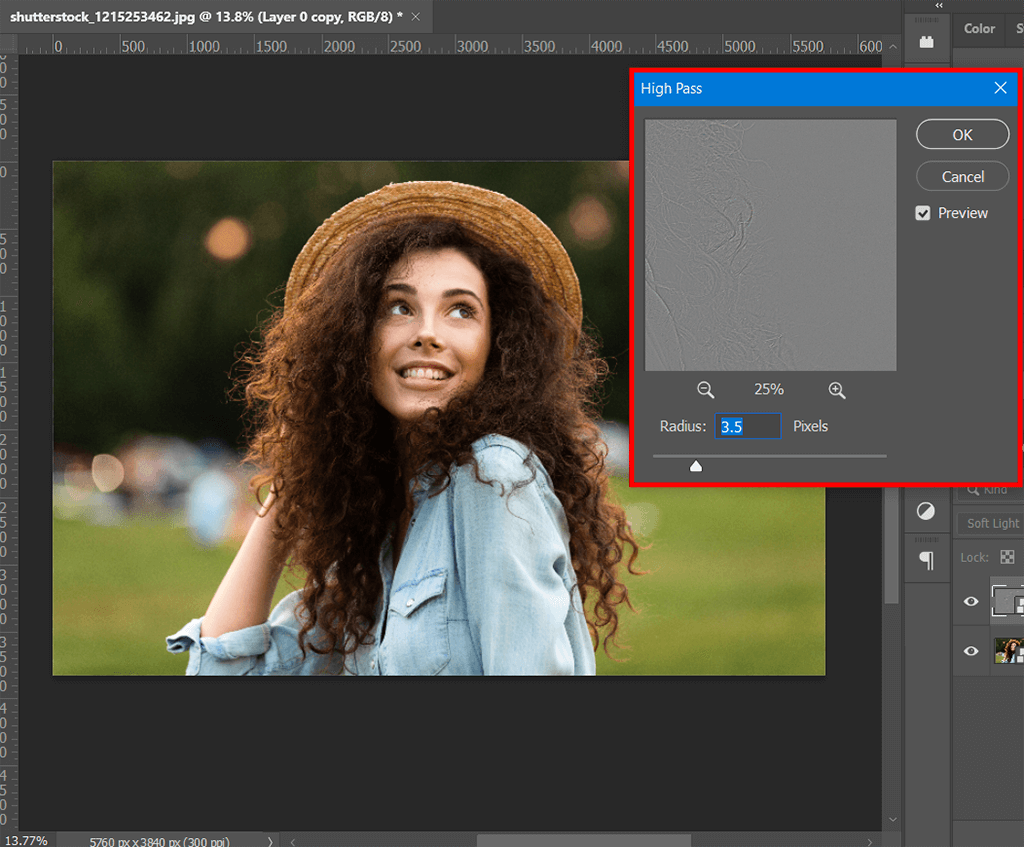
This is the final step to take. Use the slider to choose the proper radius. Create an enhanced edge by adjusting the preview. It may take some time to select the proper value. If you are pressed for time to learn all the intricacies of the process, you can address photo printing services, and experts will take care of image resizing and adjusting resolution.
If you plan to sell your photos, you need to make sure they look flawless. This usually involves performing retouching and improving colors. Doing all the adjustments yourself can be time-consuming, so many people delegate the task to professionals. They will improve skin tone, remove defects, improve colors, etc. Besides, such companies work very quickly, so you will get your pictures in the shortest time possible.
To try this method of how to make an image bigger without losing quality for printing, you need to use Adobe Lightroom. In 2021, Lightroom received the “Super Resolution” feature. Now, if you need to resize an image in Lightroom and double the initial size, you can use this feature for instant results. Keep in mind that the width and height will be 2 times the size of the source photo and 4 times the total pixel count without quality loss.
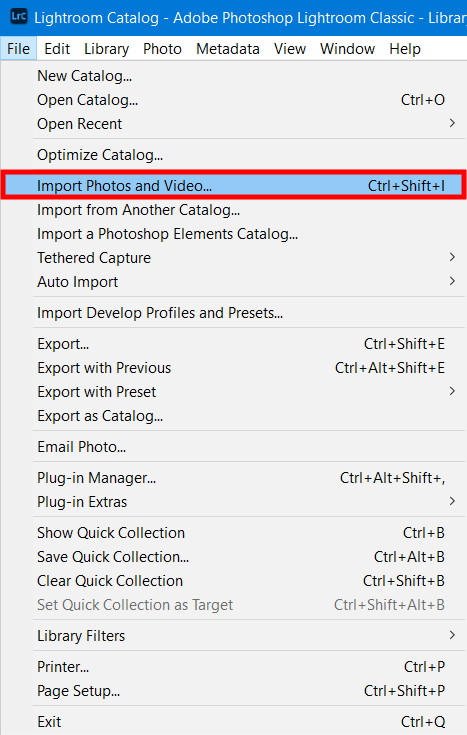
You should start by importing RAW files into Lightroom. Open the main menu, choose File > Import Photos And Video… Or, you can go to the Library module, find there the “Import…” button, and click on it.
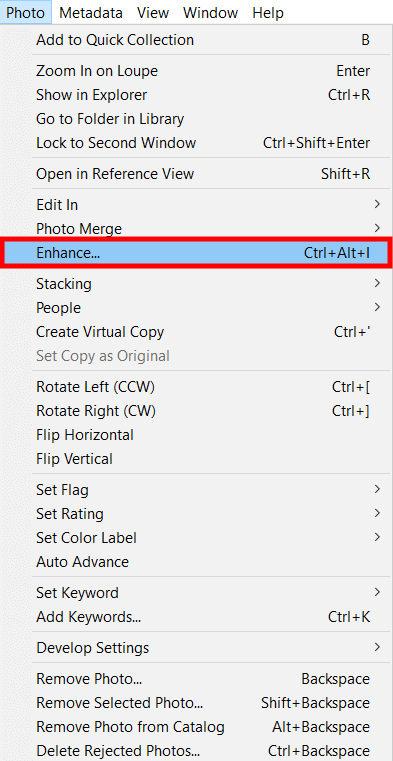
Once in the Develop section, select your photo and go to Photo > Enhance. There you will find the Super Resolution feature.

The program employs machine learning algorithms to enhance photo quality. You can preview the enhancements in the special window, so don’t neglect this possibility. If you like the result, click the Enhance button. You will receive a DNG file beside the original image.
You may have free photo resizing software installed by default on your computer, and it’s capable of adjusting DPI and preparing pictures for print. In fact, this program is very user-friendly, so tutors frequently use it when explaining to students how to print photography.
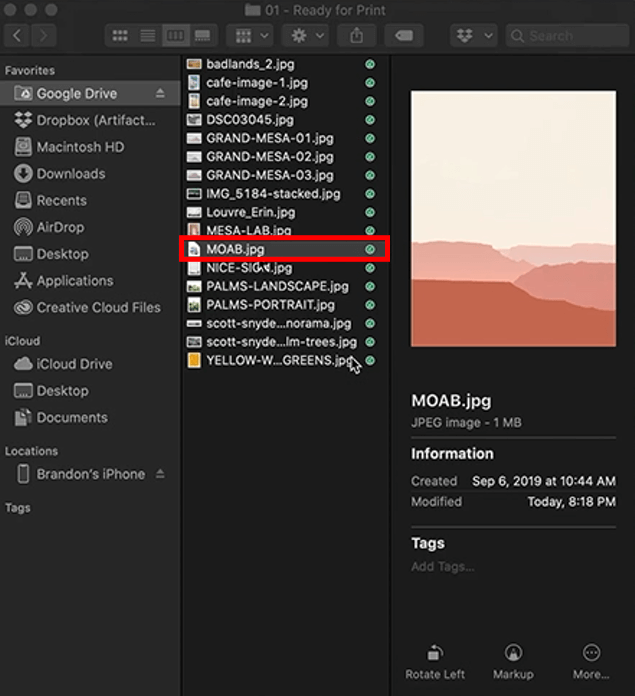
Double-click your image to open it in Preview. If the program isn’t used for this purpose by default, you need to right-click a picture and hover over “Open with” > “Preview”.
Select the needed image(s) by highlighting them on the Preview sidebar. If you need to enlarge several pictures in one go, you need to select them all by holding down the Command button and clicking each thumbnail you want to edit.

Go to the menu bar and click on “Tools” there. There will appear the “Tools” drop-down menu and you need to choose “Adjust Size” there.
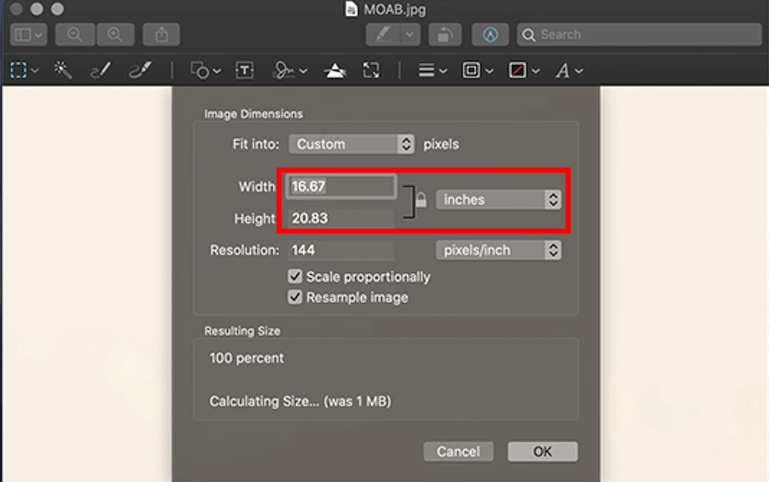
There will appear a window where you can adjust Height, Width, and Resolution. Choose “Inches” for Width and Height and “Pixels/Inch” for Resolution. By choosing “Scale proportionally”, you can alter Height or Width and have the other value adapting automatically.
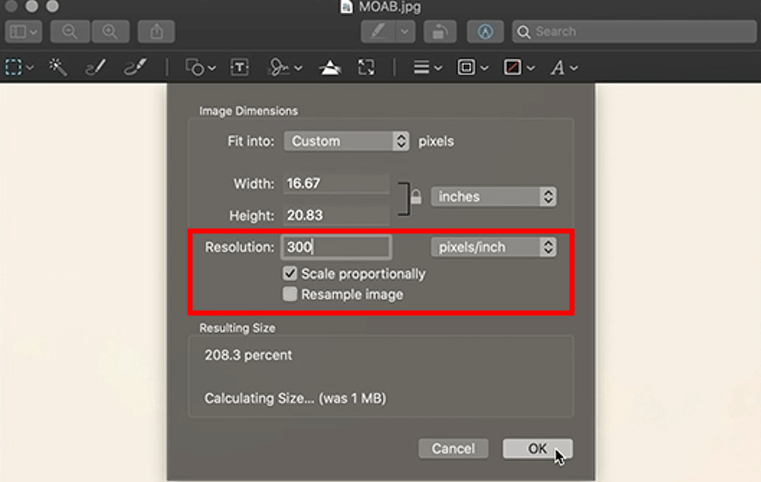
Uncheck “Resample Image” and set the Resolution to 300px/inch. The Width and Height max values will be generated automatically. If you like the outcome, you can save the file.
After the program displayed the max Height and Width at 300 DPI, you can figure out how much you can blow up a picture without compromising its quality. Of course, it is up to you to decide whether quality or size plays a more important role.
Now you know how to enlarge a picture for printing using Photoshop sublimation app, Lightroom, and Preview. However, before doing so, you should improve colors in your images and make other tweaks. Using these bonus tools, you can cope with the task in a quick way. Download the pack, refresh your knowledge of how to install Photoshop actions, and get down to work.
Using portrait actions in Photoshop, you can maintain a consistent style and elevate the quality of portrait photos. Besides, it is possible to experiment with various looks and styles, enhance subject features, and create visually appealing portraits that leave a lasting impression.


